Jump to content

Scratch Build - Steampunk Mineral Oil Server

Where to start?


Preamble

So I saw Linus' Mineral Oil Build Log when it came out and I thought it was amazing. When it came to doing my A2 Project for Graphics (UK) I was obsessed with Mineral Oil PC's. The only Problem being, I was a Graphics student not a Resistant Materials student. So without any thought on the matter I switched to fulfill my stupid fantasy of making a Mineral Oil PC from scratch. I have plenty of CNC experience but no wood or metal working skills to speak of. I have built a couple of PC's before which were quite high end, but have never water cooled let alone oil cooled.


Concept

 I Initially wanted to copy the Puget Systems build idea as it would literally just involve me Laser Cutting and gluing Acrylic panels. This idea was superseded by imagination and ambition which got the better of me. I decided the easiest way to achieve a high grade in a subject I have not much experience in was to create a circular design... Anyway its use is as a media server for my Dad and the design must fit in with his house (Hardwood was everywhere). Airflow for the Rads is one 120mm outtake fan with a vent on the back, and a 5mm gap in the lid for the difference in air pressure to draw air in. I was banking on the system being low power enough for the 400l/h pump and thick rad to keep the oil cool. I know the spec isn't really server focused at all but I had to next to no funds to build this after buying materials.


Spec List


I know the spec isn't really server focused at all but I had to next to no funds to build this after buying materials. I had a Budget of £400, which I found later was not nearly enough as Mineral Oil is sooooo expenisve. I persuaded my school to give me a grant of £100 for the oil. The rest of the money was spent on the spec:


Phenom x4 965

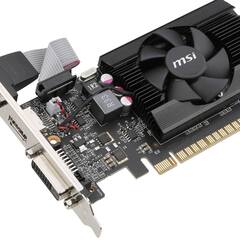
- MSI Twin Frozr3 R7850

- 960GM-VGS3 FX

- 128gb Non branded SSD

- 1Tb HDD

120mm Magicool Rad

Phobya 220 12v Pump

- Blu Ray Slim drive

- Windows 7 64bit

- 8Gb DDR3

- 450W CoolerMaster PSU (I think I removed the sticker so can't quite remember now)


Materials

The only thing I had to buy pre-made was the acrylic tube for £60. The wood was sourced locally and is an eclectic mix of Hardwoods. I spent £30 on copper piping and fittings. Another £25 was spent on switches and wires. I had to perfectly laser cut a circular disc to fit perfectly inside the tube and then glue it in place. I also laser cut the hanging piece of acrylic and bend it to a right angle to mount everything. The upper section was Laminated together from wooden rings I cut out from the hardwood. I had a fair amount of help to build this due to my inexperience.


Finale

Well unfortunately not quite. I started the build in Jan 2016 after much planning. "Finished" in May 2016. I say finished because it was only finished to the level of allowing me to get a grade. Unfortunately the GPU artifacts horrendously after installing the drivers. After Messing about for hours before the deadline I found out the problem is the PCIe connection. I don't know whether or not the Motherboard or GPU is broken as wiggling the card around in its slot fixes it incredibly briefly. This is probably my fault as the I/O shield had to be scrapped to finish the build in time and as such the card is zip tied to the wood to stop it wobbling. Because the GPU is broken I didnt put the oil so I also don't know if the pump system works annoyingly. I believe this is what you call a 50ft mod. I am incredibly proud of how the PC turned out but when you look inside at the mounting system you can tell the rush and manic solutions I had to find to finish in time. 


Aftermath

For those wondering my practical grade was a B due to the interior being very rushed, but my overall grade was an A. I have just got the computer back and intend on finishing it but just need to save up for a GPU and fix some fittings and pray to god the oil hasn't gone off or something. As well as the pump working and being fast enough to keep everything cool with only 1x 120mm rad (although it is very thick). I did test the tube for leaks with water, but I am slighlty worried about oil dissolving the glue or heating up with the system and leaking somehow (When i eventually put it in). Pictures below of water test, and system booted into a BIOS. So yeah hopefully I can fully finish it soon!


Photos


IMG_2196.JPG                              IMG_2197.JPG

IMG_2200.JPGIMG_2201.JPG

IMG_2212.JPGIMG_2215.JPGIMG_2209.JPGDSC_0035.JPGDSC_0491.JPG

IMG_2217.JPG

Link to comment
Share on other sites

Link to post
Share on other sites

I really like the cylinder look! nice job.

NEW PC build: Blank Heaven   minimalist white and black PC     Old S340 build log "White Heaven"        The "LIGHTCANON" flashlight build log        Project AntiRoll (prototype)        Custom speaker project

Spoiler

Ryzen 3950X | AMD Vega Frontier Edition | ASUS X570 Pro WS | Corsair Vengeance LPX 64GB | NZXT H500 | Seasonic Prime Fanless TX-700 | Custom loop | Coolermaster SK630 White | Logitech MX Master 2S | Samsung 980 Pro 1TB + 970 Pro 512GB | Samsung 58" 4k TV | Scarlett 2i4 | 2x AT2020


Link to comment
Share on other sites

Link to post
Share on other sites

looks pretty cool, i like the cylinder!

I spent $2500 on building my PC and all i do with it is play no games atm & watch anime at 1080p(finally) watch YT and write essays...  nothing, it just sits there collecting dust...

Builds:

The Toaster Project! Northern Bee!


The original LAN PC build log! (Old, dead and replaced by The Toaster Project & 5.0)

Spoiler

"Here is some advice that might have gotten lost somewhere along the way in your life. 


#1. Treat others as you would like to be treated.

#2. It's best to keep your mouth shut; and appear to be stupid, rather than open it and remove all doubt.

#3. There is nothing "wrong" with being wrong. Learning from a mistake can be more valuable than not making one in the first place.


Follow these simple rules in life, and I promise you, things magically get easier. " - MageTank 31-10-2016


Link to comment
Share on other sites

Link to post
Share on other sites

This is awesome! Love that you went with a cylinder concept.

Doing some research atm to start my own build.


You use a regular watercooling pump to move the oil around?

Link to comment
Share on other sites

Link to post
Share on other sites

Looks clean and nice, I like it.


You have only a 120 mm radiator in the top and only one opening with a mesh, do you? Can it dissipiate all the heat without ramping up the fan speed to extem levels?

Mineral oil and 40 kg aluminium heat sinks are a perfect combination: 73 cores and a Titan X, Twenty Thousand Leagues Under the Oil

Link to comment
Share on other sites

Link to post
Share on other sites

Thats cool!

Thermatake Tower 900 Build
Intel® Core™ i7-7700K @5.3GHz -2AVX / ROG MAXIMUS IX APEX + EK-FB ASUS M9A Monoblock 
ROG-POSEIDON-GTX1080TI 11Gb @2114MHz/5780Mhz / DIMM.2 970 EVO 2TB NVMe PCIe M.2 x2 RAID 0
EVGA SuperNOVA 1600 P2 80+ PLATINUM / Hisense 65" H9 Plus 4k HDR
Link to comment
Share on other sites

Link to post
Share on other sites

what's the server used for?

Silverstone FT-05: 8 Broadwell Xeon (6900k soon), Asus X99 A, Asus GTX 1070, 1tb Samsung 850 pro, NH-D15


Resist!

Link to comment
Share on other sites

Link to post
Share on other sites

Create an account or sign in to comment

You need to be a member in order to leave a comment

Create an account

Sign up for a new account in our community. It's easy!

Register a new account

Sign in

Already have an account? Sign in here.

Sign In Now

×