Jump to content

[Build Log] King Ghidorah, 3 Gamers - 1 Threadripper

2 hours ago, Arkratos said:


What do you all think about what you have seen?

I'm curious about the software side of the project. I know GPU passthrough was rough on TR at launch due to IOMMU groups configuration, and it took Wendell some BIOS iterations plus his own and others' work to get it all running (Linux host, Windows VM). Which eventually he did, for two GPUs (1 host, 1 VM). But I wonder whether even following his steps would allow to pass through all 3 GPUs to different VMs, and whether you can really do without any GPU for the host (instead of throwing a random 4th GPU just for the hypervisor).

Or has the IOMMU situation evolved to the point where this multiple GPU passthrough is guaranteed to work on X399?

Link to comment
Share on other sites

Link to post
Share on other sites

On 4/10/2018 at 4:19 PM, SpaceGhostC2C said:

I'm curious about the software side of the project. I know GPU passthrough was rough on TR at launch due to IOMMU groups configuration, and it took Wendell some BIOS iterations plus his own and others' work to get it all running (Linux host, Windows VM). Which eventually he did, for two GPUs (1 host, 1 VM). But I wonder whether even following his steps would allow to pass through all 3 GPUs to different VMs, and whether you can really do without any GPU for the host (instead of throwing a random 4th GPU just for the hypervisor).

Or has the IOMMU situation evolved to the point where this multiple GPU passthrough is guaranteed to work on X399?

From what I've read it should work, however I have to get the computer back to the point where I can turn it on again.  Also I'm not sure how the motherboard support will be.  Gigabyte hasn't updated their bios for this board since nvme raid was released, so I've very skeptical.  I'll be really sad if I have to buy a different motherboard but that might give me a chance to get the Asrock x399 professional gaming with its dual gigabit NICs + 10 gigabit NIC....  Just really don't want to and possibly can't spend more money on this project at the moment....  We'll see.  Theory is sound, support in linux seems to be there, it all comes down to the mobo.

Edit: Also... The Aorus board has some amazing lighting and looks that I don't want to give up.


Edit edit: Also I could sneak a 710gt in the bottom slot if I need an output for the host, because I do have the PCIe lanes for it along with a low profile passive version lying around.

Link to comment
Share on other sites

Link to post
Share on other sites

I concur with Crunchy. I'm glad to see the progress and that you're still taking your time to tweak things as you go along.

Link to comment
Share on other sites

Link to post
Share on other sites

On 4/15/2018 at 12:46 PM, S0m3guy said:

I concur with Crunchy. I'm glad to see the progress and that you're still taking your time to tweak things as you go along.

I'm running out of time to sit there and tweak but I feel pretty confident about everything I have left to do.  So I'm very happy to see everything come together.


Here's what I'm working on at the moment as I get the side monitors mounted.


You can see in this photo that the surface I'm using to mount the monitor arms is not flat...

5ad4e8165ad88_SideMonitorMountingProblems1.jpg.d8283fa357c1f99f286c0ff7c955deb7.jpg


The difference in height is luckily very very very close to 1/8 inch thick acrylic, so I should be able to use that as a buffer to fill out the indent.


*Photo taken from the "Legit Reviews" review of the case, modified to show points of interest*
I really recommend looking at their review.  I really really like this case the more I work in it.
http://www.legitreviews.com/corsair-carbide-air-740-case-review_185791

Also obviously the LinusTechTips review is good too :P


I'm super surprised this case isn't WAY more popular, my only assumption is people don't want to pay over 100 dollars for a case... But I'd call this one worth it.  I'm sad I lose the outer aesthetic but the layout is amazing.

Link to comment
Share on other sites

Link to post
Share on other sites

I made some spacers, drilled some holes...

And learned that if you are drilling perfectly into the side of sheet metal you have no problems...

DSC_0673.JPG.68ee906f4b7c27e400644a30619d82b4.JPG


If you are off by a little bit...

DSC_0675.JPG.ec6f9dab520c2e9ca1f36ee4f64f1b2a.JPG

Dremil made it work if not pretty at least it works... And the dremil was used to make room for the nut.


But the case is becoming sentient!  It's growing arms!


DSC_0676.JPG.93a2733671374207338b5e290eb5e0a7.JPG


Here is picture shows the spacer I made to make the surface flush

DSC_0674.JPG.ff0cb5964ae87e814cca8b7c549e340c.JPG


And here is a pretty picture of everything mocked up before the tear down.  See you all soon when I can set up and take good pictures with all the monitors attached!


5ad666c0d0014_teasemock1.jpg.58369e73e4261b627a5e7345165c1305.jpg


I now just need to figure out my front IO plan, make the new outer shell of the case, clean everything up, flush radiators, etc and reassemble... Right?  Right???

Link to comment
Share on other sites

Link to post
Share on other sites

Lots of updates coming this week.  I spent a good bit of time over at V1Tech this weekend.  I'm happy to announce that I will be collaborating with them as soon as I get some designs drawn up.


The monitors are mounted and situated.  However I'll be pulling the monitor arms back off to paint them.

received_2127687287246374.thumb.jpeg.e0028ff7c7016abeec80e2906f5631c4.jpeg


And wow this thing is wide.  I also wanted to announce that I have commissioned the great Max Davenport a concept artist at Gearbox Software (the makers of Borderlands) to make a custom wallpaper to span the three monitors and help bring the theme into the software too.  Seriously, go check out his work this guy is amazing: https://www.artstation.com/daven


In just a quick quick sketch for a sense of layout, he's proposed this monster!

31253051_10216219232772373_7036653415929217024_n.thumb.jpg.e21fc8946757a577d2ad234aca781dee.jpg


King Ghidorah will be flying straight at you.  Each monitor will be a head with the body residing behind the middle monitor.  I'm so excited!


A little bit of minor construction is left on the case as I figure out how to route the monitor cables cleanly.  And then I just need to finish the designs for the case panels and get everything fabricated with the help of V1Tech.

And then lastly reassembly!


After that I'll have photos of the build and begin working on the software set up.  But I can't do that till I can turn everything back on again.


I'll leave you all with an action shot of a nearly empty case ;P
received_2127687053913064.thumb.jpeg.9a23eff60df91c2cbdd4b8e3d89181bf.jpeg

Link to comment
Share on other sites

Link to post
Share on other sites

Shaping up nice. Looking forward to the custom wallpaper, that will a sweet touch on top of it all.

Link to comment
Share on other sites

Link to post
Share on other sites

So a lot has happened, to the point that I didn't get around to updating here immediately so expect another update this weekend and then one early next week as I catch up and finish up.


Unboxed and installed the last few components.

5aec8da6d73f4_PSU1.jpg.e3db7a32edf5af8d8bb8243ca644f16e.jpg


I don't think I've had a power supply with quite that many cables.

5aec8dc2b18e9_PSU2.jpg.5c64620265edcac38100983b48e794e4.jpg


And I'm still not used to how tiny M.2s are.  SOoooooo TINY!

5aec8dda8a042_M2Tiny.jpg.c380042831a24d1b26275958fdee09ad.jpg

5aec8ddcbe3f1_M2Tiny2.jpg.dadd0f57dd7c538b344948e1923f99fd.jpg


And so many of them!

5aec8deb281dd_M2Mobo.jpg.86962c3a3951e7ee496d653ed443fa96.jpg


I picked up a limited edition plush King Ghidorah and I think he approves of the monitor arm painting!

DSC_0691.JPG.81fd04747cb661542c409c80f50d51d9.JPG


However... During case construction, disaster struck, as paint really doesn't like chrome...

DSC_0694.JPG.a36d5d2d95af9cd430ef548e90d662ee.JPG


Monitor arms will be repainted or vinyl wrapped next time around.  And pictures to come as the internals are back together and leak tested.  Cable management is still a struggle though.

Link to comment
Share on other sites

Link to post
Share on other sites

I did myself a favor and got some HDMI extensions, made a few holes, and they turned out pretty good.

DSC_0702.JPG.60246dd4dd19ea37861c2b47bface704.JPG


Ok, hurdles aside the internals are done.  I assembled it and had an interesting problem I've never encountered... I was given a power button from a friend that was wired backwards...  It was set up so if you weren't pressing it the power pins were connected and if you were pressing they were disconnected.

Moral of the story... If you do the equivalent of holding the power button while trying to post you get errors: C0 sometimes, b5 sometimes, and random shut off during booting...

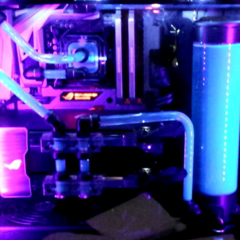
2 days later and 6+ hours to tear down, debug, and rebuild...  I present you the cell phone quality photos of the internals!


Check out those scales on the pass thru plate and on the gpus!  V1Tech really helped hook me up with their new printer.  I think it's either live on their website or will be soon, link in the first post.

DSC_0696.JPG.8b8bd63aa6471d5a62210f6a902bddf0.JPG


I didn't leave myself much room for GPU power... but it worked!

DSC_0697.JPG.199c7849588489739a887d5873dc5039.JPG


In it's preferred orientation:

DSC_0714.JPG.cb3aaa85efc870e151db77b9de269107.JPG


And one with LIGHTS (it's a gif so I spoilered it for mobile users):

Spoiler

LightsKG.gif.df5cec8e376fd281aee47c629f0ef8cb.gif


That lighting is powered by the Corsair commander pro.  That thing has a million connections making cable management an interesting endeavor, luckily the back side of this case is MASSIVE.

DSC_0703.JPG.72ee344c35c68678ae9c8e86bb1019f9.JPG


Last thing to leave you with, the artist sent me another update.  I'M SO EXCITED!!!

MaxKG3.thumb.jpg.e0c1fb3849f822ad2b1371976a79342c.jpg

Link to comment
Share on other sites

Link to post
Share on other sites

  • 3 weeks later...

Remember that scale pattern I made for the GPU backplates and the pass through plate?  Well it's back with a vengeance...

It's on the case...

DSC_0722.JPG.a632f3bbebcc8a00593c64f8d0d65ef1.JPG


Even around my HDMI and power cable pass throughs

DSC_0723.JPG.af191fa8c32a348f06f2876cca797700.JPG


Around the window

DSC_0724.JPG.d54f19715999cd3078e3e7f30b6c7290.JPG


Even took the monitor arms to get wrapped since the paint didn't work

received_2148578098490626.jpeg.f3b2ec895226106f4f40a07a62046703.jpeg


I mean, King Ghidorah is one color and nothing but scales... So it is all accurate to the character!


A few minor details I forgot to get photos of including things like the power button, the minor cables, etc.


And the photo shoot took place

DSC_0741.JPG.97736d87a475a87fc79676cc959ca6ec.JPG


And a sneak peak of the back

DSC_0738.JPG.93a28a69571b2148e1d5a3cf0510734d.JPG


Fancy photos coming soon, they are off to post production!  and WOW the raws even look amazing.  I'm working on the software side in preparation for Dreamhack Austin, if I don't have it working by then I still have time before PDX Lan but at least the physical aspect of the build is done!  I'll update as I work on the software, but I really need a few days to catch my breath!

Link to comment
Share on other sites

Link to post
Share on other sites

2 hours ago, Brett_Bst said:

is the tube frosted or is that the liquid, looks amazing by the way

Thanks!  It's Barrow's 12mm frosted acrylic tubing, I picked it up on Amazon, but it looks like it doesn't exist on there any more, but it was sold by Titan Rig.  Edit: Good news, Modmymods carries it: https://modmymods.com/barrow-12-8mm-acrylic-rigid-hardtube-500mm-satin-yktm12-8.html


It was surprisingly easy to work with, however if you blister the tube at all it's SUPER SUPER obvious.  So needless to say I had to redo a few, the blisters look like beacons of light because of the frosting.

Link to comment
Share on other sites

Link to post
Share on other sites

Corsair has started teasing the project on Twitter and Facebook.  I highly recommend checking them out as I'm waiting for them to do a tease before I follow up with pictures here.  Expect photos to trickle in here over the next week or so.

Also I have a great announcement for everyone asking about the virtualization.  IT WAS A BREEZE on unraid.  Like literally only took a few hours.  I'll post a video soon, but I was floored with how easy the menus made it.  You can find unraid here: https://lime-technology.com/  But it's really just a commercial flavor of linux running KVM, so if you want to spend a little more time and go the more hands on approach you should be able to pull this off on whatever your favorite linux distro is with KVM for the hypervisor.

Link to comment
Share on other sites

Link to post
Share on other sites

logoMaxArt.jpg.a325a7ace8345ad6aa292b5c6ec5ae8f.jpg


I got the wallpaper from the artist, it has a transparent background so I've been toying with it, but I figured it was appropriate to update the banner!

Credit to Max Davenport for the amazing art!

Link to comment
Share on other sites

Link to post
Share on other sites

14 minutes ago, Damascus said:

Wow, looks like a render lol

Nope, just some of the outer photos were taken as multiple photos with different lighting and exposure and then layered to get all the different levels of detail.  That was the photographer's work.


And just to let everyone know the scale pattern is the exact same on the inside as the outside.  Just the outside had fancy studio lighting lightening it up.

Edit: Oh and the monitors did have their images put on via post production.  TN panels don't photograph well at all.

Link to comment
Share on other sites

Link to post
Share on other sites

  • 1 month later...

I was waiting for Corsair to post all of the final photos for me to upload the rest.  I know soon they will also have an article about the build.


But I do have an announcement to make, it's looking like the build will be Corsair's booth at Quake con 2018.

Link to comment
Share on other sites

Link to post
Share on other sites

  • 3 weeks later...

Create an account or sign in to comment

You need to be a member in order to leave a comment

Create an account

Sign up for a new account in our community. It's easy!

Register a new account

Sign in

Already have an account? Sign in here.

Sign In Now

×