Jump to content

[Build Log] King Ghidorah, 3 Gamers - 1 Threadripper

So beautiful!!! Ya, but with this being my first sponsored build, I have no sponsors for the watercooling, so that's all on me.  From my previous personal project I had two rx480s with copper ek waterblocks on them.  They were on sale for a very long time on Performance-PCS for about 55 dollars, which you can't really beat... Ek makes good stuff and I used them for almost all of my gpu blocks, but damn heatkiller blocks are pretty.  I'm kind of glad EK dropped the ball on the threadripper block because without that I'm not sure I would have put so much effort into finding the perfect cpu block.  And I do think the heatkiller block is that for this build.  I have yet to find performance numbers but even just taking apart the block I'm not worried at all.


Also thinking about things a bit more, I'm trying to keep the amount of silver in the build to a minimum, really trying to push the gold with a touch of copper, so I do think the EK blocks will fit that a bit more.  I still need to find a way to paint the silver on the heatsinks on the motherboard.  But I'm pretty happy so far with the amount of gold and copper I have.


If you have more ideas for the build let me know.  Really trying to push Gold with Copper and Three's as the main theme.  Also scales!  I've got a pretty cool idea for something I want to try with the monitor arms to help that.  I've ordered one of the two side monitor arms, I think it will work.  Hopefully I'll get a friend to come over and help me shoot some photos so I can mock up the final project design wise.  Because while I have in my head what I'm planning, I'm pretty sure I conveyed it horribly.

Link to comment
Share on other sites

Link to post
Share on other sites

So the first place I took the piece to said they couldn't guarantee that it wouldn't be orange, which is a no go for me.  So I'm taking it to another place to see what I can do.  In the meantime, I'm working on the loop, ordering new fittings here and there to make it possible.  This case supports more radiator than any I've used before but wow that many pieces makes it hard too.


Here's what I was thinking, sorry for the CPU block missing, as said it's dismantled.  However it is also the cause of an interesting problem for me.  The inlet is on the right and the outlet is on the left, meaning a typical clockwise flow doesn't really work.

For context, the pump will be in the back compartment, near the bottom of the res, but on the other side.

The problem with this one, while visually cleaner, the flow goes counter clockwise. Meaning I need 4 passthru fittings to allow the bottom flow to go to the top of the res and the bottom of the res to the pump to the top.

5a7b59fc122a7_threadripperflowquestion.thumb.jpg.bc087489d46187591c04cbc69c5d211e.jpg

Here is more or less a suggested flow from bouncing the idea off some other people.

5a7b59fe9638d_threadripperflowsuggested.thumb.jpg.1e8b097da218172cbd7cd01126c2c057.jpg


Note the fitting contraption to the right of the GPUs will have the tubing leaving it go straight back then up or down based on option one or two.

Also another benefit of option 1, is that visually the res would look like it's floating with the only tubing going to it passing straight into the back wall.

This kind of doesn't matter too much because the build will be on it's side in its finished state, however I do want to be able to convert it to an upright position from time to time.

Link to comment
Share on other sites

Link to post
Share on other sites

  • 3 weeks later...

This is shaping up to look quite awesome. Hope things start falling in place for you soon. I have the same case with the same 3 front fans lol. But I have a CH6 with an R7, and a Poseidon 1080Ti I'm still planning on making a small loop on bottom for. Will be my first custom loop, and eventually, I'll take the X62 Kraken off the cpu and add it to the loop with another rad on top.

Also forgot, due to the length of the gpu, I've been thinking of maybe just hiding the reservoir in the back half of the case, but don't like the idea of putting it closer to the psu.

Link to comment
Share on other sites

Link to post
Share on other sites

  • 2 weeks later...
On 2/24/2018 at 9:57 PM, S0m3guy said:

This is shaping up to look quite awesome. Hope things start falling in place for you soon. I have the same case with the same 3 front fans lol. But I have a CH6 with an R7, and a Poseidon 1080Ti I'm still planning on making a small loop on bottom for. Will be my first custom loop, and eventually, I'll take the X62 Kraken off the cpu and add it to the loop with another rad on top.

Also forgot, due to the length of the gpu, I've been thinking of maybe just hiding the reservoir in the back half of the case, but don't like the idea of putting it closer to the psu.


You have a build log?  I'm interested to see what other people are doing with this case!  Overall I really like the case and almost regret that I'm about to start drilling a million holes in it for bulkheads and external mounts. 

Link to comment
Share on other sites

Link to post
Share on other sites

Sorry for the delay, I've literally just been waiting to get everything back.

Updates! Not too too much.

The cover for the CPU block has been anodized gold. My brother was going to help me hydro dip it but the weather in Texas has been awful so we ended up giving up waiting as I just needed the block back. We may try again later, I really hope too...
AnodizedBlockColor.jpg.21b47d0c8644648acae3b31aed39259f.jpg

I made some better brackets for mounting the reservoir to the radiator because in the photos it's barely attached, only to realize I didn't have the right screws, so I ordered some. When they came in I discovered I ordered the wrong ones and had to order more.
Screws.jpg.a30bdb6cb617412f2d6b7546753dec7a.jpg
(I actually ordered 3 boxes of each....)

(The brackets still have the protective paper on them, but don't worry they are indeed black)
ResBrackets.jpg.fb351b82deec9ea07fd30b72ea07099e.jpg

So now that I can mount the reservoir correctly I can get placement for the bulkhead holes. And with the CPU block back and assembled I can finish the loop. Look forward to updates about the loop next week sometime.

Link to comment
Share on other sites

Link to post
Share on other sites

This is sweet, I'm emulating your project with a "twist" 


6950x, 3 770s and a 980 ti

Want to custom loop?  Ask me more if you are curious


Link to comment
Share on other sites

Link to post
Share on other sites

36 minutes ago, Damascus said:

This is sweet, I'm emulating your project with a "twist" 


6950x, 3 770s and a 980 ti

How many VMs are you planning?  And are you planning to mount monitors to the case or anything like that?

Link to comment
Share on other sites

Link to post
Share on other sites

3 minutes ago, Arkratos said:

How many VMs are you planning?  And are you planning to mount monitors to the case or anything like that?

I considered it but my case isn't very mount friendly (pc-o8)


And I'm thinking 3 vms, with a one using sli

Want to custom loop?  Ask me more if you are curious


Link to comment
Share on other sites

Link to post
Share on other sites

20 minutes ago, Damascus said:

I considered it but my case isn't very mount friendly (pc-o8)


And I'm thinking 3 vms, with a one using sli

That makes sense, not sure where you could mount them...

Also, last I saw you couldn't do sli in a VM but maybe that has changed recently?

Link to comment
Share on other sites

Link to post
Share on other sites

Very nice, interested in seeing how it turns out.


Might do something like this in the future as well, although probably only with two gamers and a NAS similar to LTT's first 2 Gamers, 1 CPU video.

Quote or tag me( @Crunchy Dragon) if you want me to see your reply

If a post solved your problem/answered your question, please consider marking it as "solved"

Community Standards // Join Floatplane!

Link to comment
Share on other sites

Link to post
Share on other sites

1 minute ago, Arkratos said:

That makes sense, not sure where you could mount them...

Also, last I saw you couldn't do sli in a VM but maybe that has changed recently?

Still new to this, if sli doesn't work I'll probably just use it for the hypervisor 

Want to custom loop?  Ask me more if you are curious


Link to comment
Share on other sites

Link to post
Share on other sites

My plan is to not give the host it's own GPU but we'll have to see how I like that.  SSHing into the host may turn out to be a pain especially if I'm planning to take this to LAN events.  But I think 4 cores for each of the 3 gaming VMs plus leaving 4 cores for the host to do NAS/Server stuff for the VMs.


Speaking of LANs I do have tickets for Dreamhack Austin and PDX LAN 32A if anyone is going to those.  PDX LAN has power supply and monitor limitations so I had to buy two seats to take this monster, I hope dreamhack doesn't give me problems because I couldn't find anything against this....  And If my friends don't game on my machine with me it would be funny to turn off the VM setup and just do triple monitor surround gaming.

Link to comment
Share on other sites

Link to post
Share on other sites

52 minutes ago, Arkratos said:

Dreamhack Austin and PDX LAN 32A

Ahh, I wish.  Travel to these events is waaay too expensive for me rn

Want to custom loop?  Ask me more if you are curious


Link to comment
Share on other sites

Link to post
Share on other sites

21 minutes ago, Damascus said:

Ahh, I wish.  Travel to these events is waaay too expensive for me rn

I can drive to Austin, I'm afraid of how much it will cost to ship this monster to portland....  but I think it will be worth it, I get to stay with friends there so what would have been hotel will now go to shipping :/

Link to comment
Share on other sites

Link to post
Share on other sites

41 minutes ago, Arkratos said:

I can drive to Austin, I'm afraid of how much it will cost to ship this monster to portland....  but I think it will be worth it, I get to stay with friends there so what would have been hotel will now go to shipping :/

Cost me 100 USD to ship my pc-o8 to Canada, should be lower than that for within us shipping 

Want to custom loop?  Ask me more if you are curious


Link to comment
Share on other sites

Link to post
Share on other sites

4 minutes ago, Damascus said:

Cost me 100 USD to ship my pc-o8 to Canada, should be lower than that for within us shipping 

The only Lian Li case I have is a PC-601...


Absolute pain to build in.

Quote or tag me( @Crunchy Dragon) if you want me to see your reply

If a post solved your problem/answered your question, please consider marking it as "solved"

Community Standards // Join Floatplane!

Link to comment
Share on other sites

Link to post
Share on other sites

Just now, Crunchy Dragon said:

The only Lian Li case I have is a PC-601...


Absolute pain to build in.

Want a pc-o8? :P I'll be using mine for a rather extreme showcase build and there's a decent chance I'll downsize to itx after that.

Want to custom loop?  Ask me more if you are curious


Link to comment
Share on other sites

Link to post
Share on other sites

2 hours ago, Damascus said:

Want a pc-o8? :P I'll be using mine for a rather extreme showcase build and there's a decent chance I'll downsize to itx after that.

I've got nothing to use it for haha.


Otherwise I would.

Quote or tag me( @Crunchy Dragon) if you want me to see your reply

If a post solved your problem/answered your question, please consider marking it as "solved"

Community Standards // Join Floatplane!

Link to comment
Share on other sites

Link to post
Share on other sites

On 3/9/2018 at 11:28 AM, Arkratos said:


You have a build log?  I'm interested to see what other people are doing with this case!  Overall I really like the case and almost regret that I'm about to start drilling a million holes in it for bulkheads and external mounts. 

I don't have anything, but whenever I do make the Poseidon's loop I'll throw up a before and after pic or something. :)

Can't wait to see how your build goes.

Link to comment
Share on other sites

Link to post
Share on other sites

  • 2 weeks later...

It was a busy week, got a lot of progress done, but even had to buy some new tools to do it!


I reinstalled the CPU block

DSC_0593.thumb.JPG.c0db7a46fbe4c8a0894957891bc206b2.JPG


Reinstalled the reservoir to start marking up a plate for the pass thrus...

DSC_0597.thumb.JPG.d94f80e819ff26980d9cc8373007d101.JPG


Made the sure the top hole gave me clearance to go across and made sure it was parallel for my dip into the cpu block.

DSC_0596.thumb.JPG.a6bb4f7df338d15e130ed28b30a190d4.JPG


Once the plate was marked up and holes on the actual sheet metal were marked the cutting could begin...
However I couldn't just drill them out because the holes hung over the edge into the cable management holes... And my jigsaw couldn't get in there, my dremil was battery powered and was not strong enough...

After a trip to the local hardware store and new corded dremil...

PassthruPlateBackWhole1.thumb.jpg.ddfab951f94e3c39fab0545b891fb3ce.jpg


It looks pretty great, now don't worry the white is temporary, I was using it for the test fitting, I'll laser cut one when it's all finalized out of something prettier.  And the blue tubing is temporary, it was just for me to have a marker to help me easily see those are to the reservoir and need to be perfectly straight up and down.

PassthruPlate1.jpg.f69c91358305963e61e9f2d13b6dbc15.jpg


PassthruPlateBottom.jpg.7e4cd2aa2627c191e42a070b265af27f.jpg


PassthruPlateTop.jpg.18310f3c383008cbbf00ebbe436757ee.jpg


And here's what I'm looking at for figuring out pump placement...  Not the best, not the worst...

PassthruToPump1.jpg.95376d5390930ddabc17e153e4d81b7e.jpg


See you all next week.  Progress should be at a more steady pace as I shouldn't be waiting for any parts, unless something weird pops up again.

Link to comment
Share on other sites

Link to post
Share on other sites

Also I figured you all would enjoy the hilarity that is my HDD cage as it stands... I mentioned it was directly on top of those pass thrus... Well it looks like I'm losing the 3rd HDD slot to fittings, but I think it will work smile.gif

So this is the plastic bracket that the HDD cage mounts to:
DSC_0606.thumb.JPG.a2706eedbcb846d4fb5548ac4250e1b5.JPG

And this is the HDD cage:
DSC_0605.thumb.JPG.9827a9c0400b4ce1f9df76a11603e151.JPG

The holes are rough, I'm still cleaning them up but that was my first pass I did last night.

Link to comment
Share on other sites

Link to post
Share on other sites

I officially saved the HDD cage!
DSC_0619.thumb.JPG.c2a8c26b0d8928218d5aa9ef8a79b466.JPG


And only lost one HDD slot!

DSC_0618.thumb.JPG.f9ca6c71794a79607a83039f69b8eec9.JPG


And I used some PETG to mock up my last bend to see if I like it before I commit to using the rest of my frosted acrylic.

DSC_0616.thumb.JPG.7e7bfa01318053e71dbdde28aa82cbe2.JPG

Link to comment
Share on other sites

Link to post
Share on other sites

  • 2 weeks later...

Just a quick update.

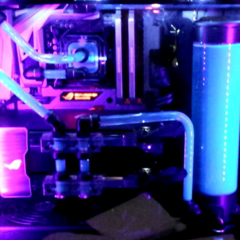
I had to tear down the entire case to clean the radiators, redo the pass thru plate, and make the front monitor mount. I'm not sure if I want to leave the pass thru plate black or if I want to work with V1 tech to make a pattern for it and illuminate the pattern, I'd probably do scales or something. However it's in a place that wont get much view as it's under a radiator and the reservoir.... I think I'm going to assemble the build again, fill the loop, turn on the lighting and see if I want more or not.

DSC_0650.JPG.02a82eb40c04a225f1db3ec60a149842.JPG

Also, I didn't post it here but I found a relatively low profile monitor adapter a while back that allows me to have height adjustment for the front monitor.

5acd0c3bd76a0_monitorMount.png.7f3ff3bb342a5dd2a14384eb0f5cdf9c.png
Found here: https://www.amazon.com/gp/product/B0741CFJVW

With that adapter I had to make my own 120mm fan to 75mm vesa mount. However the radiator mount is not centered on the case, so the adapter I made is slightly offset.

DSC_0654.JPG.5b4928e4489b81bf5b38c7cbd3f5a63f.JPG

With the monitor attached. I now have height adjustment with the monitor only about an inch off the case front.

DSC_0653.JPG.28367e508b5e44b9c14d4fbd28144b7a.JPG

Pretty pictures coming soon as I reassemble and fill the build. I still have most of exterior work to do, but I feel like the internals are in a state that can be called "done" however I may still tweak them if I don't feel like I have enough color, too much color or whatever.

What do you all think about what you have seen?

Link to comment
Share on other sites

Link to post
Share on other sites

1 minute ago, Arkratos said:

What do you all think about what you have seen?

I'm very interested in seeing the end result, this is neat project.

Quote or tag me( @Crunchy Dragon) if you want me to see your reply

If a post solved your problem/answered your question, please consider marking it as "solved"

Community Standards // Join Floatplane!

Link to comment
Share on other sites

Link to post
Share on other sites

Create an account or sign in to comment

You need to be a member in order to leave a comment

Create an account

Sign up for a new account in our community. It's easy!

Register a new account

Sign in

Already have an account? Sign in here.

Sign In Now

×