Jump to content

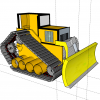
[SCRATCHBUILD] "Bulldozer" massive PC Case

BaxterTheFly

Use Skidoo track parts like rollers and stuff.. Would be about the right size.. Find some old ones off like a 70s model

I will see how to do it, the good part is that at that point i will need only the outter shell change.. like swaping the protective cover of your phone, the core part will hold all of the components :) and i will do some mechanic on that piece :) its gonna be tough but i think i should make it work :D

Link to comment
Share on other sites

Link to post
Share on other sites

UPDATE!!!, still not painting :( ran in to some work related issues :P but still sort of big update :)


1)  The "Nose job":


fuzuo.jpg

jqn6mr.jpg

1nzo6u.jpg

9hkjyc.jpg

287htea.jpg

33067x1.jpg

r2vqyv.jpg


2)  FINALLY! Fan mount... 


2j0idlh.jpg

adey39.jpg

rs53f9.jpg

nqfcz.jpg

2z6v6mo.jpg


3) Polyester filler :


2aeynwk.jpg 

Hole for 24-pin done old fashion little plate style with |-type screws :D


72pu1u.jpg

mw47c7.jpg

309t4s7.jpg


It still needs sanding before painting, i corrected the edges and everything on the bodywork of the core part, i got fittings, and i did a hole for 24-pin

Link to comment
Share on other sites

Link to post
Share on other sites

Ups power then you can drive it to LAN events or friends houses haa

Link to comment
Share on other sites

Link to post
Share on other sites

  • 4 weeks later...
Here is one long overdue update.. bodywork is taking much longer than i anticipated 


I ended up saving me the trouble with doors that open like this.. so the original idea --- to the water


20ztlwj.jpg

6i8i0y.jpg

2qjj0x4.jpg

2q1fjic.jpg

dghx6t.jpg


Made my life allot easier when it came to cooling :D fans can now be securely mounted to the side pannel xD


f43d68.jpg

5dv7gw.jpg

2uoh2dg.jpg


Also, now everything seems to fit perfectly >.> 


15ygf1x.jpg


And some finishing bodywork, tiny air bubbles gave me allot of problems after sanding... 


ae651f.jpg

96mdjm.jpg


In the end it was worth it... Just perfect :D


2nnk75.jpg

30k3ibk.jpg

2e1ta1u.jpg


Also, one more idea that took me, Idiot, almost entire day and it was complete bust!


2euk5r8.jpg

103fmnm.jpg

zv6j9g.jpg


Also, i figured that if i paint over the dry body kit, it will give it a bit of strength so i ended up doing that and it made my life easier, I paint it when i am done, and than, when i am back from work tomorrow its nice and solid, doing this saved me from allot of scratches :D


111otg5.jpg


The back fan mounted ( the one that cools the back of the socket ), i must add that when i did measurements for the cuts, i wanted to make it octagonal, i kind of dig the lines.. i think i will pinstripe them on it... Also the fan is mounted to the plate, that is than mounted to the case... 


1248u1k.jpg

1zb5ssm.jpg

2hrz4vp.jpg

10nu9eo.jpg

14n1xuc.jpg

20frlvc.jpg

317fyn4.jpg


Checking if the cables fit the hole i made, it will be awesome when i put the sleeved cables there with cable combs there :D


2yya5bd.jpg

2mwwn5j.jpg

53mw01.jpg

ano30z.jpg


There, I hope you guys like the progress i made, i will take liberty to say that it the case as a case should be done in a week, and the water cooling components and components should be fixed inside few weeks after that total...

Link to comment
Share on other sites

Link to post
Share on other sites

Awsome! Have that same motherboard and super awesome to see it used in this build :D

A shadowy flight into the dangerous world of a man who does not exist.


Core 4 Quad Not Extreme, only available on LGA 557 at your local Circuit City

Link to comment
Share on other sites

Link to post
Share on other sites

Oh man this is getting exciting!

Current System: R7 1700x 3.93Ghz, PowerColor R9 380x 1.14ghz, 16gb Corsair Vengeance Pro 3200mhz, EVGA 650 GS

Link to comment
Share on other sites

Link to post
Share on other sites

  • 4 weeks later...
  • 2 weeks later...

Oh man this is getting exciting!


Hey @BaxterTheFly


Are you still working on your amazing build?

I'd love to see it finished.


I second that. Any updates? This is such an awesome build!
Alt+MAlt+N


Here you go guys :D 


Been a while since i posted, and loads of things happened since than :) 
 
Enjoy the slideshow xD 
 
Top part still needs some minor adjustments, it now opens quite nicely with some support from suspensions :) 
 
14tshgx.jpg
2qm1c8h.jpg
2624lqh.jpg
1j9469.jpg
vobj3r.jpg
 
I dont know about you, but it looks more massive than it used to :)
 
Next in line is the finished front piece remaster! 
 
eak0bd.jpg
312v5o5.jpg
v2tmwy.jpg
10cuhyw.jpg
fdx5zb.jpg
 
next, experimenting with paint/foils :D
 
16ld3m1.jpg
mkj0wj.jpg
 
Here you can see how the roof holds with suspensions when open :)
 
And the last, i really think you will like it, 95% finished product xD
 
flcakk.jpg
24y4eag.jpg
j0jyuu.jpg
2poodjk.jpg
357n91d.jpg
 
Bare in mind that the foil didnt set as it should have, and i will re-do it, the glue needs to be heated and i didnt have good dust free chamber, i redid it and the finished pictures will be out soon, only thing left for me to do now is fill it with components :), loads of little details finished as well, this is just a preview! Finished pics will come out when i have it all working!
Link to comment
Share on other sites

Link to post
Share on other sites

YES update and a good one at that

A shadowy flight into the dangerous world of a man who does not exist.


Core 4 Quad Not Extreme, only available on LGA 557 at your local Circuit City

Link to comment
Share on other sites

Link to post
Share on other sites

What a terrific update! I am all kinds of pumped about this build again.

Current System: R7 1700x 3.93Ghz, PowerColor R9 380x 1.14ghz, 16gb Corsair Vengeance Pro 3200mhz, EVGA 650 GS

Link to comment
Share on other sites

Link to post
Share on other sites

haha :D you guys are making my day feel better with those comments :) cant wait for asrock to approve my mobo so i can show you the finished product at last :D

Link to comment
Share on other sites

Link to post
Share on other sites

Looks awesome! Can't wait for the next update! :D

My Systems:

Main - Work + Gaming:

Spoiler

Woodland Raven: Ryzen 2700X // AMD Wraith RGB // Asus Prime X570-P // G.Skill 2x 8GB 3600MHz DDR4 // Radeon RX Vega 56 // Crucial P1 NVMe 1TB M.2 SSD // Deepcool DQ650-M // chassis build in progress // Windows 10 // Thrustmaster TMX + G27 pedals & shifter

F@H Rig:

Spoiler

FX-8350 // Deepcool Neptwin // MSI 970 Gaming // AData 2x 4GB 1600 DDR3 // 2x Gigabyte RX-570 4G's // Samsung 840 120GB SSD // Cooler Master V650 // Windows 10


HTPC:

Spoiler

SNES PC (HTPC): i3-4150 @3.5 // Gigabyte GA-H87N-Wifi // G.Skill 2x 4GB DDR3 1600 // Asus Dual GTX 1050Ti 4GB OC // AData SP600 128GB SSD // Pico 160XT PSU // Custom SNES Enclosure // 55" LG LED 1080p TV  // Logitech wireless touchpad-keyboard // Windows 10 // Build Log

Laptops:

Spoiler

MY DAILY: Lenovo ThinkPad T410 // 14" 1440x900 // i5-540M 2.5GHz Dual-Core HT // Intel HD iGPU + Quadro NVS 3100M 512MB dGPU // 2x4GB DDR3L 1066 // Mushkin Triactor 480GB SSD // Windows 10


WIFE'S: Dell Latitude E5450 // 14" 1366x768 // i5-5300U 2.3GHz Dual-Core HT // Intel HD5500 // 2x4GB RAM DDR3L 1600 // 500GB 7200 HDD // Linux Mint 19.3 Cinnamon


EXPERIMENTAL: Pinebook // 11.6" 1080p // Manjaro KDE (ARM)

NAS:

Spoiler

Home NAS: Pentium G4400 @3.3 // Gigabyte GA-Z170-HD3 // 2x 4GB DDR4 2400 // Intel HD Graphics // Kingston A400 120GB SSD // 3x Seagate Barracuda 2TB 7200 HDDs in RAID-Z // Cooler Master Silent Pro M 1000w PSU // Antec Performance Plus 1080AMG // FreeNAS OS


Link to comment
Share on other sites

Link to post
Share on other sites

  • 4 months later...

Hello guys and really sorry for not updating, i have had some massive lack of time so i didn't get to do anything that i wanted. This is a little tease and i promise i will post full update log once i get time to work on it ;) . Also, tomorrow is the day i fire this thing in its cage as i have been running the system hihihi. 


So here it is for now:


2957lhk.jpg


Brm brm brrrrrrmmm

Link to comment
Share on other sites

Link to post
Share on other sites

Well I was quite happy to see this in my notifications :D

A shadowy flight into the dangerous world of a man who does not exist.


Core 4 Quad Not Extreme, only available on LGA 557 at your local Circuit City

Link to comment
Share on other sites

Link to post
Share on other sites

Ok, some things i think you are gonna like that has been done to the mod :D
 

16mm Copper tubing:


28ixjqe.jpg


Changed the board rotation, its laid down now:


51engl.jpg


Added professional grade backplane ;)


2aa0so9.jpg


And the drawers:


2ik4d3s.jpg


and the look before painting from different perspective:


xwr5i.jpg


Also, the 480EKWB rad with 8x CoolerMaster Jetflo:


ny62w8.jpg


New ones come tomorrow, enjoy!

Link to comment
Share on other sites

Link to post
Share on other sites

How are you going to insulate the copper pipes?

IntelCorei54670k,Maximus VI Formula,Swift tech H220, 16gigs Corsair Dominator platinums, Asus DCUII GTX 780,1x256 840 evo, 1x 2TB Segate barracuda, Corsair AX 860, 

3 X Noctua NF-F12, 2x Noctua NF A-14, Ducky Shine 3 Blue Leds Blue switches, Razer Death Adder 2012, Corsair vengence 1400  

Link to comment
Share on other sites

Link to post
Share on other sites

1 minute ago, mikeeginger said:

How are you going to insulate the copper pipes?

why would i do that, i will just paint them black/yellow :) 

Link to comment
Share on other sites

Link to post
Share on other sites

1 hour ago, BaxterTheFly said:

why would i do that, i will just paint them black/yellow :) 

I would guess to help prevent heat loss but over the short distance 

I doubt it would matter that much

IntelCorei54670k,Maximus VI Formula,Swift tech H220, 16gigs Corsair Dominator platinums, Asus DCUII GTX 780,1x256 840 evo, 1x 2TB Segate barracuda, Corsair AX 860, 

3 X Noctua NF-F12, 2x Noctua NF A-14, Ducky Shine 3 Blue Leds Blue switches, Razer Death Adder 2012, Corsair vengence 1400  

Link to comment
Share on other sites

Link to post
Share on other sites

2 hours ago, mikeeginger said:

I would guess to help prevent heat loss but over the short distance 

I doubt it would matter that much

"heat loss" heat loss is the goal ;) hehe

Link to comment
Share on other sites

Link to post
Share on other sites

So i have been doing what seems to be the biggest problem... how to make roof and still look sharp :)
i think this will be ok, and not make the roof stand off too much, the roof consists out of board and a U profile, the sides will go on the inside of a U profile, and also it will house a led strip that will illuminate interior, now, should i put yellow or red that is still something to decide.

Dozer7.jpg

Dozer8.jpg

This is another problem i have had. The waterblock came w/o a backplate, and i love backplates, keeps the board from bending and gives it stiffness, so i drilled the holes in my existing backplate to widen the screw holes that were there so the screws for my waterblock could go trough. it works, now i will need to reinstall it :)

Dozer9.jpg

till the next time, feel free to comment, good/bad, its all cool :)

Link to comment
Share on other sites

Link to post
Share on other sites

Create an account or sign in to comment

You need to be a member in order to leave a comment

Create an account

Sign up for a new account in our community. It's easy!

Register a new account

Sign in

Already have an account? Sign in here.

Sign In Now


×