Jump to content

A High Density, Low Power Consumption, Offsite Backup Server Build Log

Welcome to a project that has spent 19 months in planning. This server is going to be comprised of a combination of both new and old hardware that I have on hand. The system is going to start with a conservative 30TB of storage with expansion up to 90~120TB of mechanical storage which will serve my purposes for years to come.


The hardware I'll be working with over the course of this project:


IMAG0796.thumb.jpg.57e5d1be9e66983113245136c8379791.jpg


This is going to be fun. Feel free to ask questions. More to come later. :D

Link to comment
Share on other sites

Link to post
Share on other sites

looks great

21 minutes ago, Windows7ge said:

Storage: WD Elements 

why external drives?


I'm also planning to build a server but Intel Avoton processors won't be the right thing for me ( minecraft server is single threaded and the small celeron of the nas is already at 100%. those weak Atom cores would be too slow)

https://ark.intel.com/content/www/us/en/ark/products/codename/54859/avoton.html

Edited by Drama Lama
added Link to intel ark

Hi


Spoiler
Spoiler
Spoiler
Spoiler
Spoiler
Spoiler
Spoiler
Spoiler
Spoiler
Spoiler
Spoiler
Spoiler
Spoiler
Spoiler
Spoiler
Spoiler
Spoiler
Spoiler
Spoiler
Spoiler
Spoiler
Spoiler
Spoiler
Spoiler
Spoiler
Spoiler
Spoiler

hi


Link to comment
Share on other sites

Link to post
Share on other sites

31 minutes ago, Drama Lama said:

why external drives?

I assume because of price .. the 8 TB elements cost around $145


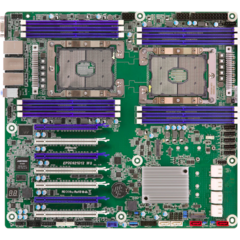
I'm surprised by the motherboard choice. I'd be reluctant to use a board with 3 different sata controllers :

2 SATA3 6.0Gbps, 4 SATA2 3.0Gbps by C2750

4 x SATA3 6.0 Gb/s by Marvell SE9230,

2 x SATA3 6.0 Gb/s by Marvell SE9172


Besides the BMC controller and remote stuff and ability to use older DDR3, don't see the big deal about it.


Also seems really expensive, I  see it on mini-itx for 430 uk pounds, i see it used on amazon for around $350


I could literally spend $200-$250 on a NEW sTR motherboard like this one for example and you can still buy 1900x processors for around 200$ and you can just disable cores if you want to save power... and should be about same cost.

You get a single sata controller with 8 sata ports, plenty of ram slots, the board above has a 2.5g ethernet and a 1g ethernet, plenty of pci-e slots with plenty of pci-e lanes, so you could easily add a 10g card and a hba card if you need more slots.


Link to comment
Share on other sites

Link to post
Share on other sites

53 minutes ago, Drama Lama said:

why external drives?

Quote

StorageWD Elements - Will be shucked

They're considerably cheaper than proper internal drives.

Link to comment
Share on other sites

Link to post
Share on other sites

8 minutes ago, mariushm said:

Snip

The motherboard is actually one of the old bits of hardware in this project. It was my first NAS about 4 years ago and after I upgraded it lost purpose.


Now I have a chance to use it for something again.


To address the 4 separate controllers concern. I'm going to be using zfsutils-linux. ZFS really doesn't care what controllers are being used so long as it has direct access to the drives.


I do have a spare Dell PERC H310 flashed to IT mode and this board supports PCI_e Bi-furcation. With the right adapter I could run both it and the 10Gbe card on the board with the single x8 slot should any of the four controllers give me issues.

Link to comment
Share on other sites

Link to post
Share on other sites

Might as well start with shucking drives. Got the first one out of its enclosure.


IMAG0798.thumb.jpg.679683753c9648e4b76d6e1e90471125.jpg


Now I'm aware of the whole CMR/SMR debacle that's going around with WD and I'm informed that ZFS really doesn't play nicely with SMR. A little googling of the model number though gives me reason to believe I'm in the clear. Anyone is welcome to double-check me though.


An issue that for some people might actually look at as a feature is the lack of a center screw hole on either side of the drive.


IMAG0799.thumb.jpg.a1a37817292351b84d9485d38353ae64.jpg


Now for the clips that come with this chassis they're meant to screw on using the center hole but because of the plastic pegs in the first and last hole and the fact it's a friction fit when you insert it in the drive bay it kind of doesn't matter. I just can't permanently affix the bracket to the drive.


And with that 30TB of cheap storage are now installed. A cool feature of this server chassis is the swingable HDD mounting cage.


IMAG0801.thumb.jpg.6dfc1774ee50cc2d081728753aa1cfde.jpg


Using 10TB drives I can fit up to 90TB of raw storage in here but because of the Mini-ITX motherboard and 12 available SATA ports I could potentially modify the chassis to hold up to 120TB. Even more if I use denser drives in the late future.


Next up, power supply.

Link to comment
Share on other sites

Link to post
Share on other sites

Got the PSU in along with all necessary cables. One issue I've been made aware of with shucked drives is the 3.3V reset pin issue. Some people do a tape mod. Some people modify their PSU cables.


Looking up my drives model number people are saying these mods are no longer necessary but regardless I'm using Molex to 4x SATA adapters. These only supply 12V & 5V which is all the drives need. So if the 3.3V reset issue is preset on these drives I've bypassed it.


IMAG0802.thumb.jpg.fb3614daf7f70c0884b5193425f34103.jpg


Next up installing the motherboard/RAM. The CPU is a BGA chip (the Intel Atom C2750).

Link to comment
Share on other sites

Link to post
Share on other sites

that swingable cage looks awesome!

it's too bad the chassis doesn't have a backplane tough for those drives. that would make swapping out possible duds that much easier.


but then again, how often do you really need to swap a dead drive?

Link to comment
Share on other sites

Link to post
Share on other sites

1 hour ago, RollinLower said:

that swingable cage looks awesome!

it's too bad the chassis doesn't have a backplane tough for those drives. that would make swapping out possible duds that much easier.


but then again, how often do you really need to swap a dead drive?

There are similar chassis that have front hot swap bays but because this build was planned so long ago I had already bought the chassis even as my needs altered. If I had the ability to do this again from scratch I would have gone for a 2U 12 hot swap drive bay chassis.


As for how frequently I swap dud drives. Not frequently. I can name 2 that I had to swap in the past 2 years or so and that's only because the drives in one array were already 4~5+ years old.


Maintenance on this box is going to be a breeze. You'll be able to see as we progress further.

Link to comment
Share on other sites

Link to post
Share on other sites

11 hours ago, Windows7ge said:


Looking up my drives model number people are saying these mods are no longer necessary but regardless I'm using Molex to 4x SATA adapters. These only supply 12V & 5V which is all the drives need. So if the 3.3V reset issue is preset on these drives I've bypassed it.


Molex to sata - loose all your data... 

Be careful which adapters you use. The molded adapter a fire hazards. 

https://cn.bing.com/search?q=molex+to+sata+fire&FORM=HDRSC1

Link to comment
Share on other sites

Link to post
Share on other sites

23 minutes ago, Blue4130 said:

Molex to sata - loose all your data... 

Be careful which adapters you use. The molded adapter a fire hazards. 

https://cn.bing.com/search?q=molex+to+sata+fire&FORM=HDRSC1

It's a backup server. If all the data were lost it wouldn't matter.


As I see it you could make this argument about any adapter cables. Do you have a better suggestion?

Link to comment
Share on other sites

Link to post
Share on other sites

30 minutes ago, Blue4130 said:

Molex to sata - loose all your data... 

Be careful which adapters you use. The molded adapter a fire hazards. 

https://cn.bing.com/search?q=molex+to+sata+fire&FORM=HDRSC1

Ah, I followed your link. I remember hearing this issue with the over-molded Molex/Sata adapters. The ones I'm using here are not of this type. I'm using the ones that cut into the wires which haven't shown to have the rampant issue you're addressing.

Link to comment
Share on other sites

Link to post
Share on other sites

Installed the RAM. Again this is temporary until I can get some proper UDIMM ECC.


IMAG0803.thumb.jpg.a5c70f02283235b0874275d29a0115c6.jpg


And that's the Motherboard installed.


IMAG0804.thumb.jpg.02dae942cc1e51cba4d0d46135c2f04b.jpg


This chassis, if you have heatsinks short enough to clear the HDD cage can hold up to a SSI EEB dual socket motherboard but with the HDD cage covering most of the base a Mini-ITX board doesn't look inappropriate either.


Next up the 10Gbe NIC. This is going to be a little special so it's going to get it's own comment.

Link to comment
Share on other sites

Link to post
Share on other sites

To keep the 10Gbe NIC cool I want to test out a prototype shroud I designed. The Fibre NICs don't get anywhere as hot as their copper counterparts so this may work out just fine.


IMAG0805.thumb.jpg.6a721277ce3ac12dd18737a6a39cd54f.jpg


This is a 12V blower style fan designed for 3D printers but I found it had the potential for other uses. I had to slightly embiggen the holes to accommodate 10mm M3 screws.


IMAG0807.thumb.jpg.ef464f3633bc9a5d951db69651164b9a.jpg


The connector on the end is also wrong so we have to chop that off.


IMAG0806.thumb.jpg.a928d344ad0deb6e42312de6e4926f89.jpg


Getting everything fitted up the card looks pretty good.


IMAG0809.thumb.jpg.9d88ec9f6b9ff3a7688e8d1cd8c66d3a.jpg


Now I'm not fancy enough to have the crimping tools to crimp on a standard 2/3-pin fan connector so I sacrificed a low noise adapter for its four pin and just soldered the leads together with some leaded solder.


IMAG0810.thumb.jpg.c4737e0697160eb1aeb50007bb881584.jpg


I'm also not fancy enough to have heat shrink tubing but I find a nice wrapping of electrical tape and a couple zip ties works almost as well.


IMAG0811.thumb.jpg.de01e686cacd29c6b5786df0307bcaeb.jpg


And that's the NIC installed.


IMAG0812.thumb.jpg.043220851c8a78ab75a4fecd274520fd.jpg


I also went ahead and connected all the front panel I/O. The chassis supports USB3.0 but the board does not. The chassis internal 3.0 connector does have an offshoot that let's you use 2.0 off of that though which is nice so you don't have to buy an adapter.


All that's left here now is to hookup the rest of the internal wiring.


Link to comment
Share on other sites

Link to post
Share on other sites

1 hour ago, Windows7ge said:

To keep the 10Gbe NIC cool I want to test out a prototype shroud I designed. The Fibre NICs don't get anywhere as hot as their copper counterparts so this may work out just fine.


This is a 12V blower style fan designed for 3D printers but I found it had the potential for other uses. I had to slightly embiggen the holes to accommodate 10mm M3 screws.


The connector on the end is also wrong so we have to chop that off.


Getting everything fitted up the card looks pretty good.


Now I'm not fancy enough to have the crimping tools to crimp on a standard 2/3-pin fan connector so I sacrificed a low noise adapter for its four pin and just soldered the leads together with some leaded solder.


I'm also not fancy enough to have heat shrink tubing but I find a nice wrapping of electrical tape and a couple zip ties works almost as well.


And that's the NIC installed.


I also went ahead and connected all the front panel I/O. The chassis supports USB3.0 but the board does not. The chassis internal 3.0 connector does have an offshoot that let's you use 2.0 off of that though which is nice so you don't have to buy an adapter.


All that's left here now is to hookup the rest of the internal wiring.


I like that you modeled the mellanox connectx-2. It's the small details that make these projects cool. 

Link to comment
Share on other sites

Link to post
Share on other sites

Got all the wiring hooked up. Fans, power, SATA, front I/O.


IMAG0816.thumb.jpg.fcb8b83f4589a1001f399597572e5510.jpg


I did run into a problem where my fancy shroud actually interferes with the 4-pin fan headers for the front fans. For this reason the front fans will report as the CPU fans (different headers). We will see how hot the CPU gets. I may have to rig a fan ontop of the cooler somehow.


And of course it wouldn't be a system build if it didn't draw some blood. Ironically it was one of the Molex to SATA adapters that got me. I don't think they'll burn down the server but they'll cut me pretty good.


Next up mounting the RL-26 rails.

Link to comment
Share on other sites

Link to post
Share on other sites

As mentioned in the original post these rails are the NORCO Heavy Duty RL-26 kit.


IMAG0819.thumb.jpg.994bef33be95ed51c7eba15dcc9a773c.jpg


As shown above the inner race detaches from the outer race. The 3rd rail from the left shows the small mechanism you pull to release it from the track.


Unfortunately these rails were designed with a one size fits all design. So they protrude a lot out the back of the chassis. This isn't necessarily a bad thing though and I'll show why in the next comment.


IMAG0820.thumb.jpg.3e9c9a9843024678783c635f9ee269a8.jpg


On the server rack side of things installation is pretty easy with the tooless design. Just press in the black dimple and pull down to lock the rail in place.


It's also necessary to install the caged nuts where the holes line up on the server ears.


IMAG0824.thumb.jpg.bd40ec802aedeeb0c48845544703e298.jpg


And with both installed rail installation is complete.


IMAG0825.thumb.jpg.cd01777e467df9318dfb9dd393de6a2a.jpg


Now we need to install the server UPS.

Link to comment
Share on other sites

Link to post
Share on other sites

I already installed the rails the UPS sits on.


IMAG0829.thumb.jpg.12ef36b011ff40047ecfaabbc203470d.jpg


These things are heavy. They weigh almost 50lbs each. Installation is just a matter of coercing it onto its rails and screwing it down with caged nuts.


IMAG0830.thumb.jpg.5ec029722ba020b17750bb2d630de716.jpg


I also went ahead and mount the server. Maintenance on this thing will be very easy because it extends out far enough to where the body clears the rack.


IMAG0827.thumb.jpg.b2f04b3abebc9c8a5820b32d1dc2cd31.jpg


Now just push it in and put in the securing screws.


IMAG0828.thumb.jpg.24bbd888ea7fed8c033ee5ef177e4c63.jpg


At this point I'll leave what comes next up to you guys. What do you want to see? Hooking it up to the network both copper/fibre or do you want me to jump strait to OS setup?

Link to comment
Share on other sites

Link to post
Share on other sites

We've struck a couple of problems and part of it is from the fact the motherboard isn't new.

  1. I can't access the remote console via the IPMI. Downloading the jviewer file fails each time. Still troubleshooting what that's all about. Might have to get on the horn with ASRock Rack. I can also try updating both the BIOS & BNC.
  2. It would appear one of the USB ports on the front of the box aren't usable. This is problematic because I need 4 ports at the minimum and there's only 2 USB type A ports and one dual USB2.0 header. I'm going to have to buy a USB PCIe adapter. The type that connects to USB headers.
  3. The CPU is getting toasty despite the two front fans at 100% so for the time being I've haphazardly tossed a baby server fan on there. It works.
  4. It would also seem some of the RAM was bunk. Have to deal with 16GB until I can get the proper stuff.

IMAG0831.thumb.jpg.fd71579198b95f83f1a39d828c8fb29e.jpg


For now we're installing the OS. This server is going to be running Ubuntu Server 20.04.1 LTS. Installation is taking a while longer than I'm use to. It looks like its behaving but still...


IMAG0832.thumb.jpg.4a34c83750462c0ace5d0da3104ba302.jpg

Link to comment
Share on other sites

Link to post
Share on other sites

So we've hit a snag.


IMAG0833.thumb.jpg.979cf44fa64a3c62e66f558c1e34fcd8.jpg


Not only did it take over 2 hours to install which is well beyond normal but after restarting the system the OS was beyond slow. Borderline completely unresponsive.


I think this has to do with my attempt at making a mdadm RAID1 with the USBs. So now we're re-installing and this time it's just a plain install. No RAID. I'll have to research if I can do anything with something like RSYNC to backup the boot drive to the other. We'll see.


So far the plain install is going much much quicker. With any luck it'll work this time.

Link to comment
Share on other sites

Link to post
Share on other sites

God, finally some progress. Gotta love old hardware. I...

  1. Installed the OS to just one USB
  2. Updated the BMC/IPMI v0.30.0 -> v0.35.0
  3. Updated the BIOS v3.00 -> v3.20

The system is still behaving strangely kind of slowly but it's not as bad as it was before. I have yet to test network performance. Won't happen until tomorrow.


I did get remote console working. It wasn't working partly because of a mis-config in the jviewer on my desktop:


42312584_Screenshotfrom2020-09-0722-45-33.thumb.png.3e3152a241d1971e07eade018efb4774.png


With SSH there's really no reason to use the remote console except for when I want control higher than the OS. Like in the example below. This is a screen grab on my desktop.


1691446970_Screenshotfrom2020-09-0722-42-46.png.5bfd7eb789acd156a4e87ce427e3c90d.png


I can also remotely shutdown, start, or reboot the system in the event of lockup which is really convenient.


More to come tomorrow. I'm afraid I'm going to have network performance issues so I want to get that tested asap.

Link to comment
Share on other sites

Link to post
Share on other sites

Alright. I got SAMBA installed & setup. I still have to create Datasets and assign owners but for the time being I just chmod 757 offsite. I'll switch it back to 755 when I'm done backing up the primary server and I'll start from scratch with datasets. The primary reason I want to just dump 9.22TB of data onto it right now is so I can switch out my primary servers OS.


Performance actually isn't bad. I'm seeing sustained writes of ~250MB/s over the 10Gig network. I need to enable Jumbo Packets which is a little bit of a pain but it should give me a little boost over what I'm getting now.


Power consumption is great. Under load I'm pulling 75W which for this UPS equates to almost 3 hours of run time. Idling it pulls 50~60W which is closer to 4 hours of run time.


I'll work on getting Jumbo Packets working and see how high I can get the speeds to go.

Link to comment
Share on other sites

Link to post
Share on other sites

As it turns out about 200~250MB/s is the max I'm going to get from this mechanical array. The good news is I can append two additional 3 drive raidz1 vdevs. This will result in three 3 drive RAID5's in RAID0 which if this scales should bring me into the 600MB/s~750MB/s range and provide a grand total of 90TB of RAW network storage.


I'm currently dumping my storage server over to this backup server and the Mellanox ConnectX-2 isn't getting hot at all. My little prototype is working quite well. I'm glad to see that.

Link to comment
Share on other sites

Link to post
Share on other sites

Create an account or sign in to comment

You need to be a member in order to leave a comment

Create an account

Sign up for a new account in our community. It's easy!

Register a new account

Sign in

Already have an account? Sign in here.

Sign In Now

×