Jump to content

New house, new set up :)

RooR

Hey guys,


I recently moved to a new place, and have so much more room. I finally have a room dedicated to just computers and such.

In this build log I will be posting pictures of the following:


- Building and painting and entire desk from scratch. Including cable management pathways, hidden compartments and lots of other little goodies.

- Draining my custom loop from my LianLi Q17 ROG itx set up and using some of those parts for the build in the InWin 301 mATX case

-Modding internal brackets in the case as well as a few other mods, I can provided more detailed instructions on things such as Pump/Res mount fabrications, painting tutorials and DIY cable sleeving.

My current set up I will post below!


I am sure nobody will really see much of this post, but I am just starting this now so i can start adding pictures as I go along. I will also save pictures on my desktop to make more detailed reports if anyone is interested.


This is my current set up


IMG_1734.thumb.JPG.332366c2f971478e86667cccdc89e7d3.JPGIMG_2208.thumb.jpg.10de1f8555039bd1503f4c7fae66c00a.jpg


I have already framed the top of the desk, its rather large. I made two sections and combined them after. One section measuring 5'x3’ and the other 4'x3’

IMG_2209.thumb.jpg.279f515ba6a16f57e0d1af22f1e15217.jpg


These are just quick pictures, I will be using my nikon D750 for the rest of them! I am excited to finally finish this project, as it is one of the last ones I have to finish before my new place is completely done and I can finally just relax!


Thanks for looking :) 

Any suggestions are welcome!

Link to comment
Share on other sites

Link to post
Share on other sites

  • 1 month later...

Haven’t updated this like an idiot, so I’m going to catch everything up in a few posts real quick.


below is part of the table top, the legs and the frame with the first coats of paint. I’m going to have to do several coats due to the cramped and dusty conditions I’m painting and working in. This will be followed by a flat clear coat. 

D1CEB380-A9B4-492A-9E62-754498E25593.jpeg

52073482-AB66-4111-9327-98D7F4EC44C1.jpeg

C556C0CE-D394-4F59-A88C-A5CFDCA7E84E.jpeg

Link to comment
Share on other sites

Link to post
Share on other sites

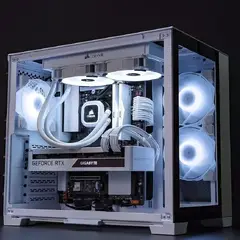
So here’s the basic footprint of the tabletop. I’ve added some tiers to the top, to give it some character. The middle tier for my ultra wide x34, the left for my second xbhu27 and the right for my tower.

i left a lot of space in the back for a boom arm, lighting for the camera, and maybe a future shelf or so.

F85C8698-466B-4CD7-87D1-375B7F8B8C91.jpeg

715E3AEA-F71D-44B8-A2D5-92C787B8D372.jpeg

E707469C-9DDE-4581-8DA8-980FB27ECD0C.jpeg

Link to comment
Share on other sites

Link to post
Share on other sites

F52C7404-B3EF-4FC5-A287-CB59FD158351.thumb.jpeg.bfcb218d7c599cf0ec7ec79577153378.jpegI will finish uploading when I am home from work, I need to host the rest of the pictures because LTT has a 20 mb limit. 

BB5C763C-FCD8-44D3-B14D-EA1CC936BA41.jpeg

ADAF217D-7747-4A8C-88A7-118606C9A089.jpeg

9B9BE600-E447-4094-9DF4-CE877E1EBA3D.jpeg

Link to comment
Share on other sites

Link to post
Share on other sites

Well I have a bunch of photos to upload but ltt has a limit, and I can’t get into my photo bucket. So for now I will just post the end product. If anyone is interested I will post the in between!

any comments are welcome :)


Link to comment
Share on other sites

Link to post
Share on other sites

Create an account or sign in to comment

You need to be a member in order to leave a comment

Create an account

Sign up for a new account in our community. It's easy!

Register a new account

Sign in

Already have an account? Sign in here.

Sign In Now

×