Jump to content

Twelve-80 Krait Gaming Edition - scratch build [Completed]

So a while back, I got a message asking me if I wanted to play with some new hardware.  How could I resist?  I mean, new hardware, short timeline, lots of other projects going on, the holidays...sounds like a challenge to me!


Originally, my idea was for an open design with the mb and gpu on display with the rest of the hardware in a base, but it felt done.  Lots of cases have pulled off that look and I gotta be different, so back to the drawing board...or rather the shower, cause that's where the idea hit me.  Standing there with shampoo in my hair, and I'm running through the details of a case design.  An aluminum shell with the tray suspended, and everything as compact as possible to keep the size to a mid tower or less.  Vertical mount the GPU, check.  SFX power supply, check.  Does it work with the parts I've already told them I need.........this will be interesting.


First up we needed a design to see if I could fit it all together.


MSI-Scratch-msi_sketch-me.jpg


Next we're gonna need some hardware, obviously, so let's see what we've got to play with.


The new hardware and what will become the foundation of the design, the MSI Z270 Krait Gaming motherboard.


MSI-Scratch-DSC00119-me.JPG


And what will be filling it's slots???  How about some HyperX Predator DDR4 RAM.  16GB of 3000Mhz.


MSI-Scratch-DSC00118-me.JPG


And a HyperX Predator 240GB M.2 drive.


MSI-Scratch-DSC00131-me.JPG


Power is going to be handled by a Silverstone 600w SFX PSU.


MSI-Scratch-DSC00091-me.JPG


And on the graphics front, we have the beefy MSI GTX980Ti Lightning.


MSI-Scratch-DSC00120-me.JPG


Water cooling parts are from Bitspower and consist of...


A 360mm Leviathan Slim radiator.


MSI-Scratch-DSC00121-me.JPG


A Water Tank Z-Multi 200 V2 res.


MSI-Scratch-DSC00122-me.JPG


For the pump and top, MCP655 + D5 TOP V2 (POM Version) with the white mod kit.


MSI-Scratch-DSC00123-me.JPG


A Summit EF CPU block in clear acrylic.


MSI-Scratch-DSC00124-me.JPG


The matching clear acrylic block for the MSI Lightning.


MSI-Scratch-DSC00126-me.JPG


And a gaggle of fittings.  


MSI-Scratch-DSC00127-me.JPG


For fan duties, I've snagged three Thermaltake Riing 12 fans in white cause I just like the look when they're lit.


MSI-Scratch-DSC00088-me.JPG


Now I guess I should put all this together...but first a shout out to the sponsors for this build, MSI, HyperX, and Bitspower.


sponsorlogo-me.jpg

Current Project:  The Gunslinger - CM MasterCase5, Crimson King - CM MasterCase5, Twelve-80 - scratch build

Past Projects: SparkF3,  ShinaiScoutGiganteaRehab

Or catch me on social media: Insolent Gnome on the facepage or @Insolent_Gnome on the tweets or check out my InsolentMods website!

Link to comment
Share on other sites

Link to post
Share on other sites

First up on my list of things to do was a motherboard tray.  Since pretty much everything goes on it and that determines the final width of everything, it's a little important.

I cut out a piece of 5052 Al, leaving some space at the top for tabs, but sticking to the mb dimensions otherwise.


MSI-Scratch-2016-12-24_16.00.28-me.jpg


MSI-Scratch-2016-12-24_16.00.35-me.jpg


To save some space I'm mounting the GPU vertically which requires a riser.  This is a very nice one from Li-Heat.


MSI-Scratch-2016-12-24_16.01.09-me.jpg


Lining up the Lightning and figuring out my measurements.


MSI-Scratch-2016-12-24_16.03.34-me.jpg


I made three aluminum brackets that will use the motherboard mounts to hold the GPU.  Seemed like the simplest plan.


MSI-Scratch-2016-12-26_15.48.51-me.jpg


MSI-Scratch-2016-12-26_15.53.45-me.jpg


MSI-Scratch-2016-12-26_15.54.25-me.jpg


With that headed in generally the right direction, I decided to work on the flip side and get the PSU mounted up.  A nice little feature on the Silverstone SFX are some extra mounting points.


MSI-Scratch-2016-12-26_20.25.03-me.jpg


So it was just a matter of figuring out the final location and drilling a few holes to get it mounted up.


MSI-Scratch-2016-12-26_20.25.15-me.jpg


MSI-Scratch-2016-12-26_20.27.37-me.jpg


Thanks to:


sponsorlogo-me.jpg

Current Project:  The Gunslinger - CM MasterCase5, Crimson King - CM MasterCase5, Twelve-80 - scratch build

Past Projects: SparkF3,  ShinaiScoutGiganteaRehab

Or catch me on social media: Insolent Gnome on the facepage or @Insolent_Gnome on the tweets or check out my InsolentMods website!

Link to comment
Share on other sites

Link to post
Share on other sites

OMG YES! A new log from @InsolentGnome!!! Gimme!!

Use this guide to fix text problems in your postGo here and here for all your power supply needs


New Build Currently Under Construction! See here!!!! -----> 


Spoiler

Deathwatch:[CPU I7 4790K @ 4.5GHz][RAM TEAM VULCAN 16 GB 1600][MB ASRock Z97 Anniversary][GPU XFX Radeon RX 480 8GB][STORAGE 250GB SAMSUNG EVO SSD Samsung 2TB HDD 2TB WD External Drive][COOLER Cooler Master Hyper 212 Evo][PSU Cooler Master 650M][Case Thermaltake Core V31]

Spoiler

Cupid:[CPU Core 2 Duo E8600 3.33GHz][RAM 3 GB DDR2][750GB Samsung 2.5" HDD/HDD Seagate 80GB SATA/Samsung 80GB IDE/WD 325GB IDE][MB Acer M1641][CASE Antec][[PSU Altec 425 Watt][GPU Radeon HD 4890 1GB][TP-Link 54MBps Wireless Card]

Spoiler

Carlile: [CPU 2x Pentium 3 1.4GHz][MB ASUS TR-DLS][RAM 2x 512MB DDR ECC Registered][GPU Nvidia TNT2 Pro][PSU Enermax][HDD 1 IDE 160GB, 4 SCSI 70GB][RAID CARD Dell Perc 3]

Spoiler

Zeonnight [CPU AMD Athlon x2 4400][GPU Sapphire Radeon 4650 1GB][RAM 2GB DDR2]

Spoiler

Server [CPU 2x Xeon L5630][PSU Dell Poweredge 850w][HDD 1 SATA 160GB, 3 SAS 146GB][RAID CARD Dell Perc 6i]

Spoiler

Kero [CPU Pentium 1 133Mhz] [GPU Cirrus Logic LCD 1MB Graphics Controller] [Ram 48MB ][HDD 1.4GB Hitachi IDE]

Spoiler

Mining Rig: [CPU Athlon 64 X2 4400+][GPUS 9 RX 560s, 2 RX 570][HDD 160GB something][RAM 8GBs DDR3][PSUs 1 Thermaltake 700w, 2 Delta 900w 120v Server modded]

RAINBOWS!!!


 QUOTE ME SO I CAN SEE YOUR REPLYS!!!!

Link to comment
Share on other sites

Link to post
Share on other sites

10 hours ago, 8uhbbhu8 said:

OMG YES! A new log from @InsolentGnome!!! Gimme!!

Ask and ye shall recieve.  LOL!

Current Project:  The Gunslinger - CM MasterCase5, Crimson King - CM MasterCase5, Twelve-80 - scratch build

Past Projects: SparkF3,  ShinaiScoutGiganteaRehab

Or catch me on social media: Insolent Gnome on the facepage or @Insolent_Gnome on the tweets or check out my InsolentMods website!

Link to comment
Share on other sites

Link to post
Share on other sites

Next up I laid out my components on the back side of the mb tray.  Nothing really exciting, just marking out mounting holes.  Res at the top, pump bottom front, and PSU bottom back.  And of course directions of the tray labeled so I didn't make a huge mistake.


MSI-Scratch-2016-12-29_22.25.46-me.jpg


With that done, I could start getting everything ready to check out the fit.  


Installing the CPU and block.  


MSI-Scratch-2016-12-30_23.19.14-me.jpg


MSI-Scratch-2016-12-31_00.03.29-me.jpg


And while I'm at it, the M.2 Drive and RAM.  I've got something special in mind for that M.2 but I'll save that for later.


MSI-Scratch-2016-12-31_00.04.48-me.jpg


MSI-Scratch-2016-12-31_00.10.18-me.jpg


Then I had to mount up the Bitspower backplate to my GPU brackets.  Laying it out.


MSI-Scratch-2016-12-31_17.02.53-me.jpg


And putting it together.  I wound up switching to flat head screws and countersinking them for a little extra clearance and peace of mind.


MSI-Scratch-2016-12-31_17.15.44-me.jpg


And mb and GPU side of the tray ready to go.


MSI-Scratch-2016-12-31_18.23.08-me.jpg


MSI-Scratch-2016-12-31_18.23.44-me.jpg


MSI-Scratch-2016-12-31_18.24.01-me.jpg


I hate to say it, but the other side of the tray was really boring.  Just mounting parts.  So boring, in fact, that I forgot to take pictures of it.  But there was a little something special that had to be done before moving to the shell.  Off to the CNC!


MSI-Scratch-2017-01-01_14.37.13-me.jpg


Wire management is going to be a pain because there's just no space to hide wires.  I always manage to shortchange myself that way.  The solution this time, route the wires through the tray and under the motherboard.  Here I'm using the CNC to knock out some 4mm holes with a bit more precision than I could pull off by hand.


Sponsored by:


sponsorlogo-me.jpg

Current Project:  The Gunslinger - CM MasterCase5, Crimson King - CM MasterCase5, Twelve-80 - scratch build

Past Projects: SparkF3,  ShinaiScoutGiganteaRehab

Or catch me on social media: Insolent Gnome on the facepage or @Insolent_Gnome on the tweets or check out my InsolentMods website!

Link to comment
Share on other sites

Link to post
Share on other sites

And now the shell.  The idea was a single shell piece that attached to a base panel and it needed to be pretty rigid so I went with some more 2mm 5052 aluminum.  But before I could start bending everything into shape, I had to get my grill patterns cut out on the CNC.  That or cut out a bunch of little hexagons with a dremel....yeah, CNC.  After getting my panels cut to their overall size, I strapped it down and let the Dewalt go to work.


MSI-Scratch-2016-12-29_22.03.46-me.jpg


And ta-da!


MSI-Scratch-2016-12-29_22.31.57-me.jpg


That's the bottom panel that will hold the radiator.  I came up with a hex pattern that matched the hole spacing on the rad so that the pattern wouldn't have to be manipulated around the screw pattern.  The holes line up with the tips of what would be the next hex in the pattern.  It's a little restrictive, but looks clean.


Next, I laid out the bends and my end panels in order to figure a cable pass-through.  The design has all the components sitting well inside the ends so an I/O panel is not much of an option.  A nice side effect is a clean back panel, the downside is figuring out what to do with the cabling.  Through the bottom panel it is.


MSI-Scratch-2016-12-30_23.01.17-me.jpg


Then I worked a little magic on the brake.  Well, not magic, but I did bend the panel to my will! Muahahahahahahaha!


I'll never get tired of that.


MSI-Scratch-2017-01-01_15.14.05-me.jpg


And one bottom panel.


MSI-Scratch-2017-01-01_15.20.47-me.jpg


With the rad and fans mounted up.


MSI-Scratch-2017-01-01_15.35.02-me.jpg


Then there was the shell.  Same basic principle.  CNC the grills, lay it out and stick it on the brake.  


MSI-Scratch-2017-01-01_20.19.58-me.jpg


I didn't cut my windows out beforehand for a few reasons:  1) I don't trust myself at all, 2) Aluminum stretches a bit when it bends, maybe a 1/16 to an 1/8" on the bends I'm doing, and that might throw things off, and 3) I didn't want to remove that much of the panel and make a weak spot that might get tweaked.  This turned out to be a great idea since one of the sections was too narrow for my brake and I had to get a little creative with things.


Even though I had to fight it a bit, it turned out perfect.


MSI-Scratch-2017-01-01_21.02.39-me.jpg


MSI-Scratch-2017-01-01_21.02.46-me.jpg


MSI-Scratch-2017-01-01_21.02.59-me.jpg


And in the vertical orientation.  I like this look.


MSI-Scratch-2017-01-01_21.07.53-me.jpg


Sponsored by:


sponsorlogo-me.jpg

Current Project:  The Gunslinger - CM MasterCase5, Crimson King - CM MasterCase5, Twelve-80 - scratch build

Past Projects: SparkF3,  ShinaiScoutGiganteaRehab

Or catch me on social media: Insolent Gnome on the facepage or @Insolent_Gnome on the tweets or check out my InsolentMods website!

Link to comment
Share on other sites

Link to post
Share on other sites

This case is meant to show off the hardware...all of it...so after the shell was bent, I knocked out some windows.


MSI-Scratch-2017-01-02_10.27.35-me.jpg


I always promise myself I'm done doing radiused corners, whoops!


MSI-Scratch-2017-01-02_11.33.09-me.jpg


Next I had to figure out hanging the motherboard tray, and there was a lot of figuring involved.  How to bend the top of the tray to keep things from moving around too much was a first priority.  But I also had to consider whether the bend was possible for me to pull off and what it would look like in the end.  This is what I wound up with.


MSI-Scratch-2017-01-02_11.47.40-me.jpg


The idea being that three opposing tabs would spread the connection out more across the top of the shell to reduce flexing and keep the tray from levering on just one side of the top.  It also spread the screws out across the top bend giving what I think is a better look.  Not symmetrical, but balancing it out a bit.


Before I could go and mount the tray up, I still had one thing to do, mount the shell to the base to keep it from doing the splits.  You might notice a couple of extra holes in the bottom panel.  Those are for the back ports of the radiator.  The plugs kept it from sitting flush so I drilled a couple of holes to get it to sit down, thinking that it might just help with draining and filling the system as well.


MSI-Scratch-2017-01-02_18.33.44-me.jpg


Then I put it all together.


MSI-Scratch-2017-01-02_19.25.44-me.jpg


MSI-Scratch-2017-01-02_19.25.52-me.jpg


So far so good.  But what about the hardware?  Time to test fit that.


MSI-Scratch-2017-01-02_20.24.12-me.jpg


MSI-Scratch-2017-01-02_20.24.25-me.jpg


MSI-Scratch-2017-01-02_20.24.35-me.jpg


MSI-Scratch-2017-01-02_20.28.38-me.jpg


Talk about cutting it a little close.  I had to pull the I/O bracket on the GPU and lower the pump on it's bracket in order to have room to squeeze it all in.  But, it fits!  You'll also notice in that last picture, I brought the res down to sit in the window and show it off more.


Sponsored by:


sponsorlogo-me.jpg

Current Project:  The Gunslinger - CM MasterCase5, Crimson King - CM MasterCase5, Twelve-80 - scratch build

Past Projects: SparkF3,  ShinaiScoutGiganteaRehab

Or catch me on social media: Insolent Gnome on the facepage or @Insolent_Gnome on the tweets or check out my InsolentMods website!

Link to comment
Share on other sites

Link to post
Share on other sites

And now for some paint.  Although I really loved the naked aluminum look, I decided that I wanted to bring the design on the motherboard to the outside of the case and go with it's black and white color scheme.  To do this I laid down a black base and covered that with 6 coats of clear, sanding after the third coat and the last coat to get everything as smooth as possible before polishing.


MSI-Scratch-2017-01-08_14.59.30-me.jpg


I'm sure of one thing now...I hate black.  Every speck of dust and every slight scratch glares at you.  But it does look killer when it's polished up.


MSI-Scratch-2017-01-14_19.44.42-me.jpg


MSI-Scratch-2017-01-14_19.46.05-me.jpg


As you can tell, while I was polishing the hell out of this thing, I was also knocking out my wiring, sleeving all my cables in white paracord.


MSI-Scratch-2017-01-12_22.37.59-me.jpg


The joy of routing wires through individual holes...


MSI-Scratch-2017-01-15_17.55.13-me.jpg


But totally worth it when it's done.


MSI-Scratch-2017-01-15_19.06.16-me.jpg


MSI-Scratch-2017-01-15_19.06.51-me.jpg


Once again, thanks to my sponsors!


sponsorlogo-me.jpg

Current Project:  The Gunslinger - CM MasterCase5, Crimson King - CM MasterCase5, Twelve-80 - scratch build

Past Projects: SparkF3,  ShinaiScoutGiganteaRehab

Or catch me on social media: Insolent Gnome on the facepage or @Insolent_Gnome on the tweets or check out my InsolentMods website!

Link to comment
Share on other sites

Link to post
Share on other sites

With the wiring done, I could go ahead and install the rest of the hardware.


MSI-Scratch-2017-01-15_20.02.24-me.jpg


It was a bit of a pain routing all that wire behind the mb.  I had to get creative with the routes.  It's not what I originally planned but it works well.


MSI-Scratch-2017-01-15_20.02.32-me.jpg


I still have to tighten the wires up a bit but I'm not using combs.  I like that loopy, bundle of wires look.


Now it's time to start getting the outer shell finished up.  For the graphics, I copied the claw marks from the Krait motherboard in vinyl and applied them to the shell.


MSI-Scratch-2017-01-17_20.18.23-me.jpg


Simple, but I didn't want anything crazy.  Both sides got mirrored graphics and sponsor logos.


MSI-Scratch-2017-01-17_20.50.45-me.jpg


MSI-Scratch-2017-01-17_20.50.57-me.jpg


MSI-Scratch-2017-01-17_21.13.54-me.jpg


With the graphics out of the way, it was time for the windows.  Some 1/8" clear acrylic for the sides and 1/4" smoked for the ends.


MSI-Scratch-2017-01-18_18.24.41-me.jpg


MSI-Scratch-2017-01-18_18.36.21-me.jpg


I'm using mod blocks to hold the acrylic on and I'll screw the end pieces into those same blocks.  Speaking of mounting the end pieces.


MSI-Scratch-2017-01-18_20.00.26-me.jpg


MSI-Scratch-2017-01-18_20.04.24-me.jpg


Almost ready but just a bit more fab work before we can bring everything together.


One of those things is this little deal.


MSI-Scratch-2017-01-18_20.12.33-me.jpg


Needs some paint and vinyl, but then we can cover up the M.2 with something a little better looking than a sticker.


Sponsored by:


sponsorlogo-me.jpg

Current Project:  The Gunslinger - CM MasterCase5, Crimson King - CM MasterCase5, Twelve-80 - scratch build

Past Projects: SparkF3,  ShinaiScoutGiganteaRehab

Or catch me on social media: Insolent Gnome on the facepage or @Insolent_Gnome on the tweets or check out my InsolentMods website!

Link to comment
Share on other sites

Link to post
Share on other sites

Since I've got a whole lot of water cooling stuff installed, it'd probably be a good idea to run some lines.  I'm using Bitspower's 12mm OD PETG with their deluxe white fittings.


MSI-Scratch-2017-01-18_21.09.22-me.jpg


Since I kind of screwed my self space-wise, trying to keep the case compact, I had to get imaginative with some of the loop.  There wasn't enough space for fittings between the GPU and the window so all my runs had to stay between the GPU and the mb.


MSI-Scratch-2017-01-18_21.09.29-me.jpg


Other than the tight confines around the GPU, most of the line was straightforward.


MSI-Scratch-2017-01-18_21.09.42-me.jpg


MSI-Scratch-2017-01-18_21.24.05-me.jpg


The last two lines I can't do until I get all this in the shell with the radiator.  So I guess it's time to mate things up.


MSI-Scratch-2017-01-20_18.03.16-me.jpg


MSI-Scratch-2017-01-20_18.03.25-me.jpg


MSI-Scratch-2017-01-20_18.03.37-me.jpg


I want some lighting to brighten things up so I went with some Darkside white LED strips.


MSI-Scratch-2017-01-20_18.03.08-me.jpg


MSI-Scratch-2017-01-20_18.15.50-me.jpg


I mounted them in the top of the shell to give some top down lighting for the components.  I ditched the foam tape that was on them since it never stays stuck for long and went with Scotch clear mounting tape.  It always does the trick even though it's a pain to cut and get the backing off of.


After finishing the last two lines to the radiator, it was time to fill it it up with some Mayhems Blitz to clean the loop and check for leaks.


MSI-Scratch-2017-01-21_14.43.26-me.jpg


MSI-Scratch-2017-01-21_14.43.34-me.jpg


Once that was flushed out, I filled it with Mayhems Pastel white to stay with the black and white theme.


MSI-Scratch-2017-01-22_11.23.17-me.jpg


MSI-Scratch-2017-01-22_11.23.27-me.jpg


MSI-Scratch-2017-01-22_11.23.36-me.jpg


And now she's ready for her glamour shots!


MSI-Scratch-2017-01-22_14.00.43-me.jpg


Again, thanks to my sponsors:


sponsorlogo-me.jpg

Current Project:  The Gunslinger - CM MasterCase5, Crimson King - CM MasterCase5, Twelve-80 - scratch build

Past Projects: SparkF3,  ShinaiScoutGiganteaRehab

Or catch me on social media: Insolent Gnome on the facepage or @Insolent_Gnome on the tweets or check out my InsolentMods website!

Link to comment
Share on other sites

Link to post
Share on other sites

Well, it's about that time, just one more thing before all the shiny goodness.  You might have noticed that I never covered installing a power or reset button.  That's probably because I didn't install one.  I couldn't find a place where it fit in or where it wouldn't detract from the clean interior.  So instead I created a power dongle, I guess you could call it.  I took a small reset switch from another case, prettied it up with some heatshrink, and ran it out the cable management pass through in the bottom of the case.  Not the most elegant solution, but it does provide a nice hidden switch without cluttering up either the inside or outside of the case.  I totally forgot to grab any pics of making it up, but I mention it because it does show up in some of the final shots.


Alrighty, time for final pics!


Twelve-80-DSC00193-me.JPG


Twelve-80-DSC00195-me.JPG


Twelve-80-DSC00140-me.JPG


Twelve-80-DSC00139-me.JPG


Twelve-80-DSC00203-me.JPG


Twelve-80-DSC00211-me.JPG


Twelve-80-DSC00162-me.JPG


Twelve-80-DSC00168-me.JPG


Twelve-80-DSC00180-me.JPG


And now, let's flip it on it's side.


Twelve-80-DSC00220-me.JPG


Twelve-80-DSC00225-me.JPG


Twelve-80-DSC00226-me.JPG


Twelve-80-DSC00233-me.JPG


Twelve-80-DSC00242-me.JPG


Twelve-80-DSC00240-me.JPG


And now details.


Twelve-80-DSC00197-me.JPG


Twelve-80-DSC00201-me.JPG


Twelve-80-DSC00154-me.JPG


Twelve-80-DSC00237-me.JPG


Twelve-80-DSC00249-me.JPG


Twelve-80-DSC00251-me.JPG


Twelve-80-DSC00176-me.JPG


Thanks for following along!  And once again, thanks to my sponsors:


sponsorlogo-me.jpg

Current Project:  The Gunslinger - CM MasterCase5, Crimson King - CM MasterCase5, Twelve-80 - scratch build

Past Projects: SparkF3,  ShinaiScoutGiganteaRehab

Or catch me on social media: Insolent Gnome on the facepage or @Insolent_Gnome on the tweets or check out my InsolentMods website!

Link to comment
Share on other sites

Link to post
Share on other sites

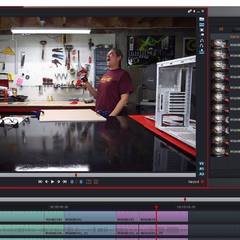
As part of the project I also had to make a video.  I'm not gonna be blowing up MTV anytime soon, but the video sure does show off the finish that made taking pics a pain.

And one more time, with feeling, thanks to MSI, HyperX, and Bitspower!

sponsorlogo-me.jpg

Current Project:  The Gunslinger - CM MasterCase5, Crimson King - CM MasterCase5, Twelve-80 - scratch build

Past Projects: SparkF3,  ShinaiScoutGiganteaRehab

Or catch me on social media: Insolent Gnome on the facepage or @Insolent_Gnome on the tweets or check out my InsolentMods website!

Link to comment
Share on other sites

Link to post
Share on other sites

Create an account or sign in to comment

You need to be a member in order to leave a comment

Create an account

Sign up for a new account in our community. It's easy!

Register a new account

Sign in

Already have an account? Sign in here.

Sign In Now

×