Jump to content

My water cooling adventure. with a car radiator.

so, we all seen how much of a hack job Linus and Alex did with their car radiator 2 years back. right? 
I wanted to do it better.
Note that this was done BEFORE the current water cooled car rad from a week ago. but I digress.


The goal:
In Wisconsin, outside temps can get to about 80 to 90F with near 60 to 80% humidity. My room can get to a scorching 80F from my PC which is almost always folding at home or playing Hunt: Showdown. Needless to say, I was tired of the heat and I wish there was a better way! but there is a way: cooling my PC down stairs in the basement. but I'm not Linus, I dont have a grand to spend on a Fiber optic cables and have my monitors and peripherals sent up to my room. so the backup plan is to buy a Car Rad and send down tubes from my already water-cooled system to the basement.

The plan:
Taking insperation from Linus's video from 2 years ago. but better and done "right." (foreshadowing)
I needed a car rad, Bulk soft tubes that are 3/8th, Fittings from the hardware store, a few 2020 extruded aluminum, angle brackets, a aquarium pump and a way to protect the PC incase of pump failure.
this seems easy but cost is kinda up there. but we can split it up by buying a few parts per month as we need them.


Action:
The entire build is depended on the car radiator. during this phase, I had a lot of questions. What size tubes from the Rad am I going to need to adapt? how much aluminum am I going to need? will I need a fan? and the most important part: How clean/used is the rad. 
A quick Facebook market place search yielded a BRAND NEW NEVER BEEN USED Car radiator for a Subaru forester! Perfect! The kind old man bought the wrong part. so I'd take it off his hands for $40. We dont need to worry about cleaning the rad inside and out. 
After Obtaining the Rad. we have a few problems to solve. The tubes from the Rad are about 1 inch DIA. we need to reduce the size to 3/8ths. A trip the the hardware store yielded fittings, barbed fittings, 1 inch dia clear soft tube and hose clamps to secure it all. so we are good. the next issue is how am I going to mount it? well 2020 aluminum will do the trick ($69.99 on amazon(Nice)). we will build a box around the aluminum which will hold the rad up right and kinda protect it if we are moving it around (see image 1). The rad didn't have a radiator cap so I had to go to the automotive store to get one for $12.
I'm not going to worry about the reservoir since the rad is already going to take up about 3/4ths of a gallon of distilled water (and 2 bottles of EK coolant concentrate $50).
I got a variable speed aquarium pump that had the head lift for about 12 feet. since I didn't know what Gal per min I needed and I also wanted something to last. it was about $60.
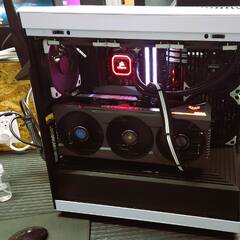
Few days later Bulk tubing came in from amazon ($21). as well as the pump. lets test it See image 2, 3 and last. under max load from F@H. I dropped CPU temps from 80c to 56c. I also Dropped GPU temps from 60c to 35. this is going to work!

Not so Fast:
instead of using plumbers tape. I used paste. looks like some of that stuff got into the GPU water block. welp. Time to clean it out and its not the first time something like this happen. so I took apart the GPU water block. cleaned it out and I installed a gas Filter into my water loop before the PC and after the Pump (see 4). I had to use the gas filter before to clean out the "bubble sponge" out of my system. so I just reused it. I left the gas filter in for insurance and to slow the pump flow a little to improve heat transfer to the coolant. I did this because I don't remember the correct flow rate that actual water cooling loops used.

I'm tired of typing and ADHD meds is out of my system. NEXT and final post will continue tomorrow. which will talk about the PC safety and minor adjustments.


part two is up. we talk about galvanic corrosion, Pump failure and little about why I did it this way.


1.jpg

2.jpg

3.jpg

4.jpg

7.png

Do you know the definition of insanity?

Link to comment
Share on other sites

Link to post
Share on other sites

think youll wanna mix some antifreeze or coat the copper in the block with some other metal to prevent any galvanic corrosion


Usually car radiator ghetto loops are the kinda thing oc nuts do, they are usually far superior compared to a normie custom loop in price/performance, just kinda annoying to diy and need a coated block or antifreeze to stop galvanic corrosion, i have one laying around but too lazy to finish and i might skip it entirely and go straight to phase change cooling


Im curious as to what kinda temps you are getting with that setup

Link to comment
Share on other sites

Link to post
Share on other sites

insetting to see what the final cost is... that kink thow... 🤔

i seen people do this but never hear a long term fallow up. the point is to save moeny but do they in the end... 🤷‍♂️

I have dyslexia plz be kind to me. dont like my post dont read it or respond thx

also i edit post alot because you no why...

Thrasher_565 hub links build logs

Corsair Lian Li Bykski Barrow thermaltake nzxt aquacomputer 5v argb pin out guide + argb info

5v device to 12v mb header

Odds and Sods Argb Rgb Links


Link to comment
Share on other sites

Link to post
Share on other sites

2 hours ago, Somerandomtechyboi said:

think youll wanna mix some antifreeze or coat the copper in the block with some other metal to prevent any galvanic corrosion

i mean with the tube already going cloudy and one side being pee yellow, it is ongoing.

Press quote to get a response from someone! | Check people's edited posts! | Be specific! | Trans Rights

I am human. I'm scared of the dark, and I get toothaches. My name is Frill. Don't pretend not to see me. I was born from the two of you.

Link to comment
Share on other sites

Link to post
Share on other sites

GaLvAnIc CoRrOsIoN:
ok. On my return write up for the rest of the build. I'm going to quickly nip this in the butt because this topic always devolves in the water cooling community on ANY build. This was considered during the build. I even referred to the topic by going to JaysTwoCents channel on the subject so I could be refreshed on the matter. I'll also ask everyone concerned on the subject to do so as well before continuing on the topic. 
I've added 2 bottles of EK water loop coolant to my already 1 water to the system. giving me 3 liters of corrosion protection to the system. 
the only exposed copper in the water loop is my CPU water block(the GPU is nickel plated). since this setup will be seasonal only. I'll be taking this apart and switching it back to normal for the winter(I use my PC as a space heater). during the tare down, I'll be inspecting the water block and rad. at the same time, the tubing is about ~15feet from the copper to the aluminum, so I don't think the electrons from the two materials would travel that far. now then if you are a material scientist I would like to hear from you!
 

12 hours ago, SorryBella said:

i mean with the tube already going cloudy and one side being pee yellow, it is ongoing.

this is not the behavior of corrosion but as result of UV saturation. At one point my PC was in direct line of sight to the window and was a normal water loop. 
the water loop is clear. any cloudiness you see if the result of the type of tubing used.
another part that I see that is "cloudy" is the plastic water distributor on the CPU. its old. about the same age as the pee color tube.
since I'm a minimalist builder (notice the lack of RGB) I dont have a window on my case. so if it looks like crap, I dont care. I only care about functionality and as far as I know I don't see any degradation in performance from the build.

now then. with that out of the way. lets continue the Build log.

Computer Safety:

Corrosion aside. my real concern with the PC was it over heating on a pump fail. PCs do strange things when it comes to heat. Some PCs will endure the heat like a champ and just throttle. others turn off. even worse, some just melt away. so I needed some way to protect it.
I had a left over Arduino NANO BLE 33. lets actually use it ($40?) and add a shield to screw wires to it instead of soldering ($12). 
I bought a Brass Flow sensor for about $17 as well as a simple IoT Relay for $30.

After 3 days of trying to understand Arduino coding, I manage to learn and write/copy something for my needs. As soon as the flow sensor is not sending a pulse to the Arduino, the Arduino will send the 3.3v signal to the IoT relay shutting off the power to the PC. Work saving be damned I want to protect my PC over all since its my Life and a way to "work." 
I also had a left over Power backup unit. I plugged in the Arduino and the pump into it. I dont have a power backup that can run my 1200 Watt PC. again, saving be damned.


Things I've learned:
Leaks are a pain. most of the time its just seeping leaks but still annoying. 

Have better ways to fill and drain the loop FIRST before the rest of the build. I knew I was going to drain the loop from time to time, but not this often. get your valves first. when you have to fix something you don't have to worry about making a mess as much if you can easily control the flow of water.

Plumber paste is a pain. dont use it. ever. just use plumbers tape instead.

Costs:
so why did I do it this way?
mostly price. An alternative I wanted was 3 480mm Rads or 3 360mm Rads so I could maybe passively cool the system. but finding the parts used in Wisconsin was not easy, during the search I found a few ranging from $50 to $75. each. without shipping included in the price(some people just wanted you to pick it up). I then had to get specialized fittings for them on the internet. my normal EK water cooling supplier gone belly up. so I would have to go to amazon or EK and pay a premium. it just seemed better to go to the hardware store and just get plastic parts. So if you just wanted a Rad for a short term solution, a car rad was a better option. I spent more money to make it a seasonal cooling solution. 

Follow up?
sure, I can do that. I'll make a note on my google calendar in a year of how well this works. especially those who wonder about GaLvAnIc CoRrOsIoN!


5.thumb.jpg.da3ed4d126cae8594db1f4c74508c01e.jpg

6.jpg

Do you know the definition of insanity?

Link to comment
Share on other sites

Link to post
Share on other sites

well i see alot of extra parts that wasted moeny on looks... but maybe you did like looks but dont now? 🤷‍♂️ my point is dose this even save money... a 1080 rad is like $200 probably cheap in us and ya a few d5 pumps cost a bit but i mean you get like 10+ years out of them. will the mixed metal become a problem time will tell and you will need $50 every year for cooling... but maybe im missing something?


not saying thow pumps wont last that long just there an un known there.

fun project to try ya why not. doing it to save moeny i dont see it. but time will tell i guess.

I have dyslexia plz be kind to me. dont like my post dont read it or respond thx

also i edit post alot because you no why...

Thrasher_565 hub links build logs

Corsair Lian Li Bykski Barrow thermaltake nzxt aquacomputer 5v argb pin out guide + argb info

5v device to 12v mb header

Odds and Sods Argb Rgb Links


Link to comment
Share on other sites

Link to post
Share on other sites

7 hours ago, thrasher_565 said:

well i see alot of extra parts that wasted moeny on looks... but maybe you did like looks but dont now? 🤷‍♂️ my point is dose this even save money... a 1080 rad is like $200 probably cheap in us and ya a few d5 pumps cost a bit but i mean you get like 10+ years out of them. will the mixed metal become a problem time will tell and you will need $50 every year for cooling... but maybe im missing something?


not saying thow pumps wont last that long just there an un known there.

fun project to try ya why not. doing it to save moeny i dont see it. but time will tell i guess.

Please provide more context on parts that are for looking "nice." at which point did i say that this would cost me $50 a year. Unless i didn't explain myself well. I feel like there is added details somewhere that I don't write. 

Do you know the definition of insanity?

Link to comment
Share on other sites

Link to post
Share on other sites

Create an account or sign in to comment

You need to be a member in order to leave a comment

Create an account

Sign up for a new account in our community. It's easy!

Register a new account

Sign in

Already have an account? Sign in here.

Sign In Now

×