Jump to content

Project Crystal Madness - A project for the ages (big images)

OddsCrazyStuff

I did the same as you, started off with a 1000W PSU, it would have run it all, but for some overclocking I wanted a 1200+, altough 2000W will not be needed if you are not planning on doing extended overclocking. I got the EVGA 1600W now instead!

Yeah, I might have been able to get away with the EVGA 1600W as well, but cant regrett choices now.

I speak my mind, sorry if thats a problem.

Link to comment
Share on other sites

Link to post
Share on other sites

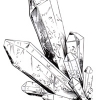
what is the color scheme for the build? also you can grow your own crystals if you want 

post-116840-0-82501200-1442713676.jpg

post-116840-0-45993900-1442713795_thumb.


you can pretty much get any color you want and most are translucent so you could shine led in them 

Project Iridium:   CPU: Intel 4820K   CPU Cooler: Custom Loop  Motherboard: Asus Rampage IV Black Edition   RAM: Avexir Blitz  Storage: Samsung 840 EVO 250GB SSD and Seagate Barracuda 3TB HDD   GPU: Asus 780 6GB Strix   Case: IN WIN 909   PSU: Corsair RM1000      Project Iridium build log http://linustechtips.com/main/topic/451088-project-iridium-build-log/


Link to comment
Share on other sites

Link to post
Share on other sites

what is the color scheme for the build? also you can grow your own crystals if you want

attachicon.gifyellow crystal.jpg

attachicon.gifblue crystal.JPG

you can pretty much get any color you want and most are translucent so you could shine led in them

Do you have an link to how you make them?
Link to comment
Share on other sites

Link to post
Share on other sites

what is the color scheme for the build? also you can grow your own crystals if you want 

attachicon.gifyellow crystal.jpg

attachicon.gifblue crystal.JPG


you can pretty much get any color you want and most are translucent so you could shine led in them 

It might give you crystals, but you have zero controll over the result and it can even fail, so is it not that tempting.


My color scheme is black, red and white.

I speak my mind, sorry if thats a problem.

Link to comment
Share on other sites

Link to post
Share on other sites

Some glamor shots for those who wanted them


I think these sleeving colors works quite well together:

P1010325.jpg


The fittings I currently have (white is lacking):
P1010337.jpg


Ram block with one pair of metal covers:

P1010341.jpg


The monoblock:

P1010355.jpg


A small mountain of fans:

P1010375.jpg


The PSU with a small mountain of cables:

P1010393.jpg


Just for fun, here is a shot of the PSU with some fans as scale:

P1010389.jpg


And lastly, I dont get why they give you zip bags and then melt it shut  :angry:

P1010331.jpg

I speak my mind, sorry if thats a problem.

Link to comment
Share on other sites

Link to post
Share on other sites

Do you have an link to how you make them?

just look up how to grow crystals but some of them you will not be able to make because they use somewhat dangerous chemicals that an average person cant get there hands on 

Project Iridium:   CPU: Intel 4820K   CPU Cooler: Custom Loop  Motherboard: Asus Rampage IV Black Edition   RAM: Avexir Blitz  Storage: Samsung 840 EVO 250GB SSD and Seagate Barracuda 3TB HDD   GPU: Asus 780 6GB Strix   Case: IN WIN 909   PSU: Corsair RM1000      Project Iridium build log http://linustechtips.com/main/topic/451088-project-iridium-build-log/


Link to comment
Share on other sites

Link to post
Share on other sites

There goes my day of work.


First so do I forget to bring buy a lighter, so no sleeving can be done.

Then I find that the screws is too short to mount the radiator to the case. Fans + case is 28mm, screw is 30mm, so 2-3mm short.

And since I still need the pc, so cant I afford to start mounting water blocks when everything else is a week or more away.


So 66 days left and very little is done yet :(

I speak my mind, sorry if thats a problem.

Link to comment
Share on other sites

Link to post
Share on other sites

Subbed, this seems like the stuff Linus would use

Hopefully so wont this build end with the same ration of dead parts, as when Linus does something.

I speak my mind, sorry if thats a problem.

Link to comment
Share on other sites

Link to post
Share on other sites

Hopefully so wont this build end with the same ration of dead parts, as when Linus does something.

Yeah, 3 dead mobos and an dead cpu all for 1 project.
Link to comment
Share on other sites

Link to post
Share on other sites

The result of my first sleeved cable:


This end is a bit ugly, but it will be in PSU chamber, so it works.

P1010409.jpg

Bigger image: http://s1.postimg.org/oww60hjbh/P1010409.jpg


I think the combo looks good.
P1010411.jpg

Bigger image: http://s1.postimg.org/63ad3hl3h/P1010411.jpg


This end is fairly clean, as long as you dont look too close.
P1010414.jpg

Bigger image: http://s1.postimg.org/z88it5b0t/P1010414.jpg


Getting right length is the key for a clean look and having the cable too far onto the crimp (as tutorials says), dont work, as the end ends up too thick to lock in. Having the sleeve (with heatshrink transition) end just where the connector does, seems to work best for a clean look. It also looks like its best to have both ends free from the connector, as dealing with all the other cables without burning them is hard.


I also need to get some string or something like that, so the cables will not be as messy looking (cable training?).

I speak my mind, sorry if thats a problem.

Link to comment
Share on other sites

Link to post
Share on other sites

The result of my first sleeved cable:


This end is a bit ugly, but it will be in PSU chamber, so it works.


I think the combo looks good.


This end is fairly clean, as long as you dont look too close.


Getting right length is the key for a clean look and having the cable too far onto the crimp (as tutorials says), dont work, as the end ends up too thick to lock in. Having the sleeve (with heatshrink transition) end just where the connector does, seems to work best for a clean look. It also looks like its best to have both ends free from the connector, as dealing with all the other cables without burning them is hard.


I also need to get some string or something like that, so the cables will not be as messy looking (cable training?).


Pics not loading for anyone else?

Don't forget to Like the things you like!

Link to comment
Share on other sites

Link to post
Share on other sites

No, I wish they did. I'm sure he will fix it and we'll be able to see the glorious images, though. :P

Yay! Now they work!

Don't forget to Like the things you like!

Link to comment
Share on other sites

Link to post
Share on other sites

Yay! Now they work!


No, I wish they did. I'm sure he will fix it and we'll be able to see the glorious images, though. :P

They work, its just that they are big, so takes a while to load.


Too much quality?

I speak my mind, sorry if thats a problem.

Link to comment
Share on other sites

Link to post
Share on other sites

They work, its just that they are big, so takes a while to load.


Too much quality?

No it just said some numbers .jpg in a box. Now that I refreshed the page its doing it again. Probably something on the servers side though.

Don't forget to Like the things you like!

Link to comment
Share on other sites

Link to post
Share on other sites

No it just said some numbers .jpg in a box. Now that I refreshed the page its doing it again. Probably something on the servers side though.

Guess the servers need a little longer to prosess it, when the images are bigger.

I speak my mind, sorry if thats a problem.

Link to comment
Share on other sites

Link to post
Share on other sites

Get some cable combs for those messy cables!


Now if only I could get those pics to load, lol.

Stil numbers?


And I'm planning on using the sewing the cables, rather then using cable combs.

I speak my mind, sorry if thats a problem.

Link to comment
Share on other sites

Link to post
Share on other sites

Okay, I scaled the images again, guess 4592x3448 is way too much.

So I will post 1600x1200 on the forum, then post a link under too the full quality one.


It was just a test for later, to see if people could handle it.

I speak my mind, sorry if thats a problem.

Link to comment
Share on other sites

Link to post
Share on other sites

Okay, I scaled the images again, guess 4592x3448 is way too much.

So I will post 1600x1200 on the forum, then post a link under too the full quality one.

It was just a test for later, to see if people could handle it.

My phone (lg g3) couldn't load the old images, now that you have changed them i can see them. Looks great!
Link to comment
Share on other sites

Link to post
Share on other sites

followed looks amazing so far 

RIP-A10-5800k @ 4.0Ghz | ASUS GTX 750Ti OC Edition | Gigabyte F2A68HM-DS2H | Corsair Spec-01 | EVGA 500w | Kingston HyperX Fury 2x4 1600mhz | 1tb WD Blue & 500Gb WD Blue | Hyper 212 EVO |

Link to comment
Share on other sites

Link to post
Share on other sites

My phone (lg g3) couldn't load the old images, now that you have changed them i can see them. Looks great!

I would have been more surprised if a phone could handle the original quality.

But at least I know what format to use from now on.


followed looks amazing so far 

Thanks.

I speak my mind, sorry if thats a problem.

Link to comment
Share on other sites

Link to post
Share on other sites

2 steps forward and 1 step back


Nice and clean looking this time:

P1010431.jpg


I might need to have shorter distance between the ties.

P1010430.jpg


Sadly, this happend to one of my fans, so guess I need to be more carefull next time:

P1010423.jpg


So thats sums up my day. Fans takes 1-2h per and there is still 37 to go. Plus everything else.

Guess no break time for me for a while.

I speak my mind, sorry if thats a problem.

Link to comment
Share on other sites

Link to post
Share on other sites

Project fans is going well, 11 done so far. Hoping to do 5 more before the end of the day, as that makes 2 of 5 radiators done.


P1010443.jpg

Bigger image: http://s21.postimg.org/db34vum6d/P1010443.jpg


Looking over the first page so did I realise that I havent writen what my experince with everything is:

For the record, I have built 2 PC's (this one is an upgrade of my 2nd one) and only water cooled once before (current one). Guess this project then proves how easy it is to do stuff, with enough time and of course money to get what you need/want.

I speak my mind, sorry if thats a problem.

Link to comment
Share on other sites

Link to post
Share on other sites

Create an account or sign in to comment

You need to be a member in order to leave a comment

Create an account

Sign up for a new account in our community. It's easy!

Register a new account

Sign in

Already have an account? Sign in here.

Sign In Now


×