
Cool "newbie" projects

Practice in general. Learn to use Lightroom. Go outside, use full manual. Stay outside for hours. Freeze your tits off. Come back. Find out that out of the 1000 pictures you took that only 5 are worth editing. Edit them. Find people. Show them your pictures. Those people said it's shit. Always. Repeat the process. Get better. Realize your pictures were shit before. But now are better. Ask people again. They are still shit. Repeat for 5 years. Spend thousands of dollars on lens, lights etc. You convince yourself you are good now. You have the equipment and practice with over 10000000000000000000000000*Infinite pictures (but obviously you had to delete 99% of them because you didn't upgrade your computer). This is enough to convince others that your Instagram is worth following because of the 50 good pictures you have. You get 10 new followers in 10 months. You realize you can do better. You go to a convention because nobody else wants you to take pictures of them and their child, you creep. You do it for free. You take the pictures and edit them and give them away. Congratulations. You did something with the thousands of hours of practice. This motivates you. You end up taking pictures of cats for fun. Your reputation is ruined because you posted them on Instagram. You lost 50 followers. Later you end up upgrading your computer, congratulations you have a Mac. You got 2K followers because you posted you have a Mac. You get an actual job with money, it's not much but it's enough for now. You spend that well earned 5 dollars on an Ice Cream. You become an Instagram food person. You are ruined, with no hope of turning it back around. You give up. You go outside. With your camera. And take a picture. You don't care if its good or not because its your picture and it is what you want to do. You are finally happy. OP keep taking those pictures.
Edit: Or do this.
Following are some of the key terms that can be used to describe the visual or graphic elements of a photograph.
1. Light
Frontlit: Light comes from the camera position few shadows.
Sidelit: Light comes from the side, shadows cast to the side.
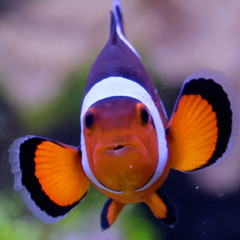
Backlit: Light comes towards camera, front of subject is shaded.
Direct light: Hard-edged, often dark, shadows.
Directional-diffused light: Distinct, but soft-edged shadows.
Diffused or revealing light: No, or almost no, shadows.
Silhouette: Subject very dark against light background.
Glowing light: Light comes or seems to come from the subject itself.
Take one for each category
2. Tone & Contrast
High Key: Mostly light tones.
Low Key: Mostly dark tones.
Full Scale: Many tones of black, grey and white.
High Contrast: Very dark and very light areas, with few middle greys.
Low Contrast: Mostly middle greys.
3. Texture
Emphasized: Usually due to light hitting the subject at an angle – textures stands out. Light skims across the subject’s surface, producing small shadows that cause the details of texture to become apparent.
Minimized: Usually due to light coming from the camera position, textures become less apparent / flattened. Light hits the subject straight on, producing very few shadows and the texture is not clearly revealed.
4. Focus & Depth of Field
Sharp overall: The entire photograph is in focus. If a photograph is sharp overall, the viewer is more likely to see all parts of it as having equal value. Reports use to allow unbiased perspective. Photojournalism use sharp overall focus.
Soft Focus: The entire photo is gently out of focus. It a photograph has no one clear point of focus; it tends to give the photo an ethereal quality.
Selective Focus: One part is sharp, others are not.
Shallow Depth of Field: Short distance between nearest and farthest sharp areas.
Extensive Depth of Field: Considerable distance between nearest and farthest sharp areas.
5. Viewpoint
Eye-level: The image is captured from a natural standing point of view. Camera angled directly at the subject.
Overhead, low level or unusual point of view: The image is captured by looking down or up at a subject. This flattens space and reduces a subject to its graphic elements. It can exaggerate its height or size.
Frame: The way the edges of the photograph meet the shapes in it.
6. Space and Perspective
Shallow Space: Most objects seen close together in depth.
Deep Space: Objects seen at different distances in space.
Positive space or figure: The most important form in the composition. Often represented as a key figure against a background which contextually adds to the “story” of the individual.
Negative space or ground: That which surrounds the figure. Figure and ground are not always fixed and can be reversed. Consider a pencil drawing on a white piece of paper, the paper represents the ground.
Compressed perspective or telephoto effect: The scene seems to occupy an unusually shallow depth. This is achieved with a telephoto lens being fully extended, which will compress the distances between objects even if there is a considerable distance between them. Using a telephoto lens most effectively demonstrates this result.
Expanded perspective or wide-angle distortion: Parts of the scene stretched or positioned unusually far apart. Lines can bulge and curve. This is achieved with a wide angle lens fully opened and causes distortions in perspective and scale. Using a fish eye lens most effectively demonstrates this result.
7. Line
Curved: curving angles like stage, cloud, rainbow
Straight: finding strong dominant use of straight, entire picture, train tracks, architecture
Horizontal: same ^ buildings
Vertical: same ^ fences
Diagonal: Strong compositional lines cutting from corner to corner
Implied: Such as created by the direction of someone’s gaze follows, baseball throw arc before thrown, the arc it creates
8. Balance
This is bases on an internal, physical response. Does the image feel in balance or does it tilt or feel heavier in one part more so than another?
Take 5 pictures which displays a composition you feel captures Balance effectively, at least 3 differently.
Day 1. Plan
Day 2. Shoot
Day 3. Shoot
Day 4. Shoot
Day 5. Submit

-
Topics
-

derekchan ·
Posted in New Builds and Planning0 -
 0
0 -
 0
0 -
 2
2 -
 1
1 -
 2
2 -

kerriya ·
Posted in Cases and Mods8 -

octester ·
Posted in Troubleshooting6 -

DavidPatrascu ·
Posted in General Discussion7 -
 2
2
-
-
play_circle_filled

Latest From ShortCircuit:
The coolest looking monitor. Period. - ASUS ROG display at Computex (Sponsored)


Create an account or sign in to comment
You need to be a member in order to leave a comment
Create an account
Sign up for a new account in our community. It's easy!
Register a new accountSign in
Already have an account? Sign in here.
Sign In Now