Jump to content

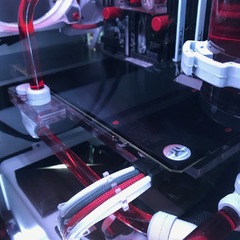
[In Progress] “Into the Void” Watercooled Define Nano S | i7 6700k | GTX 1080 Founder Edition | Full EK build

Introduction :


So I have been into computer for as long as I can remember. I used to just build my PC with no actual concept or color scheme in mind. I built them pretty much only for the purpose of gaming, what they looked like did not really bothered me. At the beginning of the year I got into watercooling and PC modding. Needless to say I was hooked. I am not super active in LTT therefore most of you might not remember my first attempt at watercooling (that build had no full build log, just an actual end result post)


So my s340 Elite as served me well but I need a new challenge, and my wife needs a new PC. Ever since I finished my build I wanted to build something in the ITX form factor. I've been thinking long and hard about what case would be the perfect fit for this project. I was hesitant between the Manta and the Define Nano S. In the end I opted for the Fractal Design case because of the smaller footprint and also because it is oh so well built. Most of my current setup is following me (I am not in need of an upgrade any time soon) and what I swap from my build will be replaced in my wife's build. 


In my last build I have made my first cable extensions, custom paints, etc. This time around I'll be doing full length PSU cables as I want everything to be super tiddy. 


TO DO LIST :


Making custom cables for the PSU

Sleeving the fans and fans extensions

Sleeving the front panel connectors

Painting the fans rings

Wiring LED strips (and sleeving of its cables.)

Disassembling the old rig

Delidding 6700k & applying liquid pro

Sleeving and wiring the pump directly to PSU

Washing and prepping watercooling hardware

Bending the tubes

Filling the loop

Photoshoot!


Hardware :


This build is not some extreme X99/x299 computer. So everything I have is mostly standard gamer setup for 1080-1440p


None watercooling HW:


Fractal Design Define Nano S

Intel Core i7 6700k 

16gb G.Skillz Trident Z 3200mhz 

Asus ROG Strix z270i Gaming

Gigabyte GTX 1080 Founder Edition

1TB Western Digital Blue 

500gb Kingston SSD

5x Corsair SP120 PWM Performance

Silverstone Strider 650w 80+ Gold

RioRand RGB LED Strip w/ Controller 


Watercooling Gear :


EK Supremacy EVO Nickel/ Plexi

EK GTX 1080 FC Plexi Waterblock and Backplate

EK X3 110 Reservoir
2x EK Coolstream SE 240 Radiator

10x EK-HD Fittings 16mm [Black Nicke]l

2x EK-AF 2x45 Dual Rotary Fittings  [Black Nickel]

2x EK 6mm Static Extender [Black Nickel]

2x EK-AF Rotary 90 Fittings [Black Nickel]

EK Shutoff Valve [Black Nickel]

2x EK Plugs [Black Nickel]

EK Plug w/ EK Badge [Black Nickel]

EK D5 Plexi Pump Top

Liang D5 Vario Pump

PrimoChill True Opaque [Candy Purple SX] Coolant

EK PETG 16mm Tubings


Other Hardware :


RockitCool - Rockit88 115- Delid/Relid Tool

CoolLaboratory Liquid Pro

Permatex Black Silicone RTV

3mm UV/Purple LED

2x5mm UV/Purple LED

Paracord Planet Black 550 Paracord

Paracord Planet Acid Purple 550 Paracord

Paracord Planet Graphite 550 Paracord

Paracord Planet Acid Purple 90 Paracord

AWG 16 Wire

AWG 18 Wire

AWG 22 Wire

Multiple types of crimps

Multiple types of connector

Crimper

Wire Striper 

Flush Cutter

Soldering Iron

Solder

Heatgun

12mm Silicone Insert

Duplicolor Metalcast Reflective Base Coat

Rustoleum Gloss Clear Coat

Rustoleum High Gloss Black Enamel


IMG_1049.thumb.JPG.56d473487ab2d81937239030e0fb320d.JPG


#1 PURPLE!!!

Sleeving the front I/O, fans extensions, fan cables, swapping the blue LEDs.


When I thought about this build I decided that this time I would go with paracord sleeving instead of Teleios sleeves. It is a question of taste I guess but the paracord looks so shiny (especially that Acid Purple I chose). To go with the purple I went with classic black and I ordered some graphite paracord from Ensourced (which I have sadly not yet received)


IMG_1050.thumb.JPG.b05ba260a55dd4a7609d9716770019ab.JPG


550 paracord for the PSU cables and I also got some 95 Acid Purple paracord for all the small cable sleeving (YES!!! I will single sleeve every front I/O cables and the fan extensions that will be showed.


IMG_1025.thumb.JPG.e3a2effead126fe450f05f3c1004a031.JPG


These where a lot harder than I first expected. I had to cut the connector off so that I could feed the cable through the tiny paracord. But it turned out great! I also removed the cable for the front I/O headphone jack since I do not use them ever. Less cable to cramp into the back of this case. My brother is also 3D printing me some custom cable combs for the small wires, should get those shortly, until then I will not be crimping back new connector until they are ready to be finished. 


I also removed the front Blue LEDs and order some 2x5x7 Purple/UV LED and a couple regular 3mm Purple/UV LED, will solder them back once they arrive. More to come on that.


IMG_1024.thumb.JPG.2754640cc05ba265a91c1ff58706f5ef.JPG


Figured out where I had to place my fan splitter for all those fans that will be installed soon. then single sleeved the extension that will go to the motherboard. Once again I will be crimping the other side of the connector once I get the cable combs. 


IMG_1032.thumb.JPG.684dfd56a0c0cb742acc3b66b6491c10.JPG 

This is where I am at right now. More to come in the next few days I promise!

Link to comment
Share on other sites

Link to post
Share on other sites

#2 More sleeving

Custom fan lenght, fan extensions, painting Corsair SP120 rings. 


While I’m still waiting for my shipement from Dazmode I figured I would start routing and sleeving all of my fans. 


07B7EDF7-FED0-419F-B911-EB64F1E30771.thumb.jpeg.63105f5b52bd07de28a1a05449486e16.jpeg

31AFA3E3-ABF8-4F92-A40D-85D0D63B9A89.thumb.jpeg.6a439c9a4e7839d1547ed159ddfd7c69.jpeg


To get the anodized purple finish I am looking for I start with a black chrome base. So black primer, chrome base coat. Then I layer the Dupli-color metal cast on top. 


3CB384F3-87A7-410C-B613-5D38CDB01736.thumb.jpeg.0623dbc8309587ffa838bbae0c0fd116.jpeg


My rear extaust fan does not have a long enough cable so I made the cable the right lenght by wiping out my soldering iron!


ACA83CBA-5EA1-46D2-A513-F024FA9EF3F0.thumb.jpeg.e7fad99457d93deddf11f1c49e3e000c.jpeg


This picture was taken after the sleeving job was done. The ring doesnt have the finish I wad looking for (this was before I figured how I was suposed to use the metal cast paint. Will have finished result up in no time! 


Until next time guys!

Link to comment
Share on other sites

Link to post
Share on other sites

#3 Wires!!


This update is never gona take me has long has it took to do the custom wires. I am pretty pleased with the results. Custom lenght so there won’t be any cable buldge around the back (hell I might even put an acrylic window since its going to be so tiddy. Still have the 24 pin left to assemble (just waiting on PSU to confirm the pinout I was provided on overclock.net)


here are some pictures


F5DE0B2A-D296-45CD-84DB-C9638D0FB295.thumb.jpeg.3278cb7e16587d9ce72a38c9b8021e57.jpeg

D3B21D83-25DE-448E-AF7D-22188BB613AE.thumb.jpeg.a3bd3259236daf47f25094ad04a601d6.jpeg

4EC65390-2D96-4F72-8EF5-3D544A5ACBD8.thumb.jpeg.f922c271a0a51b9ea15d285a384ce1c6.jpeg

331D06EF-A69A-45E6-9E90-E023CDFDDAB2.thumb.jpeg.11f7492eab215f7fdf4350e09a43bfd1.jpeg

31AC4A47-CFE7-4B81-BB9C-E49B76AF3550.thumb.jpeg.bd0f22596d54c7a5aa54652194bee67b.jpeg

AEC5CB03-9417-4918-86A8-D5AB7495639B.thumb.jpeg.15c08f9bd4ba96fce4147c34d0f1527f.jpeg


Until next time!


Link to comment
Share on other sites

Link to post
Share on other sites

#5 Finished cables


So just to complete last night updates I was able to finish my 24pin this morning. I think this whole cable set took me well over 15 hours to make. But it feels so satisfying to have done it myself! Here are a couple more glamour shots.


7FCA789A-970A-42BB-877E-FEA7BAC46D7C.thumb.jpeg.d706610a362e1b6dad06dea5741ce177.jpeg5025D5C2-2DF1-479A-9E6F-5B8138232068.thumb.jpeg.de0fec17519916b0764049e287f19aa1.jpeg


On a side note, I also received a shippement from Dazmode, with a bunch of new EK parts and fittings!! I technically only needto find a new motherboard now and i will be able to finish this build (hopefully before Christmas)


F26E1932-63E1-4DF3-915F-D918E75B274C.thumb.jpeg.11c898669b30176ba02645bd5f476431.jpeg21DB99F9-69FB-40A2-8629-981D789C606A.thumb.jpeg.0d5a9da266d90fbc79f7f998f2de4688.jpegimage.thumb.jpg.2b047ff2aea8807faaf6c7fff5ecdaa8.jpgimage.thumb.jpg.11bd44cd4e0732e467cc504b897da9bc.jpg


Until next time!!


Link to comment
Share on other sites

Link to post
Share on other sites

This is one of my favourite cases to mod i'll be watching this with interest :)

Link to comment
Share on other sites

Link to post
Share on other sites

#6 Initial cable routing and PSU instalation. 


So my PSU came in this morning. Did a test run in my current system and everything checks out. So I went on to do some minor mods so that it would blend in nicely within the new build. 


D3BC400C-AC03-4703-8372-7EEF7175F558.thumb.jpeg.fd135a77fb7723b498b30fe7fb5260f2.jpeg

5CAFC718-0195-4D86-A569-B93312EB33ED.thumb.jpeg.15004e8cdbba071f3640226d808d3d53.jpeg


Removed the stickers and painted the blue PCI-E connector black. I then moved on to do some initial cable routing and training. 


40584EA4-446D-422C-BBED-82FB5FDD4DCD.thumb.jpeg.f47161d0f5549f3a08fd1f02c8f1b3bd.jpeg

3EB009D0-F64D-4B50-BB15-69C183E78A1B.thumb.jpeg.1685d1e9eb066f6e0668cbf619c22b9b.jpeg

B1CAA49C-FB22-4EF1-9905-0E4E157209AF.thumb.jpeg.ef48ed1e7c0dc873d8a5af4e6fe8a78c.jpeg

DE58A0AF-0EA6-4ED4-8F75-EE6830039CF7.thumb.jpeg.c7ff0c2a69570fefc31f879c41879d26.jpeg

4F3FD910-FC11-466F-8BDE-E376C7F02F27.jpeg


I still need to fix the 24 pin but the will happen when i get the motherboard.


I found an Asus Strix z270i Gaming motherboard over on CanadianHardwareSwap if everything checks out I should be getting that one shortly and move on to the next step. 


Until next time!

Link to comment
Share on other sites

Link to post
Share on other sites

#7 Motherboard, front i/o sleeving touch up, last batch of fans. 


So that motherboard from hardware swap checked out. Received it this morning. My current CPU is in my main rig so i basically just made some test fit finalized the front I/O cables than removed the board for future testing.


E0F360D7-480F-4DC6-96A0-434BDD152266.thumb.jpeg.5c8889520912aed6c291e6a5a4b560fb.jpeg


The Strix z270i came with a front panel extension kit. So i sleeved part of the cables, then spliced the extension wire and solored them to the actual front I/O. It resulted in a very clean single sleeved, heatshrink less front panel connector cable job. 


F425A48C-D7DA-470F-895B-CF63521F8909.thumb.jpeg.b25e124fa87d0b55f66a62f74669c83d.jpeg30A7D07C-FB8D-441B-9EC6-0B929B7C30D4.thumb.jpeg.4bc069dafa82d08b730b6f5c13f2d87f.jpeg


My sata cables will then be mostly covered by the front panel cables therefore I do not really need to invest into some cable mods sleeved sata cables. That USB 3.0 cable well I just decided to live with has it is far beyond my skill set to get into sleeving that one. 


I also finished the paint job on the rings of my sp120. Still have some extension work to do with their cables, and I also need to sleeve them. Should be done tonight i’ll post an update for the final results. 


Until next time!


Link to comment
Share on other sites

Link to post
Share on other sites

Very nice so far, looking forward to seeing the final product! On the topic of the pesky 20-pin USB 3.0 front panel header, ModMyMods sells an extension that has 20 separate cables and a lower profile connector.


USB 3.0 20-Pin Internal Header MF Extension Cable (Low Profile Connector) (CAB027)

Main Rig: CPU: AMD Ryzen 7 5800X | RAM: 32GB (2x16GB) KLEVV CRAS XR RGB DDR4-3600 | Motherboard: Gigabyte B550I AORUS PRO AX | Storage: 512GB SKHynix PC401, 1TB Samsung 970 EVO Plus, 2x Micron 1100 256GB SATA SSDs | GPU: EVGA RTX 3080 FTW3 Ultra 10GB | Cooling: ThermalTake Floe 280mm w/ be quiet! Pure Wings 3 | Case: Sliger SM580 (Black) | PSU: Lian Li SP 850W


Server: CPU: AMD Ryzen 3 3100 | RAM: 32GB (2x16GB) Crucial DDR4 Pro | Motherboard: ASUS PRIME B550-PLUS AC-HES | Storage: 128GB Samsung PM961, 4TB Seagate IronWolf | GPU: AMD FirePro WX 3100 | Cooling: EK-AIO Elite 360 D-RGB | Case: Corsair 5000D Airflow (White) | PSU: Seasonic Focus GM-850


Miscellaneous: Dell Optiplex 7060 Micro (i5-8500T/16GB/512GB), Lenovo ThinkCentre M715q Tiny (R5 2400GE/16GB/256GB), Dell Optiplex 7040 SFF (i5-6400/8GB/128GB)

Link to comment
Share on other sites

Link to post
Share on other sites

2 hours ago, TheSLSAMG said:

Very nice so far, looking forward to seeing the final product! On the topic of the pesky 20-pin USB 3.0 front panel header, ModMyMods sells an extension that has 20 separate cables and a lower profile connector.


USB 3.0 20-Pin Internal Header MF Extension Cable (Low Profile Connector) (CAB027)

Yeah I thought about getting one of those. But it would add a lot of cable bulk at the back of the case. I’m happy with how it turned out so far, once the tubing is in place you will barely see the connector anyway.


I think I might have to make some cutout in the frame of the fans. My trident z are a couple millimeters too high for the max clearance of the case. I’ve seen some build that used them so i’ll make it work ahah.

Link to comment
Share on other sites

Link to post
Share on other sites

So I have a bunch of fittings, as most people can allready see this build is inspired by the tubing run that Paul's Hardware did in Hotbox 2.0 I tryed and mimic the pump placement with the EK rad at the front but for some reason any combination of fittings I try always seems to be off. Did anyone did that exact same run in the past and could possibly tell me how they fixed the pump, buying extra fittings is not an issue I would tho like the fittings to be all black nickel. 

Link to comment
Share on other sites

Link to post
Share on other sites

#8 LED wiring 


This is for some reason the thing that was the most difficult to be so far. All that sleeving was time consuming but was not difficult in a way. The soldering of the LED strips were a lot more tough than I expected. I thought “hey i’ll be done in 20 minutes” 1 hour later they were done and worked!! This is defenatly not the cleanest job i’ve done so far in this build but the wiring will not be seen so I can live with it. Might end up going back to make it cleaner but that will be all for tonight. 


Here are some pictures (I did not take any of them on but you’ll have to take my word for it ahah) 


Sleeved the main wire than soldered the connections. 


40D83D85-89AF-4052-B1A2-3130B786379C.thumb.jpeg.3614de41ae57c51aba4b4698e0014ebf.jpeg

BF6B3CEA-8A81-4230-B53A-62AB7E3A0A5C.thumb.jpeg.1bf0e639c8345830d48a2f8be8fc6e1e.jpeg


Than went on to decide were to place the strips


6E291BB6-B3B3-42C9-8EEB-01EBB7A47056.thumb.jpeg.6660d87875be78007b2c6c13f54f71be.jpeg


Finally I soldered everything togheter


B6D09CED-2A4D-4021-B755-BF8D6AFC086F.thumb.jpeg.9cb9c466b45baefd89111577e95496a8.jpeg

2995A3AC-163C-4062-9946-325F875099D4.thumb.jpeg.a6a29b259fc2865435d909654050a39f.jpeg


I was fun and the first connection defenatly was the most challenging. 


I also swapped the front panel LED for some UV purples. My phone was dead so I do not have any pictures of the process. 


Until next time! 


Link to comment
Share on other sites

Link to post
Share on other sites

On 11/5/2017 at 6:39 AM, Problader said:

That USB 3.0 cable well I just decided to live with has it is far beyond my skill set to get into sleeving that one. 

you can use a cablemod AIO kit to change your USB3 to have the look you want 

Link to comment
Share on other sites

Link to post
Share on other sites

Its their modmesh look, I did 100% of my sleeving in paracord so i’d rather keep the stock cable than to trow in a different type of sleeve. Thank you for the idea though.

Link to comment
Share on other sites

Link to post
Share on other sites

#9 Quick update, received my Rockit88 + Liquid Pro Combo. Ready to delid very soon


Well this update titles pretty much says it all. I received my delid and relid tool combo from Rockit Cool. I chose to go with Liquid Pro (ultra was out of stock at the time and from reviews it seemed like there was not much difference in both products, apart from the fact that the Liquid Ultra is supposed to be easier to apply)


I also finished rewiring all of my front panel Power and HDD new UV Purple LED's, I just got some basic clear UV 3mm and 2x5mm LED's from eBay and got down to soldering everything back in place. Overall that part was probably the easiest wiring I've done so far in this build. Won't be able to see if they work until I swap the CPU in this new rig though ahah. 


Here are some shots of the goodies the mailman brought me today! And also I should be passing my last order straight from EK and finish this build in a week or two!


IMG_1148.thumb.JPG.75cc93edd1f6e11cdc6538afd06c5050.JPG

IMG_1149.thumb.JPG.81ab9fbf896ef9d402131ed6a87f23bd.JPGIMG_1150.thumb.JPG.b98868edb9b720c31e2b32badf5a8b19.JPG


Until next time!

Link to comment
Share on other sites

Link to post
Share on other sites

This is going to be amazing man! Those cables look great! I really want to do mine. One day I will upgrade my case and I am going to do them then. 

Link to comment
Share on other sites

Link to post
Share on other sites

It really isnt that bad to do. If you want to take the time to do it properly. Just make sure you have the right pinout. Silverstone strider PSU are pretty much the easiest I would say. Only one double wire and most of the pinout are 1-1 so it is quite simple. Measure twice, cut once. You’ll be fine. Also personnaly i know some people have been saying that sleeving paracord is a pain in the ass. But just do it like I did. Crimp one side, pass the sleeving through than crimp the other side. Super simple and no need for extra tools.


Cheers!!

Link to comment
Share on other sites

Link to post
Share on other sites

#10 Coolant delivery from Primochill!


So I just received my order from Primochill. I got a bottle of True which came with a bottle of SysPrep. But since I have been running red Mayhem Pastel for the last 4-5 months in my blocks I also decided to grab a bottle of System Reboot which hopefully will help me clean the blocks properly without having to take them appart. 

00100dPORTRAIT_00100_BURST20171122233414200_COVER.thumb.jpg.292bed2d209de206eb8d975aeafac92c.jpg

00100dPORTRAIT_00100_BURST20171122233536985_COVER.thumb.jpg.97b23f27eb2133e7e8c25bc380d88990.jpg


Here are the shots I took with my brand new Google Pixel 2. That portrait mode really rocks.


I'm also receiving the rest of the components by Friday so I'll be building this weekend!!


Until next time!

Link to comment
Share on other sites

Link to post
Share on other sites

#11 Old rig disassembly and CPU delid


So I got down to the last few steps. Disassembling the old rig and delidding the 6700k. 


IMG_20171125_104359.thumb.jpg.b47c24cd3d7f1ec95a2f39095f9feeb0.jpgIMG_20171125_120020.thumb.jpg.856cf25ffcfb835b41e28f31fd5dadf9.jpgIMG_20171125_120202.thumb.jpg.116d7073bdf094058a6e26a21c92d7b1.jpgIMG_20171125_122454.thumb.jpg.affc22baa24f6318317a6dc879915f70.jpgIMG_20171125_123355.thumb.jpg.8bf7feccbce67cde233138e95ad12a1d.jpg


The True fluid wasn't what I wanted so I ordered the VUE candy purple. Also had to RMA the ITX mobo since one of the memory slot was broken. Build is on hold for now.


Until next time!

Link to comment
Share on other sites

Link to post
Share on other sites

  • 3 weeks later...

Still waiting on my VUE fluid. Bare with me I will post some more interesting pictures soon


Link to comment
Share on other sites

Link to post
Share on other sites

Watch out, you probably want to REALLY scrub everything.  VUE reacts very poorly to pastel leftovers

Want to custom loop?  Ask me more if you are curious


Link to comment
Share on other sites

Link to post
Share on other sites

Also, followed.  Interested in how the purple VUE will look

Want to custom loop?  Ask me more if you are curious


Link to comment
Share on other sites

Link to post
Share on other sites

Ahhh I love it! I love DIY stuff like this! I can't wait to see the end product as well :-). Followed.

On 10/22/2017 at 1:22 AM, Problader said:

I am terrible at naming my builds so if anyone feels like he has an idea feel free to pitch in.

Dude I'm in the same boat. I'm designing a build myself and I cannot think of a decent name for the life of me!

Link to comment
Share on other sites

Link to post
Share on other sites

Create an account or sign in to comment

You need to be a member in order to leave a comment

Create an account

Sign up for a new account in our community. It's easy!

Register a new account

Sign in

Already have an account? Sign in here.

Sign In Now

×