Albums
-
PC Showcase Photography
An album for any photography I take of my very own custom PC.
- Album created by jiyeon
- Updated
- 60 images
- 6 album comments
- 3 image comments
- 60 images
- 6 album comments
- 3 image comments
-
-
-
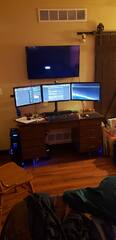
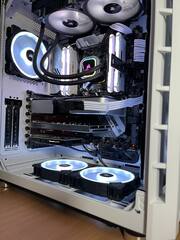
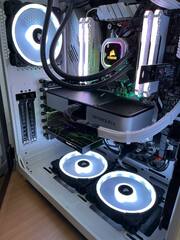
Evolution of My Daily Driver PC
It took a little bit of time to get it all straightened out the way I wanted but this is it.
I will be making more adjustments in the future as the placement of my desk is only temporarily in my Bedroom since we moved our son into the room that was my office.
Enjoy.
- Album created by SansVarnic
- Updated
- 6 images
- 2 album comments
- 6 images
- 2 album comments
-
Noods?
Here I'll post many pictures of PC's I personally own/built. From gaming pc's to retro, you'll find a lot here. this will be used as a contrast to @seoz with more black builds
Disclaimer:
this may not be safe for work. most pictures will be from a phone, so don't mind the quality and my cable management is okay-ish. i know
- Album created by LukeSavenije
- Updated
- 20 images
- 4 album comments
- 23 image comments
- 20 images
- 4 album comments
- 23 image comments
-
-
-
-
-
Random Build Log Pics
- Album created by NoxiousOdor
- Updated
- 38 images
- 2 album comments
- 4 image comments
- 38 images
- 2 album comments
- 4 image comments
-
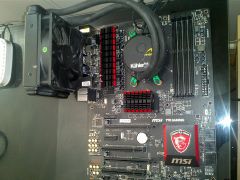
Project Murasame Liger
[Work In Progress]
Inspired by Zoids
Murasame Liger
Chassis: InWin H-Frame
Motherboard: MSI Z77 MPower
Processor: Intel i7 3770K
RAM: GSkill Ares 16GB 1866
SSD: OCZ Vector 256GB
HDD: WD Green 1TB
HDD: WD Green 2TB
Video Card: Palit Jetstream GTX 780
PSU: Seasonic X-Series 850W
Cooler: Phanteks TC14PE with 3 Cougar Dual-X LED fans
Monitor:
BenQ RL 2450H
Sony 32" HDTV
Other Peripherals:
- Ducky Shine 3 Year of the Snake (083/999)
- Razer Mamba 4G
- Razer Goliathus Control
- Corsair Vengeance 2000
- Album created by zeiferlance
- Updated
- 30 images
- 2 image comments
- 30 images
- 2 image comments
-
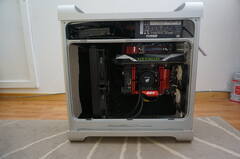
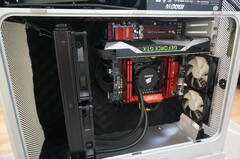
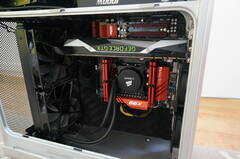
2014 - Power Mac G5 Build
This was a project I made a while back. Never got around to posting it in the build log section. Still, this being my first attempt at actually modding a case, I am proud of it. I made this build in 2014
Specs at the time:
Processor: Intel i7 5960X
Cooler: Corsair H110
Memory: 16GB GEIL Evo Potenza 3200MHz
Graphics: GTX 1080 Founders Edition
Motherboard: ASRock X99m
PSU: Cooler Master ProM 1000W
- Album created by Analog
- Updated
- 21 images
- 21 images
-
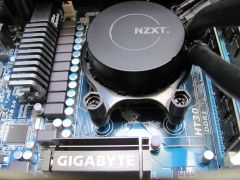
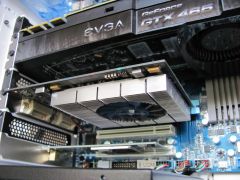
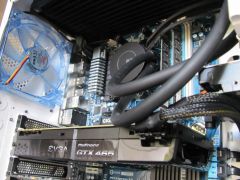
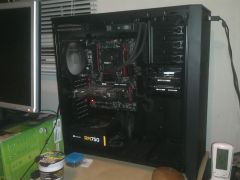
Cooler Master Watercool Build "Mastercase Racing"
See my entire build log on LTT, HERE
I'll primarily be doing video and photo editing. I got deals on the Gigabyte OC-FORCE motherboard, 4790K and two 980Tis from friends upgrading their hardware. The rest of the components were bought on sale or Ebay. I don't need the latest and greatest hardware as I rarely have time for gaming anymore. I've performed a lot of custom modifications to this PC build. The theme was inspired by legendary PORSCHE 917. The only Gulf Porsche 917 to win the 24 Hours of Le Mans was the one driven in Steve McQueen's "Le Mans" movie. If you're a motorsports enthusiast, I highly recommend seeing this movie for vintage racing footage alone. The story line stinks, but it's really about the event and cars. There is an HD version on YouTube. Many innovations in cinematography were created while filming this movie. Steve's production company welded brackets to the front frame work of the 917, so they could mount a camera to shoot him, and the other drivers, in the cockpit.
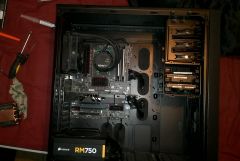
The OC-FORCE motherboard has north and south bridge water block by EK. The EVGA 960Ti cards have Koolance water blocks with back plates. The black acetal block tops and back plates were painted the Gulf Racing blue. The Bitspower dress-up pump cover was painted orange. The four Corsair Vengeance DDR (32GB) heat spreaders were painted to match later the theme later. A lot of people asked how I painted them, so I created a video guide for dismantling and painting your own DDR heat spreaders here, https://www.youtube.com/watch?v=jHVXsvd-5QE
Staying with the race car theme, I chose 1/2" O.D. Stainless Steel tubing was inspired by the fuel and brake lines of a race car. I used 316 Marine Grade Stainless, so corrosion isn't an issue. Working with Stainless Steel tubing requires a Mandrel bender and lots of practice. It takes a great deal of practice to get the perfect bends. I always keep my water loops simple for easy maintenance. I only use distilled water and change it every 6 – 8 months. I may use Mayhems Dyes when using clear PETG tubing to accent a color theme in other builds. I’ve been DIY liquid cooling for past decade and find most cooling additives or radiator cleaners are gimmicks and a waste of your money. Just use distilled water and be diligent about cleaning your loop. The water pump is an Alphacool VPP655 with adjustable speed. It has a Bitspower dress-up kit. The pump cover was painted to match the exterior paint. Did you notice that my loop has no reservoir? I like my builds simple and clean. I have a Koolance bleed valve on top of the SLI bridge for filling the loop. I fill the loop through a Koolance 3-way splitter fitting with fill port on the top of the 360mm radiator. Beneath the PC is a Koolance Drain Valve. All I have to do is connect tubing to the drain valve and drain the loop into a bucket next to my workbench.
The front grill is 1/8” thick cast acrylic that was laser cut into honeycomb. The top of the case has a smoked acrylic "moonroof" window. The clear side panel has embedded magnets. Both of these window panels are made by Mnpctech. It allows you to look into the PC from above. It has a machined aluminum 120mm ring / fan grill that emulates a fuel fill port on a race car. The ring has blue anodized washer with socket head screws. The rear fan grill is machined aluminum 120mm "Overkill" Ring. All of the fans are Scythe Gentle Typhoons AP-15. Part# D1225C12B5AP-15, 1,850 rpm, 28 dBA @ 57.68062 CFM. Unfortunately these cooling fans are no longer made by NIDEC SERVO, but there is still some available from online retailers. Dazmode sells similar version called the “DarkSide Gentle Typhoon Performance Radiator Fan” They have good static pressure and under volt nicely. You can easily dismantle them for custom paint.
You don't often see pastel colors used on custom PC builds, but it was important that the GULF RACING / PORSCHE LIVERY paint be authentic. We traced down the factory paint codes for the 1970 Porsche 917. The paint colors were mixed by Jim at "Auto Plus" in Bloomington, Minnesota. The EK XTX 360mm Radiator was painted the Gulf Racing Orange. The orange stripe is mirrored onto the chassis. The circle number five represents "Mastercase 5"
The gauge is a VDO 12 volt gauge from an old VW to indicate power. The main power switch is a momentary toggle switch with red safety cover which is used for ignition switch in the Porsche 917. The reset switch is Blue anodized aluminum push button. Both switches are mounted in machined aluminum mounting plate. The PSU shroud has embedded magnets, so it’s easy to remove and re-install. The paracord sleeving for the 24 pin and video card cables is “Graphite Grey” from Ensourced.net . The paracord PC cable combs are machined aluminum designed for the Ensourced cables.
I didn't like the Cooler Master Mastercase 5 case at first. I feel the engineer missed a lot of opportunities that could have made the case even better. Especially since CM marketed it as "modular" and it’s designed for DIY liquid cooling. The Mastercase falls 40% from it's marketing pitch, but the overall build quality and finish is outstanding. It eventually won me over after dismantling and re-assembling the case. Here is my final thoughts about the Mastercase 5 case, keeping in mind that I look at cases from perspective as DIY liquid cooler and modder.
RAVES about the Cooler Master Mastercase:
Overall Build Quality, Fit & finish. Top panel / cover design options are nice. Modular HD/SSD tray design and mounting options are best to date. 240/360/280 radiator option for front is nice.
REVISIONS for the Cooler Master Mastercase
Top radiator mounting location should be offset, to clear DDR slots on some motherboards 100% Riveted chassis?! I understand using rivets over screws to save time in manufacturing, but at minimum, the mid section floor should be removable for better access. Lack of Water pump and reservoir mounting. CM's competitors started embracing DIY cooling market over year ago, by including mounting options for reservoirs and water pumps. Mastercase 5/ Pro window panel is very flimsy. The "smoked" poly window is bluish/purple and has very poor clarity for viewing inside the case.
In closing, I want to stress that you can create an awesome PC build without having the bleeding edge of hardware inside.
Thanks again to everybody at LTT
Bill Owen
- Album created by Mnpctech
- Updated
- 9 images
- 1 image comment
- 9 images
- 1 image comment
-
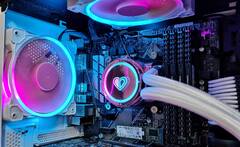
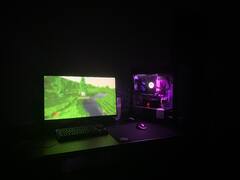
Minecraft build
umm; rtx 2070 super oc 8g
i5 10600k
16gb 3600mhzM/18
1tb nvme + 1tb sata ssd
z63
h710i
z490e asus
hx750i
- Album created by c3dric69
- Updated
- 7 images
- 1 album comment
- 7 images
- 1 album comment
-
-
-
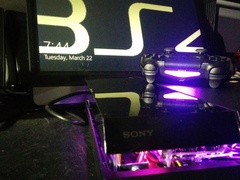
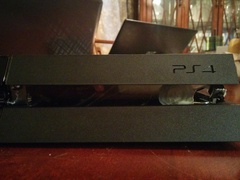
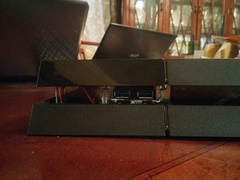
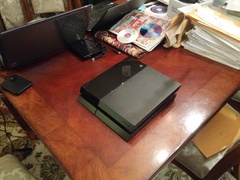
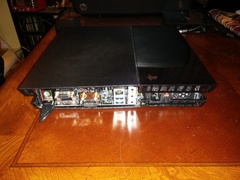
The BS4..."Not by Sony"
Not sure why the album manager uploaded all my photos twice, but yeah... this is my first itx build. very small, very sloppy
- Album created by Drgns N Bacn 4tw
- Updated
- 20 images
- 1 album comment
- 1 image comment
- 20 images
- 1 album comment
- 1 image comment
-
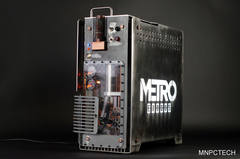
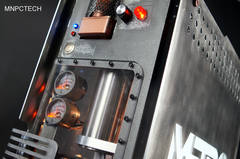
Metro Exodus PC
Corsair 570x case mod & build details, https://mnpctech.com/metro-exodus-4k-gaming-pc-build-case-mod-mnpctech-worklog.html
- Album created by Mnpctech
- Updated
- 3 images
- 3 album comments
- 3 images
- 3 album comments
-
My current Rig
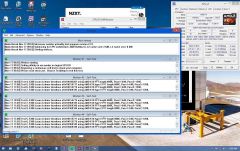
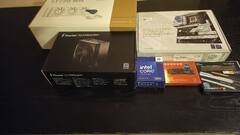
I didn't have a large budget. I had to make do with a $350 usd budget. I found a motherboard locally that came from a Lenovo Thinkcentre m93p mini tower. The board itself is a 1150 sockect board and comes with it's I/O shield. I was hoping to find a board that uses 3rd gen intel cpus and was happy to find that this board can use 4th gen cpus for under $12. As for the cpu I went with, I chose the I5-4590 for $50 that I found on Ebay. I didn't buy any ram since I had some lying around. The ram is from Micron and its speed is 1600MHz. I had 3 sticks and they total up to 16GBs total. I wasn't sure what would be a good cpu cooler so I just went with what Amazon recommended. Amazon recommended a cpu cooler from thermaltake for $13. For the gpu I bought a gtx 1060 6gb single fan model on Ebay for $130. I spent $20 bucks for a 120gb ssd from kingston for the boot drive and then I bought a 500gb hdd for storage which costed me another $25. I wasn't sure what psu I needed so I went on EVGA's website and used their power meter to know what psu I needed. Afterwards I bought a 450 bronze psu for $45 from them. For case I bought a Rosewill FBM-01 micro atx tower for $21. I did have to spend $5 for an 24 pin to 14 pin adapter for the motherboard to use my psu. For case fans I bought both from Artic. One is a 80mm and the other is a 120mm fan. Both costed me $16. In total I spent $336 for my rig.
I did my best for cable management but I'm not sure if it's good enough. It's my first time building a computer.
A couple weeks later the gtx 1060 stopped working. Sad times. Luckily the seller offered a 30 day warranty so I got my money back.
Since Nvidia was a bust I went with a AMD card this time. I bought a rx 570 Sapphire nitro+ 8gb for $110. Card was used for mining for about 3 months according to the seller.
So I flashed the original bios for the card I got from the manufacturer and the card works great.
- Album created by Jpo_Fett
- Updated
- 8 images
- 3 album comments
- 1 image comment
- 8 images
- 3 album comments
- 1 image comment
-
Bitfenix Prodigy build
- Album created by GrossistenDK
- Updated
- 70 images
- 1 image comment
- 70 images
- 1 image comment
-
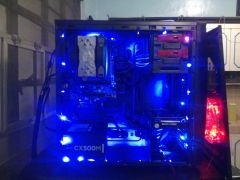
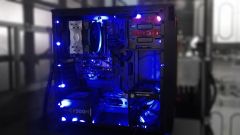
"Spike" PC Mid Gaming Rig
My Personal RIG: "Spike"
Processor: AMD A8-6600K OC'd 4.2Ghz
Motherboard: Gigabyte F2A78M-HD2
Hard Disk: Western Digital Caviar Blue 500GB
RAM: Transcend 4gb DDR3 1600 CL11
CPU Cooler: Cooler Master Hyper 212X
PSU: Corsair CX500M
Casing: Tecware Omega
Fans and Extras:
2x DeepCool Ice Blade 120mm
1x DeepCool X/BL LED 120mm
1x Corsair SP120
1x NZXT Sleeved LED Kit
- Album created by AlvinPacheco
- Updated
- 7 images
- 2 image comments
- 7 images
- 2 image comments
-
FX 6350/GTX 465 Build
It's fast
- Album created by Ryan Leech
- Updated
- 78 images
- 7 image comments
- 78 images
- 7 image comments
-
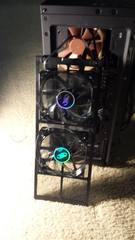
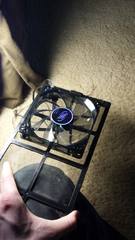
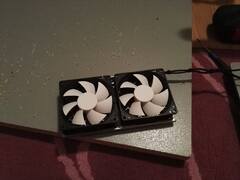
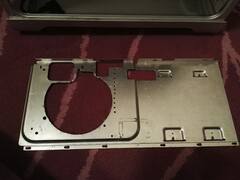
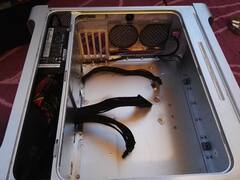
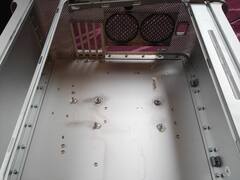
Rad Problems
Fans won't fit :(
- Album created by Shhuks
- Updated
- 2 images
- 2 album comments
- 2 images
- 2 album comments
-
My RIG +OVERCLOCKING
GIGABYTE GTX 570 SOC @955/2120
INTEL CORE I5 760 @4GHZ
- Album created by epkoc
- Updated
- 10 images
- 1 image comment
- 10 images
- 1 image comment
-
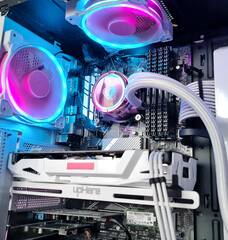
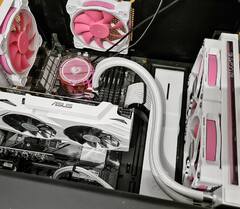
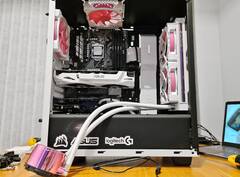
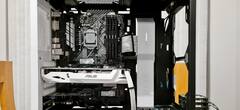
My PC
CPU: Intel® Core™ i9 processor 14900KF
Motherboard: ASUS ROG Strix Z790-A Gaming Wifi
RAM: G.SKILL 32GB Trident Z5 RGB DDR5 7600MHz CL36 KIT F5-7600J3646G16GX2-TZ5RK
GPU: ROG-STRIX-RTX3080-O10G-WHITE-V2
SSD: Samsung 970 EVO Plus Series 250GB
SSD2: Crucial P1 M.2 2280 1To
SSD3: ADATA 2TB XPG Gammix S70 Blade M.2 PCIe M.2 2280 AGAMMIXS70B-2T-CS
SSD4: CRUCIAL 1TB BX500 SATA 3 2.5" CT1000BX500SSD1
PSU: FRACTAL DESIGN ION + 2 Platinum 860W
Case: Fractal Design Meshify S2 TG (Blanc/Transparent)
CPU Cooler: DEEPCOOL LT720 WH
Keyboard: ASUS ROG Strix Scope Cherry MX Brown (HU)
Mouse: ASUS ROG Strix Impact II Electro Punk
Mouse Pad: ASUS ROG Sheath Electro Punk
Controller: Xbox Wireless Controller + Wireless Adapter for Windows 10
Monitor 1: AOC C27G1
Monitor 2: LG 34GL750-B
Headphone: Audio Technica ATH-MSR7GM
DAC: Focusrite Scarlett Solo MK3
Microphone: Audio Technica AT2040
- Album created by TheDucky94
- Updated
- 6 images
- 6 images
-
zfz.Radiance
I call the project Radiance. The inspiration is an item from DotA that when equipped causes your character to radiate a damaging aura. The item icon in DOTA2 is represented by a glowing blade and creates a visible aura around your character; it is this aura that I was trying to re-create with the lighting system installed in the computer. While this serves as the inspiration for the aesthetic I don’t want overt branding to alienate those who might appreciate a tasteful and elegant piece of art; this is what I hoped to achieve.
Powder Coated Case Labs SM8, I chose Prismatic Powders for the color.
PC Part Picker: http://pcpartpicker.com/user/ultimatt/saved/7WRkcf
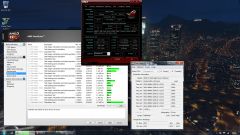
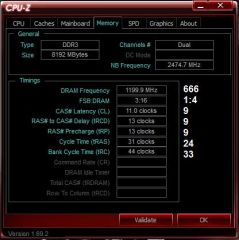
Pushes 4.98 stable at dangerous voltages without heat issues, but runs rock solid at 4.8GHz and 1.28V so that's where we keep it.
- Album created by culprit
- Updated
- 9 images
- 3 image comments
- 9 images
- 3 image comments
-
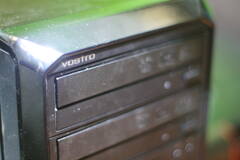
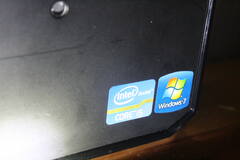
dell vostro sleeper build
images from
- Album created by sub68
- Updated
- 10 images
- 1 album comment
- 10 images
- 1 album comment


![IMG_20160322_194609[1].jpg](http://pbs-prod.linustechtips.com/monthly_2016_03/small.56f1e0cde595a_IMG_20160322_1946091.jpg.7ebf3a0314186f16dc33df8b8a4950dd.jpg)
![IMG_20160322_190146[1].jpg](http://pbs-prod.linustechtips.com/monthly_2016_03/small.56f1e0b9e7ed7_IMG_20160322_1901461.jpg.1211dda4ced2fa91b9e0d5afe9134e35.jpg)
![IMG_20160322_190133[1].jpg](http://pbs-prod.linustechtips.com/monthly_2016_03/small.56f1e0ac314c6_IMG_20160322_1901331.jpg.269a82f319f736efbe1f91fdccc91bfa.jpg)


![IMG_20160322_194609[1].jpg](http://pbs-prod.linustechtips.com/monthly_2016_03/small.56f1dcef415c4_IMG_20160322_1946091.jpg.dcad8d3f7939d49d888614738ffa7752.jpg)
![IMG_20160322_194437[1].jpg](http://pbs-prod.linustechtips.com/monthly_2016_03/small.56f1dce923bed_IMG_20160322_1944371.jpg.fc5485b2c1c5b5632b6371df74d9c990.jpg)
![IMG_20160322_190205[1].jpg](http://pbs-prod.linustechtips.com/monthly_2016_03/small.56f1dce1c265a_IMG_20160322_1902051.jpg.e47e0dd8e44faff00b50bbaadb2a62d3.jpg)
![IMG_20160322_190146[1].jpg](http://pbs-prod.linustechtips.com/monthly_2016_03/small.56f1dcd450e38_IMG_20160322_1901461.jpg.508b94b9a0b2060963bfa47da18e33cc.jpg)
![IMG_20160322_190133[1].jpg](http://pbs-prod.linustechtips.com/monthly_2016_03/small.56f1dcc687804_IMG_20160322_1901331.jpg.c811a441972d97e2c2cf0e7b9b0e4892.jpg)
![IMG_20160322_190059[1].jpg](http://pbs-prod.linustechtips.com/monthly_2016_03/small.56f1dcc019654_IMG_20160322_1900591.jpg.9bee363ed51839e51970fa8ee5b1d489.jpg)
![IMG_20160322_190043[1].jpg](http://pbs-prod.linustechtips.com/monthly_2016_03/small.56f1dcab6d15b_IMG_20160322_1900431.jpg.8f672307b67b1655ef83dca1b11a687d.jpg)

![20191001_141841[1].jpg](http://pbs-prod.linustechtips.com/monthly_2019_10/small.1507456308_20191001_1418411.jpg.700f54f82f165be12608c73416becbfb.jpg)
![20190929_135621[1].jpg](http://pbs-prod.linustechtips.com/monthly_2019_10/small.796061218_20190929_1356211.jpg.6122fb8681527b19211c0af24dacce65.jpg)
![20190929_134502[1].jpg](http://pbs-prod.linustechtips.com/monthly_2019_10/small.1298653314_20190929_1345021.jpg.be2505906861475d85cb6060f1a52108.jpg)
![20190929_135648[1].jpg](http://pbs-prod.linustechtips.com/monthly_2019_10/small.80916418_20190929_1356481.jpg.fd9e69f8e57eb719196a28efb35ab227.jpg)
![20190913_150641[1].jpg](http://pbs-prod.linustechtips.com/monthly_2019_10/small.2140204646_20190913_1506411.jpg.7ce923778a2672a94aa5a6f8babeb43b.jpg)
![20190929_134517[1].jpg](http://pbs-prod.linustechtips.com/monthly_2019_10/small.356457519_20190929_1345171.jpg.fa5925e18497460135f1bad965e227d9.jpg)
![20190929_134451[1].jpg](http://pbs-prod.linustechtips.com/monthly_2019_10/small.167528592_20190929_1344511.jpg.0b4899a17462d5e47a5b5985b261ffe9.jpg)


![IMG 8133[1]](http://pbs-prod.linustechtips.com/gallery/album_417/sml_gallery_18388_417_1972920.jpg)
![IMG 8120[1]](http://pbs-prod.linustechtips.com/gallery/album_417/sml_gallery_18388_417_1461089.jpg)
![IMG 8119[1]](http://pbs-prod.linustechtips.com/gallery/album_417/sml_gallery_18388_417_1019575.jpg)
![IMG 8118[1]](http://pbs-prod.linustechtips.com/gallery/album_417/sml_gallery_18388_417_1951083.jpg)
![IMG 8117[1]](http://pbs-prod.linustechtips.com/gallery/album_417/sml_gallery_18388_417_631049.jpg)
![IMG 8116[1]](http://pbs-prod.linustechtips.com/gallery/album_417/sml_gallery_18388_417_440230.jpg)