Jump to content

Luminous Pandora (X99/1080ti SLI/Hardline Glass)

Lathlaer

Oh boy where to start. 


This will not be your typical build log since I have not been taking many pictures during the build - instead I will share the story and link some almost-finished pics.


It began a bit less than a year ago when I seriously started considering building something totally awesome - something my friends and family would call a mid-life crysis if it weren't for the fact that I'm not yet approaching the required age. But well, they have their hobbys, I have mine. They buy cars and I can't drive one. With that in mind I started looking for some kind of inspiration - the help came in the form of YT videos. After watching some stuff from LTT/GN/Bitwit/Paul'sH/Jayz2Cents I got hyped into building some kind of ridiculous high end PC.


I have build a PC twice before that. First one was years ago with the good old Sandy Bridge i5 2500k, the second one a bit more contemporary - i7 6700k with a GTX 1060. With that in mind, I wanted something balls to the wall that would look great in my living room. 


So, having build a PC twice before, I made the decision of going the custom watercooling route. Not only that, it was going to be a hardline lc build. Not only that, it was going to be glass. You can probably see where this is going ;-)


Without further ado, here are the parts:


CPU i7 6950x

GPU Asus GTX 1080ti OC SLI

Motherboard Asus Rampage V Ed. 10

RAM Corsair Dominator Platinum Special Edition (Chrome) 32 GB 3200mhz

Storage Samsung 960 EVO m.2 1TB

Case In Win Tou 2.0

PSU: In Win SIV 1065W 

Cables custom by Singularity Computers


Cooling

EKWB Asus Rampage V Ed. 10 Monoblock

2x EKWB 1080ti blocks for Asus Strix 1080ti

2x EKWB Backplates

2x EKWB 360mm Coolstream PE radiators

EKWB D5 Pump

EKWB 250 Res

6x Corsair ML 120 pro (white)

Alphacool fittings and connectors

Alphacool glass tubing

Mayhem's Dark Grey Pastel fluid


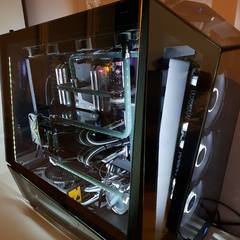
Let's address the elephant in the room - the case. Holy shit this thing is beautiful. I'd be lying if I said that I weren't inspired by Jayz2Cents' build for Terry Crews. I loved looking at that case back then on screen, I love it even more in person. Full  tempered glass that acts as a mirror when the system is turned off but becomes transulecent when the inside LED's turn off? It looks spectacular, especially in a dark room.


It's not the most practical thing. It's big and heavy, it doesn't have any kind of shroud to hide the cables on the bottom and the front fans are heavily choked - I am still in the process of buying new furniture so the thing isn't yet in my apartment but will let you know how do the thermals fare. I suspect it will not be the coolest system but as long as it will do what I require of it, it should be fine.


The case is a limited edition (500 made) and comes with it's own custom PSU (In Win SIV 1065W). The PSU is a royal pain in the ass when it comes to custom cables. I have searched for a while and to my knowledge only Singularity Computers do custom cables for that specific unit. I know they did it at least 3 times ;-) Some modders could do it as well if they got the pinout but the main problem is the front touch panel connector, which originally is wired to a black 24pin extension and is proprietary, so In Win will not send that pinout. But a modder can (and Singularity did it like that) use the physical cable In Win provided if you send it to them to Australia. 


Now, my adventures with custom cooling are something I will fondly remember for a long time. Like I said, it's my first ever watercooled build. It was also the first time I took a Dremel to cut glass. I had no idea how to go on about it since not even the best videos will not prepare you for those little things that might go wrong. 


I bought much more fittings and adapters than I needed and I consider this my personal Idiot Tax. The original conception was to not make any bends and use 90 degree adaptors but then I changed the conception after seeing that Alphacool has pre-bent 90 degree glass tubing. So I ended up with few unnecessary adaptors, I also bought more fittings than I needed because I wanted to be secured in case I could not connect tubes the way they were supposed to (I had to change one 90 degree fitting for a 2x45 rotary one that allowed me more play for instance).


When I filled the loop, my res started leaking immediately because of a faulty plug.


The biggest and stupidest mistake I made was connecting the GPU's with tubes and without really measuring the distance between them. I was so confident that since they connect and are in the right PCIE slots and there is no leak that everything will be fine - until I tried to install the Asus HB bridge. Imagine my frustration when I had realized that I have those GPU's literally 2mm too wide for the bridge. And of course since they are held together by rigid tubing, they will not budge. So off we go to drain the system and again with the dremel.


Overall, I had a lot of fun doing this. I made plenty of mistakes but I also learned a lot from them. None of those mistakes were really generic enough so I don't feel like if I made a soft tubing build first it would've gone better. The typical stuff, like the loop order, pump location etc. I knew and did right. I also build my dream machine that will last me a long time - I suspect I will be changing the CPU when the succesor to x299 comes out and the GPUs - well, who knows, depending on their performance in games, probably for next gen "ti" version but only if they will really dazzle me with performance boost.


Also, it was a great way for me to connect with my father - because I don't have enough space in my apartment to do a build that could take months to complete, my parents graciously allowed me to use my old room in which I lived before I moved out. Naturally father got interested in the project and did some things with me. He put together one GPU block, helped me with some drilling to install the pump etc. He did not stick around for the glass cutting ;-)


The name Luminous Pandora, because it shines like there is no tomorrow when the brightness of LED is highest and the shape kind of reminds me of Lunatic Pandora from FF8.


Last but not least

I will not pretend that I designed the loop on my own. I didn't. I didn't really like the way In Win did their LC when they announced the case at Pax East 2017 nor the way Jay did it for Terry Crews. Fortunately I found another build on the internet on YT channel and decided to replicate the general shape of it, only with different cables and glass tubing instead of brass. Here is the link for anyone who wishes to see: 


Now, here are some pictures of my build. It's not fully finished, I still need to handle the cables a bit more and put more fluid in the reservoir ;-)


Front:


20180404_124859.jpg


Side:


20180404_124826.jpg&key=db4dabbd9a7c5297


20180404_124955.jpg


20180404_124912.jpg


These are without the side panel glass - it's extremely hard to take a good picture of the case once it's all "glassed" ;-)


20180401_183715.jpg


20180401_183700.jpg


And finally, this is how the PC looks when turned off. The case turns into a mirror from all sides:


20180404_130914.jpg

CPU: i7 6950X  |  Motherboard: Asus Rampage V ed. 10  |  RAM: 32 GB Corsair Dominator Platinum Special Edition 3200 MHz (CL14)  |  GPUs: 2x Asus GTX 1080ti SLI 

Storage: Samsung 960 EVO 1 TB M.2 NVME  |  PSU: In Win SIV 1065W 

Cooling: Custom LC 2 x 360mm EK Radiators | EK D5 Pump | EK 250 Reservoir | EK RVE10 Monoblock | EK GPU Blocks & Backplates | Alphacool Fittings & Connectors | Alphacool Glass Tubing

Case: In Win Tou 2.0  |  Display: Alienware AW3418DW  |  Sound: Woo Audio WA8 Eclipse + Focal Utopia Headphones

Link to comment
Share on other sites

Link to post
Share on other sites

Looks like you wrote a book?

Link to comment
Share on other sites

Link to post
Share on other sites

2 hours ago, PC_Master said:

Looks like you wrote a book?

;-)


It's not really that much more text than a long spanning Build Log on these forums, just condensed into one post because I wasn't sure how long it will take me to build it - if at all - so I decided to make one post after mostly finishing.


Here is a pic of the Dominator Platinum SE memory ;-)


20180404_123850.jpg


CPU: i7 6950X  |  Motherboard: Asus Rampage V ed. 10  |  RAM: 32 GB Corsair Dominator Platinum Special Edition 3200 MHz (CL14)  |  GPUs: 2x Asus GTX 1080ti SLI 

Storage: Samsung 960 EVO 1 TB M.2 NVME  |  PSU: In Win SIV 1065W 

Cooling: Custom LC 2 x 360mm EK Radiators | EK D5 Pump | EK 250 Reservoir | EK RVE10 Monoblock | EK GPU Blocks & Backplates | Alphacool Fittings & Connectors | Alphacool Glass Tubing

Case: In Win Tou 2.0  |  Display: Alienware AW3418DW  |  Sound: Woo Audio WA8 Eclipse + Focal Utopia Headphones

Link to comment
Share on other sites

Link to post
Share on other sites

Small update; had to redo the glass tube between the reservoir and the pump. For some reason it passed a 48h leak test but when I bumped it while trying to handle the cables, it developed a small leak. Meh. Apparently it was a bit too short and did not fit correctly, hopefuly the new one which is a bit longer will be fine.


20180408_160358.jpg


Post was succesful, everything seems to be working. Wanted to install Win7 but it doesn't see my M.2 - I think its because Win7 doesn't natively support this format, so if I want to install a system, it needs to be Win10.

CPU: i7 6950X  |  Motherboard: Asus Rampage V ed. 10  |  RAM: 32 GB Corsair Dominator Platinum Special Edition 3200 MHz (CL14)  |  GPUs: 2x Asus GTX 1080ti SLI 

Storage: Samsung 960 EVO 1 TB M.2 NVME  |  PSU: In Win SIV 1065W 

Cooling: Custom LC 2 x 360mm EK Radiators | EK D5 Pump | EK 250 Reservoir | EK RVE10 Monoblock | EK GPU Blocks & Backplates | Alphacool Fittings & Connectors | Alphacool Glass Tubing

Case: In Win Tou 2.0  |  Display: Alienware AW3418DW  |  Sound: Woo Audio WA8 Eclipse + Focal Utopia Headphones

Link to comment
Share on other sites

Link to post
Share on other sites

  • 1 month later...

OK, probably last update since I found some archived pictures and made new ones in it's default setup.


Here is what you have to do to your motherboard in order to keep the IO shield AND install the Monoblock.:


20180404_125748.jpg


Also found a picture of a pre-bent 90degree glass tube (amazing stuff, allows for much cleaner routing for people without means to bend glass and those who don't want to rely on 90degree angled connectors).


20180404_125957.jpg


I wanted a better cable management but it's almost impossible right now - the cables from Singularity Computers are very high quality and rigid, it's hard to move them around and the case lacks the basement to hide them. Maybe if I ordered some custom made glass shield as a basement...It's a thought for the future.


This is why it is essential that owners of Tou 2.0 get custom made cables. Otherwise it will look terrible. And let's not forget the proprieritary 24pin connector extension that is needed in order to hook up the front touch panel:


20180404_125505.jpg


Fortunately Singularity Computers knew what to do with it and they wired it directly to the 24pin custom cable.


And finally few pictures of the build when it illuminates a complete dark room:


pan3.jpg


Unfortunately even with Asus Aura it's hard to get a clear white color of the lights and it always ends up a bit blue or greenish. I did not plug the SLI bridge cable to the RGB header so I had to manually choose a color (the bridge works like a touch panel).


pan1.jpg


This is how it looks like when it's basically the only light source in the room (aside from monitor).


pan4.jpg


And finally I like this one since it shows those nice glass tubes - like I said, I drew the blueprint from a video in the original post since it was by far the cleanest and nicest way of designing the loop. The parallel glass tubes are very nice and boy am I glad that Alphacool offers pre-bent 90degree glass tubing ;-)


EDIT: 


Front touch panel - much like Jayz2Cents I had to remove the power wire from touch panel - not because it was too easy to bump it but because cleaning it with microfiber cloth needed turning off PSU :D


20180529_005648.jpg


As such in now serves the function of controlling the lights inside the case. Here is the dimmed version when only inner component light it up:


20180529_011316.jpg


Specs:

I run it daily at:

CPU: 4.2 GHz (1.20v) uncore 3.4 GHz (1.15v)

GPUs: +50MHz clock on top of Asus' OC and +350MHz Memory

RAM: Standard XMP for Dominator Platinum SE: 3200Mhz CL 14 16 16 36 with 1.35v


Temps:

CPU full load during AIDA: 68C package, 61C hottest core

GPU's under 100% load: max temp 50-51C, holding both a stable 2025MHz


I was able to OC the CPU further to 4.4 GHz at 1.29v and uncore to 3.6 at 1.20v but after passing Cinebench 6-7 times it crashed. I could hold this overclock when I increased the voltage to 1.35 but decided against it, didn't like the temperatures (about 80C on package)


Not the most efficient system temperature-wise but I already knew this when I chose this case. It was a conscious decision which I do not regret ;-)


CPU: i7 6950X  |  Motherboard: Asus Rampage V ed. 10  |  RAM: 32 GB Corsair Dominator Platinum Special Edition 3200 MHz (CL14)  |  GPUs: 2x Asus GTX 1080ti SLI 

Storage: Samsung 960 EVO 1 TB M.2 NVME  |  PSU: In Win SIV 1065W 

Cooling: Custom LC 2 x 360mm EK Radiators | EK D5 Pump | EK 250 Reservoir | EK RVE10 Monoblock | EK GPU Blocks & Backplates | Alphacool Fittings & Connectors | Alphacool Glass Tubing

Case: In Win Tou 2.0  |  Display: Alienware AW3418DW  |  Sound: Woo Audio WA8 Eclipse + Focal Utopia Headphones

Link to comment
Share on other sites

Link to post
Share on other sites

Create an account or sign in to comment

You need to be a member in order to leave a comment

Create an account

Sign up for a new account in our community. It's easy!

Register a new account

Sign in

Already have an account? Sign in here.

Sign In Now

×