

.jpg.2f4f9e9537f2d49f96e5daf1404be20f.jpg)
Robert__White
-
Posts
21 -
Joined
-
Last visited
Reputation Activity
-

.thumb.jpg.bc7c5e1af01b0fd70ba69d920f0836a4.jpg) Robert__White reacted to fenderjaguar in Mobo/CPU makes my system fans run full speed after waking up!
Robert__White reacted to fenderjaguar in Mobo/CPU makes my system fans run full speed after waking up!
Sorry for digging up an old thread, but I didn't find any answers to this anywhere, and it was annoying me for some time. But I finally solved the problem with speedfan. And this thread was one of the top results on google, when searching "speedfan wake up 50%".
It's really quite simple, but all you do in speedfan is click on configure, then go to the speeds tab, then highlight which fans you want, then make sure "automatically variated" is checked. Also, whatever you enter for a minimum value will be what your fans will be spinning at when you wake up from sleep. That's it.
I don't know how this will work with the advanced fan control, where you created a profile and start making a graph, because I don't use that, I just have fixed speeds which I manually alter, depending on gaming.
-

 Robert__White got a reaction from KazerTheKeen in I painted my RAM white.
Intro
(skip if you don't care about WHY I did this)
Hi all, just wanted to share the process I went through when painting my RAM as I'm really happy with the result.
I bought a Cerulean blue kit when I built the first iteration of my PC because it matched the motherboard I bought (Asus M5a97 r2.0). The change of colour was first conceived moments after I upgraded to a 4790k and a Krait edition motherboard yet I still wasn't convinced it was necessary as only a tiny bit of the ram was showing. That was until one of the heat-spreaders started to fall off. It also gave me the opportunity to mess with stuff sooo...
Kit List
Paint: Kobra Paint's pure white - semigloss in one of their low pressure aerosols. TIM: Akasa thermal adhesive tape Alcohol - Hexeal Chemicals 99.9% Isopropyl alcohol Masking/Painters tape - In the end I used normal, clear tape. I got the paint, TIM and alcohol from amazon.
Work Log
I first carefully pried the heat spreader off of the RAM modules, the side directly touching the (single sided) PCB came off really easily as they were the ones nearly falling off. The other sides were adhered to what seems to be a strip of acrylic fixed to the PCB and were more difficult to remove, I spent a long time and just about managed it using just my fingers to minimise bricking potential. I didn't take any pictures of this as it didn't strike me as an interesting step. The adhesive Corsair used left some nice residue that took a while to get rid of with 99.9% alcohol, again; no pics for this dull step.
Following the clean I used a hairdryer to warm the adhesive beneath the stickers, this allowed me to peel them off and stick the to a sheet acrylic (I think) from an old laptop screen. There was a tiny bit of residue where the last part of the sticker hung onto every one of the heat-spreaders. So I hit it with more alcohol before painting.
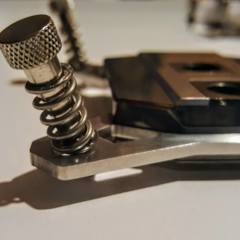
Moving onto paint, I began by taping the area where the modules contact the heat-spreader, I used normal tape here as I couldn't find enough masking/painters tape. You might be able to see this in the pic below (it's not very clear).
I then took it all outside to the 'multi purpose utility area' a well ventilated yet not too windy or dusty space to lay down the paint. Below is what I got after one coat.
Two Coats Three Coats
I'm really happy with the result, however I am fully aware that it is not perfect. If I were to do this again I would be more patient and apply more, lighter coats with a much shorter interval to attain a smoother finish. I would also not tear a bit of cardboard nearby to make a support raining fibres all over the drying paint...
Onto the stickers!
Since I stuck them onto a smooth surface I could peel them off fairly easily and apply them back onto the heat-spreaders to really finish them up. Unfortunately some of the corners would not stick down so I applied some super glue and pushed then corners down with a cotton bud/que tip.
Now to put them back together.
Here I cut up the TIM into rectangles appropriately sized to cover the memory modules, I used larger rectangles for the other side with the plastic plate thingy. I peeled off the protective layers on one side of the adhesive tape rectangles, applied them all to the RAM before peeling off the layer on the other side (now facing up) and lining up the heat-spreaders.
Thanks for taking a look at this little project.
If you'd like anything clarified or want me to add some extra detail, let me know.
In the spoiler below are some pictures of the system both before and after this mod.
-
 Robert__White got a reaction from cj09beira in I painted my RAM white.
Intro
(skip if you don't care about WHY I did this)
Hi all, just wanted to share the process I went through when painting my RAM as I'm really happy with the result.
I bought a Cerulean blue kit when I built the first iteration of my PC because it matched the motherboard I bought (Asus M5a97 r2.0). The change of colour was first conceived moments after I upgraded to a 4790k and a Krait edition motherboard yet I still wasn't convinced it was necessary as only a tiny bit of the ram was showing. That was until one of the heat-spreaders started to fall off. It also gave me the opportunity to mess with stuff sooo...
Kit List
Paint: Kobra Paint's pure white - semigloss in one of their low pressure aerosols. TIM: Akasa thermal adhesive tape Alcohol - Hexeal Chemicals 99.9% Isopropyl alcohol Masking/Painters tape - In the end I used normal, clear tape. I got the paint, TIM and alcohol from amazon.
Work Log
I first carefully pried the heat spreader off of the RAM modules, the side directly touching the (single sided) PCB came off really easily as they were the ones nearly falling off. The other sides were adhered to what seems to be a strip of acrylic fixed to the PCB and were more difficult to remove, I spent a long time and just about managed it using just my fingers to minimise bricking potential. I didn't take any pictures of this as it didn't strike me as an interesting step. The adhesive Corsair used left some nice residue that took a while to get rid of with 99.9% alcohol, again; no pics for this dull step.
Following the clean I used a hairdryer to warm the adhesive beneath the stickers, this allowed me to peel them off and stick the to a sheet acrylic (I think) from an old laptop screen. There was a tiny bit of residue where the last part of the sticker hung onto every one of the heat-spreaders. So I hit it with more alcohol before painting.
Moving onto paint, I began by taping the area where the modules contact the heat-spreader, I used normal tape here as I couldn't find enough masking/painters tape. You might be able to see this in the pic below (it's not very clear).
I then took it all outside to the 'multi purpose utility area' a well ventilated yet not too windy or dusty space to lay down the paint. Below is what I got after one coat.
Two Coats Three Coats
I'm really happy with the result, however I am fully aware that it is not perfect. If I were to do this again I would be more patient and apply more, lighter coats with a much shorter interval to attain a smoother finish. I would also not tear a bit of cardboard nearby to make a support raining fibres all over the drying paint...
Onto the stickers!
Since I stuck them onto a smooth surface I could peel them off fairly easily and apply them back onto the heat-spreaders to really finish them up. Unfortunately some of the corners would not stick down so I applied some super glue and pushed then corners down with a cotton bud/que tip.
Now to put them back together.
Here I cut up the TIM into rectangles appropriately sized to cover the memory modules, I used larger rectangles for the other side with the plastic plate thingy. I peeled off the protective layers on one side of the adhesive tape rectangles, applied them all to the RAM before peeling off the layer on the other side (now facing up) and lining up the heat-spreaders.
Thanks for taking a look at this little project.
If you'd like anything clarified or want me to add some extra detail, let me know.
In the spoiler below are some pictures of the system both before and after this mod.
-
 Robert__White got a reaction from Damascus in I painted my RAM white.
Intro
(skip if you don't care about WHY I did this)
Hi all, just wanted to share the process I went through when painting my RAM as I'm really happy with the result.
I bought a Cerulean blue kit when I built the first iteration of my PC because it matched the motherboard I bought (Asus M5a97 r2.0). The change of colour was first conceived moments after I upgraded to a 4790k and a Krait edition motherboard yet I still wasn't convinced it was necessary as only a tiny bit of the ram was showing. That was until one of the heat-spreaders started to fall off. It also gave me the opportunity to mess with stuff sooo...
Kit List
Paint: Kobra Paint's pure white - semigloss in one of their low pressure aerosols. TIM: Akasa thermal adhesive tape Alcohol - Hexeal Chemicals 99.9% Isopropyl alcohol Masking/Painters tape - In the end I used normal, clear tape. I got the paint, TIM and alcohol from amazon.
Work Log
I first carefully pried the heat spreader off of the RAM modules, the side directly touching the (single sided) PCB came off really easily as they were the ones nearly falling off. The other sides were adhered to what seems to be a strip of acrylic fixed to the PCB and were more difficult to remove, I spent a long time and just about managed it using just my fingers to minimise bricking potential. I didn't take any pictures of this as it didn't strike me as an interesting step. The adhesive Corsair used left some nice residue that took a while to get rid of with 99.9% alcohol, again; no pics for this dull step.
Following the clean I used a hairdryer to warm the adhesive beneath the stickers, this allowed me to peel them off and stick the to a sheet acrylic (I think) from an old laptop screen. There was a tiny bit of residue where the last part of the sticker hung onto every one of the heat-spreaders. So I hit it with more alcohol before painting.
Moving onto paint, I began by taping the area where the modules contact the heat-spreader, I used normal tape here as I couldn't find enough masking/painters tape. You might be able to see this in the pic below (it's not very clear).
I then took it all outside to the 'multi purpose utility area' a well ventilated yet not too windy or dusty space to lay down the paint. Below is what I got after one coat.
Two Coats Three Coats
I'm really happy with the result, however I am fully aware that it is not perfect. If I were to do this again I would be more patient and apply more, lighter coats with a much shorter interval to attain a smoother finish. I would also not tear a bit of cardboard nearby to make a support raining fibres all over the drying paint...
Onto the stickers!
Since I stuck them onto a smooth surface I could peel them off fairly easily and apply them back onto the heat-spreaders to really finish them up. Unfortunately some of the corners would not stick down so I applied some super glue and pushed then corners down with a cotton bud/que tip.
Now to put them back together.
Here I cut up the TIM into rectangles appropriately sized to cover the memory modules, I used larger rectangles for the other side with the plastic plate thingy. I peeled off the protective layers on one side of the adhesive tape rectangles, applied them all to the RAM before peeling off the layer on the other side (now facing up) and lining up the heat-spreaders.
Thanks for taking a look at this little project.
If you'd like anything clarified or want me to add some extra detail, let me know.
In the spoiler below are some pictures of the system both before and after this mod.
-

.thumb.jpg.94f4ebc6714f0921314e56fdba4a05bf.jpg) Robert__White got a reaction from ARikozuM in I painted my RAM white.
Robert__White got a reaction from ARikozuM in I painted my RAM white.
Intro
(skip if you don't care about WHY I did this)
Hi all, just wanted to share the process I went through when painting my RAM as I'm really happy with the result.
I bought a Cerulean blue kit when I built the first iteration of my PC because it matched the motherboard I bought (Asus M5a97 r2.0). The change of colour was first conceived moments after I upgraded to a 4790k and a Krait edition motherboard yet I still wasn't convinced it was necessary as only a tiny bit of the ram was showing. That was until one of the heat-spreaders started to fall off. It also gave me the opportunity to mess with stuff sooo...
Kit List
Paint: Kobra Paint's pure white - semigloss in one of their low pressure aerosols. TIM: Akasa thermal adhesive tape Alcohol - Hexeal Chemicals 99.9% Isopropyl alcohol Masking/Painters tape - In the end I used normal, clear tape. I got the paint, TIM and alcohol from amazon.
Work Log
I first carefully pried the heat spreader off of the RAM modules, the side directly touching the (single sided) PCB came off really easily as they were the ones nearly falling off. The other sides were adhered to what seems to be a strip of acrylic fixed to the PCB and were more difficult to remove, I spent a long time and just about managed it using just my fingers to minimise bricking potential. I didn't take any pictures of this as it didn't strike me as an interesting step. The adhesive Corsair used left some nice residue that took a while to get rid of with 99.9% alcohol, again; no pics for this dull step.
Following the clean I used a hairdryer to warm the adhesive beneath the stickers, this allowed me to peel them off and stick the to a sheet acrylic (I think) from an old laptop screen. There was a tiny bit of residue where the last part of the sticker hung onto every one of the heat-spreaders. So I hit it with more alcohol before painting.
Moving onto paint, I began by taping the area where the modules contact the heat-spreader, I used normal tape here as I couldn't find enough masking/painters tape. You might be able to see this in the pic below (it's not very clear).
I then took it all outside to the 'multi purpose utility area' a well ventilated yet not too windy or dusty space to lay down the paint. Below is what I got after one coat.
Two Coats Three Coats
I'm really happy with the result, however I am fully aware that it is not perfect. If I were to do this again I would be more patient and apply more, lighter coats with a much shorter interval to attain a smoother finish. I would also not tear a bit of cardboard nearby to make a support raining fibres all over the drying paint...
Onto the stickers!
Since I stuck them onto a smooth surface I could peel them off fairly easily and apply them back onto the heat-spreaders to really finish them up. Unfortunately some of the corners would not stick down so I applied some super glue and pushed then corners down with a cotton bud/que tip.
Now to put them back together.
Here I cut up the TIM into rectangles appropriately sized to cover the memory modules, I used larger rectangles for the other side with the plastic plate thingy. I peeled off the protective layers on one side of the adhesive tape rectangles, applied them all to the RAM before peeling off the layer on the other side (now facing up) and lining up the heat-spreaders.
Thanks for taking a look at this little project.
If you'd like anything clarified or want me to add some extra detail, let me know.
In the spoiler below are some pictures of the system both before and after this mod.
-
-
 Robert__White got a reaction from Arcanekitten in I painted my RAM white.
Intro
(skip if you don't care about WHY I did this)
Hi all, just wanted to share the process I went through when painting my RAM as I'm really happy with the result.
I bought a Cerulean blue kit when I built the first iteration of my PC because it matched the motherboard I bought (Asus M5a97 r2.0). The change of colour was first conceived moments after I upgraded to a 4790k and a Krait edition motherboard yet I still wasn't convinced it was necessary as only a tiny bit of the ram was showing. That was until one of the heat-spreaders started to fall off. It also gave me the opportunity to mess with stuff sooo...
Kit List
Paint: Kobra Paint's pure white - semigloss in one of their low pressure aerosols. TIM: Akasa thermal adhesive tape Alcohol - Hexeal Chemicals 99.9% Isopropyl alcohol Masking/Painters tape - In the end I used normal, clear tape. I got the paint, TIM and alcohol from amazon.
Work Log
I first carefully pried the heat spreader off of the RAM modules, the side directly touching the (single sided) PCB came off really easily as they were the ones nearly falling off. The other sides were adhered to what seems to be a strip of acrylic fixed to the PCB and were more difficult to remove, I spent a long time and just about managed it using just my fingers to minimise bricking potential. I didn't take any pictures of this as it didn't strike me as an interesting step. The adhesive Corsair used left some nice residue that took a while to get rid of with 99.9% alcohol, again; no pics for this dull step.
Following the clean I used a hairdryer to warm the adhesive beneath the stickers, this allowed me to peel them off and stick the to a sheet acrylic (I think) from an old laptop screen. There was a tiny bit of residue where the last part of the sticker hung onto every one of the heat-spreaders. So I hit it with more alcohol before painting.
Moving onto paint, I began by taping the area where the modules contact the heat-spreader, I used normal tape here as I couldn't find enough masking/painters tape. You might be able to see this in the pic below (it's not very clear).
I then took it all outside to the 'multi purpose utility area' a well ventilated yet not too windy or dusty space to lay down the paint. Below is what I got after one coat.
Two Coats Three Coats
I'm really happy with the result, however I am fully aware that it is not perfect. If I were to do this again I would be more patient and apply more, lighter coats with a much shorter interval to attain a smoother finish. I would also not tear a bit of cardboard nearby to make a support raining fibres all over the drying paint...
Onto the stickers!
Since I stuck them onto a smooth surface I could peel them off fairly easily and apply them back onto the heat-spreaders to really finish them up. Unfortunately some of the corners would not stick down so I applied some super glue and pushed then corners down with a cotton bud/que tip.
Now to put them back together.
Here I cut up the TIM into rectangles appropriately sized to cover the memory modules, I used larger rectangles for the other side with the plastic plate thingy. I peeled off the protective layers on one side of the adhesive tape rectangles, applied them all to the RAM before peeling off the layer on the other side (now facing up) and lining up the heat-spreaders.
Thanks for taking a look at this little project.
If you'd like anything clarified or want me to add some extra detail, let me know.
In the spoiler below are some pictures of the system both before and after this mod.
-
.png "Funny")
-
Robert__White reacted to nicklmg in Tesoro Excalibur v2 & Sagitta Spectrum Giveaway
We are bringing you guys another awesome giveaway today thanks to our friends over at Tesoro! They are giving away:
THREE units of their Excalibur v2 keyboard (purchase link: http://bit.ly/1mIFiE0)
and
THREE units of their Sagitta Spectrum mouse (purchase link: http://bit.ly/1WsEf7c)
But how do you win one for free?
As usual, entry is super simple:
1. Comment below telling us which product you want to win and why you want it.
2. Follow Tesoro on Twitter at https://twitter.com/tesorotec
and
3. Continue watching the awesome content we produce (we can't actually track that, but hey, even if you don't like the videos we'll probably have more giveaways at some point... ).
This is a worldwide giveaway with no age restrictions.
Entries will close in one week, on 3/11/2016. Winners will be selected soon after entries close, individually, by random draw, and will be contacted by this account, here on the forum.
Best of luck to all who enter!
EDIT: Yes this announcement is late, I apologize.
Anyway, WINNERS!!
Sagitta:
@BroliviaWilde
@AbsoluteFenrir
@xwboy
Excalibur v2:
@RaTheWitcher
@LimeFloss
@brodech2
Congrats to the winners, and best of luck to everyone else in the next giveaway!
.thumb.jpg.bc7c5e1af01b0fd70ba69d920f0836a4.jpg)


.thumb.jpg.94f4ebc6714f0921314e56fdba4a05bf.jpg)
