


Arkratos
-
Posts
71 -
Joined
-
Last visited
Reputation Activity
-

 Arkratos reacted to Rosinbole in B L A C K B I R D
Introduction
Scratch built case specifications:
7.23L excluding raised sidepanels
8.97L including raised sidepanels
100% anodized CNC milled aluminum structure
- main structure will be entirely 12mm panels
- inside structure will be 3mm panels
2x 4mm thick tinted tempered glass panels
Entirely assembled with metric countersunk-
and metric thumb-screws
Hardware specifications:
Custom modded Asus X470-i motherboard
AMD Ryzen 7 2700x CPU
2X8GB of 3GHz G.Skill TridentZ RGB
Gigabyte GTX 1070 MINI ITX OC 8GB
Samsung 512GB 950 PRO M.2 NVME SSD
450W G-unique Archdaemon + unlimited brick combo as power supply
Watercooling loop:
Alphacool Eisbaer LT solo
Alphacool NexXxoS UT60 triple 80mm X-Flow Radiator
(3x) Noiseblocker NB-BlacksilentPRO PCP 4-pin PWM 80x15mm fans
Exclusively low profile koolance fittings
Koolance QD3 quick disconnect fitting for filling, topping off, and draining
Worry not, for the build log will soon begin!
Thanks to Josh of NFC for lending me his beautiful skyslot design for this project!
-
Arkratos reacted to Rosinbole in B L A C K B I R D
I've built and used the PC in the state it was in in the original post for quite a bit (even though I haven't been good at updating the build logs), and I've made quite a bit of changes - both performance and usability wise. Among the changes are:
A completely new front panel design allowing for substantially larger fans and incredibly improved airflow. Top and bottom covers on two structural pieces instead of single solid panels on the top and bottom. This eases assembly by a considerable amount.
I'm also thinking about adding the GPU into the loop by converting it into a single slot card with a waterblock and adding a slim 120mm rad with a 15mm fan behind it. One thing at a time though.
I'm waiting for some new hardware to fit on the new front panel design (should arrive in the coming week), so for now I've made a slideshow of the assembly to please your eyes. Because I'm only home in the weekends, I saw no use in building the entire PC to "completion" just to disassemble it again on saturday when I come home. This is only to give and idea of how the case is designed and built.
The case assembled
Notice that the screws holding the radiator assembly together are too long - this is because I'm waiting for thicker fans to arrive.
The assembly
Just for kicks, I laid most of the hardware and all of the case components out on the floor. Don't worry, no PCB's are touching carpet, and I took proper care when assembling the PC.
I will start by assembling the front panel. This is the lower front panel part in the new design with the powerbutton mounted.
The lower half of the radiator mount is mounted to the lower front panel assembly (had to split the rad mount because of my printers print volume).
The process is repeated for the upper half of the front panel.
Here comes the hard part. The front panel has to be assembles with the fans, fan covers, two halves of the front panel, and radiator all "floating" in 3D space before the parts can be secured with a set of long screws. With the new front panel design, I've made room for 25mm fans. Those will be put in when they come in the mail.
Now the top and bottom structural pieces must be assembled. For clarification, this is the top part.
Process is repeated with the bottom part.
Sidepanel mounts are assembled on to the top and bottom.
The case feet are mounted on the bottom panel.
The bottom structural piece can now be mounted to the front panel assembly.
The GPU-backplate is mounted on the bottom structural piece.
The back panel is mounted to the case.
The top structural piece is mounted to the case.
The motherboard tray is mounted to the case.
Struts are secured between the GPU-backplate and motherboard tray. This adds an incredible amount of stability.
Top cover is mounted on the case.
Bottom cover with the case feet attached is mounted on the case.
Motherboard is mounted.
GPU is mounted.
TG sidepanels are put on.
-
-
 Arkratos got a reaction from Tobleh in [Build Log] King Ghidorah, 3 Gamers - 1 Threadripper
Here is a video of it at PDX Lan:
-
Arkratos reacted to Koverhar in Mahogany Desk, Build of the Year 2018
Build is finished now. Thanks for following me. Time to hope for a mod of the month nomination! You've been a lovely community for my first project and I will continue with this hobby and take it further. I hope you will follow then again as you did now.
Pictures in no particular order
Husky bongs
-
 Arkratos got a reaction from Izzdy in [Build Log] King Ghidorah, 3 Gamers - 1 Threadripper
Time for some photos! (Part 1)
-
 Arkratos got a reaction from S0m3guy in [Build Log] King Ghidorah, 3 Gamers - 1 Threadripper
Nope, just some of the outer photos were taken as multiple photos with different lighting and exposure and then layered to get all the different levels of detail. That was the photographer's work.
And just to let everyone know the scale pattern is the exact same on the inside as the outside. Just the outside had fancy studio lighting lightening it up.
Edit: Oh and the monitors did have their images put on via post production. TN panels don't photograph well at all.
-
Arkratos got a reaction from S0m3guy in [Build Log] King Ghidorah, 3 Gamers - 1 Threadripper
Time for some photos! (Part 1)
-
Arkratos got a reaction from S0m3guy in [Build Log] King Ghidorah, 3 Gamers - 1 Threadripper
I got the wallpaper from the artist, it has a transparent background so I've been toying with it, but I figured it was appropriate to update the banner!
Credit to Max Davenport for the amazing art!
-
Arkratos got a reaction from S0m3guy in [Build Log] King Ghidorah, 3 Gamers - 1 Threadripper
Corsair has started teasing the project on Twitter and Facebook. I highly recommend checking them out as I'm waiting for them to do a tease before I follow up with pictures here. Expect photos to trickle in here over the next week or so.
Also I have a great announcement for everyone asking about the virtualization. IT WAS A BREEZE on unraid. Like literally only took a few hours. I'll post a video soon, but I was floored with how easy the menus made it. You can find unraid here: https://lime-technology.com/ But it's really just a commercial flavor of linux running KVM, so if you want to spend a little more time and go the more hands on approach you should be able to pull this off on whatever your favorite linux distro is with KVM for the hypervisor.
-
Arkratos got a reaction from S0m3guy in [Build Log] King Ghidorah, 3 Gamers - 1 Threadripper
Remember that scale pattern I made for the GPU backplates and the pass through plate? Well it's back with a vengeance...
It's on the case...
Even around my HDMI and power cable pass throughs
Around the window
Even took the monitor arms to get wrapped since the paint didn't work
I mean, King Ghidorah is one color and nothing but scales... So it is all accurate to the character!
A few minor details I forgot to get photos of including things like the power button, the minor cables, etc.
And the photo shoot took place
And a sneak peak of the back
Fancy photos coming soon, they are off to post production! and WOW the raws even look amazing. I'm working on the software side in preparation for Dreamhack Austin, if I don't have it working by then I still have time before PDX Lan but at least the physical aspect of the build is done! I'll update as I work on the software, but I really need a few days to catch my breath!
-

 Arkratos got a reaction from 8uhbbhu8 in Mahogany Desk, Build of the Year 2018
That's some intense tubing!
-
Arkratos reacted to Mr_Armageddon in Project Ecthelion: Thermaltake Tower 900 Build, Dual Loop Hardline Liquid Cooling
Stats Screen & Case Lighting
Now that the bulk of the components have been installed in the system, I wanted to add a small display screen to the case to show loads and temps at a glance using NZXT CAM as a dashboard. Same idea that I used on my current build, Project Open Core as seen below, although the display on that case is larger than what we will be using with the Tower 900.
We are also using NZXT HUE+ to control the exhaust fans and RGB LED strips on the case, so it will all tie together nicely. I wasn't sure what size screen to go with at first. A 5.8in photography display would have fit the space perfectly, but I couldn't find one that had the display inputs located in an ideal place to mount the screen, and I was also worried about it being too small to be useful unless directly in front of the screen. After careful measurements, I decided on a 7in display, which is a tad larger than the space it would be mounted on the case, but should still look great. Here is the link to the display I used for this build. (Toguard 7 inch HDMI Monitor)
As mentioned before, I didn't want any cables showing for the display, so I needed a right angle HDMI input, and had to make a 12v, 5pin Molex Plug to Barrel Plug (Rt Angle) converter as well. The process is pretty simple, and allows for the display to turn on with the PC, so there aren't any additional button presses needed.
Now that the power and display signal has been addressed, time to mod the look of the screen to better match the overall build theme... and hide the ugly buttons on the bezel. Before I started "modding" the display, figured I should probably test it out to verify it was in working order. Plugged it in to one of my RetroPie systems, and everything came up just fine.
Picked up a matte white vinyl with adhesive backing that should do the trick. Measured the dimensions of the outer display and screen, and transferred the measurements to the back of the vinyl. Then carefully used a hobby knife and metal ruler to cut where needed.
With the cutouts made, I started to slowly wrap the vinyl around the display, being extra careful around the edges. This particular wrap is pretty flexible, and was easy to work with. Seems to have good adhesion as well, which is plus.
With the wrap installed, I worked any lingering bubbles out and then mounted the display to the case using some extremely strong double-sided tape. It feels really secure, so going to leave it like that for now. Here is a sneak-peak at what CAM will look like as a dashboard on this display.
With the Stats Screen up, moving on to the Case Lighting. In most of my builds, I prefer to leverage the built in RGB LED motherboard headers to control all aspects of system lighting, to get consistent colors and brightness. With this build, the user will be working in a multi-OS environment, and didn't want the RGB elements to be dependent on an OS specific application, such as ASUS Aura in Windows. That is the reason for using the HUE+ unit. Once the colors have been selected, they will stay as-is, even when booting into a different Operating System. In addition to controlling the fans, the HUE kits also have some pretty nice RGB LED strips, so it should work out really well once everything is installed and configured.
In the picture to the right, just showing as a reminder to always line up the small arrow with the voltage input on these strips. Usually it will be 12v, but in the case of the NZXT Strips, 5v is used.
With that completed, here is a quick shot of the the case lighting in effect!
Still have a lot of work to do with the power cables, and verifying the loops are leak-proof, then adding the color to the liquid, but getting closer to being done.
.
-
Arkratos reacted to Lady Fitzgerald in Roisin Dearg (a Scratch Built "Modular" Case)
This morning was...let's just call it weird. I spent four hours installing 5.25" bay devices that should have taken only an hour but didn't because the devices that fit the last time I test fitted them, didn't fit this (mutter, mutter, mumble, mumble!). In the process of getting everything to fit, I managed to break the latch on one of the storage drawers. The drawer itself works fine and i could just order a new drawer for the case that has the latch but I was mad enough by then, I just replaced the whole thing with a blank 5.25" bay cover. There was another problem I ran into I'll discuss later
That's all I got done today. I didn't sleep well last night so, by the time I got through horsing around with this, I was pooped and, after lunch, I crashed. Enough with the carping; here are the pictures.
First, all the devices installed. The top one is the switch panel but I haven't installed the switches yet plus I need to make up cables for them. There is an ODD (Optical Disk Drive) in there (just above the USM drive) but you can't see it because I "stealthed" the drive and I can't open it until the computer is up and running.
Hiding behind door number one is the front I/O panel. I got a bit of a shock when I opened the door because I converted one to have two USB 3.0 ports and two USB 2.0 ports (I have a few spares since it's apparently being or has been discontinued and I use the door sections for other purposes). Instead, it had four USB 3.0...(oh, excuse me, I forgot a bunch of morons renamed USB 3.0 to USB 3.1 Gen 1)...make that four USB 3.1 Gen 1 ports.
After taking the photos, I fixed the problem. However, somewhere in the umpteen boxes I have of spare parts is another one that has been already converted. There is an eSATA port in there as well but, since I'll never need it, I filled it with a handleless dus cover and cut the cable off the back.
Behind door number three is the dual card reader for SD and micro-SD cards. The missing door number two is supposed to be between doors one and three (duh!) and was supposed to have two USB 3.1 Gen 2 ports fed from the rear I/O ports on the MOBO but I had problems getting compatible hardware (hardware has been slow to catch up with technology) so, for now, I have a blank 5.25" bay cover there.
Just below door #3 is the stealthed ODD. Below that is the USM (Universal Storage Module) bay. It takes an external 2.5" drive enclosure that can be plugged into the bay or used with a USB 3.1 Gen 1 cable. I use USMs with SSDs in them for backing up my notebook and transferring data between the notebook and my desktop machine. In a pinch,if I ever need a second ODD (don't laugh, I use ODDs for ripping CDs, DVDs, and BDs), I can swap it out with the USM bay.
These are the 2.5" trayless hot swap bays. I will use them for updating up to four backup drives at a time.
These are the eight 2.5" bays for my internal data drives.
Since these drives get pretty much permanently installed and I needed a way to dramatically reduce the amount of air that could escape or be drawn in through the front (the bays have fans in the back and I modified the bays so air flows in one fan travels from one side of the bay to the other side where the other fan can draw the air back out; I have the option to turn off the fans if they aren't needed), I stealthed them with cut down blank covers held on with magnetic tape. A piece of steel inside the center of the cover allows me to use a child lock magnetic key to remove the covers.
Here is a shot of the backside of the 5.25" bay. I need to make up power jumper cables to feed the devices from the power strip and route the I/O cables so that will keep m busy for a while. I just ordered a USM 3.1 Gen 1 header to two type A female connectors adapter cable to feed the the card reader. I also need to order some cable management clips for corralling the I/O cables. This is the side of the computer not normally seen so I'm just going for easy organization and reorganization as changes are made and reasonably neat and compact cable management rather than pretty but bulky individually sleeved cables.
The way this is set upo, I can move 5.25" devices around without having to make new power cables. I can also quickly add or remove devices without having to shut down the computer and tear it apart.
I'll be stuck on making, sleeving, and managing cables for a while.
-
 Arkratos got a reaction from Glennieboyyy007 in [Build Log] King Ghidorah, 3 Gamers - 1 Threadripper
Time for some photos! (Part 1)
-
Arkratos reacted to Damascus in [Build Log] King Ghidorah, 3 Gamers - 1 Threadripper
Wow, looks like a render lol
-
 Arkratos got a reaction from EunSoo in [Build Log] King Ghidorah, 3 Gamers - 1 Threadripper
I got the wallpaper from the artist, it has a transparent background so I've been toying with it, but I figured it was appropriate to update the banner!
Credit to Max Davenport for the amazing art!
-
Arkratos got a reaction from EunSoo in [Build Log] King Ghidorah, 3 Gamers - 1 Threadripper
Corsair has started teasing the project on Twitter and Facebook. I highly recommend checking them out as I'm waiting for them to do a tease before I follow up with pictures here. Expect photos to trickle in here over the next week or so.
Also I have a great announcement for everyone asking about the virtualization. IT WAS A BREEZE on unraid. Like literally only took a few hours. I'll post a video soon, but I was floored with how easy the menus made it. You can find unraid here: https://lime-technology.com/ But it's really just a commercial flavor of linux running KVM, so if you want to spend a little more time and go the more hands on approach you should be able to pull this off on whatever your favorite linux distro is with KVM for the hypervisor.
-
Arkratos got a reaction from EunSoo in [Build Log] King Ghidorah, 3 Gamers - 1 Threadripper
Remember that scale pattern I made for the GPU backplates and the pass through plate? Well it's back with a vengeance...
It's on the case...
Even around my HDMI and power cable pass throughs
Around the window
Even took the monitor arms to get wrapped since the paint didn't work
I mean, King Ghidorah is one color and nothing but scales... So it is all accurate to the character!
A few minor details I forgot to get photos of including things like the power button, the minor cables, etc.
And the photo shoot took place
And a sneak peak of the back
Fancy photos coming soon, they are off to post production! and WOW the raws even look amazing. I'm working on the software side in preparation for Dreamhack Austin, if I don't have it working by then I still have time before PDX Lan but at least the physical aspect of the build is done! I'll update as I work on the software, but I really need a few days to catch my breath!
-
Arkratos reacted to Koverhar in Mahogany Desk, Build of the Year 2018
Time for final assembly. Bit time consuming but fun So everything went out and the wood got polished a final time with some carvarnish and canvas. Then the cable combs were predrilled and installed. Then taken out again Then panels were put in and the cables thrown there. Bad picture but that small box keeps all the 230 volt. So we get cables for the screen, DAC and psu while using minimal space After a few hours of getting frustrated the combs were installed. This is a 2 man job:D one guy holding the comb while the other inserts 72 cables in order Still got to watercut a comb or 2 for the 24pin atx and satapower so this is a bit of a mess still. Good enough to get running though. Apologies for those expecting the newest coolest gpus etc. This is my old trusted 3930k-i7 and 2 gtx 980s. I trust this rig and there wasn't money to buy brand new stuff Work continues but not that much longer left -
Arkratos got a reaction from S0m3guy in [Build Log] King Ghidorah, 3 Gamers - 1 Threadripper
I did myself a favor and got some HDMI extensions, made a few holes, and they turned out pretty good.
Ok, hurdles aside the internals are done. I assembled it and had an interesting problem I've never encountered... I was given a power button from a friend that was wired backwards... It was set up so if you weren't pressing it the power pins were connected and if you were pressing they were disconnected.
Moral of the story... If you do the equivalent of holding the power button while trying to post you get errors: C0 sometimes, b5 sometimes, and random shut off during booting...
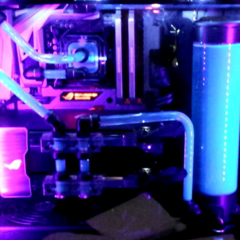
2 days later and 6+ hours to tear down, debug, and rebuild... I present you the cell phone quality photos of the internals!
Check out those scales on the pass thru plate and on the gpus! V1Tech really helped hook me up with their new printer. I think it's either live on their website or will be soon, link in the first post.
I didn't leave myself much room for GPU power... but it worked!
In it's preferred orientation:
And one with LIGHTS (it's a gif so I spoilered it for mobile users):
That lighting is powered by the Corsair commander pro. That thing has a million connections making cable management an interesting endeavor, luckily the back side of this case is MASSIVE.
Last thing to leave you with, the artist sent me another update. I'M SO EXCITED!!!
-
 Arkratos got a reaction from Rosinbole in Mahogany Desk, Build of the Year 2018
That's some intense tubing!
-
Arkratos got a reaction from EunSoo in [Build Log] King Ghidorah, 3 Gamers - 1 Threadripper
I did myself a favor and got some HDMI extensions, made a few holes, and they turned out pretty good.
Ok, hurdles aside the internals are done. I assembled it and had an interesting problem I've never encountered... I was given a power button from a friend that was wired backwards... It was set up so if you weren't pressing it the power pins were connected and if you were pressing they were disconnected.
Moral of the story... If you do the equivalent of holding the power button while trying to post you get errors: C0 sometimes, b5 sometimes, and random shut off during booting...
2 days later and 6+ hours to tear down, debug, and rebuild... I present you the cell phone quality photos of the internals!
Check out those scales on the pass thru plate and on the gpus! V1Tech really helped hook me up with their new printer. I think it's either live on their website or will be soon, link in the first post.
I didn't leave myself much room for GPU power... but it worked!
In it's preferred orientation:
And one with LIGHTS (it's a gif so I spoilered it for mobile users):
That lighting is powered by the Corsair commander pro. That thing has a million connections making cable management an interesting endeavor, luckily the back side of this case is MASSIVE.
Last thing to leave you with, the artist sent me another update. I'M SO EXCITED!!!
-
Arkratos reacted to Koverhar in Mahogany Desk, Build of the Year 2018
Not a lot left no, just gotta get the waterjet to cut out my pipe strengthener bits and get those powdercoated and final assembly can commence. Here's a small sneakpeak -
 Arkratos got a reaction from mikeeginger in [Build Log] King Ghidorah, 3 Gamers - 1 Threadripper
I did myself a favor and got some HDMI extensions, made a few holes, and they turned out pretty good.
Ok, hurdles aside the internals are done. I assembled it and had an interesting problem I've never encountered... I was given a power button from a friend that was wired backwards... It was set up so if you weren't pressing it the power pins were connected and if you were pressing they were disconnected.
Moral of the story... If you do the equivalent of holding the power button while trying to post you get errors: C0 sometimes, b5 sometimes, and random shut off during booting...
2 days later and 6+ hours to tear down, debug, and rebuild... I present you the cell phone quality photos of the internals!
Check out those scales on the pass thru plate and on the gpus! V1Tech really helped hook me up with their new printer. I think it's either live on their website or will be soon, link in the first post.
I didn't leave myself much room for GPU power... but it worked!
In it's preferred orientation:
And one with LIGHTS (it's a gif so I spoilered it for mobile users):
That lighting is powered by the Corsair commander pro. That thing has a million connections making cable management an interesting endeavor, luckily the back side of this case is MASSIVE.
Last thing to leave you with, the artist sent me another update. I'M SO EXCITED!!!


