Search the Community
Showing results for tags 'thermaltake'.
-
Can I replace the stock fans on the nzxt kraken x62 rev 2 with these? https://pcpartpicker.com/product/Wqx9TW/thermaltake-riing-plus-14-rgb-tt-premium-edition-5-fan-pack-632-cfm-140mm-fans-cl-f057-pl14sw-a
-
So I wanna put the thermaltake fans:https://pcpartpicker.com/product/Wqx9TW/thermaltake-riing-plus-14-rgb-tt-premium-edition-5-fan-pack-632-cfm-140mm-fans-cl-f057-pl14sw-a On the this aio cooler:https://pcpartpicker.com/product/NMtWGX/fractal-design-celsius-s36-876-cfm-liquid-cpu-cooler-fd-wcu-celsius-s36-bk
-
Hello, Quick question: How could I remove the printed logos on thermaltake (and bitspower) fittings, like the 90 degree adapters? Is there a way to do so without harming the finish underneath? My initial thought was to use acetone, but Im unsure of its efficacy. Thank you for any assistance!

-
I don't know how to use this forum anymore so the entire post is in a spoiler
- 6 replies
-
- 1
-

-
- yummychickenblue
- mitx
- (and 4 more)
-

thermaltake Thermaltake Riing Plus Fans Compatability with Ryzen
HanTr posted a topic in Peripherals
Hello Guys, Are the TT Riing Plus fans compatible with a Ryzen build using a B350m motherboard? Are there any issues? I'm using an MSI B350M Mortar, planning to a buy the Riing Plus 12 fans in the near future. -
Hello guys! I am looking forward to start a new custom-loop build. Since I have never done this before, I wonder what brand has the most reliable liquid cooling parts. My personal choices lie between EK and Thermaltake after doing some research. TK has good integration with their own products. If I go with TK, I will probably use their new RGB fans and strip. But EK has such a good reputation... And the NZXT Aer fans look just as great. Regardless of the loops, the case choice is either TK the tower 900 or core p7 for me. Cheers!
-
I was wondering if soft tubing would work in the thermaltake 900 case? I currently have soft tubing and I was going to buy more soft tubing and I already have the bitspower compression fittings for soft tubing was wondering if this would actually work or not I have two Rads one is a 360 by 60 Ml and the other is 280 by 60 Ml.. My current build is in the Corsair 760t and I just wanted to spice it up and get a new case that has a little bit more room because the bends on the soft tubing are not the best. What's everyone think of this case with soft tubing
-
Which is the best RGB cabinet for budget below 150$. In my country only cooler master, corsair, thermaltake, nzxt, panteks are available. Which is the best company for gaming cabinet. And a local company called as circle is there. I am planning to buy a ATX motherboard and the cabinet should support 400mm 2 GPU, 160-170mm processor tower cooler.
-

Fan led stays on but the fan stop spinning
ethebigd posted a topic in CPUs, Motherboards, and Memory
I bought 2 Thermaltake Riing last year. They does the job fine to keep my cpu temp down. But I noticed recently than one of them stop spinning from time to time than come back to life. The led stay on all the time no problem... Ive got an Asus Maximus VIII, I use the Pump header for the pumb, cpu fan for one of them and cpu OPT for the other one. The CPU OPT is the one that is causing issue. ALL FANS ARE PLUGGED CORECTLY Anyone have a suggestion. -
I bought 2 Thermaltake Riing last year. They does the job fine to keep my cpu temp down. But I noticed recently than one of them stop spinning from time to time than come back to life. The led stay on all the time no problem... Ive got an Asus Maximus VIII, I use the Pump header for the pumb, cpu fan for one of them and cpu OPT for the other one. The CPU OPT is the one that is causing issue. ALL FANS ARE PLUGGED CORECTLY Anyone have a suggestion.
-
 So.. after a few weeks of going back and forth between some parts and some other decisions (liquid vs air)... I finally ordered parts on Friday. Many arrived Sunday, went to MicroCenter (love that place) to grab some more, case arrived Wednesday, and now just waiting on the cooling parts from performance-pc (big shoutout for to those guys for getting stuff shipped Friday... hope damage from Irma was minimal if at all!). Components: CPU: Ryzen 7 1700x MOBO: Gigabyte Gaming 5 GPU: Gigabyte Waterforce WB edition RAM: 16 GB Corsair Vengeance LPX (DDR-3200) Storage: Crucial MX300 1.1 TB M.2 Crucial MX300 525GB M.2 (using a sata to M.2 adapter. got a KILLER deal on an open box @ micro center) Case: Thermaltake Core P3 Snow Edition PSU: Corsair RMx White 750 Keyboard: Corsair K70 RGB LUX Mouse: Corsair GLAIVE RGB Monitor: LG 34UM58-P OTHER: Corsair Lighting node pro & Fan RGB controller Cooling: Hardware Labs Black Ice Nemesis GTR 420mm in white, Mayhems Pastel white, Mayhems ultra clear tubing, Alphacool 90 degree rotatable compression fittings, ekwb ball valve, thermaltake pacific d5 res w/silent kit, EKWB Gaming x370 mono block, 3x corsair HD140 So I assembled the case this evening, and couldn't contain myself from assembling parts I have. Some of it will come apart for the cooling to go in, but I wanted a general idea of what to expect as far as room and looks. TODO: Install cooling, paint orange accents on GPU white, MJ silhouette sticker on resevoir
-
 Hi all, First time poster here, but long time computer enthusiast and reader of Linus Tech Tips, both on Youtube and these forums. I'm 28 but I built my first computer when I was 16. I've been out of the self-building phase for a while but I just built a brand new setup this past weekend and my specs are: ASUS CROSSHAIR VI HERO (WI-FI AC) AM4 AMD X370 SATA 6Gb/s USB 3.1 ATX AMD Motherboard Ryzen 7 1800X G.SKILL Flare X Series 32GB (2 x 16GB) 288-Pin DDR4 SDRAM DDR4 2400 RAM SAMSUNG 960 PRO M.2 512GB NVMe PCI-Express 3.0 x4 Internal Solid State Drive (SSD) MZ-V6P512BW CORSAIR RMi Series RM850i EVGA GeForce GTX 1080 Ti SC2 HYBRID GAMING Graphics Card Thermaltake Water 3.0 280 Riing Red Edition PWM AIO Tt LCS Certified Liquid Cooling System CL-W138-PL14RE-A NZXT H440 STEEL Mid Tower Case Upon initial build and OS install, I noticed that my CPU temps were hovering around 60C. My BIOS was out of date (v.1201) so I updated using Asus' FlashBIOS utility and updated to the latest 1501 version. I re-checked my temperatures and the CPU went down a bit, but still hovers around 42C at idle. Is this normal for Ryzen 7? I know they potentially run a little hotter than other CPUs, but idling in the low-to-mid 40s doesn't seem to make much sense given the AIO liquid cooler (http://www.thermaltake.com/products-model.aspx?id=C_00003008). I've checked the fan connections on my motherboard and they are all seated correctly. I've attached an image of where I've placed the AIO (pump and fan) connections. I connected both 140mm fans on the cooler to the left two fan headers (CPU_FAN and CPU_OPT) and the pump to the AIO_Pump header on the right. Is this the correct configuration for my Thermaltake cooler? I would assume that, if my pump wasn't working correctly, that the CPU temps would be much higher than even 60C at idle. However, assuming that my pump is correctly working, I figured I would get idle temps hovering around the high 20s to low 30s. Am I correct in my thinking? Or is there something potentially off with my computer and I need to adjust fan and/or other settings? Also, as an FYI, my ambient temperature in Boston, MA is around 68F or 20C right now. Cheers (and thanks in advance for any help), James
-
 Hi guys. My first post here so I thought I'd make it a good one. It's been a dream of mine to build a reservoir and integrate it into the window of a case for some time. I initially went down the path of having someone else (A very well known custom PC builder with a huge Youtube presence) do all of the design work and production for me, but after waiting nine months with no communication from them except to sometimes reply to an email giving me excuses as to why we'd blown out the initial six-week timeframe, I decided to do it myself. Here is where it all started. This was done up in paint hastily as a way to try and visualise what I was going for. Now, I have some design experience and could have done the next step myself, but as a high school teacher I rarely find the time and since we were in the middle of marking season, I decided to outsource the designing to a fantastic case modder in Italy, FlowMods. He was absolutely fantastic, and offered me a more than reasonable price. From top to bottom it measures at 570mm. Go measure that. YOU SEE THAT?! That's absolutely huge! So, now I had to source the case and acrylic block for machining. The block itself was actually quite cheap, but the shipping. Good lord. It was more than the damn block! And yet, it was still the cheapest option I had. From Sydney to Canberra it cost me $57 to ship it. The block itself was only $45. Here it is, and where it'll be sitting on the case window. My next job was to find a CNC shop with the equipment to machine acrylic this size. I eventually came across a shop called "Devilish Racing", who despite the name mostly built custom equipment for the Australian Defence Force. Naturally, Defence work took priority, so after about two and a half months I dropped by and picked up the freshly machined reservoir, threaded for M4 bolts to hold it to the window and G1/4 for the water cooling connections. He even cut the holes in the window for me, which was nice of him. So that was the easy part. Next came the polishing. This stage took about six hours in total. I needed a few things. 600 and 1200 grit sandpaper. Kerosene. Most people wet sand acrylic with water, but kerosene is more viscous than water, so I drowned my sandpaper in that instead. Learn from my mistakes and work in a well-ventilated area, because I started seeing my cat Naan Bread (Yes that's her name) talk to me about half an hour in. A drill and polishing attachments (Reasonably cheap). Brasso. WD-40. Plastx headlight polish. FW1 cleaning wax. As you can see, the reservoir was quite cloudy from the CNC process. So my first step was to hit it with my kerosene drenched 600 grit sandpaper. This took about an hour. As you can see, it looks much clearer already. Next step, 1200 grit sandpaper and even more kerosene. Another hour :'( The improvement was a bit harder to see this time, but it felt MUCH smoother. After this came the brasso and drill polishing kit. Thankfully this was nowhere near as physically taxing as the sanding and significantly faster. So it looks much clearer now. Brasso is fantastic stuff and was recommended to me by Ross at Devilish Racing (the CNC shop that produced the reservoir). The only problem was that it gunked up the threads. This was something I would have to deal with a little later on. So, this is where I used the Plastx. The reservoir was much clearer already, but still cloudy in some areas, especially those the polishing attachments couldn't reach. I neglected to take a photo of the reservoir immediately after hitting it with the Plastx, but you can see the impact it had in this photo where I'm cleaning out the threads with WD-40. So I found that even though I was doing this part by hand, I couldn't quite clear up the internal corners. I grabbed my Dremel kit and attached the small polishing tools to finish that job. Something I once again forgot to take a photo of. But here is the reservoir after, about to get another hit from some Plastx. As you can see, it's already very clean at this point. Following this, I gave it a final polish with some FW1 cleaning wax. Naturally, I only applied this to the outside. You don't want wax residue flowing through your loop. Here she is, looking crystal clean. Polishing is now complete, thank god. So with the polishing out of the way I now had to measure and cut the O-Ring cord to fit. Please ignore my pyjamas. You can usually use superglue for this bit, but I opted for an O-Ring connecting specific glue (Sureloc SL406 Cyanoacrylate). Here it is fused together. Looks good, hey? Nearly done now. The first step of sealing it up was to bolt down a select few of the screws so that everything was lined up. This is the part where I had to be most careful. If I overtightened a single bolt, the entire thing would be ruined. I set my electric screwdriver to its lowest torque setting so that at the slightest touch of resistance it would automatically stop. I lightly tightened each bolt three times after they had been fully inserted so ensure that there would be no leaks. I cannot stress enough how careful you have to be here. As soon as you feel resistance, move on and come back around to it. After tightening every single bolt in the first pass I found that the bolts I'd first done now needed additional tightening. Here it is all fastened and ready to begin filling for the leak test. SUCCESS! Here she is! Finished at last.
- 1 reply
-
- 3
-
-
- water cooling
- thermaltake
- (and 3 more)
-
Hi guys! I'm planning to upgrade my case, as I have some spare money. My rig is quite good, but operates on air cooling. I want something with high airflow so after a long research I've found two cases which I like. Corsair Air 540 and Thermaltake Core X9. Is anyone of you have one of these and can tell me advantages and disadvantages? Thanks! Edit - My rig is in my profile, if anyone of you is curious :>
-
Hey guys, So I have somewhat finished the first iteration of this build, however there are updates and changes yet to come. I wanted to do something I hadnt seen done very much. After a lot of deliberation over which case to use as a platform i landed on the Core P3. I love the modularity and flexibility of the case, and I wanted the challenge of making something unique from such a minimal chassis. I also wanted to do this without breaking the bank completely. Here is what I have so far: Motherboard: Asus x99 a-ii CPU: Intel i7 6850k RAM: G.Skill Trident Z RGB 16gb 3000MHz kit GPU: GTX 1080 Founders (currently a gtx 780 until the block and back plate come in. PSU: EVGA 650 GS I am not going to list all of the water cooling bits since it isnt finished yet but i will say that i am currently running a swiftech apogee drive ii cpu water block/ pump combo, and a single xspc ex360 radiator. This was my first time doing hardline tubing and i couldnt be happier with how it turned out. I did some intricate bends just for added aesthetics. If there are any questions about the build or anything please feel free to ask. I do have a second 360mm rad that will be going into the case but my creativity has yet to yield a good way to mount the second. I do have a few solid ideas kicking around tho. For now here are some crappy pics. And one before i did the water cooling. Ill be taking some better quality pics soon hopfully. Maybe tomorrow. lol JRob
-
 Hey guys, So I have somewhat finished the first iteration of this build, however there are updates and changes yet to come. I wanted to do something I hadnt seen done very much. After a lot of deliberation over which case to use as a platform i landed on the Core P3. I love the modularity and flexibility of the case, and I wanted the challenge of making something unique from such a minimal chassis. I also wanted to do this without breaking the bank completely. Here is what I have so far: Motherboard: Asus x99 a-ii CPU: Intel i7 6850k RAM: G.Skill Trident Z RGB 16gb 3000MHz kit GPU: GTX 1080 Founders (currently a gtx 780 until the block and back plate come in. PSU: EVGA 650 GS I am not going to list all of the water cooling bits since it isnt finished yet but i will say that i am currently running a swiftech apogee drive ii cpu water block/ pump combo, and a single xspc ex360 radiator. This was my first time doing hardline tubing and i couldnt be happier with how it turned out. I did some intricate bends just for added aesthetics. If there are any questions about the build or anything please feel free to ask. I do have a second 360mm rad that will be going into the case but my creativity has yet to yield a good way to mount the second. I do have a few solid ideas kicking around tho. For now here are some crappy pics. And one before i did the water cooling. Ill be taking some better quality pics soon hopfully. Maybe tomorrow. lol JRob
 -
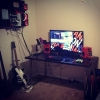
So I built a new computer last week, currently I'm looking at investing in a few fans, maybe 4/5 fans to put in the case for better airflow and some LED lighting for effect. I would prefer 140mm fans just to use up all the space available for fans. My parts list is: PCPartPicker part list: https://uk.pcpartpicker.com/list/vFfNCy CPU: AMD - Ryzen 5 1600 3.2GHz 6-Core Processor Motherboard: MSI - B350M GAMING PRO Micro ATX AM4 Motherboard Memory: Corsair - Vengeance LPX 16GB (2 x 8GB) DDR4-3000 Memory Storage: Samsung - PM961 128GB M.2-2280 Solid State Drive Storage: Seagate - Barracuda 1TB 3.5" 7200RPM Internal Hard Drive Video Card: Asus - GeForce GTX 970 4GB STRIX Video Card Case: Thermaltake - Core V21 MicroATX Mini Tower Case Power Supply: SeaSonic - S12II 620W 80+ Bronze Certified ATX Power Supply I'm not sure if I should go with white LEDs or Red. I light the brightness of the White and as for red, it's basically the theme that's there right now since the Motherboard glows Red and the memory is red but white could be nice to light that all up. Opinions would be awesome. I've added some photos below.
-
Hi, I bought a cpu online cheap and it came with the Corsair H115i cooler. Pcpartpicker says it isn't compatible with the thermaltake level 10 gt. I was just wondering whether anyone has managed to make it work despite the large reservior. If not I think i'll go with the noctua NH-D15, thoughts?TIA
-
 Hi, I'm considering delidding my 4690k to replace the intel thermal paste with that coolabratory liquid ultra stuff. I currently use a Thermaltake Water 3.0 Riing RGB 240 cooler with the thermal paste that was pre applied so may also change that. Will the overclock be worth all the hassle? what more can I expect? Attached image is current overclock running Prime95 small FFT for a few minutes.
-
I have a Thermaltake Toughpower Cable management 750w SLI/Crossfire ready PSU. Jonnyguru rated it 9.5/10 and also recommended it. I'm planning to get a 1070 equivalent Vega card(If one comes out) and I'm on a tight budget. It may use 2x 8 pins but my PSU has 1x 8pin and 2x 6 pins. Is it okay if I use an 2x 6 pins to 1x 8pin adapter?
-
Hi , I am planning on buying a 240mm watercooling kit for my cpu in a XB evo, though I am really torn between the EK-KIT L240 (R2.0) and the Thermaltake Pacific CL-W063-CA00BL-A DIY LCS RL240 Water Cooling Kit. At first sight it looks like the Thermaltake one is higher quality, with d5 vario and the thick radiator (made out of zinc btw) but I would like to hear your thoughts guys on this too. Thanks!
-
 Im still new to pcs and liquid cooler and AIOs . So my friend told me that my AIO cooler(Seidon 240V) would be kinda short if i would put it on top of case but he is not sure so im kinda panicking right now http://www.coolermaster.com/cooling/cpu-liquid-cooler/seidon-240v/ - cooler http://www.thermaltake.com/products-model.aspx?id=C_00003011 - case Please help because i dont now what to do or how to do. So yeah please help. This is gonna be my build Intel i7-7700kCooler Master - Seidon 240V Liquid AIOGigabyte GA-Z270X ultra gaming ATXCorsair Vengeance LPX 16(2x8) 2666 mhz Seagate - Barracuda 3TB 3.5" 7200RPM MSI GTX 1060 6G + 9GBPS gaming XThermaltake view 31 TG case
 -
I'm currently upgrading from a upgrading from a hd7950 to a gtx 780 (I plan to overclock) and so I need to buy a new power supply I was wondering which of these are better Thermaltake Toughpower TPD 750M https://m.newegg.com/products/N82E16817153198 Corsair CX650 (2017) https://m.newegg.com/products/N82E16817139200 I'm open to other options if neither of these are good
-
this is the build:Intel i7-7700k LGA 1151Cooler Master - Seidon 240V Liquid AIO LGA 1151 240mmGigabyte GA-Z270X ultra gaming ATX LGA 1151 288 pin Corsair Vengeance LPX 16(2x8) 2666 mhz 288 pin Seagate - Barracuda 3TB 3.5" 7200RPM Gigabyte GTX 1060 9GBPS Aorus edition H=38 L=280 W=111 mm https://www.gigabyte.com/Graphics-Card/GV-N1060AORUS-6GD-rev-10#sp Thermaltake View 31 TG because its a nice case + its cheap enough for me http://www.thermaltake.com/products-model.aspx?id=C_00003012 I know that the CPU and mbd are compatable and so is the cooler because its a socket lga 1151 I was thinking of putting the cooler on the top and myb buying 1 more fan for the front side. So i am still new to pc-ing i already have a build at pcpartpicker.com( https://pcpartpicker.com/list/9ggfLD ) but it says The Thermaltake - View 31 TG ATX Mid Tower Case supports video cards up to 420mm long, but video cards over 278mm may block drive bays. Since the Gigabyte - GeForce GTX 1060 6GB 6GB Xtreme Gaming Video Card is 280mm long, some drive bays may not be usable. which i dont know what is mean so can you please explain it to me in understandable language or at least try to explain But i still dont know what is everything that needs to be compatable so i need your help with that Bassically idk anything about pc when it comes to compatibility so that why i am writting this here . So yeah.
-
I have a Kraken X52 and I have attached two Thermaltake Riing Plus RGB fans to it. However now that's it's all installed in my case I have noticed that the cable that is supposed to connect the pump to the fans are incompatible (they have a different number of pins) and am not sure what to do. Can I just plug the fans into the controller box that Thermaltake includes with the fans? Or do I need to remove these fans and install the NZXT ones? I would prefer to use the RGB fans that I purchased because I plan on using the lighting options available. So if I can manage the fans through the Thermaltake software and have them just work separately from the pump, that would be cool. This is my first build and I'm stuck so any help would be appreciated