


DeSean
-
Posts
3 -
Joined
-
Last visited
Reputation Activity
-

 DeSean reacted to Snef in [WIP] Snef's Purple Chimera (**Completed**)
HI
Snef's Purple Chimera is Complete
some Final Pics
ah!... not closed
anyway, no led
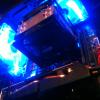
With Leds
now stop talking and place to Pics
and the last one, the Snef's Caselabs Family
already planning for my next Project
a bench test,
-
DeSean reacted to Snef in [WIP] Snef's Purple Chimera (**Completed**)
another teaser
Leak test
I have a small tear, I really like it, really happy with the result
sorry for the pic, I don't want put to good pics, keep it for the final :blush:
better pics this week end
-
DeSean reacted to Snef in [WIP] Snef's Purple Chimera (**Completed**)
thanks
Hi
Little Update
need some angle adapter to finish it
still using acrylic tubing but no bending
I will use white angle adapter
I don't like it without, more industrial look with angle adapter
first GPU under water and painted backplate
painted Dazmode special edition CPU Block
in case
now
need to order angle adapter and spacer from Daz
-
DeSean reacted to Snef in [WIP] Snef's Purple Chimera (**Completed**)
HI
just download and ""Purchase"" Adobe Lightroom 5
and make some test with Lens distortion
and by the way I found how to take pics with purple led on fan
just calibrate the right amont of light
some pics
now we see they are purple/Uv led fan, not blue
I corrected the les distortion pon this one
look the fan with direct light, they are blue, and all hidden are purple???
loll the real thing is the one on the front are the new purple fan from xigmatek and the others on top and back are previous model from Xigmatek and they are UV, not purple
but in real they are similar, diferent only on pics
another couple shoots from the sleeving, made some test with the F-stop setting
with both previous, I made some test with different lightning source and these are for Saccima :thumbs-up:
and this one simply because I like it and the lens distortion work very well, need to learn how lightroom work, its a lot of settings, WOW
-
DeSean reacted to Nicktrance in [WIP] Snef's Purple Chimera (**Completed**)
Snef's making another build??!!
-
DeSean reacted to PBaines in Custom Water Cooled Desk - 56k warning. Lotsa Pictures! *Now with Table of Contents*
I probably won't be able to get another huuuge update out till next week as I have had a lot of work lately!
However, will just let you know what i've been up to on this;
I have finished wiring the GPU cables,
I took the loop apart and gave it a final flush out to get rid of any internal flakes that came from the radiator.
I got some Black SATA Data cables to replace the red ones
Time to start sleeving everything which will be a painstakingly long process but "perfection takes time", and with sleeving. I don't settle for anything that isn't perfect.
here is a quick snap that I took with my HTC One, the DSLR has been kidnapped by my mother for a few days :P
I have made the decision to only use ONE CPU cable, this is to reduce cable clutter and I think it looks much more aesthetically pleasing. I will only be overclocking my 3770k to a 24/7 clock of 4.5 @ 1.28v so no need for the second CPU cable.
-
DeSean reacted to PBaines in Custom Water Cooled Desk - 56k warning. Lotsa Pictures! *Now with Table of Contents*
First things first, thank you very much Mayhems for sponsoring me 2L of Mayhems Pastel Orange Coolant :)
(will add picture of logo shortly after I get it from Mick)
It has been a bit too long without an update, here is a small one while the I get onto making a PCB for the GPU cables.
After getting a hold of the last bit of crystal link It was time to start filling it up! Just for testing to see how the fittings are and that I have no leaks. The top of the reservoir has a T fitting, on the top right of the T I have a Tap that I used
As untreated wood absorbs water I laid handy towels under every fitting joint otherwise if I do not see a leak in time there will be a different shade and an outline of the drop.
Think this is a 1L Koolance filling bottle, super simple. Fill, screw, squeeze!
After filling it all, giving it a few rounds I noticed a leak. Now, as soon as I saw it I knew what was wrong with it. As you can see quite a large air bubble at the end, you know that there is not a complete seal around the O-Ring, which means that the O-Ring would be quite damaged. If it were a leak that had partial damage to the O-Ring, there would be no air bubble, and just a little drop forming every now and then. Still, either way the fitting was binned!
Time to drain it, to replace the fitting. Draining... something I had not thought about before filling. Only way I thought of doing it was this way, which did create a bit of a spill but that is what the handy towels are for!
I fixed the fitting and found that the flow rate of the loop was terrible. I mean, literally dismal. I thought that if I took out that manifold, and ran the pumps in serial it would fix it. (though still intaking from their own reservoir)
But I thought wrong, as the left pump intaked water it would flow water into the right pump, but also would flow water into the right reservoir too. That being said, the flow rate of the loop was better, but still very poor. The option that was always there, but I would rather not have done it for aesthetical reasoning, have the left pump intaking from both the left and right res and running the pumps in serial.
Though again, not thinking about draining whatso ever, I had to be delicate and lift the reservoirs up, take the pumps off, and then put a stop fitting on the end of the reservoirs until my new fittings came to eliminate the problem
So I got my fitting, the configuration is a T fitting on the left, and an L fitting on the right. I think from this close up you can easily see what is going on
I just put the loop together quickly to see how the flow rate is. And it is much better, perfect pretty much!
Time to move onto a different aspect of the build, the storage. I changed the SSD's to: x1 256GB Samsung 840 Pro for the OS and then x2 Samsung 250GB SSD's in RAID 0 for my Steam, Origin and other gaming stuff. All of my media is on a file server that I just stream through Plex over the network
Anywho, I decided that I would actually put the SSD's up by the PSU. This made cabling a lot easier, and also would make it a lot tider. However it does leave a bit of space for where I was going to put them originally, though I will probably put something there in due time
To power the 3 drives I had to run the SATA Power cable under the PSU. I folded the cable over and crushed it with some pliers to make it sit flat
Time to make the new SATA Power cable, I measured where the bottom connector would go.
Sat the drive on top and pushed the wires into the grooves
Third one on, with this one I have to cut the wires off the top, and has to be very flush to the top of the connector otherwise the close-over cap will not fit on.
Excellent!
Test fit
Though the red cables do not mix in well with the build, I will be sleeving them black so no need to worry :)
I didn't really like the way the GPU went to the Pump, so I changed it. It gives it less of a bunched up in the corner look, and also makes the gpu's both look a bit more symetrical on each end too
The permanent filling solution. squeeze water into this, and blow on the tube to get the water in (because the reservoirs are horizontal you can only fill them to a certain point. Where when you blow water in and close the valve it lets you fill it properly)
I also had the GPU SLI Link too short, so when I put the SLI Bridge on the fitting leaked, after fixing that time to leak test again!
After an hour and a bit of leak testing I was happy that there were no leaks (To me, if it hasn't leaked in an hour. It won't leak at all) so I decided I may as well do some quick benchmarks and see how the rig goes!
Here are the results including Heaven, 3DMark and also the Temps (Note, only using 4 fans in pull on the first rad, have not hooked up cooling on the back rad at the moment)
17577 3D Mark
http://www.3dmark.com/3dm11/6840143
That is it for this update, there isn't much left to do! Just wiring really and then will be filling everything with Mayhems Pastel Orange :)
-
DeSean reacted to MG2R in Custom Water Cooled Desk - 56k warning. Lotsa Pictures! *Now with Table of Contents*
Dude, you don't understand! I NEED more pictures! AAAAAAAHHHHHHHHHHH
-
DeSean reacted to PBaines in Custom Water Cooled Desk - 56k warning. Lotsa Pictures! *Now with Table of Contents*
Anyways, enough talk about internet :P We are here for a build log!
Will be posting this small update just because it will be a little while before I can do mass amount of work on the next points to cross off the list.
here I started the initial planning for the cablemanagement.
I measured the width of a sleeved 24 Pin cable I had in the wardrobe and used that as my guide for how I will be having the stand offs
As you can see, The cable will sit in there like that. With a clamp on that will be help by the ends of the M3 motherboard standoffs. Might use some clear plexi/acrylic. Not sure yet! As I have said, that is still in the planning stage
Can I use the original PSU 8-Pin EPS connectors?
I could... But would rather go custom :D
First wire measured to length, and crimped
I lengthened the wires so that when they wires are basically horizontal they have a curve in the end. This just makes things tider at the CPU end and will make cablemanagement easier to do
After about an HOUR I had finally cut all 8 wires, crimped them and plugged them all into their respective holes. Is a lot more time consuming than one would think
As you can see, with the wires flat at one end, the wires have been staggered
Just making sure that the cable will sit how I want it to
Time to start the 24-Pin, the thing I love MOST about the AX***i series is that they basically use 1:1 wiring (if you don't know what that means it doesn't matter :P ) so that will make the cable management so much easier, and basically if I have enough brain as I think I do, I shouldn't put the wires in the wrong holes eg, a 12v wire on the Motherboard end goes into a 5v plug. NUT GUD.
Had a spare motherboard, thought I would just test the new cables out, looks like all is well
I received my 40 Link adapters from the states, I probably won't end up using 40 but is always handy to have a few extra.
Time to start putting them all in place, and adding my Crystal Tubes. Not sure if previously stated in the log but the tubing I am using is 12/8mm. Where the Bitspower ones are 12/10mm. This is not a bad thing at all, just means I need less coolant which = win ;)
Here is where the tube splits into three. Just to take up the space, and do something different is why I did this really. Just to point out though, as the water flows through the loop and it comes to this split join it will go through the middle one mainly, and just move the side ones a bit. There will be no pressure issues when joining back to being a single route.
I needed my Q fitting to go into my radiator. Which I will be using a side port on the NeXXoS Monsta Rad. For this I need a hole in the middle board of the desk. To do so I will be using this drill bit here, known as a "wood spade". She's a bit rusty, but still bloody sharp. It is a 20mm Piece
making sure my extender fitting sits in it
After marking out where the hole needs to be using my Sliding Square.
Hole is set
Top stop the other side of the wood to shatter apon drilling through, you drill half on one side, half on the other
Lovely Jovely
(awkward picture)
Same was done on the other side
To measure the exact right length, to keep the 3-way splitted tubing square I used this little tool. Cannot remember the name of the top of my head, but I am sure someone will :P
I got the top measurement of where the link comes out, then square that up at the bottom and thus measure from the long horizontal piece going from elbow to elbow-to-rad fitting
The process of getting the links to size goes like this
Measure
Cut with dremel, very carefully
Sand with rough, 120 grit paper
sand with super smooth 1200grit paper
And BALLBAG. I needed one last piece of about 550mm, the last piece I had of link was 500mm :( Looks Like I will not be leak testing today! Another metre of 12/8mm tubing to get..
Anyways, this is where we are at now
-
DeSean reacted to PBaines in Custom Water Cooled Desk - 56k warning. Lotsa Pictures! *Now with Table of Contents*
I will just leave a teaser until I get the next update out :)
-
-
DeSean reacted to PBaines in Custom Water Cooled Desk - 56k warning. Lotsa Pictures! *Now with Table of Contents*
I will just tease for now :) Got some big stuff planned over the coming week!
Though on an off topic note; Sam the brown Labrador in the previous photos of this build has been rushed into surgery at the vets with an expanded stomach. He ate some compressed pallets (food for the horses) that expand to about 10x their normal size. about 15 of these small pallets (about 10mm x 5mm x 3mm) will fill an entire ice cream container. Heard from the vet that they got 10 LITRES of this expanded food out of him this morning. Which is scary thinking that a dog stomach is about the size of your fist. Hope all goes well for him and we see him back at home in a few days :unsure:
silly dog! That stuff has been down in the shed for a year..
Anyways; here you go!
-
DeSean reacted to heineygoat in Custom Water Cooled Desk - 56k warning. Lotsa Pictures! *Now with Table of Contents*
If Jesus were still practicing carpentry today he would envy your skills.
-
DeSean reacted to PBaines in Custom Water Cooled Desk - 56k warning. Lotsa Pictures! *Now with Table of Contents*
So here is an update for you people hungry for an update
I forgot to put this picture in the last update, but here is what the board and I/O will look like :)
The backboard is screwed on, with all of my fittings just waiting there to be used!
When I got my screws from town. I didn't get enough.. Now I have the right amount and the Rad is securely in place
Today I decided that it was time to start the dredding task of custom lengthing EVERY cable. These were my first crimps ever! didn't do too badly :D
After thinking about where to start, I started with the Corsiar SP120 fans. Measured to length and initial cut!
Cannot really show a picture of in progress crimping, But here is the first. I did them one at a time, instead of taking all the old pins out. Just so I knew exactly where the new pins would go. Have put the wires back to front once... The fan spun in the opposite direction... hehe
Lovely! All fans followed this procedure.
The pumps were the next thing on the checklist so did them next
I am actually modding the pumps so that they run off of the Fan Controller so I can undervolt them because at 12v these are actually quite loud. My old MCP655 / D5 was 10x better!
I had to do a test first to make sure that the fan controller would work with it, just to be safe. Though I was 99% certain it would.
Jotted down the wiring so that I knew were to put the pins
All soldered on!
Pump works well :D
Interesting, this MCP 355 uses a different PCB. no worries, nothing will end up different
Again, jotted down where the wires went
Crimped my wires and now time to test them both in the Fan Controller
Great! Though something interesting is that when both at 12V they have a substantially different RPM
Of course the wires need to be sleeved. I taped the ends flat so that I knew which pin went where since as all 2 wires have no writing or colouring I don't want to get it wrong!
First one sleeved
The wiring looks to be a perfect length too
Second pump done
Both plugged in
The wiring is lovely, lines up perfectly!
Tomorrow I will do more electrical stuff and will do another update. Would take too long writing out one super super super big update I think haha
Take care all;
Phil
-
DeSean reacted to PBaines in Custom Water Cooled Desk - 56k warning. Lotsa Pictures! *Now with Table of Contents*
Finally, 1/2 of my PPCS order! (2/2 is the BP fittings)
So in this we have: x2 Heatkiller GTX680 Blocks x1 Heatkiller 1155 CPU Block x1 XSPC UP7 Motherboard Block x1 Legion Fan controller x2 Vandal Switches (For power/ reset) x1 Vandal Switch plate for the switches to sit in After getting over my excitement, starting sorting out the attachment brackets to hold the back ledge on Got the drill out with a small drill bit, 2.5mm I think it was to predrill the screw holes
... That one screw that had to be a flat head... ***** Some how forgot to take a picture of the final result! Will get that uploaded in the next update ***** So it was time to now move the desk to my room, and assemble the top unit to the draws and legs. TO do this there are two dry dowel fittings just to align everything for screwing, unfortunately I drilled too far and one dowel popped through.. No worries though. This is the top left inside of the draw unit, behind draws so will not be visible! Besides, all it is there to do is make things easier when coming to assembling and disassembling. To screw the bottom and side rail to the underside of the top unit, I flipped the everything upside down and drilled a hole on an angle. Starting with the first incision to make a hole so we can essentially turn the drill 160 degrees without it slipping down the wood getting more on an angle And finally going straight down at this angle And all screws have been successfully screwed in holding everything in place! Though I will be adding an L bracket holding the front leg and the bottom of the lid, just for security as a thick L bracket is 10x stronger than any amount of screws Speaking of screws, I sourced out the screws that I will be using for the rad's, lotsa these! Two boxes arrived at my house from which contained my speakers and fans I will be using. Which may I add was very well packaged! I went with the Microlab Solo 6C's because of their wooden carcase, and I have heard many positive reviews about these. I now just have to find a place for them..
On to the next box! Containing 5 Twin packets of the SP120 silent edition Corsair fans, and also a Twin pack of the AF120 silent edition fans also. I went with these because of the Static Pressure they create, and also how silent they are. I will only be running my desk in a PULL on the first rad and PUSH on the second. I do not think I need to have push/pull on both rads, as I want to make this thing as silent as possible. With 2 480 Monsta rads, even with a pull on one and a push on the other. It will still all be overkill in terms of cooling potential with the rads as 2 680's, a CPU and Motherboard wouldn't come close to reaching peak performance of the rads. Also the rads look nice at them from the grill. On the following day I received a shipment from PPCS, which contained 2 Heatkiller 680 back plates which I forgot to order in the previous one.. and 90% of my fittings (70 in total in this order) and slipped through customs without paying an Import Tax which I am more than happy about! I all ready ripped them all open and started planning out the loop, so left some of the fittings I had joined together as that will be how they are set Now that everything was finally settling down and the desk is all setup. It was time to finally put a few blocks on components. This update will be for my UP7 with its motherboard block and cpu block too.
Putting the thermal pads, and also two small drops of Arctic Silver 5 that I have been using for a long time And all screwed on! Might look at doing something about the XSPC logo on the block, would rather it be all black for preference Next up, the Heatkiller CPU block. Boy it looks epic.. Pea size amount of thermal paste Once I put it on I cut a piece of my crystal link tubing to length and connected the two blocks together. The CPU block, UP7 Block and the Dominator RAM really work well together! -
DeSean reacted to Lukiose in Custom Water Cooled Desk - 56k warning. Lotsa Pictures! *Now with Table of Contents*
That is... F*cking
-
DeSean reacted to PBaines in Custom Water Cooled Desk - 56k warning. Lotsa Pictures! *Now with Table of Contents*
Only because you asked so nicely :)
Since the last update I have done the back rail piece, and also the back ledge for which the monitor will sit on for now (Till I get a nice desk mount for it) and to also hid the back I/O cables a bit too.
With those made, it was time to sand and vanish! I was initially going to use Danish Oil but had this stuff here which did practically the exact same thing.
After 4 coats, sanding inbetween with 500grit sand paper on the palm sander (which practically felt like paper) it was all done! And time to start finishing the main construction of the desk and do the drawer handles.
After a measure up it was time to drill!
Time to measure the screws out and figure out which segment I have to chop out
Into the vice, and chopped with a hacksaw!
Repeating the process for all and you end up with some lovely draw fronts :)
One of the last things to tick off the list is the radiator grill holes for attaching the radiator and fans. All went well and everything lines up
This is how I will leave the middle section, don't like the mesh grills in the middle. NOTE: The bolts will be cut to length too
Screwed the rad's on temporarily and got the first piece of acrylic tubing on! (Using crysal link adapters)
Thats it for this update :) Should have a lot of PPCS gear coming soon so keep an eye out!
-
DeSean reacted to PBaines in Custom Water Cooled Desk - 56k warning. Lotsa Pictures! *Now with Table of Contents*
Yes, Every cable in the build will be custom length, and it will be tidy! (So i HOPE haha)
Also here is a video of the desk I did a while back too
-
-
DeSean reacted to paultan in PaultanDesigns: Dark Knight PC
FINISHED
www.paultandesigns.com/thedarkknightpc
THANK YOU!
-
DeSean reacted to Streamline in My new rig, finally complete :)
After running on an i5-760 for almost 4 years I decided to finally do an upgrade. Not much to say here, just that I went for the highend stuff this time. My last build had a 5770 as a first graphics card, which I later upgraded to a 7850. The only thing I regret about this build is that I spent so much money on the beautiful RAM, just to remove the heatsinks later to fit the CPU cooler. My old cooler allowed me to keep the heatsinks on the RAM, but the i7 did run a bit too hot, so I decided to upgrade.
Partlist:
- i7-4770k
- bequiet! Dark Rock Pro 2 CPU cooler
- Asus Maximus VI Hero
- Corsair Vengeance Pro 8Gb (2x4) 1600Mhz
- EVGA GeForce GTX780 SC ACX
- Samsung 840 Pro 128Gb SSD
- A-Data XPG SX900 128Gb SSD
- WD Caviar Black 750Gb HDD
- WD Caviar Green 1TB HDD
- Seagate Barracuda 2TB HDD
- NZXT Switch 810
- XFX 750W Pro Black Edition
- Windows 8 hue
And the pictures
The Box
The Old
The new - well. Almost all of it.
The rest of the new, finally checking in
Old vs. new
My ikea-hue
Hidden cablemanagement - I tried
The guts
Closeup
And finally the station
-
DeSean reacted to DGPC in Bertha 2.0 (Modded Prodigy with 520MM of radiator)
Come on an adventure This is my first go at watercooling and I don't think I'm ever going back to using air! Here we have Bertha 2.0 (after getting bored with Bertha 1.0 of course). Composed of a modded prodigy with a shroud (obviously not an idea I saw watching SingularityComputers :P ), 520mm of radiator and some cable sleeving. More below.
Cable Management in a Prodigy WITH tubes everywhere = worst thing ever. Must say, it wasn't a half bad job. I'm still going to have nightmares about it. Good thing I'm not posting a pic of behind the GPU!
A bit more detail on the parts:
Case parts:
Bitfenix prodigy (Modded front panel) + shroud (installed by yours truly) + Modded Power button + Hole in the bottom (to fit a radiator) All this done with a trusty dremel.
2 Corsair SP120 fans for intake and 2 NB fans up top for exhaust (Notice how the rings are nice and green)
Some Bitfenix presleeved extenders (Hate all you want, that took effort to manage in the back since these things gotta attach to the original cables)
PC parts:
CPU: 4770K
Mobo: ASUS Z87I-Deluxe (took a lot of patience to get one of these)
RAM: 16GB Corsair Vengeance (Couldn't find the vengeance pro GOLD)
SSD: 128GB Samsung 840 PRO (wish I could get one of those evos)
HDD: 750GB WD Caviar black
GPU: EVGA GTX 780 (bow chicka wow wow)
PSU: Corsair AX860
Watercooling parts:
Resevoir: Swiftech micro res
Pump+CPU Block: Swiftech Apogee drive II (Believe me, you need to save as much space as possible in there)
GPU waterblock: EK titan something or other
Radiator(s): 240MM and 280MM black ice stealth (520 in a prodigy WOOT WOOT :D )
Fittings: Monsoon free center compression fittings (gold to match the mobo of course)
Tubing: Primochill advanced LRT Atomic UV green (I even used the included Sysprep, I'll keep this spot updated with any plasticizer issues I hope to not have) I also got 2 bitspower 90 degree fittings that I like to ignore
Coolent: Primochill Ice intensified (UV Brite Green)
More pics:
The modding process in all its painful glory
**respect for anyone who can guess where the SSD and HDD are** just noticed that the pictures don't exactly showcase it hah
Sorry for the sloppy pictures :( silly iphone why won't you take good low light pics
-
 DeSean got a reaction from TechTheWorld in Welcome to the Linus Tech Tips forum!
Thanks man, I appreciate the warm welcome

