Search the Community
Showing results for tags 'water'.
-
I was cleaning a stain in my 27 inch 1440p ROG monitor when stupid me decided to clean the stain with water and a soaked q-tip. When I cleaned it the water, obviously, it dripped on the side I was cleaning and a small amount of water seems to have gotten into the crevice of the monitor casing. I say it seems because when I observed the crevice there where some small droplets of water in there. In order to clean them I used a sheet of paper to get into the crevice, but I'm not sure if that was a good idea and maybe the paper transfered some small amount of water to other parts on the inside. After all that, now I'm paranoid about possible water damage that may have entered the monitor and damaged something. Everything seems perfect, no display anomalies, the buttons work fine, the powered on and standby led works, and the ROG logo rgb works. I've been using it the for the whole day and the situation occurred yesterday. Is it probable is that some kind of corrosion happened? I know I shouldn't worry too much, especially since it works fine, but I would like to hear opinions, which helps to calm my ocd

-
Hey there! So i was trying to clean the cpu cooler and a drop of water fell from the ceiling. It touched the aluminum dissipator and splashed like two smaller drops on the side of the am4 socket (photo), it was still with the aluminum dissipator attached so no drops touched directly on the pins. I tried to dry it all with little pieces of napkin, absorving the drops until i didn't see more water. Tried putting it in the gap between the socket and the board too. Is there any risk if i try to turn it on? Could the water have touched the pins if it got into that small gap?
-
I left my PC beside an open window when it rained (was rushing out of the house to help with an emergency). When I got back the side of my PC was really wet but after inspecting the internals, the side panel looked to take most of the water and the inside of the PC was dry. I immediately cut power to the power bar and dried the drenched table and everything connected. I didn't believe any water should have gotten into my system so after unplugging the system and throwing lots of silica packs into the system and blowdrying the PSU for a few minutes I powered it on for abit to see if there was anything off (this was because I thought everything was dry). After a minute or two, I began hearing a low humming sound I've never heard from my system before. I've since, shut down the system, took out the PSU unit and threw it in a bag with some silica packs. I am wondering how to figure out if my PSU has been water damaged. How long should I keep my PSU in the silica drying bag for, and what symptoms would appear if it was water damaged?
-
After breaking in and tuning the system to be extremely quiet for a week, I can now say that my first custom water cooling loop is preforming well and is quieter than expected. The only thing that really makes noise at lower speed is the pump. Thankfully the ASUS motherboard lets me have complete control over the speed of the fans and I can keep the pump running at its lowest setting even as the CPU warms up. I have not noticed a temperature difference when the pump is running full speed or running at minimum, likely because this pump is completely overpowered for the loop it is in. I have also noticed there is approximately a 12 C difference between the CPU/GPU temperature and the water temperature, while less than a 4 C difference across a water block. I also have some basic information about the radiator performance. When the system is running a game, the water temperature levels off between 40 and 45 C. This means there is about a 15 C difference between the inside of the case and the water in the loop. A noticeable temperature drop could be seen by doubling the radiator but the difference would only be by 7.5 C. However, that temperature drop would be less if the second radiator was positioned at the front of the case pulling air in and heating up the entire case in the process. My personal take-away on the thermals: Quality water blocks are more important than an expensive pump. Radiators at the top and back make sense, with larger radiators capable of providing a noticeable temperature drop. Larger pumps can be turned down to silent operation and still provide adequate flow rate for overclocking situations. Speaking of overclocking, I used the EVGA PrecisionX tool to see how far I could push my GPU. I was able to get a stable overclock of an additional 235 MHz on the GPU. That boosted the GPU clock speed from 1265 to 1500 Mhz, or about 18.5%. Much higher clocks caused the driver to stop responding during testing. I also boosted the memory by 800 to 4305 MHz, or 22.8%. Much higher and artifacts would appear and fail the test. For testing I used 3DMark 2015 and focused on running the 'Fire Strike Extreme' test. This test seems to stress 900 series graphics cards without turning the whole process into a slideshow or have unrealistically fast FPS speeds. Non overclocked runs resulted in scores hovering around 5030 overall and 5170 graphics scores. The fully OC runs resulted in scores around 5820 overall and 6030 graphics. That shows a 15.7% and 16.6% increase in performance scores running this test overclocked. Not bad considering my GPU temps never broke 62 C in all of my testing. Update: After running through my motherboard settings, I was able to boost the PCI link speed of the GPU. It turns out my GTX 970 may have been running at PCIe 3.0 x1 speeds! Turning it up to the available x4 speeds only boosted my 3D mark score by 180 points and 300 points overclocked, but any extra 'free' performance is welcome. I have update the results above to reflect these new values. If this is true, this is a huge validation that current graphics cards are not utilizing much of the PCIe bandwidth with a single graphics card. SLI configurations are probably a whole different story. Update 2: It has now been a few weeks and the thermals and overall computer have been very stable. I decided to take a quick crack at overclocking the CPU to see how much overhead I have with this rig. It turns out that even without turning up the voltages much (an additional 0.075V to 1.3V) I can achieve a stable 4.6 GHz, up from 3.3 GHz. That is a 39.4% overclock! With so much overhead, I will likely run the CPU overclocked for daily use. Currently many of my games are bottlenecked by the CPU anyway due to them only stressing a single core... Overall I am very happy with the result. The system achieved my goal of creating a system that remains quiet even when stressing both the GPU and CPU. This is also hands down the best looking system I have created to date. I have absolutely no problem with the thought of looking at this computer every day for the next 5 years. Now I might need to save up to improve everything else sitting on my desk...
-
Now that the water cooling components have arrived, the building has really begun. First out of the boxes were the heat sinks. The CPU water block was the easiest I have installed to date, while the GPU predictably took some time. The overall GPU size shrank significantly, reveling the nice lower motherboard heat sink once again (Yay!). Next step was to build the custom cables and rework the wiring through the case. I think these white/blue accents add quite a bit of style to this build, and being able to customize the look makes the build a little more unique. Finally, the water cooling prep truly begun. Installing the last major components of the loop ran into a snag with the large radiator. The selected radiator has a built-in reservoir, which added to the length and could not be installed correctly along the top. Thankfully, I was able to move the radiator forward thanks to the NZXT case extra long screw mounts. I couldn't get all the screws in, but there should be enough to keep the fans from vibrating and causing noise. This did mean that one of the front case fans had to be permanently uninstalled. The pump and reservoir were purchased as a set and assembly was simple. They will be quite hidden from view. Before I started bending, I looked for a way to position the pump in a way that would minimize the number of bends in the case. This would make my job of bending the tubes easier and keep the look of the case as clean as possible. I found that mounting the pump on a drive tray, as originally planned, worked well and only needed to be raised about 7mm on washers. Installing the fittings also added that final bit of chrome, and the selected blue fittings brought in a little more of the color accent into the case. I believe this gave a fairly consistent look to the build. The tube bending took a considerable amount of time. Hardline tube bending is not a trivial matter and requires lots of measuring. Thankfully I purchased the complete bending kit from Monsoon, which came with measuring tools, but it took over an hour until I had enough confidence in the measurement to bend and trim my first tube. The process of measurement was tricky, but I believe that simply has to do with the awkwardness of making measurements in a confined 3D space where the rulers can't be secured to anything. As for the bending, it took a few tries until I was able to make bends with millimeter accuracy. I kept to the simple bends at first, making sure that the minor mistakes I was making wouldn't ruin the looks. I saved the most noticeable double bend for last and the result was more than acceptable. I would say that many who have worked around power tools and is a little patient would have about the same experience after bending and cutting only 5 tubes. I test fit the bent tubes before securing the ends of the tubes on. I went with Monsoon fittings, which require the extra step of attaching the ends of the tubes with adhesives before securing the ends of the tubes into the case. Once the ends of the tubes are on, there is no undoing the adhesive and getting the ends back. Same thing goes for the tube they are connected to. I would highly advise a full test-fit before gluing any ends onto a pipe. A dremel tool may also come in handy, as some of the ends might need to be sanded down and flattened to ensure the end caps adhere straight. Once the test fit was done, I followed the instructions on securing the end caps from YouTube videos published by Performance PCs ( https://www.youtube.com/channel/UCEHPVLaMY9zeDOynltKhgdA ). This is also about the time I noticed a good number of my fittings had parts where the blue paint had chipped off, revealing the chrome underneath. I had worked over a tile floor and had dropped two fitting, but somehow 5 of the fittings had significant chipping which must have mainly come from handling them. Oils from hands can be quite harsh to finishes, but the quality of these 'premium' hardline fittings was simply not up to my expectations. I placed the blemished fittings around the case in locations that would be less noticeable, but I wonder if this is the norm for Monsoon free center colored fittings or if this set of fittings skipped a step during manufacturing... Once the tube ends were cured to the tubes, I installed them and realized just how clean this particular build ended up. I managed to keep the water cooling loop toned down and simple, while still color coordinating it with the rest of the build. The water cooling loop still dominates the center of the case, but the Y created between the pump and the water blocks has symmetries and looks like the rather elegant configuration I was aiming for. This was my first time doing a custom water cooling at all, so a clean result was far from guaranteed. At this point I tried to pressure test the loop, but made a horrible rookie mistake in my eagerness to complete the system. I forgot to attach any thing to the bottom of the GPU water block... When my pressure test was inconclusive and I decided to proceed with the 'paper towel' method, a fair bit of water doused the SSD just below the GPU after turning on the pump for a quick second. I was using an external power brick to run the pump, so thankfully the power supply, which was also under the GPU, was not powered or plugged in. I quickly cleaned it up and found no water hit any crucial components. The water used is PrimoChill and is not conductive, but I will still be letting it dry out just in case. I continued filling the loop by filling the res and then running the pump for a second until there was enough water in the loop to keep the pump on. I was watching the bubbles flow through the loop and noticed a bit of water leaking from below one of the GPU's rotary fittings. Second rooky mistake, I didn't tighten the rotary fitting down to the block enough and I could clearly see space below the o-ring... Another reason to wait for the system to dry out, even though it looks like the water didn't touch any part of the GPU. I tightened the rotary fitting down, cleaned up the drops of water, and continued cycling the water. I ran the system like this for a little over an hour with no more signs of leaks anywhere. It looks like it may be a day or two before I try to boot again, but I am willing to be a little patient for this project. Overall, I am very happy with how this computer looks and would go so far as to say it might pass as a professional build. I'll post a summary when/if the computer is up and running.
-
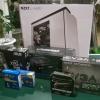
The computer parts have arrived, being picked up during a quick vacation to Southern California. You can probably guess from that alone where the purchase was made. All the water cooling components are in transit and should be here in the next day or two. The boxes of the computer components looked rather good themselves, so I couldn't resist taking a few glamour shots of them. There are very few components in this build, which will help keep the computer interior clean. I took this chance to also start building the computer and make sure it can post with air heat sinks. I won't do much more until the water cooling components get here as I don't even have a proper heat sink for the CPU. I will never recommend doing this, but I ended up installing a heat sink on the processor without any retention mechanism. This meant that the computer had to be on its side to post and couldn't be moved at all. This massive air cooler from a previous build also barely fit between the RAM modules. Putting the components in went very smooth, aside from some issues with the power cables being too snug. In the process I also realized the custom cabling will be a little different than I first anticipated. I ordered components to make extensions, not a custom braided cable going from PSU to the component. It won't effect the looks and it is likely the choice I would have made anyway. I do with I had done a little more research as I will now have some extremely long extensions... After piecing together what I have, I find the overall look of this computer rather pleasing already. Pictures may never do this computer justice, but it is all I can share so far. The best news of the day: It posts! I closely watched the CPU temps the entire time I set up the BIOS to make sure it wasn't at risk. This is as far as I care to go until a properly sized CPU cooler is installed. Once the water blocks arrive I'll post some shots of the build again.
-
With the justifications/excuses for building a computer with a custom water cooling loop out of the way, I move on to the design of the computer in this entry. For this first water cooling computer build, as with all my previous personal builds, it needs to be built of components to be low maintenance and last at least 5 years. To achieve that enthusiast components are to be used, namely an x99 motherboard, lga 2011-v3 CPU, and a GTX 900 series graphics card. The exact components were selected based on their relative performance per dollar and my overall budget. Another key part is honestly the looks. As with interior decorating (laugh if you want), I decided to search out the current computer parts available and see if there was a well designed inspiration piece to base the computers color scheme upon. Good inspiration pieces I have seen are motherboards and cases. This time around, I came across the ASUS X99 ATX motherboard. I was particularly drawn to the black/white design with chrome/blue accents on the heat sinks. Choosing components that fit the style of the motherboard helped keep a cohesive color scheme. These particular colors are also rather common, so finding matching components was relatively easy. The final computer component selection: Case: NZXT H440, white MB: ASUS X99-A CPU: Intel Core i7-5820K, 6-core 3.3GHz GFX: EVGA GeForce GTX 970 (reference) RAM: Corsair Dominator Platinum 4x4GB DDR4 2666 SSD: Intel 730 Series 480GB PSU: Corsair HX750i Full Modular (complete overkill...) Many of the above internal components changed as I settled on the type of cooling in the system. Air At first this was not intended to be a water cooling build. My first intention was to air cooling everything, but I wasn't satisfied with the decibel levels of some of the heat sink fans. Additionally, air cooling wouldn't look like anything special through the case side panel. Hybrid In my second attempt at silent cooling I decided to try and throw in an AIO cpu cooler along with the EVGA GTX 980 hybrid cooling card. But again I wasn't satisfied that the AIO would have a double 120mm radiator and the graphics radiator would only have a single, even though the graphics card can actually produce more heat than the cpu under load. Also, this would likely end up looking like a mess with two different water cooling tubes running through the case. Water Finally, I scrapped both of those ideas and decided to finally build that water cooling loop I had always wanted. I know it will not be cheap or easy, but I have the opportunity and the time to make it happen. This also allowed for some of the blue accents to be incorporated back into the systems aesthetic design, which would have otherwise only been brought out by a few blue/white custom cables. The decision to go with a custom water cooling loop came with more hurdles than I first through. A quick google image search comes up with a long list of functional water cooling loops, but I personally only find a small percent that I like. To me, a computer interior dominated by flexing gigantic colored tubes does not look good. It does not reflect the refined yet powerful system components hiding under the uncontrolled mess of tubes. Many may disagree, but this is just my opinion. I want people who have no interest in computers at all to find this design attractive. So finally, I focused on hardline tubing for my first custom water cooling system. I have heard from many sources this is a bad idea for a first time custom loop. I just see no other alternatives that will satisfy what I want to create. This could get interesting... The selection of fittings and specific tubes was of major concern for the look of this computer. From an engineering and design perspective, I found the Monsoon cooling fittings and clear PETG tubes attractive in many ways. First, the quality of the O-ring seals between the tubes and the water cooling components look second to none. Second, the color choices can tailored to most designs. Tube lights can also be integrated directly into the fittings if the look is desired. For the water blocks I looked for something clean that would match the color scheme of the build. EKWB nickel plated water blocks for the X99 CPU and the GTX 970 fit the bill. The nickel should look very similar to the chrome accents, while the black plates should fit right in. The long list of water cooling components: CPU WB: EK-Supremacy EVO X99 - Nickel (NEW!!!) GPU WB: EK-FC970 GTX - Nickel GPU BP: EK Backplate - Black Pump: EK-DCP 4.0 PWM (completely overpowered, but PWM = low noise options) RES: EK-DCP 4.0 XRES RAD: Swiftech MCR320 Quiet Power Res - Black 3x Corsair Air Series SP120 Quiet Edition High SP Fan (for the RAD) 5x Monsoon Light Port 90 Rotary Angle Fitting 5/8" - Chrome 2x Monsoon Free Center Compression Fittings 1/2" x 5/8" 6-pack - Blue Monsoon PETG Hardline Tube 1/2" x 5/8" 4-pack Monsoon Hardline UV Cure Adhesive for Acrylic Monsoon Hardline Bender Kit 1/2" x 5/8" (for first time build) 4x Monsoon G 1/4 Plug - Chrome 6x Monsoon G 1/4 Plug - Blue PrimoChill ICE Fluid - Clear Custom cabling will be done using CableMod ModFlex cables. This should bring a little more blue accent color into the system. The individual wires have been purchased and will be used to make blue/white patterned cables. Making the cables myself also means a much reduced cost, as I only need to buy cable components for the cables that I know will be seen through the side window of the case. I highly recommend making customized cables based on price alone, but I haven't done this before either... Custom cable connectors and wires: 2x 24-pin ATX Connector Black 2x 8-pin EPS Connector Black 4x 6-pin PCI-e Connector Black 8x 16" Sleeved Wire White 4x 16" Sleeved Wire Blue 16x 24" Sleeved Wire White 16x 24" Sleeved Wire Blue Variety of CableMod clear combs Over all this is a very new build with many unknowns even as an experienced computer builder. The inside will hopefully end up attractive, with an understated but noticable water cooling system and blue and chrome accents being echoed by every major component. All the unknowns could make for interesting reads in later entries...
-
This entry is a bit of a story. If you are looking for something about designing and building a water cooling loop, future entries will cover that. As I write this, $900 worth of water cooling components and custom cables have been ordered and will be packed and shipped in the next week. That amount could easily build a decent gaming computer, especially if secondhand components are involved. Having built dozens of computers over the past 14 years I know how far $900 USD could go towards better components. It may seem crazy, but this build is about more than just performance per dollar. In part it is a celebration. I just graduated with a Masters of Science in Mechanical Engineering and Applied Mechanics. That’s a lot of words to say I know how to design mechanical and thermal systems. I can't celebrate by just building another computer with my same tried and true methodology. In part it is a culmination of all the builds that have come before. The dozens that I have built for family, friends, businesses, and myself were all good machines. For this build however, I want something that really stands from all my previous builds. I have never done a custom water cooling loop before and I want to give it a solid try. In part, I have nothing else to do. I know this is going to take a lot of time to make a custom water cooling loop that looks as much as it costs. Just selecting the parts has taken me weeks, with many modifications being made to stay within budget and not offend the eyes through the side panel. Until I get a job though, all my design abilities are going into projects of my choosing. Perhaps I am writing this to try and justify the expense I have just incurred. As an Engineer, $900 is a lot to spend on a little thermal loop that transports about 300W of thermal power less half a meter. Air cooling is hands down the sane option, but sane is exactly what I have been doing for the past 14 years. I need to break out, if only just this once. So here goes, there is no backing out now. I plan to document everything about this build, from the little triumphs to the horrible mistakes. I do hope that this documentation helps someone down the road.
-
Finnished this blog now?: Not quite, I am yet to do the Grid2 Benchmark but I can talk about the general use of the cards. Before modding, the reference card was extremely loud, as you can imagine, whereas the Tri-X cooler stayed almost silent. After this mod, I found that while the total noise for both cards has been reduced, the single 120mm fan is having to work harder that the three 80mms on the Tri-X. So it's louder post mod unfortunately. On the bright side though, the card runs at the same temperature but goes back to idle temps much faster. As for the reference, almost a 40 degree difference in max temperature. VRM: The bane of my life while working on these cards, VRM temps are still higher that I would like. At this point though, I can't amend this short of buying bigger and less stylish coolers. Which might seem like a good trade off to some of you but for me, getting this build to look right is more important that perfect temps. 65 degree average VRM in intensive games is good enough for me. Whats Next?: Well since the change from PC In A Drawer to PC On The Wall, I have made progress with the designs. These cards should be installed into the custom case next week, since its half term I can get a day off to do it in. However, I am working on another Attempts blog now. This one will feature a some packaging and an ITX Motherboard. I will not be uploading onto this blog until the cards are fitted into the final case, or until something breaks. Thank You :)
-
Whats Going On?: Almost as soon as I started mocking up the layout of the drawer, I found that the total thickness would be too much for an under desk drawer. Moreover, the width and height of the case would bee too much to fit, practically, on my desk. With careful consideration to the style of both my office and the PC, I am going to be swapping over to a PC on the wall. However, I will still be building a PC into a drawer. I plan to sue older 939 socket era hardware and some passive cooling solutions to make a work PC that will have hot swap HDD bays, small boot ssd and will fit entirely into a 1.5U sized drawer. I was limited by the magnitude of the hardware in this build, VRM overheating and other unforeseen troubles have lead me to re-work the basis of my build. I plan to adapt what I already have to fit onto the wall, rather that into a desk. The biggest advantage to this would be dropping the cable mechanism that I had planned for the drawer. In order to be able to extend the PC while still in use I would have added 50mm to the thickness of the case. Doesn't seem a lot now but because I can not change some other sizes, I should be able to slim the bulk of the case down, barring the 120mm fans which have to be 120 thick. The Smokey's Chronicles blog has a post entitled Important! which you can actually vote on. If I get more of you asking for a drawer then I will go and build it with this hardware. Please keep in mind that there will be a PC In A Drawer just not with this hardware. Thank You :)
-
Grid 2 Benchmark, Max Settings, 2560x1080: Maximum VRM temp was 64 degrees, well within acceptable limits considering the up to 105 degree guarantee. However, Tri-x Sapphire cooler VRM temps will not get beyond 50 degrees with the same settings. This is due, most likely, to the difference in heatsink size between the two cards rather than the airflow. After I ran the bench on loop for 50 minuets, the VRMs dropped down to 40 in a matter of seconds and only took five minuets to get back to the idle (34). Of course, these are the VRM1 temps on the card, which are the main VRMs. j VRM2 readings showed a max of 61 and an idle of 51 with just heatsink and no airflow at all. This is also acceptable and I plan to get some airflow over these sinks too in the final project. There are no benchmark images due to the 2mb size limit and the fact that I have no compression software at this time. Fresh install and what not. So is all I can provide at the time. FPS was an average of 56 and max of 79 (rounded) this is all at stock clock. I will be overclocking the cards once I have compared this first 290x with the second after it's modded. Thank You :) p.s. Planning to change mounting for the second 290x. Using Paste for the VRMs rather that the provided pads. I will also spread the processor paste myself to ensure it has good spread.
-
Finally Some Results!: Geil VRM sinks came this morning, only two days late... Anyway, these sinks are pretty small and with a fan ghetted on the card pretty poorly, they still hit 103 degrees with furmark. However, in regular gaming, I am seeing 95s on average which is on par to the reference cooler that was on here. This post isn't about the core temps but I'm really happy with them. So this higher VRM temp is worth the sacrifice. Can I Make It Better?: I can certanly get rid of the thermal pads that came with the VRM sinks, replaceing it with a nice dolop of MX-4. Which could help with the temeratures. Moreover, placing a fan closer to the sinks will be much better. The original schems for the drawer build had me using the flow directly from the rads to cool the MOSFET, VRAM, RAM and VRMs but I think I am looking at adding more smaller fans into the mix. I suppose the two 200mm NZXTs I have hanging arround would suffice but they would wreck my airflow. Since this is by no means the finnished design I will not be posting in depth test results. Photos!: Whats Next?: Tomorrow moring I will be uploading some core temp readings and tomorrow evening there will be proper bench results. Using furmark and Vally most likely. In addition, I have H60 CPU temps to post on the drawer blog. As well as some mounting test images and other odds and sods. I'd apologise for the lack of content over the past few days but it's not like I've been slacking off. My main systems motherboard died, GA-990FX-UD5. Flat out broke, PC shut down mid youtube video and would not post. So I'm suing an MATX GA-78LMT-USB3 I theived out of my sisters build. Some good news though? I am going to be splurging and grabbing an Asus Formula V. So look forward to that blog. Thank You :)
-
Whats Going On?: Okay so I work as a roofer, due to the ice and snow we've been getting we are working much later that usual. This also means that I have to wait for longer delivary times. I have missed several deliveries already. However, there is good news. I have the schematics started and I am working on the next Red Mod update. Make sure to check it out tomorrow. I appreciate anyone who follows these blogs. Thank You :)
-
Whats Next?: All updates that I planned for today have been haulted due to time constraints. I have to get this build finnished before 6 this evening which is going to be tough. I simply don't feel like working on blogs today. Hoever, lots of stuff arrived today so i can start updating the Drawer Blog and The Red Mod Blog. Stay tuned. Thank You :) p.s. Here's some images of the build so far...
-
Cooling 'n' stuffs: Just cooling the processor isn't enough, VRM and to a lesser extent, VRAM need some attention too. These heat sinks were pretty cheap and came with a terrible thermal pad that wouldn't stick at all. So I took these off and used the smallest amount of MX2 paste as possible. I also had to spread the paste by hand because the heat sinks are under any kind of retention. Didn't take long after I got the hang of spreading the paste. I have some photos but I've been having phone camera issues so this is all I got. The rest were ether corrupted or severely blurred. Whats Next? Very long day today, more posts coming tomorrow on a gaming build. These will be on the main blog channel Smokey's Chronicles. Other than this I plan to dribble bits on the Drawer blog until Wednesday where I will have major updates. Benchmarks for this 290x will be up Wednesday, delivery's permitting.
-
 TLDR - It's Takeya Usa. But some backstory first. I work at a pool at a decently well-known resort. We get tons of clientele from all over the place. Clients like Edward Jones investments, Phillips (yes, the medical company) and Robin hood are all among companies that come and stay, have meetings, ect. While cleaning the pool today, doing as I do, I came across a particular water bottle that I thought looked very familiar, but didn't think much of it UNTIL I got home. I went to lttstore and low and behold, it's the same lid and what I assume to be the same body, albeit with a different external coating than the ones that are actually shipped. I've included photos of my findings attached to this post. Some interesting things to note: - The bottle isn't dated, but it stays "Patent Pending" on the bottom, so I don't know how old or new this design is specifically. - The silicone ring around the screw top is gray, as compared to lttstore's black ring - It appears that the metal body is 40oz while the lttstore one is 41oz - The hydrophobic coating on this bottle is not as good as reviews of an lttstore bottle would suggest for a legitimate one, but I'll have to wait for mine to come in. - It also appears that takeya either no longer sells or has yet to sell the 2nd gen lttstore screwtop, as the one on their site is a different version. Easy enough to check just by going to their website. The bottle I found is a little scratched up, but I think that the proof is in the pudding. If this post gets enough traction, I'll probably end up posting a review of the differences for everyone to see. This is also NOT at all a suggestion or recommendation to NOT buy an lttstore water bottle!! I actually bought one! this is just something interesting I wanted to share with the community. This is also in NO WAY an attack on LMG or anyone who worked to design prints and worked with manufacturers for the actual lttstore bottle, so PLEASE DO NOT take it as such. Have a great day!
-
So i spilled som iced tea on my laptop it fell on the keyboard and the laptop was on stand by i flipped it so it wouldn’t get to the insides i have managed to desasembly most of it even get the motherboard out for the keyboard i got the keys out and cleaned with isopropil alcohol and a toothbrush i did this with all the motherboard what should i do now?
-
Hello there! I am thinking about buying an old GTX 1080 Ti Asus Poseidon model. It is the hybrid card, and it has two ports for the tubes, with a pre-installed water block. I am wondering if I can use a standard aio with the pump in the dead space of the radiator, and detach the water block and put fittings to connect it to the two openings on the card? Or am I just stupid. Thanks in advance. PS: what are those connectors called? Barbs or something?
-
UPDATE: While downloading important files to an external drive, all of a sudden, things seemed to be going suspiciously smoothly. Scrolling seemed instantaneous. Opening folders was snappy. What could be happening?!? I checked Task Manager and then HwInfo, both reporting nominal CPU operation. I'm over the moon thrilled right now. Given this is my college laptop, I don't really have the money to drop on a replacement right now. My VERY speculative guess on how it fixed itself: I was playing subnautica when I spilled the water, so the laptop definitely had active threads, memory, unsaved progress, etc. It was only once I started digging into the subnautica folders under steam in my C drive that it magically fixed itself. I don't have a deep understanding of the topic to draw genuine conclusions, but I suspect it could have realized there were issues relating to those folders/files, and reset to a save state once I started digging in those files, which somehow solved the root issue. Alternatively, this could just be coincidental timing of a super lucky event. Either way, my woes seem to be gone for now. Huge thank you to everyone who gave suggestions and advice below. I learned a lot through this process. Original Post: I have a dell XPS 13 inch, running an i5-1135G7, 512gb SSD, 16 gigs ram, and intel Iris Xe. It runs windows 11 64 bit and is currently on bios version 3.11.0. This is primarily my college laptop, but being home for break I’ve done some light gaming on it. While gaming, I spilled water on the keyboard, enough to get in pretty much everything. The laptop instantly shut off, and I dried it out as much as possible. I was able to get it to turn on into a bios update, which bios logs show failed 4x before the final success. It then shut down until I took it apart, removing every last bit of water, cleaning up with isopropyl, and removing/installing the battery. After reassembly, it ran through a series of RGB on the display and then booted to windows, which shocked me. It seemed ok but very slow. Some digging into the task manager showed me it was running at 0.19 ghz, or 8% CPU frequency almost constantly. The ram, SSD, Wi-Fi, and Iris Xe seem completely fine. I removed and re-installed the battery twice more to see if that would solve things, but nothing changed. I ran an intel CPU diagnostic tool, which came back with everything as a “pass” and even showed that it recorded 2.41 ghz on the cpu frequency test, which surprised me (result image attached). Following various other forums, I messed with dell power, fan, and thermal throttling settings (setting to the most intensive I could). I also went into the bios and changed two of the “smart, adaptive power” settings (I forget the proper names, but they didn’t change anything). Using resource monitor, I found that the “maximum frequency” was pretty constant at 8%, though it occasionally jumped to 10-12% which surprised me. Lastly, I booted in safe mode, and while it was still slow, the task manager and resource monitor there showed the proper 2.41 ghz and 100% frequency. This confuses me because the speed in safe mode suggested it wasn’t any faster. One forum post I came across claimed that reverting to an older bios version solved a similar issue, so that might be a route for me to explore, as it did automatically update bios in the midst of this all. I plan to backup important files on an external drive and probably factory reset if I can’t find a good solution. Note- the laptop never physically got very hot during these processes, so besides a broken sensor, I doubt it would be thermally throttling here. I also confirmed that the fans do work normally if the laptop gets hot, which also suggests it’s not just thermal throttling. (The fans only briefly came on while in the BIOS).
-
Hello everyone! I am upgrading my setup since I didn't do a rly good job at the last, but i was thinking of adding water cooling to my setup, the big cpu cooler is kinda boring. if i go water cooling its only gonna be the cpu for now. But I was searching and came across IAO and custom, I'm tempted to go for custom maybe to upgrade later on and more customizations. I am looking for a 3 fan rgb radiator and a cpu cooling block, with a pump combo. the pump is the only extra thing from the IAO but I will spend 200+ euro more when going custom. can anyone help me out with a solution to go IAO or custom and if custom help me out with parts (I have a Sharkoon tg5 case so 3 fan should be okay), I don't have a really big budget, I am also going for the i7 13700kf hope some of you can help me, Thank you for your time! And have a nice day
-
 I purchased a RTX 2080S Hybrid and often I can hear the noise of water trickling. It is very audible, last for a few seconds, but comes and goes. It doesn't matter if I am gaming or my PC is Idling it will make that noise every.. about 10min or so. I have the rad positioned at the back of the case as exhaust. Does orientation of the tubes coming out the top or bottom matter? To clarify if you looked at my setup the radiator is vertical with the tubes coming out the top. Should I rotate it so that the tubes are at the bottom? Does the orientation matter? And does the water trickling noise even matter?
 -
 How many radiator does the Praxis WetBenchSX Complete Edition support https://www.primochill.com/products/praxis-wetbenchsx-complete-edition?_pos=1&_sid=86004b9ea&_ss=r
 -
 So I am doing a build for a friend, and he got 1/2'' ID, and 3/4'' OD fittings for his build, and due to COVID I don't want to go exchange them in the store. I have 1/2'' ID and 5/8'' OD tubing laying around, is that possible to use in compression fittings, or should I get the same sized tubing labeled on the fittings (1/2'' ID, 3/4'' OD)? Heres the fittings i'm using btw: https://www.microcenter.com/product/486938/bitspower-g-1-4-straight-compression-fitting---white
 -
i just put a screw straight threw my radiator will it still work or is water going to pour threw it its the asus rog lc strix 240
-
I was cleaning my pc of dust today and while i was looking at the gpu (palit stormx 4gb 1050 ti) i tried blowing on it but i spitted a little bit. So i cleaned it up made sure its dry and i assembled my pc. I lost 2 standoffs for my thermaltake cooler so i just put 2 diagonally. gravity pushes it down so i dont think i should get higher temperatures. When i booted on the pc i played a match of csgo and my fps was 10 or 5 lower than usual and it would stutter. Is this because my cooler is missing 2 standoffs or because i spitted on my gpu and are there any possible fixes. cpu cooler is thermaltake contac 16.