50mm
-
Posts
170 -
Joined
-
Last visited
6 Followers


Recent Profile Visitors
1,413 profile views


50mm's Achievements
")
-
Sorry for the long pause guys, i wanted to finish this project already but i had to much other stuff going on at that time. This will most likely be the last post before i can show you the final pictures since i had to do some changes. The tubing i used started to get really dirty so i had to tear down the whole loop. Turned out there was some greasy residue on the inside of the tubing. I swapped it out and got some Mayhems Clear 13/10 tubing and even after a few weeks it still looks like the first day. I also redesigned the loop since some tubes started to kink, the new one looks way cleaner and doesn't block the view on the inside anymore. Next step was to add some lighting to the build. As you might remember i already installed 2 switches on the back of the case so i can turn the light on and off. To attach the LEDs i printed a little bar that can be mounted underneath the top radiator. Here you see two prints, the first one failed and is only used to demonstrate what the prints looks before sanding and spraypainting it. After some post processing you can't tell anymore if it's printed or not. I always use these high density strips with 120 LEDs/m. One of them got white LEDs, the other one UV. So no RGB in this build Please don't mind the cables on the bottom, it's only the back of the case This one is a little blurry but i think you can see how the LED bar looks like. I plan to change the side panel to the new tempered glass version but i'm not going to make another update for this, since all i need to do is drill 4 holes and attach it.
-
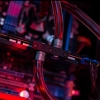
This week i worked a lot on this project and got a very big update ready. I started sleeving the cables and decided to use black, grey and yellow mdpc-x sleeve, this will give a nice contrast to the crystal blue coolant. For the yellow sleeve i chose white wire underneath, this makes the sleeve more vibrant. These alphacool combs work very good with mdpc-x sleeve which has some rougher meshes than other sleeves. Before putting the other end of the cables into the male connector i need to guide all the wires through my custom combs. This is the GPU cable. In the meantime i had a new little job for my 3D printer. I plan to install UV and white LEDs to illuminate the inside of the case later but i want to be able to turn it on and off. I ordered some little switches and printed a small cover for them. This will be attached to the back of the case. Made a rough cutout with the dremel. The edges still need to be sanded. Small but very effective. I love to create such things with the printer. It only costs a few cents (with the switches) and takes less than 5 minutes to make. Now before i install all the aluminium covers i need to prepare the pump. When designing the aluminium covers i measured everything as exactly as i could. To get a straight axis for the in- and outlet of the pump i had to turn it a bit. There are only a few mm space between the pump and the fins of the radiator later. Taking exact measurments is worth so much. The in and outlet are right undernath the holes. Let's get back to the printer, which is currently printing the small lightbox for the chemical formula. Look at these clean layers. To create the "crystal effect" i will only use a piece of LED Strip without a distribution plate. A quick test. And we're ready to attach it with double sided tape. I ended up putting another LED strip in there since some parts of the formula were too dark. Now i have the perfect effect that i was looking for. Turned down the exposure so you can see what it looks like. Cameras tend to make these things more white than they appear to our eyes. 2 or 3 months ago i already put some coolant into the custom reservoir to see if it gets rusty and doesn't leak any water. Now i had to check if there are any residues inside the coolant. If so, i couldn't use this reservoir since it might destroy the pump or other parts of the loop. But everything was fine, the coolant was clear as day one and there was no rust inside the reservoir. I love this part of a build, especially when working with soft tubing. I really should do more soft tube builds.. The first tricky part: connecting the pump under the aluminium cover. It got even more tricky when i wanted to connect the reservoir with the pump. I think it's time to put the hardware in there. Made a fast cutout on the top radiator mount to place an inlet right above the reservoir. My aim for the tubing was to achieve this "chemical lab" look, tubes going everywhere and stuff like that. It's easy to put more tube in there as needed, but i had to find the balance between too much/messy and too less. And after 2 or 3 hours i think i got what i wanted. No tubes are touching each other, made use of possible short connections (CPU Block -> Top radiator) and even got some kind of looping when i connected the GPU block with the front radiator. Time for some crystal blue coolant. It looks very dark in the bottle, but it gets just the right colour inside the tubes. Didn't want to include the loop filling in this update, but i thought i might tease you a little bit. Stay tuned!
-
I'm back with a small update. Took some time since i was in vacation but now i can continue working on it. Aquatuning sent me a new Light Panel for the XPX CPU Cooler since the one i have has blue instead of white LEDs. To make it fit better i needed the white LED so i can use the filter foil. With the colour problem solved i wanted to create a similar effect as with the illuminated 3d printed inlay i showed you in the last update. The plan is to reprint the exisiting inlay with PETG filament. To make this work i had to take exact measurements and create the new model in CAD. What you see here is the support structure generated in Slic3r, after the print you remove it. Let's see if it fits and put it back together. Definitely looks much better now. Today i received the last parts for the custom sleeved cables. I'm going with extensions for this build since it's faster and uses less material. For the next update i plan to finish the cables and the backlit aluminium cover, so i can start installing everything and build the water cooling loop.
-
Got another update for you guys, sorry for the long wait! I finally managed to get some shots while the desk was cleaned up The Desks now stand in an "L" shape, the bigger one is used as main desk for my computer. The other one functions as workspace for minor modding and my 3D printer. Please ignore the cables for now, still need to manage these and get some longer ones for the monitor. The new shelf is also mounted to the wall and fits perfect. Still something's missing, right? The guys from Caseking and noblechairs thought the same and sent me this bad boy, a new ICON series chair! Big thanks to you! The new chair doesn't only look good, it's also super comfy. Everyone who want's it more "noble", there's also a genuine leather version. I'm really happy and going to game a bit now.
-
Hi guys, got another small update. This time i also want you to help me with a decision, more at the end of this post. Yeah i'm looking for something like this, not sure if the pop figures would fit since they look more like.. well.. pop figures We'll see. That can be true but i couldn't test it myself yet. I really like the bigger versions of this case, so i thought, why not use the ITX one for this build. Also thanks for the kind words, i'm glad you all like what i'm doing! Before i start installing all the aluminium covers inside the case i had to finish the illuminated structural formula. I created an Inlay in CAD using the files which were used for the CNC milling. To make the inlay translucent i use PETG filament for this print. It will lose a bit of its clarity during the print but that's fine. The first layer still looks pretty clear. But as soon as it starts printing more layers it gets more "milky". Unfortunately the print failed as the freshly printed PETG didn't stick to the layer underneath. I changed some printing parameters and tried til it failed again. Always a challenge to get good results with a new type of filament. After a few tries it worked and the print got finished without problems. Still need to tweak the settings in future but for now this will do the job. I had to sand some edges since the inlay didn't fit properly. After that was done i took the new PSU cover and put it into the case to see how much space i have behind it. I wasn't sure if i was able to build another lightbox because i only have a few mm. I also hadn't enough Endlighten T acrylic anymore to make a rectangular lightbox. I could've cut the acrylic at an angle but that might lead to unequally illumination. So i ordered a piece of EL foil, an inverter and some filter foil from lee filters. After installing and testing the EL foil i noticed that it wasn't as bright as i expected . Usually i would just leave it as it is, it's not that bright during the day but enough when it get's darker. I also have everything here so why not use it. But when i was postprocessing these photos i found one that i took while searching for the right filter foil. I used my smartphone LED for the backlighting and that created a very different effect. The inlay gets more depth and looks like it's made out of crystals. What do you guys think? EL Foil for smooth backlighting or the LED variant to make it look more crystalline?
-
Hi guys, got a pretty big update today Before i start working on the inside of the case, i wanted to finish the exterior. Since the front cover and inlay are ready, let's go over to the backlighting. To create a smooth lighting i'm going to use the same concept as i used in the sLights from my previous builds. From bottom to top i'll need a frame, a backplate which reflects as much light as possible, the thick acrylic plate to break the light coming from the edges and the visible part, the inlay in this case. I use white LED stripes with a density of 120LEDs/m, these are really bright. Some people use standard clear 8 or 10mm acrylic plates and engrave a pattern to achieve a smooth light distribution. I never did it this way but i bought the so called EndLighten T from Evonik which is specially made for this purpose and distributes the incoming light from the edges very evenly. The reflecting backplate will be created with chrome/mirror wrap from Oracal, the best and cheapest way i can think of. So all that's left is the frame and i'm not going to use angle profiles again - this time i want to make use of my new printer. I created a first design in CAD and this is what it looks like in Slic3r. Slic3r is an amazing tool to prepare your 3D models for printing. This is needed to set all the parameters before printing, so the printer knows what to do. Even for a beginner like me pretty easy to use! First i wanted to print this piece with PLA, one of the most common printer filaments which is recommended for beginners because chances of failing your prints are pretty low. On the downside PLA starts to lose stability at 60°C, that's why i decided to use ABS. Everything went fine, to keep the smell of molted ABS out of my room i kept the window open all the time. Right here it's printing the infill, a structure generated by Slice3r to save time and material while still maintaining the stability. But then the open window ruined my print... 5 hours after the start it got late and cold outside, the heated bed keeps the object at around 100°C, the cold air from outside cools it down at the surface. The temperature difference leads to tension inside the object which then leads to the so called "warping". There are some ways to correct a warped print afterwards, but in addition i also got a layer shift because i had the printer running at a too high speed. The whole print got shifted about 5mm and i aborted the print after nearly 6 hours and went to bed a bit frustrated. The next day i decided to print it in PLA, i will try ABS with smaller prints first to get the hang of it. The LEDs will get warm, but not that warm so i won't have to worry about the PLA losing it's stability. I also redesigned the frame to save some material and time. This time it didn't even take 3 hours and i had no problems at all, the print turned out perfect. To secure the frame later i designed hexagonal recesses to put in M3 nuts. Let's go over to the front part of the case, still needs some preparing. After sanding i did a test fit. In the meantime i printed a 1mm thick plate which will be used as the backplate later. Outside i went on with the distribution plate. I bought it last year already and had other measurements back then, time to adjust this. Another test fit. After cutting the plate i needed to sand and polish the edge again. This is what it looks combined. Inside again i prepared the LED stripes. The little canals i left in the frame will be used for the cables, these fit in there perfectly. Time to put the chrome wrap on the backplate.. And another test before i put everything together. You notice i test these things very often, but i rather take the time to do so than to take it apart later when something doesn't work. With the distribution plate installed: Everything works, let's put it together. And the result looks amazing! Last step, cable sleeving.. and done! I really enjoy working with the printer. It's a cool gadget but when you use it for parts like this it turns into a powerfull tool and i'm looking forward to use it more often in future.
-
thanks Already working on something, will keep you updated
-
Sorry for the late update guys, i was pretty busy the last weeks. Today i want to show you the CNC milled parts from Gosumodz. I already coated them with clear varnish to prevent them from oxidation. The front cover was powder coated in matt black with a fine texture. The few scratches are only on the clearcoat because i already installed some of the combs via screws, they won't be visible later. The sharp object is my own designed USB3.0 cable comb. Since you can't take off the connector i had to make a comb that closes when you mount it to the big plate. With the powder coating the inlay fits perfect! That's not all i want to show you today. I recently got an amazing addition to my workbench. Let me present to you: My new Prusa i3 MK2S 3D Printer! I ordered the kit version which took me 2 days to build. I also ordered a few spools of filament to work with, especially for this mod Stay tuned!
-
I'm back and finally able to work at this mod again. No photos of the cnc milled parts yet but i continued working on the heatsinks and stuff. Since the red didn't go away with the drain cleaner i started sanding these parts like i did with the RAM heatsink. After 1-2 hours this is what it looks like. Definitely worth it. To prevent the aluminium from oxidation i sprayed a really thin layer of clear varnish on it, this way the heatsinks are still functional. Some hours later the varnish dried and i put everything back together. I decided to countersink the holes in the RAM modules, this way it looks much better. Next step was the Eisblock XPX CPU Cooler. I had to swap the alphacool logo with the white one from the modding kit and i also wanted to make the cover fit better. I took it off, started sanding it, gave it the brushed look, painted it with clear varnish and voilà. I might paint the mounting matt black afterwards, not really sure yet. To end this update i have some more pics of the GPU block. Next update will contain some shots of the whole hardware in the case as well as the cnc milled parts.
-
Hi guys, just want to let you know that the CNC milled parts finally arrived. I'll be on a trip till saturday, going to update the logs as soon as i'm back.
-
Hi guys, i don't want to let you wait longer so i'll just start with the final photos. I'm still working on the fill video, already got the material but i'm not that experienced with the postprocessing so this might take a while. For the photoshoot i wanted to try something new: Instead of just showing pictures of the case and the hardware i'm going to present the whole setup. To make good use of the RGB lighting this shoot runs under the Thermaltake theme: "Game with your MOD" So, let's start with a title which is always good for some late night fun - Rocket League. Orange and blue, a perfect match! When i have some more time i change the genre to some more time intense MMOs. And whats the first game you think of? Of course, World of Warcraft. The build now shines in "Legion" green with purple accents. But what if you want to play something more competitive? Get your friends and play a few matches Counter Strike Global Offensive, T's vs. CT's, Blue vs. Yellow ( more like ocher ) This one is my favorite combo btw. Of course we still have the classic RGB rainbow, but that's pretty hard to capture in one photo. Eventhough i had some setbacks this project was great. Meanwhile i'm a big fan of RGB, it's still a gimmick but it's a cool one which can make your whole rig always match the things you do. And if you still don't like it, turn it off! To end this post i have some pictures that didn't fit the theme but i still want to show. Are there any other games with good looking color schemes? Let me know!
-
Unfortunately the CNC milled parts didn't arrive yet because there are some problems at the post office.. In the meantime i already prepared the water cooling parts for the next step. The black finish looks cool but won't really fit the theme, so i'm going to change this. I startet taking apart the GPU block because i have to separate the aluminium parts from the rest. This is why alphacool blocks also watercool the rest of the card. It might not be the same as a fullcover block from other manufacturers, but it still has contact with the "water part" and not only uses passive cooling for VRM etc. Since i already assembled the RAM modules a few months ago i'm going to take these apart aswell. The motherboard heatsinks are also made out of alumnium. Time to go outside To get the black layer off the surface i'm going to put the parts in drain cleaner and leave them for a few minutes. Even though nothing will explode be sure to wear safety gloves and googles due to its high pH. Long clothes also might be a good option. After a few seconds you can already see something happening. After a minute the aluminium starts to shine through, but i'll leave it a little longer. Now i took the bowl and went to the drain. When it starts to foam i take it out and wash it off with water and a brush. Sometimes some parts of black are still left on the piece, just put it in the drain cleaner a few minutes to make sure it's clean. I then did the same with the backplate.. ..and the RAM modules.. ..and of course with the MB heatsinks. The red seems to be another kind of paint, the drain cleaner had no effect on it. The cool thing is, the laser engraved logos are still visible after this procedure. Unfortunately some parts had these stains which only went away after sanding. So i tried it with one of the RAM modules and it looks really great. I started sanding with 120 grit, then used some sanding fleece to create the brushed look. Looks much better, doesn't it? A big thanks to my friend Matthias from Aquatuning who teached me this procedure!
-
Hi, also direkt nebenan The support for the frame was important to me because i don't want the desk to wiggle. Also i wasn't sure if it would be enough to only put two legs under the wood when i want to put my heavy pc on there. The setup is already working but i didn't have time to tidy it up for some photos since i'm still working on some case mod projects as well. Nevertheless i have a small update for you guys. I still have some shelf mounts left in the wall and some wood, so we decided to make a new shelf. The piece of wood has a really cool shape imo. For the mounting we had to mill the backside of the wood. After that we drilled two holes for the metal rods. Then i used the same oil that i used for the desks. the colour looks a bit weird because i had my camera set to jpg instead of raw and the white balance was pretty f*****. But it definitely looks the same as the desk.
-
Ok guys, finally got a first update for you. My friend John from Gosumodz sent me first pictures of the CNC milled parts. This is the front cover, i'm going to powdercoat it black once it's here. Unfortunately the acrylic plate was too thin so John came up with an idea. He milled little pockets for the inlay and divided it into 3 smaller parts. The tape is only for shipping. And this is the front view, keep in mind that we had to leave a little gap since the powder coating will create a ~0.1mm thick layer. Really looking forward to receive the parts and start working on the case itself.
-
Normally you should find pics of the filled loop here but unfortunately i had a little accident. When i was preparing the camera for the photos i suddenly got a bluescreen. No problem, i thought til i saw water on the inside of the window. I instantly pulled the cables and took everything apart. The loop developed so much pressure that the tube at the back radiator intake got pushed out spilling water all over the hardware. Good thing it didn't take any damage. The water and fittings were extremely hot which might explain the high pressure inside the loop. I talked to Thermaltake and they sent me another package. I swapped out the push in fittings with compression ones and the 360 slim radiator with a thick one. I also got a few litres C1000 Pure Clear coolant and the new concentrates as well as a pressure equalizer stop plug. About the black premixed coolant: If you're looking for pure black, this is the coolant you want to get, you can even see the particles move when illuminated. Pretty cool effect, but keep in mind that you have the clean the whole loop when changing the coolant. You'll need more than just a little bit water. This is what the coolant looks like under the flash of the camera: After taking the build apart i fitted the new radiator. Since it is not only thicker but also wider i had to use smaller spacers for my aluminium reservoir tray. After replacing them i noticed that the Sata port are unreachable this way so i went into my workshop. The first raw cut was done with my scroll saw, after that i use a file to clean the edges. Already a little bit smoother but not smooth enough so i take different types of sandpaper until it's shiny again. I also had to reposition the reservoir so i drilled a few more holes. Now i'm able to start building the loop again. While i'm at it i thought about a better routing. I wasn't able to do it without bends since the disctance between CPU und GPU block is to short for fittings. I want to try to make a video of the filling, so if you're patient i will see what i can do