Albums
-
Side Projects
This is an album of some projects I have done over the years.
- Album created by befmccracken
- Updated
- 9 images
- 1 image comment
- 9 images
- 1 image comment
-
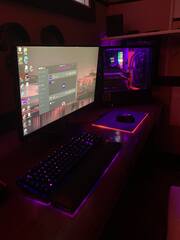
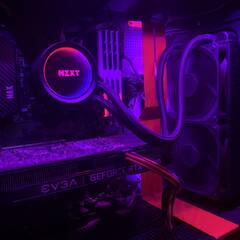
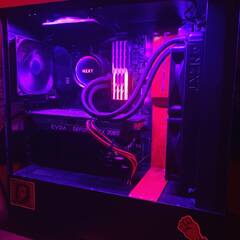
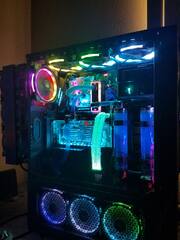
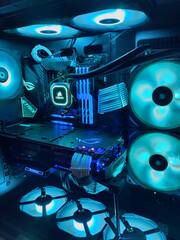
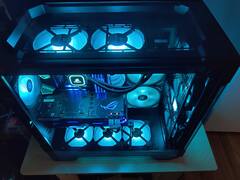
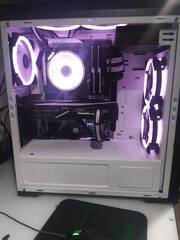
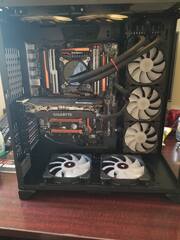
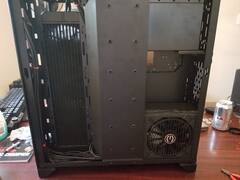
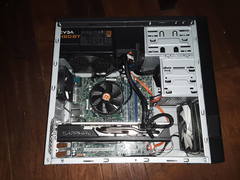
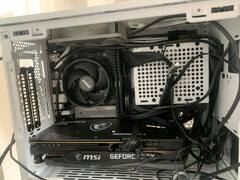
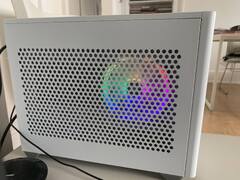
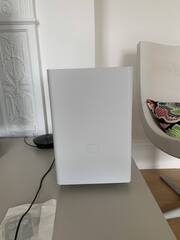
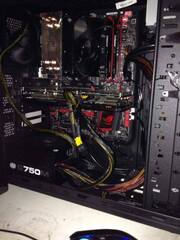
My current Rig
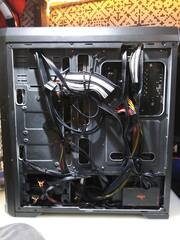
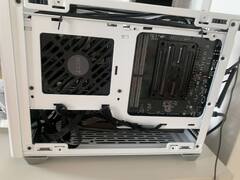
I didn't have a large budget. I had to make do with a $350 usd budget. I found a motherboard locally that came from a Lenovo Thinkcentre m93p mini tower. The board itself is a 1150 sockect board and comes with it's I/O shield. I was hoping to find a board that uses 3rd gen intel cpus and was happy to find that this board can use 4th gen cpus for under $12. As for the cpu I went with, I chose the I5-4590 for $50 that I found on Ebay. I didn't buy any ram since I had some lying around. The ram is from Micron and its speed is 1600MHz. I had 3 sticks and they total up to 16GBs total. I wasn't sure what would be a good cpu cooler so I just went with what Amazon recommended. Amazon recommended a cpu cooler from thermaltake for $13. For the gpu I bought a gtx 1060 6gb single fan model on Ebay for $130. I spent $20 bucks for a 120gb ssd from kingston for the boot drive and then I bought a 500gb hdd for storage which costed me another $25. I wasn't sure what psu I needed so I went on EVGA's website and used their power meter to know what psu I needed. Afterwards I bought a 450 bronze psu for $45 from them. For case I bought a Rosewill FBM-01 micro atx tower for $21. I did have to spend $5 for an 24 pin to 14 pin adapter for the motherboard to use my psu. For case fans I bought both from Artic. One is a 80mm and the other is a 120mm fan. Both costed me $16. In total I spent $336 for my rig.
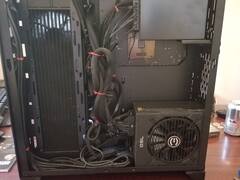
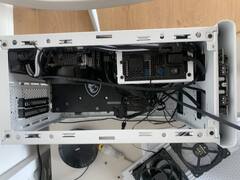
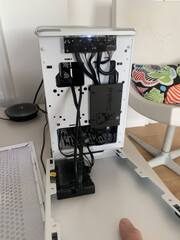
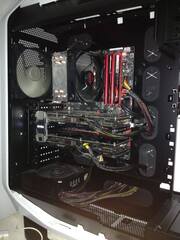
I did my best for cable management but I'm not sure if it's good enough. It's my first time building a computer.
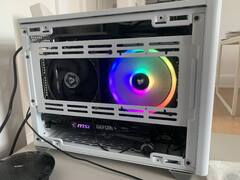
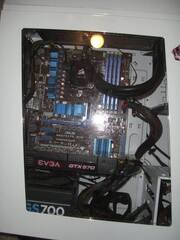
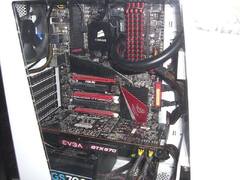
A couple weeks later the gtx 1060 stopped working. Sad times. Luckily the seller offered a 30 day warranty so I got my money back.
Since Nvidia was a bust I went with a AMD card this time. I bought a rx 570 Sapphire nitro+ 8gb for $110. Card was used for mining for about 3 months according to the seller.
So I flashed the original bios for the card I got from the manufacturer and the card works great.
- Album created by Jpo_Fett
- Updated
- 8 images
- 3 album comments
- 1 image comment
- 8 images
- 3 album comments
- 1 image comment
-
Cooler Master Watercool Build "Mastercase Racing"
See my entire build log on LTT, HERE
I'll primarily be doing video and photo editing. I got deals on the Gigabyte OC-FORCE motherboard, 4790K and two 980Tis from friends upgrading their hardware. The rest of the components were bought on sale or Ebay. I don't need the latest and greatest hardware as I rarely have time for gaming anymore. I've performed a lot of custom modifications to this PC build. The theme was inspired by legendary PORSCHE 917. The only Gulf Porsche 917 to win the 24 Hours of Le Mans was the one driven in Steve McQueen's "Le Mans" movie. If you're a motorsports enthusiast, I highly recommend seeing this movie for vintage racing footage alone. The story line stinks, but it's really about the event and cars. There is an HD version on YouTube. Many innovations in cinematography were created while filming this movie. Steve's production company welded brackets to the front frame work of the 917, so they could mount a camera to shoot him, and the other drivers, in the cockpit.
The OC-FORCE motherboard has north and south bridge water block by EK. The EVGA 960Ti cards have Koolance water blocks with back plates. The black acetal block tops and back plates were painted the Gulf Racing blue. The Bitspower dress-up pump cover was painted orange. The four Corsair Vengeance DDR (32GB) heat spreaders were painted to match later the theme later. A lot of people asked how I painted them, so I created a video guide for dismantling and painting your own DDR heat spreaders here, https://www.youtube.com/watch?v=jHVXsvd-5QE
Staying with the race car theme, I chose 1/2" O.D. Stainless Steel tubing was inspired by the fuel and brake lines of a race car. I used 316 Marine Grade Stainless, so corrosion isn't an issue. Working with Stainless Steel tubing requires a Mandrel bender and lots of practice. It takes a great deal of practice to get the perfect bends. I always keep my water loops simple for easy maintenance. I only use distilled water and change it every 6 – 8 months. I may use Mayhems Dyes when using clear PETG tubing to accent a color theme in other builds. I’ve been DIY liquid cooling for past decade and find most cooling additives or radiator cleaners are gimmicks and a waste of your money. Just use distilled water and be diligent about cleaning your loop. The water pump is an Alphacool VPP655 with adjustable speed. It has a Bitspower dress-up kit. The pump cover was painted to match the exterior paint. Did you notice that my loop has no reservoir? I like my builds simple and clean. I have a Koolance bleed valve on top of the SLI bridge for filling the loop. I fill the loop through a Koolance 3-way splitter fitting with fill port on the top of the 360mm radiator. Beneath the PC is a Koolance Drain Valve. All I have to do is connect tubing to the drain valve and drain the loop into a bucket next to my workbench.
The front grill is 1/8” thick cast acrylic that was laser cut into honeycomb. The top of the case has a smoked acrylic "moonroof" window. The clear side panel has embedded magnets. Both of these window panels are made by Mnpctech. It allows you to look into the PC from above. It has a machined aluminum 120mm ring / fan grill that emulates a fuel fill port on a race car. The ring has blue anodized washer with socket head screws. The rear fan grill is machined aluminum 120mm "Overkill" Ring. All of the fans are Scythe Gentle Typhoons AP-15. Part# D1225C12B5AP-15, 1,850 rpm, 28 dBA @ 57.68062 CFM. Unfortunately these cooling fans are no longer made by NIDEC SERVO, but there is still some available from online retailers. Dazmode sells similar version called the “DarkSide Gentle Typhoon Performance Radiator Fan” They have good static pressure and under volt nicely. You can easily dismantle them for custom paint.
You don't often see pastel colors used on custom PC builds, but it was important that the GULF RACING / PORSCHE LIVERY paint be authentic. We traced down the factory paint codes for the 1970 Porsche 917. The paint colors were mixed by Jim at "Auto Plus" in Bloomington, Minnesota. The EK XTX 360mm Radiator was painted the Gulf Racing Orange. The orange stripe is mirrored onto the chassis. The circle number five represents "Mastercase 5"
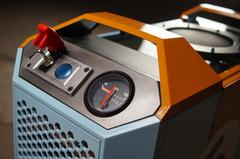
The gauge is a VDO 12 volt gauge from an old VW to indicate power. The main power switch is a momentary toggle switch with red safety cover which is used for ignition switch in the Porsche 917. The reset switch is Blue anodized aluminum push button. Both switches are mounted in machined aluminum mounting plate. The PSU shroud has embedded magnets, so it’s easy to remove and re-install. The paracord sleeving for the 24 pin and video card cables is “Graphite Grey” from Ensourced.net . The paracord PC cable combs are machined aluminum designed for the Ensourced cables.
I didn't like the Cooler Master Mastercase 5 case at first. I feel the engineer missed a lot of opportunities that could have made the case even better. Especially since CM marketed it as "modular" and it’s designed for DIY liquid cooling. The Mastercase falls 40% from it's marketing pitch, but the overall build quality and finish is outstanding. It eventually won me over after dismantling and re-assembling the case. Here is my final thoughts about the Mastercase 5 case, keeping in mind that I look at cases from perspective as DIY liquid cooler and modder.
RAVES about the Cooler Master Mastercase:
Overall Build Quality, Fit & finish. Top panel / cover design options are nice. Modular HD/SSD tray design and mounting options are best to date. 240/360/280 radiator option for front is nice.
REVISIONS for the Cooler Master Mastercase
Top radiator mounting location should be offset, to clear DDR slots on some motherboards 100% Riveted chassis?! I understand using rivets over screws to save time in manufacturing, but at minimum, the mid section floor should be removable for better access. Lack of Water pump and reservoir mounting. CM's competitors started embracing DIY cooling market over year ago, by including mounting options for reservoirs and water pumps. Mastercase 5/ Pro window panel is very flimsy. The "smoked" poly window is bluish/purple and has very poor clarity for viewing inside the case.
In closing, I want to stress that you can create an awesome PC build without having the bleeding edge of hardware inside.
Thanks again to everybody at LTT
Bill Owen
- Album created by Mnpctech
- Updated
- 9 images
- 1 image comment
- 9 images
- 1 image comment
-
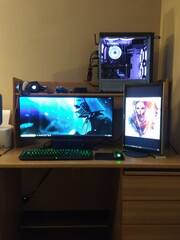
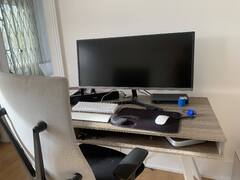
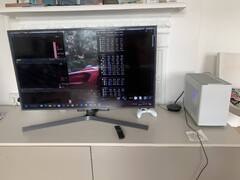
My PC
Just some photos of my personal rig.
- Album created by Callum McConnell
- Updated
- 9 images
- 1 image comment
- 9 images
- 1 image comment
-
Project-PC: The College Upgrade
Since I don't have the money to straight up build computers from scratch anymore, this computer has been and will be my daily driver and constant source of upgrades. I usually update it here from time to time, but after the upgrade to twin SSDs and more RAM, I felt that it would be acceptable to post it here once again. I have had little problems overall with the system and the upgrade from Windows 8 to 8.1 to 10.
- Album created by Dubesta11
- Updated
- 9 images
- 1 image comment
- 9 images
- 1 image comment
-
I kinda like Razer
my first custom built tower/battle station
- Album created by DemiTheon
- Updated
- 12 images
- 1 image comment
- 12 images
- 1 image comment
-
I like it simple
- Album created by coldgate
- Updated
- 11 images
- 1 image comment
- 11 images
- 1 image comment
-
H440 build
H440 red and black build
- Album created by Espen
- Updated
- 7 images
- 1 image comment
- 7 images
- 1 image comment
-
Computer after new case!
- Album created by CydiaDash
- Updated
- 4 images
- 1 image comment
- 4 images
- 1 image comment
-
Custom Define R4
The few pictures I have of my Define R4. I unfortunately didn't take any progress pictures
- Album created by fieldsy
- Updated
- 2 images
- 1 image comment
- 2 images
- 1 image comment
-
Classic Lan laptops
This is about my 3 old lan laptops one of them is fairly new but the other 2 are from 1995-6 My first was a Compaq Lte 5100 then upgraded to a 5300 while my friend had a 5000 which had a broken screen, the cpu thermal control unit was damaged and his bios was corrupted over the few years he had it.
i had given him my 5100 and stolen parts from the 5000 to make my 5300 better but his 5100 is not here at the moment because it's at his place so i am left with these 2.
we use these machines for classic gaming and i use them for audio purposes as i want to do chiptune on these with AT2 and my machine works on the internet as i have a fax card and an Ethernet card to go on it.
the machine can load google in under 2 seconds with a download speed of 74kbp/s with no problems just if i go to a page that has html5 only or uses java/adobe i can't use certain parts of it. just shows that Internet Explorer 5.5 can still work in some ways.
LTE 5000
Pentium 75mhz 256k cache 66mhz bus
16mb crucial edo ram 8mb on-board 2x4mb card
1mb vga cirrus logic res of 800x600 or xga of 1024x800 10.4" display
Ess 688 8bit Opl3 (Sound Blaster Clone works with Sb Pro 2 ct1600 driver)
3.5" Floppy
95w power brick
810mb hdd
Lte 5100
Pentium 90mhz 256k cache 66mhz bus
Kingston 24mb edo ram 2x8mb 1x8mb on-board
1mb pci cirrus logic svga res of 800x600 or xga or 1024x800 10.4" Display
Ess 1688 16bit opl3 44.1khz (Sound Blaster Clone)
1.35gb hdd
3.5" Floppy
95w power brick
Lte 5300
Pentium 133mhz 256kb cache 66mhz bus speed
80mb crucial edo ram 16mb on-board
1mb cirrus logic svga 800x600 res 1024 xga 12.1" Display
Ess 1688 16bit 44.1khz (Sound Blaster Clone)
2.16gb hdd
3.5" Floppy
External Cd ROM Drive pcmcia interface
Original Mouse
Original Case
3com Ethernet card
Original Fax card
95w power Brick
I used to make doom maps on this with doom builder and play them at a home lan as usual :P
Compaq R4000
Athlon 64 3200+
1gb Crucial ddr 333mhz ram Max of 2gb
ATI Radeon express 200m ddr 1280x800
60gb hdd
15.4" Screen
All of these photos are taken with a floppy drive camera lol
- Album created by Scrumpy
- Updated
- 25 images
- 1 image comment
- 25 images
- 1 image comment
-
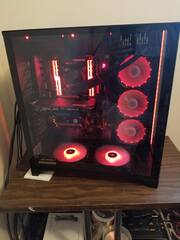
Dark Knight PC
Inspired from the Dark Knight Trilogy
- Album created by paultan
- Updated
- 41 images
- 1 image comment
- 41 images
- 1 image comment
-
-
-
H440 - X99 Build
Recent X99 build using the NZXT 440 case.
- Album created by asenna32
- Updated
- 10 images
- 1 image comment
- 10 images
- 1 image comment
-
My Project "Lucifer"!
- Album created by Aughrox
- Updated
- 2 images
- 1 image comment
- 2 images
- 1 image comment
-
current setup.
second ssd isn't wired up due to waiting for connectors and sleeving
- Album created by Sinon
- Updated
- 2 images
- 1 image comment
- 2 images
- 1 image comment
-
Test
More test. hurrdurr
- Album created by XTankSlayerX
- Updated
- 2 images
- 1 image comment
- 2 images
- 1 image comment
-
-
-
-
-
First Build - update 3
This is my first build updated with another motherboard, the ASUS Maximus VI Formula!
- Album created by MathijsZ77
- Updated
- 4 images
- 1 image comment
- 4 images
- 1 image comment
-
My personal RIG.
GTX TITAN!!!
- Album created by e29gr8t
- Updated
- 3 images
- 1 image comment
- 3 images
- 1 image comment


![20191001_141841[1].jpg](http://pbs-prod.linustechtips.com/monthly_2019_10/small.1507456308_20191001_1418411.jpg.700f54f82f165be12608c73416becbfb.jpg)
![20190929_135621[1].jpg](http://pbs-prod.linustechtips.com/monthly_2019_10/small.796061218_20190929_1356211.jpg.6122fb8681527b19211c0af24dacce65.jpg)
![20190929_134502[1].jpg](http://pbs-prod.linustechtips.com/monthly_2019_10/small.1298653314_20190929_1345021.jpg.be2505906861475d85cb6060f1a52108.jpg)
![20190929_135648[1].jpg](http://pbs-prod.linustechtips.com/monthly_2019_10/small.80916418_20190929_1356481.jpg.fd9e69f8e57eb719196a28efb35ab227.jpg)
![20190913_150641[1].jpg](http://pbs-prod.linustechtips.com/monthly_2019_10/small.2140204646_20190913_1506411.jpg.7ce923778a2672a94aa5a6f8babeb43b.jpg)
![20190929_134517[1].jpg](http://pbs-prod.linustechtips.com/monthly_2019_10/small.356457519_20190929_1345171.jpg.fa5925e18497460135f1bad965e227d9.jpg)
![20190929_134451[1].jpg](http://pbs-prod.linustechtips.com/monthly_2019_10/small.167528592_20190929_1344511.jpg.0b4899a17462d5e47a5b5985b261ffe9.jpg)


.JPG.403dcba326898990e9a2abb39aabd917.JPG)