


asone
-
Posts
34 -
Joined
-
Last visited
asone's Achievements
")
-

Hey, i don't know if you saw but i sent you a PM. Can you help me out please?
-
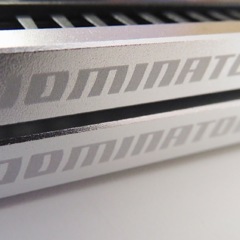
Update XIV Tempered glass panel goes on The original plan was to have someone laser cut the original side panel, but no one wanted to take on such a small job. I 3D modelled the side panel with the correct mounting pin layout and with the window cut out, then printed it in 4 segments. I then attached the printed panel parts to the glass panel with 3M tape, then applied tint over the top. This is is exactly what I envisioned for the project, and I'm very happy with the outcome.

-
Thanks! I'm using an Adafruit Feather M0 to control the lighting. There are 3 pins for the Neopixel RGBW strip: 5v, GND, and Data in. Here are my pinouts Feather -> Strip 3.3v -> 5v GND -> GND 6 -> Data in I have it connected to the PC via USB, so that I can program the lighting to however I want. hope that helps!
-
Update XIII Everything went smoothly today, and the build is now assembled and running. The only thing left to do is the side panel window, but that can wait a couple weeks. I couldn't be happier with the way it looks and runs!
-
Update XII Aaaaaand the final parts are here. No glamour shots as I'm not at home right now. Intel i7 7700k I went back and forth between this and the 7600k. I was originally planning for the i5, as the original planned GPU was a GTX1060 or an RX480. By the miracle of Boxing Day sales, I was able to grab a GTX1070 for $529 (AUD), compared to the usual price at the time of $679. I want to avoid bottlenecks at all cost and really get the most out of the 1070 at 1080p, so the 7700k was the final decision. The SSD also came, I decided to just go with 240GB for now. OS (30GB) + BF1 (50GB) + DOOM (50GB) + Witcher 3 (35GB) sits me under 200GB easily and I plan on those games lasting a long time. I'll add a ~500GB SSD when I need it in a several months time. Lastly, my choice of lighting - the Adafruit Neopixels. I'll be using their Feather M0 microcontroller to handle the lighting effects. It's a lot smaller (and cheaper) than the NZXT Hue+ which is why I went for it. Going to commence building this Thursday and absolutely cannot wait!
-
Update XI 24-pin is done! Went for the smallest cable length possible. I don't want to draw attention to the cables at all, I'm going for that stealthy look. The smallest cable is 74mm long, and the longest is 140mm. The black paracord is a lot easier to work with for some reason, the melting and welding was much more willing and forgiving. Im very pleased with the end result. CPU and SSD coming this week
-
Update X EVGA sent me out the updated BIOS chip with Intel 7th gen support for my Z170 board. Thought i'd install it while getting some measurements for the motherboard to PSU cables. Those are damn long cables. Thankfully the motherboard and power supply are right next to each other so I'm hoping to do a nice, tidy, minimal cable.
-
Update IX Some sleeving progress made today. Lots of frustration, patience, and learning. Decided to take on the 8-pin PCIE cable first. I wanted this in white, so that it reflects the LEDs nicely. All the tools. Wire crimper, wire stripper, side cutters, lighter.. you get the picture. You need the right tools for sleeving or you'll have no hope. a couple hours in, learning through repetition. About 4-5 hours in at this point.. frustration levels were peaking and I was one more failed cable away from giving up. I learned that I was crimping the wires way too hard. It would flatten so much that when I came time to weld the paracord over it, it was too thick to make an entry into the PCIE plug. Here's my first two successful cables.. Some planning for the junction wires.. First junction wire complete! And the finished product. The heatshrunk junctions will be hidden behind the GPU, so I'm not concerned. Very happy with how it turned out for my first cable. Going to do the 24-pin this Sunday, as well as order the remaining parts (CPU and SSD). By the end of next week I should have a finished build (aside from the glass side panel).
-
Update VIII NCASE M1 feet are done. I think they look great, gives the case a nice stance. Printed at 100% infill ABS, with a TPU layer for traction which worked really, really well. Some other goodies arrived today! Arctic Silver 5 to keep the CPU temps nice and low. Cryorig M9i - a stealthy but fairly low profile cooler that'll fit the M1 nicely. At $35 I'm interested to see how the temps are. Corsair SF450 Power Supply - holy crap, the unboxing experience was epic. I mean, look at these damn pouches that the cables and unit come in.. Cable sleeving supplies from Ensourced. Stuck with plain black and white paracord for now. Attempted some sleeving today but it was an epic failure. Couldn't get the paracord to weld nicely to the wire, and when it did, it was too thick to insert into the PCIE plug. Very frustrating to say the least but willing to give it another shot. Hopefully better luck tomorrow..
-
I couldn't give two shits about the thumbnail, but.. 4K resolution for CPU testing? WTF were you thinking?
-
GIGABYTE Aorus GTX 1080Ti Revealed by HardwareCanucks?
asone replied to HKZeroFive's topic in Tech News
"The actual graphics core is so new that we can't actually tell you what it is" "It will certainly be interesting spring time at HardwareCanucks offices" Would a 1080Ti really operate on a completely new graphics core? I think this is something else. -
Update VII GTX1070 Founder's Edition arrived today. This thing is such a beast, and I love the cooler design. I can't wait to tear through 1080p on this thing. I've watched hours and hours of reviews on the GTX 10-series cards, drooling pretty much through their entirety, and can't believe I actually own one of these now.. For me, seeing that 1070 standing proud against the M1 hit me right in the feels. Almost there.
-
Thanks! I think they look great too. The glass panel is only a render for now but i'm contacting a laser cutters and custom glass companies to get that underway. If you have an M1, i'd be happy to send you the .STL files so that you can get them printed yourself.
-
Thanks! I'm definitely considering it, the benefit of hyper-threading of the i7 over the i5 is definitely starting to show in newer games. I think I may go end up going with the 7700k seeing as i'm waiting for Kaby Lake anyway. I'd highly recommend the K65, the thing is so rigid and well constructed. The leather wrist rest is awesome, and as far as I know the Asus Claymore doesn't come with a wrist rest? The K65 is also $30-40 AUD cheaper.
-
Update VI While I wait for some more hardware to arrive, I thought I'd get started on the new feet design for the M1. The angles and design of the M1 are sharp, but the feet are round and peggy, which kind of throws off the aesthetic. Good thing I have a 3D printer Here are some renders, Showing the bottom of the feet here, with 1mm of rubber with a 12mm diameter cut-out for the screw to pass through. First 3D printed prototype (the front, right foot). Print settings were 0.3mm layer height, ABS printed at 242Cº / 110Cº bed temperature (glass bed). I like the way it looks, and will mirror the model to fit the other side. The finished feet will be sanded, primed, and painted black to give a nice, finished look.


.png)


