


InsolentGnome
-
Posts
278 -
Joined
-
Last visited
1 Follower

Recent Profile Visitors
1,432 profile views


InsolentGnome's Achievements
")
-
 And a video of the finished product.
 -
And here are the final shots! And a huge thanks to the sponsors who made this build possible! Check them out and check out the MSI PRO MOD Season 5 competition!
-
So, hopefully the last update before final pics, just a bunch of touch up and finishing details. Let's start off with a decal for our SSD, even though it'll be hidden behind the GPU. And some touch up on the case. I went ahead and painted the rivets and screws that show to match. And I redid a little bit of vinyl on the keyboard to make it look better. I also got Mei's hairpin painted up. And the headset. And to be the best troll you can, you really need to get into character. For another Mei touch, I wanted to do something with the tempered glass panel. One of her in game highlights is her drawing a smiley face in frost on the screen. So first off, I want to mask off the area that I don't want any paint. And then I took some sealer to lay down a base that sticks to the glass. Next is to go back with some regular white mixed with a transparent base and blend everything out. For the final product, you'll have to wait for the finals though! Sponsored by:
-
And it continues. A little slower than planned because something went wrong between the chip and the board. Not sure what, but they don't like playing with each other so new ones are on the way and everything got pulled apart. In a way this was good because it let me go in and take care of things that I wasn't worried about but add to the finish detail. Like vinyl stickers on the backs of the fans. Not necessary, but a nice touch. Speaking of vinyl, that's where we'll start with this update. First off, the sponsor's logos on the back panel. But that needed a little work to match the build. So I went back and frosted the edges. And then some logo replacement on fans... And on the CPU cooler. Can't wait to see this one backlit. And since this is a Mei build, I thought her ability graphics would look cool right above the motherboard. Now, I can't forget that MSI gave me a whole bunch of peripherals, so I should probably match them up too. The mouse got disassembled and painted. Same with the keyboard and headset, although I'm not done with the headset yet. But I think they keyboard need some more changes... So I went with a set of white keycaps to match. It's nice that they use standard cherry caps. Still a bit boring so lets spice it up a bit, and since I'm in the vinyl cutting mood... I jacked up my graphic for the blizzard ultimate so I'm cutting another for the 'Q'. While I was working on the details for Mei, I thought it be cool to try to make a pretty iconic part of her wardrobe, her hairpin. I had picked up some wooden dowels and random wood spheres for my last build so I went through all them and found ones that would work. I used my cordless lathe *cough, cough* and some sandpaper to taper the dowel down to more of a pin shape. There are a couple of rings on the pin and a charm, I copied those in L200 foam since it's easy to cut and work with. Then I drilled a hole in a couple of small wooden balls to turn them into beads and with a little fishing line... Slap on a round dowel rod end and you've got it. Next up I'll give it a few coats of Plasti-Dip to seal it up and it'll be ready for paint. And it'll be ready to figure out what I'm going to do with it, LOL! I think I'll mount it on the headset so anyone playing Mei gets to look like Mei. Sponsored by:
-
Yeah, I just ditched the adapter.
-
Thanks!
-
To finish up the acrylic, I went ahead and edge lit the piece next to the mb. I was hoping for a more all over effect, but that wasn't going to happen unless I had more room behind the panel. Oh well. So I slapped a white LED strip onto the edge before sticking the mb back in. For more lighting effects, I again went with LED strips, but this time a RGB set with a controller, to light the area housing the PSU and wiring. It's not so much for lighting inside the case, but to get some glow coming through the InWin's unique grill when the side panel is on. And I guess it's sort of obvious, I finished up my sleeving. Except for the USB 3. I just cut it off. It'd be nice if they could come up with a way to make it easy to sleeve. Til then, I'll just live without front panel USB 3. And mounted up my fans. But only the 120's. I didn't even think to check, but the 303 doesn't have any mounting for 140mm fans and for some reason, I've got two of them. I could have easily worked out some mounts before I started the final assembly, but now it's a little late to be drilling into things. Fortunately, the 3 120's move plenty of air, and the 140's would have been useless where I'd have mounted them anyways. Before I get too far, I need to make a heatsink for my SSD too! And then painted to match the rest of the components. Before I could install the CPU cooler I had to do something with the LED wiring. Stock uses a splitter setup that is a bit cumbersome and I managed to pull the wires out of the connector first thing anyways, so we need a new way of connecting it. I wound up slipping it down the fans wire chase and soldering it to the + and - of the fans PCB. The soldering is a little rough, but the wire is pretty much invisible with the cooler installed. So what's left...oh yeah, the GPU. With a little help from a Li-Heat riser. When I went to turn it on since it's basically put together, the damn thing kept shorting somewhere. I finally tracked it down to the InWin's power connector for the panel LED's. And that's why you always check what pins the wires run to on aux SATA connectors. 4 wires going in, but only 2 pins used, the 12v and the common. The way I had it was basically shorting it. After that was solved, she posted right up. Next up are some vinyl graphics and touch-ups. Then we can have a little fun with the tempered panel and finish everything off by matching the keyboard, mouse and headset to the build. Sponsored by:
-
So I changed things up a bit with the foam and went with a piece of 1/2" L200 and a piece of 1/4". It's only a 1/4" difference, but it worked a lot better. After gluing it all on, I went in with a razor and carved it similar to Mei's wall. Luckily, it's ice, so imperfection was a good thing. After the carving, I primed the foam with Plasti-Dip and then went back and used white glue as a filler to fill a few gaps. A few more coats of Plasti-Dip put a nice protective coating on that and it was ready for paint. To see how the process works, you can check out the tutorial I made. It really turned out to be a cool material to work with. As far as painting the base, I started with a base of Laguna Blue. Then added white highlights, topped that with some candy blue, and then went over the whole thing with some clear base with a touch of pearl white. I wanted the white to lighten everything a bit and the pearl gives it a bit of shine. It's still a bit dark and I need to hit some of the highlights again, but I'm happy for the first try. With the base done, it was time for the rest of the case to get pulled apart for paint. Everything got a coat of satin white while the interior got the blue treatment. Starting to assemble the case with the acrylic panels to clean everything up. And I did a darker blue acrylic panel for the back. And throwing it on the base just to see how it looks. That base definitely needs to be lightened up. Sponsored by:
-
Although I'm moving right along on, details are always a sticking point on any build. They can make or break it. So to make sure I don't break anything, I've decided to call in some backup to make sure I get all the details right. You might know her... That's right, Mei-Ling Zhou, everybody's favorite climatologist from Overwatch. I figure if anyone knows about the arctic and ice, it's Mei! So expect to see some influences as the build goes on. Picking up where I left off, I've got the acrylic cover panels worked out, cable pass through cut and the piece that takes up the area next to the motherboard actually slipped under the edge of the board and still has room for back lighting. The next challenge is to figure out the way to make this... the bottom of the case. I could just stick some feet on it, but where's the fun in that? First off, I grabbed some scrap MDF. And started to figure out a way to make a base that let me still deal with the cables. I figure two layers of 3/4 will give me plenty of room for plugs and cables. With everything cut out, I glued the layers together with basic wood glue and then sanded and hit them with a coat of primer. At first I though I'd be content with just the MDF as a base, but while getting them attached to the case, it became apparent that I did also need a set of feet since the MDF would pick up any dirt and grit and tear up anything you sat it on. So I snagged a set of MNPCTECH billet mITX case feet to throw on. They aren't too big and fit nicely in the one tight corner I had. Now I know that doesn't look very impressive, but all that's just to give me some room for my real plan for the base. Can you say ice wall? As Mei would say, I'm going to have to science the heck out of this. I started with some 1/2" L200 foam. This is something I've been wanting to work with for a while and is going to be fun to learn to use. Cut strips that would fit the base. Since 1/2" isn't really thick enough to do what I want, I doubled up the strips by putting them together with some adhesive. Then I glued them to my base with some more adhesive and clamped them down to make sure I got good contact. I also made them oversized, then cut them down after attaching them to make sure I didn't wind up with any large gaps. Next up is to draw a pattern on them and carve me some ice. Sponsored by:
-
Thanks!
-
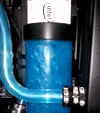
While taking apart the PSU, it shows that there is a lot of thought put into making it quiet, unfortunately that makes taking it apart and painting it a bit difficult. I had to get creative because you can't separate the board from the casing without un-soldering it. Once everything was unpainted, it was time to sleeve up the 24-pin. I went with MDPC sleeving because of the color selection. Super nice stuff, and it looks and works great, just reminds me how much I dislike how stiff it makes the cables though. That's always a factor if you've got some tight spots or short runs. But anyways, once the 24 was sleeved, I could put the PSU back together. I painted it to match the rest of the components, even though you won't see some of the details. With most of the painting out of the way, I could start on cleaning up the interior of the 303. I want to cover up a lot of the mounting holes since I won't be using them. Decided to use a translucent blue acrylic. I really like this color and it lights up pretty well with LEDs. This just barely slipped past the board but will look super clean. And with a bit of filing this piece will finish the look. Some LED strips behind it should give it a nice glow. Sponsored by:
-
So...painting. OMG so much painting and I haven't even touched the case yet. First up, we gotta take some stuff apart. And clean all the adhesive off. Priming... I decided on white and a couple of blues for the color scheme. To help the blues really pop, everything got a coat of white though. I decided to airbrush the pieces that were going to be blue, that way I didn't have to wait 48 hours for rattle can paint to cure. The water based airbrush paint is ready to go as soon as it dries. I did rattle can the fan frames, and that turned out to be a mistake as the rubber edges didn't want to cure. And cleaning off the edging and getting a nice finish was a pain so I decided to do some alterations to the fans. Since the mounts will keep the fans spaced away from anything that might interfere with the blades, I just sanded off the lip that held the edging. Then I went back and hit them with the airbrush, once again for the quick turn around. With the white sorted out, next up was some blue. And to give things a frosty look, I went back and airbrushed some frost onto everything. Then I got to put it all back together. The CPU cooler. I still need to cut a vinyl decal to replace the logo I took off. The RX580. I'm really happy with how the RAM turned out. And the fans. Still working on the PSU, that thing is a pain to take apart. Supposed to get some material in this week that will let me start working on the base for the case so I can get it painted too! Sponsored by:
-
Pushing forward with the GPU mount, I decided to try something a little different from my norm for making GPU mounts and use the original I/O bracket as one of the mounting points. This let me just cut a slot in my bracket and not have to do any extra bending. Everything turned out perfect... Until I got to the CPU cooler. In order to clear the GPU it has to have a horizontal orientation with the motherboard. Which wouldn't be a problem except that AM4 bracket for the Core Frozr L doesn't work that way. After marking out some changes, I did a little grinding to make everything fit. And that worked perfect...except that now it clips the top of the RAM in the first slot. Not really hard contact, but touching so that needs to be addressed. Clipping off the bottom fins with a Dremel solved that problem. So now that it fits, I need to go in and get the logo right side up since the cooler is asymmetrical and I can't just flip it over. Luckily, MSI had me covered on that front. The top of the cooler was easy to take apart and flip. But while I'm here, I'm thinking an arctic theme for the MSI logo, so let's check out that badge. It's painted clear plastic over a LED sheet. With some thinner, the paint came off so I don't think it'll be hard to use a bit of paint and vinyl to switch the colors up to blue and white to match the build. Sponsored by:
-
After some experimentation with different grinders, I figured out what works best and started cleaning up my cuts. Sooo much metal dust! Most of it was pretty easy, but the tips were a bit of a pain. But totally worth it! I did manage to scratch up the case a bit while doing this so painting is in it's future, but I'll cross that bridge when I get to it. There's gonna be lots of painting. Next up was dealing with the GPU. I want to show it off, but the standard layout doesn't really do that. We're gonna need some metal. Luckily I had some .063" or ~1.5mm 5052 left over from a previous project. Handy tip: label your scraps so you know what your grabbing, makes life easier. The best thing, this piece wound up being just the right width for what I was doing so all I had to do was mark out a cut and a bend. Bending was done in a vise with some love from a hammer since that little tab wouldn't work too well in my brake. Then I marked out my tab spacing from the original brackets. Little work on the bandsaw. Followed by a little filing. And then marking out and drilling some holes... And I've got a nice PCI bracket cover that uses the original mounting. A little more work and it'll be ready to hold the GPU. Sponsored by:
-
The Gunslinger - CM MasterCase5 casemod [Completed]
InsolentGnome replied to InsolentGnome's topic in Build Logs
Thanks! I'm not sure if manufacturers just haven't had time to implement the vertical mounted GPU trend or are having a hard time pulling it off. I can see some issues trying to get it to work well with the standard PCI brackets we usually run into. Though if they got rid of the dividers between the brackets, you could easily sell a mount that would convert the case. I'm doing this on an InWin 303 I've got. A scratch would have been a whole lot more work than the couple of panels I did. Honestly, I used the MasterCase cause I had one and I was hunting for something to do with it. It doesn't really suit the theme (a square case that you could do bricks on would be better) but it was a fun challenge and a chance to go crazy inside a case and leave the exterior mostly stock. Definitely not my M.O. Or check out the movie in July, should give you an idea of the world you're stepping into. But be careful, The Gunslinger was my gateway into Stephen King.- 33 replies
-
- 1
-

-
- coolermaster
- mastercase5
- (and 2 more)
