pexon
-
Posts
162 -
Joined
-
Last visited


pexon's Achievements
")
-
Sorry for the lack of updates, work has gone mad! Here is where I got to... I managed to dig out a spare 60% aluminum keyboard case, so, matching Vault 76 keeb for this project too! Whilst at Overclockers working on some cables for the epic 8 PACK Orion X-2, I picked up a new SFX PSU for the build, the sweet little Silverstone 500W. I also knocked up a little IEC cable to connect the PSU to the rear of the case, using a new C14 connector New window time. The superglue and the edge panel trimming has come out sweet. Forcing the glue to dry with a quick hit of Isopropyl caused some sweet off white patina. With the front panel, I thought it would be sweet to light the sides to allow the light to bleed through, not so intensely, so I made up a quick little LED strip set up Raw cool white Black electrical tape on top 1/3rd and red electrical tape on bottom 2/3rds of the cool white LED strips. Quite like this.... Its red, blue, purple, could work well.... Now... How the HELL do I make them flicker Thats all for now! Thanks so much for looking
-
Because where is the fun in that?! Its different to what I've seen others do and not just same old hardline tubing in a boring case
-
Thanks so much Alex!
-
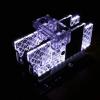
Hello! Welcome to Vault 76. Its been a while since I managed to find the time to squeeze in a build in between my manic worklife! Following off the back of my Vault 111 build, I want to continue the 'battle hardened' style, with actual damage, dinks, holes all the gory bits, not just vinyl stickers and paint. This time around, something different and something to challenge my skills, I am going with a glorious N-CASE M1 v5.0 Massive thank you to Joshua and Dan SFF Lab for generiously providing the case and allowing me to 'distress' it! First job was to get some work done on the case.... on to the fun stuff!!! The M1 is absolutely STUNNING. The build quality is second to none, every panel is removable, the finish is spotless and all the accessories will allow me to have endless options for cooling, storage and GPU choice Now, on to some distressing... Rough dremelling on the front to get the Vault 76 text cut out, I will mount some clear, sanded acrylic to add some nice back glow to the front. I felt the front needed breaking up a little, so I added some rough black spray paint on the front and sanded it back down and added some rough files cuts and acetone to loosen the still wet paint Its not very Fallout-y, but I realllly like the red LED glow on the front, on Vault 111 I used blue and yellow as the dominant colours to contrast the black and silver, I am digging the red this time around though. That it for the moment, I have the side panel window cut out and will finish the acrylic this weekend and add some vinyl decals with additional weathering too! Thanks for looking. Cheers, James
-
Scythe Slip Stream if I remember correctly
-
Hey guys, sorry for the lack of updates, I've been really busy with work, plus no sign of the watercooling gear as of yet, so not a lot of progress can be made yet... I managed to have a play around with the 24 pin however and I found that a few strands of MDPC-X Vivid Violet and a shake up with the pattern works wonders breaking the cables up and made them pop a little better. I am planning on integrating more Vivid Violet in one way or another and perhaps adding some light purple/ lilac fluid... hmmm..... Also had to do a bit of bodging with the top rad, even though the case is massssive, the top will only really support a 30mm thick rad and a set of Scyth 12mm fans in order for me to get a nice cabling job on the 8 pin showing through.... Small MDPC-X Cable clamps and some stainless countersunk screws later... Cheers for stopping by!
-
haha yea, just on there for testing purposes
-
Right, cable update! Managed to get the 8 pin and 24 pin, they need to be taken down a little bit. I plan on cutting each wire to different lengths to get all the cables laying perfectly in the rear of the case... Pretty time consuming getting each cable through the mobo tray and secured in each connector! and even MORE time consuming pulling them through to the right curvature! Progress looking good! Next update will hopefully have some watercooling stuff involved
-
As promised, here is another update I order a sheet of 6mm thick aluminium for the midplate, but when I picked this up from Overclockers on Friday afternoon and installed it in the case, it wont work, its way to thick... I went with the M5 as the dark grey heatsinks and reasonable sleek visuals will suit the build better than most of the new Z270 boards from any vendor, so many RGBs. The XPower board would have been great, but 350 for a Z270 is a little too much for me, maybe if I was going X99, but hey. I will be reusing some Crucial RAM from a previous build, the white heatsinks will add some nice contrast to the black/ anthracite mobo I think I will remove the stickers once the boards been tested etc Next up, some drilling. I wanted to create a nice clean look for the cables, namely the 24 pin as I am still undecided on the SATA cables, or if I should go all M2 SSDs or go for an external NAS.... Anyway, I used a cable comb as a guide and drilled through the plexi mobo tray and case with a 3.5mm drill bit, luckily there wasn't any chipping of the plexi, I took it nice and slow. NOTE:- SLEEVING COLOUR is not the final product, just some spare wires I had ready sleeved It needs some filing to neaten up a little (but I cant find my round jewelers files). With that said, I am really happy with the result using an old Makita 240v drill lol I realllly like Vanilla sands, it was my original idea to go with Plat grey and VS, but I don't think I can make it work. Anyway, cheers for looking!
-
Time for another one, really looking forward to this
-
Welcome this transmission from a fallen star otherwise known as Arcturus CASE:- Lian Li PC-V1000L MOTHERBOARD:- MSI Z270 Gaming M5 CPU:- i5 6600K (7700K TBA) GPU:- SLI MSI GTX 980Ti 6G GAMING or MSI GTX 1070 FE RAM:- Crucial 16GB Sport DDR4 SSD #1:- Intel 600P M.2 SSD #2:- Crucial MX300 525GB HDD:- Samsung M8 500GB 2.5" PSU:- Silverstone Strider 750W or SuperFlower LEADEX Titanium 750W Hello! Time for another build log. Off the back of my Overwatch build, I was itching to start a new build, something a little different this time, no theme really, just a nice, clean and sleek build; only one chassis brand to help me achieve this... Lian Li. My first big project was a Lian Li and I have been wanting to build in one for a while, the PC-V1000L caught my eye and got the creative juices flowing. Lets get the case out of the box. inb4 it looks like a Macintosh Easy LAN access with those wheels! Original plan was to go for MDPC-X Platinum Grey and Shade 19, but I am still unsure as the idea is to keep it clean and simple; however, it may need some colour later on down the line First up, sleeving those USB 3.0 front panel headers Light is bad on the following photos (sorry)! I ordered some aluminium angle and some plexi to mock up a lightbox/ midplate and mother board tray cover I have some more pictures to add this weekend, just waiting for them to upload on imgur! Happy weekend! See you soon. James/pex
-
For modding, it would be best to look out for a Filco keyboard. Easy to get good quality aluminium cases for, cables, plates and stadard layout for easy keycap replacement.
-
Thats a decent PSU to make cables for then, there is plenty of info on OCN in regards to the pinout
-
Hey! Most 18AWG wire will be fine. Look for an O/D o <2.3mm though, that way, you wont damage your crimping tool. Be careful buying wire from overseas, I've had a lot of rubbish stuff, with varying degrees of quality, its always better to buy it locally if you can, if there are any issues, its easy to remedy. You only need female crimps for all the major bits, like 24, 8 pin etc. Which PSU are you using? I can help you out if needs be. In regards to the crimping tool, there is only one, MDPC-X one
-
Hey guys, long time no see, I am sorry Work has gotten on top of me and I was not able to get some final, decent photos of the project, but, here we go! http://imgur.com/a/ynMmA // more pics here < Now, all I can do is thank the following for supporting PROJECT OVERWATCH, the build would not have been doable without you:- Tom and the media guys at MSI UK who kindly displayed her on their stand at Insomnia. Nate at E22/ HEXGEAR for the case and continued support The guys at Alphacool, Eddy you are a legend All the lads at Overclockers, Chris, Pack, Hal And thank you all for looking, I hope to be back with a new build log in the next month or so. This time, not as hectic as this! <3 James/ pex