Jump to content

The Lightning 350D - [BUILD UPDATE 4/3/14]

avenge_peach

AFAIK a Nikon D80.


Those are amazing photos for a cheap DSLR. I was looking at the Canon Rebel for about $200 bucks more and this actually seems like a better deal because your build photos look awesome.

Link to comment
Share on other sites

Link to post
Share on other sites

Those are amazing photos for a cheap DSLR. I was looking at the Canon Rebel for about $200 bucks more and this actually seems like a better deal because your build photos look awesome.

Don't forget though: It depends more on the lens, lighting and the

photographer's skill than the camera body itself, as long as the

cemara body is at least halfway decent. Just as a side note. ;)

BUILD LOGS: HELIOS - Latest Update: 2015-SEP-06 ::: ZEUS - BOTW 2013-JUN-28 ::: APOLLO - Complete: 2014-MAY-10
OTHER STUFF: Cable Lacing Tutorial ::: What Is ZFS? ::: mincss Primer ::: LSI RAID Card Flashing Tutorial
FORUM INFO: Community Standards ::: The Moderating Team ::: 10TB+ Storage Showoff Topic

Link to comment
Share on other sites

Link to post
Share on other sites

Don't forget though: It depends more on the lens, lighting and the

photographer's skill than the camera body itself, as long as the

cemara body is at least halfway decent. Just as a side note. ;)


So I've heard. I've been engaged in hour long marathons of YouTube photography tutorials and I'm finally mastering white balance and lighting. That's the hardest part! I'll probably be getting that same camera along with a 1.8mm lens as well as it will be cheap enough to do some practice shots. Cheers :)

Link to comment
Share on other sites

Link to post
Share on other sites

So I've heard. I've been engaged in hour long marathons of YouTube photography tutorials and I'm finally mastering white balance and lighting. That's the hardest part! I'll probably be getting that same camera along with a 1.8mm lens as well as it will be cheap enough to do some practice shots. Cheers :)

Hehe, it would appear our photographic journeys are rather similar. ;)

BUILD LOGS: HELIOS - Latest Update: 2015-SEP-06 ::: ZEUS - BOTW 2013-JUN-28 ::: APOLLO - Complete: 2014-MAY-10
OTHER STUFF: Cable Lacing Tutorial ::: What Is ZFS? ::: mincss Primer ::: LSI RAID Card Flashing Tutorial
FORUM INFO: Community Standards ::: The Moderating Team ::: 10TB+ Storage Showoff Topic

Link to comment
Share on other sites

Link to post
Share on other sites

 This looks amazing. I was thinking about doing the same (colour coding a 350D); did you find it difficult to find things that matched? I was thinking about doing a white one, how did you source the parts and did you choose yellow because you found the parts that worked or did you pick yellow and then find the parts?

Thanks a lot,

cjsun9


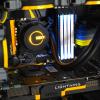
Settled on the Motherboard first and built around it.  The Lightning and PSU were kind of lucky as I was planning on painting/modding units that did not match.  The Lightning dropped in price (was $750) due to the 290X release, and the RM750 was just released, reviewed pretty well and had matching yellow.


Here is a teaser potato picture with my phone of the new fan and HDD set-up.  I wish there was an elegant way to leave the GPU like that but alas.


iqZo9NE.jpg

Link to comment
Share on other sites

Link to post
Share on other sites

How Did You paint Those Rings

Future Build : Intel-Core i7 4790K : Corsair H100i : Asus Maximus VII Hero : Corsair Vengeance Pro 8GB (DDR3-1866) : Samsung 840 EVO 120GB : Seagate Baracuda 1TB : Asus GeForce GTX 770 : NZXT H440 (Red/Black) : EVGA SuperNova G2 850W :

 Acer H236HLBMID Corsair M45 Mouse : Ducky Shine 3 (Red LED/Cherry MX Brown) : Audio Technica M50RD : Some Nice Cheap Mouse Mat 

Peripherals :
Link to comment
Share on other sites

Link to post
Share on other sites

How Did You paint Those Rings


Sprayed them directly. Asked him about it on PM earlier, and I did the same to mine.


Bought a yellow spray from a local store, and just spray painted it directly on the rings, and no primer or anything like that used.

NZXT H440   //   MSI Z87 MPOWER MAX AC   //   i5 4670K   //   MSI GTX 780 Lightning 3GB   //   HyperX Beast 8GB 2400mhz   //   OCZ Agility


Link to comment
Share on other sites

Link to post
Share on other sites

If I were to be honest with you, this is the best build I have seen on this forum by far :D 

Great color scheme and build.

Link to comment
Share on other sites

Link to post
Share on other sites

Love it !

Area 51 2014. Intel 5820k@ 4.4ghz. MSI X99.16gb Quad channel ram. AMD Fury X.Asus RAIDR.OCZ ARC 480gb SSD. Velociraptor 600gb. 2tb WD.

Link to comment
Share on other sites

Link to post
Share on other sites

Settled on the Motherboard first and built around it.  The Lightning and PSU were kind of lucky as I was planning on painting/modding units that did not match.  The Lightning dropped in price (was $750) due to the 290X release, and the RM750 was just released, reviewed pretty well and had matching yellow.


Here is a teaser potato picture with my phone of the new fan and HDD set-up.  I wish there was an elegant way to leave the GPU like that but alas.

-pic-


Well obviously you can't really put it that far down. PSU will be in the way. However you can go crazy and mod the case a bunch. Then use some risers. and tada! 

Here are some pictures of risers. This is a DIY made so it's black, most of them are grey, but he just used some tape to make it black.  

pci-hei-px-1.jpg


There are as well PCB's but I don't think the direction of the card will be correct with those.

1275745750405_hz-cnmyalibaba-web1_20686.


It's possible to mount the GPU like that. Here is a picture of @paultan his build that he did recently. 


16-300x292.jpg

NZXT Phantom windowed, Asus Z77 Sabertooth, Intel 2600K, Noctua NH-D14, EVGA 780 Classified, Crucial Ballistic Tactical, Crucial M4 128GB + Samsung 850 EVO, Corsair RM850, Creative X-Fi Fatal1ty Peripherals: Sennheiser HD598, FinalMouse Classic, SteelSeries Qck Heavy, Ducky Shine Zero (MX Brown), AOC G2460PF & Qnix QX2710

Build Log: Phantom - Antique Noctua

Link to comment
Share on other sites

Link to post
Share on other sites

Nice........ :D  You're an Artistic PC Builder.............Black and Yellow is The Best Color Scheme.

My RIG CPU:Intel Core i5 6600K OC'ed 4.5 GHz Cooler: ZALMAN CNPS 10X Motherboard: GIGABYTE Z270M D3H RAM: Crucial Ballistix 8GB 2400 MHz DDR4  GPU: ZOTAC GeForce GTX 970 4GB 256 bit GDDR5 Storage: SEAGATE Sv35 1 TB and WD Green 2 TB . PSU: Seasonic S12ii 520W Case: Cooler Master N200

Link to comment
Share on other sites

Link to post
Share on other sites

  • 5 weeks later...

DAT ASS!!


Pqn4Frn.jpg


 What did you think I meant ;)


Link to comment
Share on other sites

Link to post
Share on other sites

Nice build. Nice ass

System Specs - CPU: i7 4770K - RAM: 8GB(2x4GB) Vengeance Pro - Motherboard: Maximus VI Gene - Case: Modded PowerMac G5 - CPU Cooler: H100i - PSU: AX860i - SSD: Samsung 840 Series 120GB and Kingston V300 120GB - HDD: Seagate Barracuda 1TB - Graphics Card: 2x GTX 780 - Case Fans: SP120s and Spectre 140s - Headphones: HD700, Alpha Dog, SE215

Sony A7R w/ Zeiss 55mm F1.8

Link to comment
Share on other sites

Link to post
Share on other sites

I am really inspired by your build! I wanted to do a similar build but with a red accent instead of yellow. I also really like your choice of colors for the grey, darker grey and black sleevings.


You also said that you purchased the majority of your sleeving materials from lutro0-customs. What color sleeving did you use for the grey, darker grey, and black sleevings? 


http://lutro0-customs.com/products/lc-teleios-sleeving-black-25ft

http://lutro0-customs.com/products/lc-teleios-sleeving-dark-gray-25ft

http://lutro0-customs.com/products/lc-teleios-sleeving-gray-25ft


Were these the colors? 

Link to comment
Share on other sites

Link to post
Share on other sites

God, ive been drooling for that mobo for quite some time. The color scheme is pretty much what i intend to do someday xD


Good job

Link to comment
Share on other sites

Link to post
Share on other sites

I am really inspired by your build! I wanted to do a similar build but with a red accent instead of yellow. I also really like your choice of colors for the grey, darker grey and black sleevings.


You also said that you purchased the majority of your sleeving materials from lutro0-customs. What color sleeving did you use for the grey, darker grey, and black sleevings? 


http://lutro0-customs.com/products/lc-teleios-sleeving-black-25ft

http://lutro0-customs.com/products/lc-teleios-sleeving-dark-gray-25ft

http://lutro0-customs.com/products/lc-teleios-sleeving-gray-25ft


Were these the colors? 


Yup!  Those are the colors.

Link to comment
Share on other sites

Link to post
Share on other sites

Build update!  I also modified the OP with the new pictures and stuff below:


Update 4/3/14: I spent the last few months since my first post making some updates to the build.  Updates copied from my reddit post on /r/cablemanagement:


  • Re-sleeved the 24-pin to remove the cable extension and sewed the wires to maintain the evenness of the cable coming out of the motherboard.

  • Shortened the length of the PCI-E cable and added three stitches to maintain evenness. The stitches keep the cable very rigid and as it passes through the back panel grommet I have it running under the corner of the GPU. This serves to prop the GPU up, eliminating GPU sag completely.

  • Removed the drive cages and mounted the HDD to the floor with anti-vibration mounting (before while in the Corsair cage, the HDD vibrations would move my mouse cursor. Problem solved and bonus airflow.)

  • Mounted the SSD to the rear panel to be in view from the window.

  • Non-cable management related: Added Bitspower fan adaptors and 120mm SP120 PWM fans to the rad. I had to literally break the locking clip on the ESP connector to get it to fit. The ESP connector is very rigid due to the sleeving, routing, and sewing so it does not budge unless I remove the whole cable. 

  • Upgraded to 4770K thanks to Staples for $230

Enjoy!


gT1TCba.jpg

4lOk6Hf.jpgx0GMPZe.jpg

dViJZkr.jpg

kuWW05F.jpg

7uBIR9z.jpg

Link to comment
Share on other sites

Link to post
Share on other sites

Also, I entered the build into Corsairs PC Domination contest in the Open System category (apparently didn't qualify for standard system because I drilled holes in the chassis to mount the HDD but whatever).  Let's just say I'm feeling confident at this point!

Link to comment
Share on other sites

Link to post
Share on other sites

Loving the update pictures!

If you ever need help with a build, read the following before posting: http://linustechtips.com/main/topic/3061-build-plan-thread-recommendations-please-read-before-posting/
Also, make sure to quote a post or tag a member when replying or else they won't get a notification that you replied to them.

Link to comment
Share on other sites

Link to post
Share on other sites

oh my goodness. so nice much wow

DREAM BUILD

I7 4770k,Corsair 900D,Asus Maximus Formula VI,16 GB Corsair VENGEANCE,2 TB WD Black,780ti,Ax760I,Cooler Master Glacer

Link to comment
Share on other sites

Link to post
Share on other sites

I need cable sleeving like this in my life!

CPU  Intel i7 5820k Motherboard Asus X99-S  RAM  32GB (8x4) Kingston Hyper X Fury GPU EVGA GTX 1080Ti SC2 iCX Case Fractal Design R4 Windowed Storage 500GB Samsung 850 Evo + 120GB Crucial M500 SSD + 2TB Seagate Barracuda + 1TB Western Digital Blue PSU Corsair RM1000 Display 2x Asus VS239HV Cooling  Noctua NH-D15 Keyboard  Corsair K70 RGB Mouse Logitech G502 Gaming Surface Razer Golitahus Extended Speed

Link to comment
Share on other sites

Link to post
Share on other sites

Create an account or sign in to comment

You need to be a member in order to leave a comment

Create an account

Sign up for a new account in our community. It's easy!

Register a new account

Sign in

Already have an account? Sign in here.

Sign In Now


×