Jump to content

HEX GEAR R40 Engineering station - Final pics on page 5

p0Pe


Lets see if you still think it is too much red:D


DAAAAMMMNNNN......!!!


sorry..


DAAAAAAAAAAMMMNNNNNN.....!!!


do u mind if i describe how does it feel following your post?

it feels like u finally CUM.. a REAL HIGH PRESSURE CUM after having a good sex for 5 hour. lol....

sorry if it's too vulgar. i really dont know how to describe my feelings lol


damn man...!! this is the best build i've ever seen in this forum.! ever..!!

even it's too much red (i'm still hoping for light black water or metal pipe) but, this is TRULY THE BEST EVER!!!


i'm sooo wit yaaa.....!!!!!!

Link to comment
Share on other sites

Link to post
Share on other sites

p0Pe, you did it again. Beautiful build. It's interesting how the fluid is red but sometimes it seems almost amber-ish. :)


Only little thing that I'm not fan of, is the screws on the front and back, they are waaaay too red. I would change them for black, but that's just nitpicking at this point. You know you did something really good, when only thing that bugs me are the screws. :D


3rd picture, you have nice pink cloth, Linus would be proud. :P

My modded Air 540 build

Spoiler


Link to comment
Share on other sites

Link to post
Share on other sites

The most perfect build on the forum that i have seen


Thanks man! Apriciate it!


Man the end result is epic. Not a huge fan of the cables... think the black make it look dirty, but personal preference never the less. The cable management is second to none. Holy shit... again.. to a point where I now NEED both a CNC and laser edger/cutter.. hell throw a decent 3D printer in that mix ;) The rest is... well... in lack of a better word... perfect. The Res looks sick... really sick!


What really blows my mind is more... how the hech do you come up with these ideas/solutions?!?! One thing is fabricating and making the stuff... Imagining it is something that can't be taught :)


What speed is your pump running at? Got the same rads  in mine and getting a bit higher temps. Granted I've only done stress testing and benchmarks still.


Thanks man! The pump is running at setting 1. I have learned that flow rate does not really have a huge impact on the temperatures, as long as its not at a stand still.


Regarding coming up with the ideas, I think it differs from person to person. I like to just start a build with a very basic idea of what I want to do (hardware specs) and then make up the rest as I go along. I often find that the ideas comes quite naturally as most of the stuff I incorporate is "form follows function" stuff. The cable plate was done to keep the cables neatly in place, but also so that it would be easier to route them to the correct output.

The rear watercooling block was made as I needed something to route the loop around on the back. I initially thought of just doing some hardline tubing on the outside, but choose this instead, as I liked the idea better.


Yeah, I'm kinda tired of red too, but this pc is beautiful, I'd have it  :)

IMO it should be in the Art Museum.


Thanks man! It will stay on my desk I think ;P


DAAAAMMMNNNN......!!!


sorry..


DAAAAAAAAAAMMMNNNNNN.....!!!


do u mind if i describe how does it feel following your post?

it feels like u finally CUM.. a REAL HIGH PRESSURE CUM after having a good sex for 5 hour. lol....

sorry if it's too vulgar. i really dont know how to describe my feelings lol


damn man...!! this is the best build i've ever seen in this forum.! ever..!!

even it's too much red (i'm still hoping for light black water or metal pipe) but, this is TRULY THE BEST EVER!!!


i'm sooo wit yaaa.....!!!!!!


Thanks man ;) Pipes will not be changed:D If I change anything, it is the GPU´s as I am thinking about upgrading them to titan x´s.


p0Pe, you did it again. Beautiful build. It's interesting how the fluid is red but sometimes it seems almost amber-ish. :)


Only little thing that I'm not fan of, is the screws on the front and back, they are waaaay too red. I would change them for black, but that's just nitpicking at this point. You know you did something really good, when only thing that bugs me are the screws. :D


3rd picture, you have nice pink cloth, Linus would be proud. :P


Thanks Frankie!


I have had a few people say that the bolts are too red, although I do not agree. I really love the looks of them:D I might order some black ones just to try it out, but as they are rather expensive, that will be next time I upgrade this I think.


I noticed that cloth when I uploaded the final pictures -_- The curse of parts with a mirror finish :D

Link to comment
Share on other sites

Link to post
Share on other sites

Thanks Frankie!


I have had a few people say that the bolts are too red, although I do not agree. I really love the looks of them:D I might order some black ones just to try it out, but as they are rather expensive, that will be next time I upgrade this I think.


I noticed that cloth when I uploaded the final pictures -_- The curse of parts with a mirror finish :D


Hey, it's your build and if you like them, more power to you. I don't try to put it down, it's a beautiful build nonetheless. :) I just thought I meantion that as a conctructive criticism, I don't like to do that, but we can't let you get cocky now can we. :D


There could be worse things in that reflection. :D

My modded Air 540 build

Spoiler


Link to comment
Share on other sites

Link to post
Share on other sites

This is easily one of the top builds I have ever laid eyes upon. Incredible craftsmanship. Absolutely love the external clear reservoir plate...brilliant.


The cabling is as (if not more) impressive than the watercooling. Love the combs and pass through mechanics. 


10/10 - Case modding hall of fame material. 

9900K  / Noctua NH-D15S / Z390 Aorus Master / 32GB DDR4 Vengeance Pro 3200Mhz / eVGA 2080 Ti Black Ed / Morpheus II Core / Meshify C / LG 27UK650-W / PS4 Pro / XBox One X

Link to comment
Share on other sites

Link to post
Share on other sites

Hey, it's your build and if you like them, more power to you. I don't try to put it down, it's a beautiful build nonetheless. :) I just thought I meantion that as a conctructive criticism, I don't like to do that, but we can't let you get cocky now can we. :D


There could be worse things in that reflection. :D


I always enjoy getting constructive critisism. It helps me improve:D And yeah, the reflection could have captured MUCH worse things. I am the most creative in my undies.


This is easily one of the top builds I have ever laid eyes upon. Incredible craftsmanship. Absolutely love the external clear reservoir plate...brilliant.


The cabling is as (if not more) impressive than the watercooling. Love the combs and pass through mechanics. 


10/10 - Case modding hall of fame material. 


Thanks man! I am currently working on a video similar to the one I made for Project NV : 

so expect another update within the next few days:D
Link to comment
Share on other sites

Link to post
Share on other sites

So I'm now planning an elaborate heist, as that is amazing. That distribution plate looks great now that the liquid cooling is complete. The hard piping is so well done.

Link to comment
Share on other sites

Link to post
Share on other sites

So I'm now planning an elaborate heist, as that is amazing. That distribution plate looks great now that the liquid cooling is complete. The hard piping is so well done.


Haha, you have to get past the guard dog first, and she is a fiesty little bastard!


I made a video! And I hope you will enjoy it:D


Link to comment
Share on other sites

Link to post
Share on other sites

Haha, you have to get past the guard dog first, and she is a fiesty little bastard!


I made a video! And I hope you will enjoy it:D


-snip-


That little thing holds surprising amount of fluid. :D

My modded Air 540 build

Spoiler


Link to comment
Share on other sites

Link to post
Share on other sites

The entire execution of this build is just perfect, I don't think I've ever seen such incredibly symmetry in a build, the concepts of some of your ideas are just out of this world. 


If I'd ever had enough money to get something build from you, I would 


tumblr_mtliheUj5j1savwuvo1_500.gif

phanteks enthoo pro | intel i5 4690k | noctua nh-d14 | msi z97 gaming 5 | 16gb crucial ballistix tactical | msi gtx970 4G OC  | adata sp900

Link to comment
Share on other sites

Link to post
Share on other sites

Haha, you have to get past the guard dog first, and she is a fiesty little bastard!


I made a video! And I hope you will enjoy it:D


I am willing to risk it. I have a few questions. How much liquid did it take to fill? It seemed like a lot. Also the little fitting assembly coming from the graphics card bridge, what's that for? Are you using it to remove air from the loop?

Link to comment
Share on other sites

Link to post
Share on other sites

Haha, you have to get past the guard dog first, and she is a fiesty little bastard!


I plan to get past the guard dog using a squeaky toy, like in the start of Johnny English.

Check out my YouTube channel here and don't forget to subscribe :D

Current build: Project Athena

Link to comment
Share on other sites

Link to post
Share on other sites

Nice build bro ! But is it ok to put the HDD behind the Motherboard? Because I think there's no airflow there.

[CPU] Intel i7 8700K [Motherboard] Asus ROG Maximus X Hero Z370 [RAM] Corsair Dominator Platinum 3000 Mhz [GPU] Asus Strix 1080 Ti OC [Case] Phanteks Enthoo Evolv ATX Tempered Glass [Storage] 250GB Samsung 960 Evo M.2 + 250GB Samsung 850 Evo + 1TB WDC Blue [PSU] Seasonic Prime 650W [Display] Aorus KD25F + Acer Predator XB271HU [Keyboard] Corsair K65 Rapidfire Cherry MX Speed [Mouse] Endgame Gear XM1 + Logitech G303 [Sound] Sennheiser Game One [OS] Windows 10 64 bit

Link to comment
Share on other sites

Link to post
Share on other sites

Nice build bro ! But is it ok to put the HDD behind the Motherboard? Because I think there's no airflow there.

Unless they're WD's 10000RPM drives, they don't really need much air. On top of that, Reds run slower (Less spin, less heat), and are designed to be fine with higher temps than standard drives.

INTEL CORE i5-7600K | ASUS ROG STRIX B250i GAMING | CRUCIAL BALLISTIX SPORT LT 16GB | EVGA GTX 970 SC | EVGA B3 550W
SAMSUNG 850 EVO 250GB | CRYORIG M9i | BE QUIET! PURE WINGS 2| FRACTAL DESIGN DEFINE NANO S

Link to comment
Share on other sites

Link to post
Share on other sites

That little thing holds surprising amount of fluid. :D


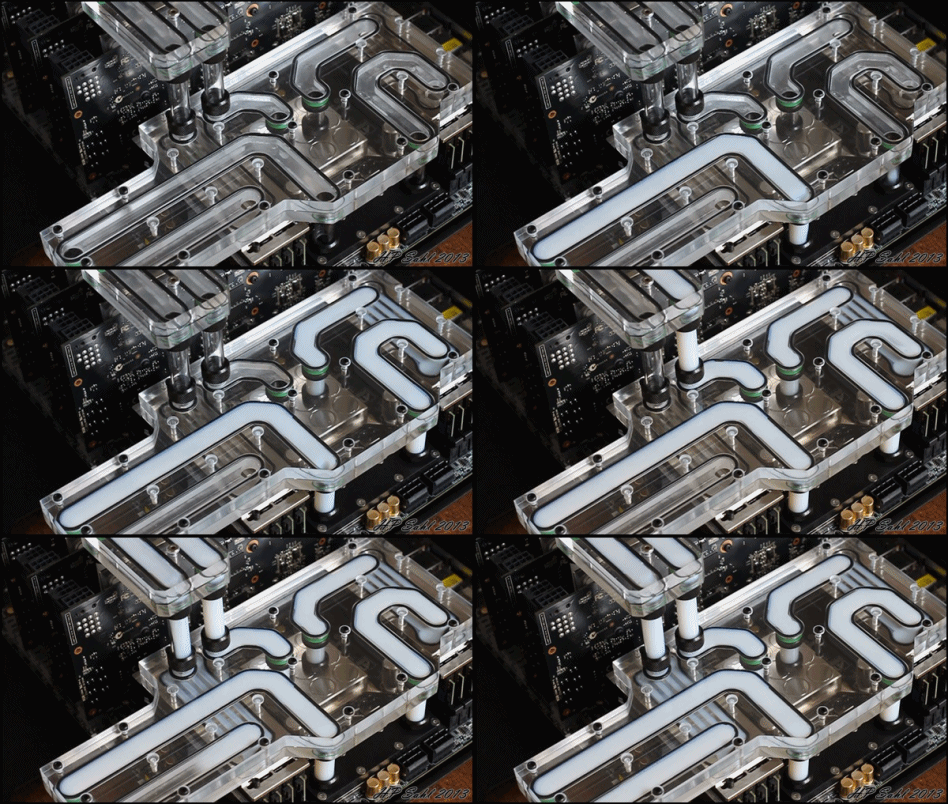
The rear distro block holds 450 ml in itself. The entire system takes 1.5L to fill:D


The entire execution of this build is just perfect, I don't think I've ever seen such incredibly symmetry in a build, the concepts of some of your ideas are just out of this world. 


If I'd ever had enough money to get something build from you, I would 


tumblr_mtliheUj5j1savwuvo1_500.gif


Haha thanks man!


I am willing to risk it. I have a few questions. How much liquid did it take to fill? It seemed like a lot. Also the little fitting assembly coming from the graphics card bridge, what's that for? Are you using it to remove air from the loop?


1.5L in total:) The fitting assembly is mostly there to ease draining of the loop, but it is also handy when doing leak testing.


I am not really fond of the "normal" way of leak testing where you fill up your loop, and hope for the best. I think that it is only in the watercooling hobby you will find people that are willing to bet their hardware that they did not mess up. I use this valve to pump air into the loop, and then close the valve. I then let that sit for 48 hours, and check if the internal pressure in the loop is still the same. If the pressure is still the same, then the loop is tight, and I can fill it up with fluid without worrying.


I feel relatively safe with my building skills when it comes to waterloops, but when you are busy, you sometime miss a fitting or something, and pumping air in the loop before water catches these little stupid mistakes that are bound to happen once or twice.


When filling water in the loop, it is also handy as I can have an "air outlet" and get more water in the loop before I have to turn on the pump as you can see in the video.


I plan to get past the guard dog using a squeaky toy, like in the start of Johnny English.


No chance that will work! :D


Nice build bro ! But is it ok to put the HDD behind the Motherboard? Because I think there's no airflow there.


Yeah, as stated by MourningSouls below, you will not really see a difference. And it gets a little airflow, and is currently 31 degrees hot, so I am not really worried about it overheating. Massive cooling of harddrives and RAM is some of the most overrated things you will see as a PC enthusiast. It looks good, but serves little purpose. 


Beautiful. So beautiful


Thanks man!


Unless they're WD's 10000RPM drives, they don't really need much air. On top of that, Reds run slower (Less spin, less heat), and are designed to be fine with higher temps than standard drives.


This^ 


And to all of you who plan on breaking in, this is what you will have to get past:


eCBODq1.jpg

Link to comment
Share on other sites

Link to post
Share on other sites

1.5L in total:) The fitting assembly is mostly there to ease draining of the loop, but it is also handy when doing leak testing.


I am not really fond of the "normal" way of leak testing where you fill up your loop, and hope for the best. I think that it is only in the watercooling hobby you will find people that are willing to bet their hardware that they did not mess up. I use this valve to pump air into the loop, and then close the valve. I then let that sit for 48 hours, and check if the internal pressure in the loop is still the same. If the pressure is still the same, then the loop is tight, and I can fill it up with fluid without worrying.


I feel relatively safe with my building skills when it comes to waterloops, but when you are busy, you sometime miss a fitting or something, and pumping air in the loop before water catches these little stupid mistakes that are bound to happen once or twice.


When filling water in the loop, it is also handy as I can have an "air outlet" and get more water in the loop before I have to turn on the pump as you can see in the video.


Okay that's kind of an interesting way of leak testing. It feels more scientific than filling it up and praying it's fine.

Link to comment
Share on other sites

Link to post
Share on other sites

Okay that's kind of an interesting way of leak testing. It feels more scientific than filling it up and praying it's fine.


It has never failed me, and are also the way most companies leak test things. 

Link to comment
Share on other sites

Link to post
Share on other sites

I..i just have no words. This is beyond what I have ever seen before. The cables makes me wanna cry, it's so beautiful!
Teach me senpai!

Link to comment
Share on other sites

Link to post
Share on other sites

I..i just have no words. This is beyond what I have ever seen before. The cables makes me wanna cry, it's so beautiful!

Teach me senpai!


Patience is key:D To be honest, if you want to do stuff like this it is actually relatively simple once you get the hang of it. It just takes a lot of time.


WOW. Just. WOW. 


Thanks man!

Link to comment
Share on other sites

Link to post
Share on other sites

Patience is key:D To be honest, if you want to do stuff like this it is actually relatively simple once you get the hang of it. It just takes a lot of time.

You've probably been asked this already, but what software are you using? And did you go to school for this or just self taught? I'm curious because i'm thinking of going to school for 3D modeling/engineering/whatever.

Just a normal guy with a constant desire to modify everything he owns. 

Check out my current build here:

https://linustechtips.com/main/topic/1006447-the-cake-is-a-lie-water-cooled-portal-pc/


Link to comment
Share on other sites

Link to post
Share on other sites

You've probably been asked this already, but what software are you using? And did you go to school for this or just self taught? I'm curious because i'm thinking of going to school for 3D modeling/engineering/whatever.


I am using solidworks right now. I have a bachelor degree in engineering where we where tought the basics of Autodesk Inventor, but much of the stuff I know about 3D programs comes from working a lot with them, so yes, basicly self tought. A lot of people I went to school with only took the classes and cant draw anything other than basic squares now. Practice makes perfect.


If you just want to learn to model, there is a vast amount of tutoriails available on youtube, for all sorts of programs.

Link to comment
Share on other sites

Link to post
Share on other sites

I just brought an upside down Hex Gear R40 5 days ago.... Please tell me the faceplate is available for purchase sometime soon!?

Sweet build, made me sign up here! Haha.

Link to comment
Share on other sites

Link to post
Share on other sites

Create an account or sign in to comment

You need to be a member in order to leave a comment

Create an account

Sign up for a new account in our community. It's easy!

Register a new account

Sign in

Already have an account? Sign in here.

Sign In Now


×