Jump to content

[Finished] Project: Cobalt (Chromed Copper Piping, Laser Etching, Cable Sleeving and More)
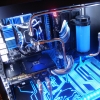
8rom1d4.jpg

Image Courtesy of "therussianpotato"


Finished Pictures


hhpkP7g.jpg


mXLCRsY.jpg


uTgACf8.jpg


2BRCB9D.jpg


pK3UsUZ.jpg


vJ5hoKV.jpg


Z5hMux8.jpg

LxEaXai.jpg

AHVR8ai.jpg

PC Builder, Engineer... BACON    Project Cobalt: http://linustechtips.com/main/topic/38058-project-cobalt-copper-piping-laser-etching-and-more/#entry489258

| NZXT Switch 810 | i5-3570k | gigabyte UD-5H | Corsair Vengeance 8gb ram | GTX 670 | 2x 60gb intel 330 series ssd's in raid 0 | 1tb seagate barracuda hdd | Corsair tx750m | XSPC razor GPU and CPU waterblocks | XSPC d5 vario pump | Thermochill Pa140.3 | phoyba 280mm radiator | Chromed Copper tubing |

Link to post
Share on other sites

Contents:


Update 1 (8/7/2013)- Front and Top Panel Mods (http://linustechtips.com/main/topic/38058-project-cobalt-copper-piping-laser-etching-and-more/#entry489261)

Update 2 (22/7/2013) - Midplate (http://linustechtips.com/main/topic/38058-project-cobalt-copper-piping-laser-etching-and-more/#entry493716)

Update 3 (25/7/2013) - copper pipe bending (http://linustechtips.com/main/topic/38058-project-cobalt-copper-piping-laser-etching-and-more/page-2#entry509277)

Update 4 (26/7/2013) - waterblocks and case mods (http://linustechtips.com/main/topic/38058-project-cobalt-copper-piping-laser-etching-and-more/page-3#entry514470)

Update 5 (28/7/2013) - all pipes and the midplate installed http://linustechtips.com/main/topic/38058-project-cobalt-copper-piping-laser-etching-and-more/page-4#entry522658

Update 6 (29/7/2013) - PSU fan swap http://linustechtips.com/main/topic/38058-project-cobalt-copper-piping-laser-etching-and-more/page-4#entry528187

Update 7 (31/7/2013) - Cable Sleeving http://linustechtips.com/main/topic/38058-project-cobalt-copper-piping-laser-etching-and-more/page-5#entry538790

Update 8 - lets just forget about update 8.

Update 9 (11/8/2013) - Assembly on main components and midplate finally finished http://linustechtips.com/main/topic/38058-project-cobalt-copper-piping-laser-etching-and-more/page-9#entry589476

Update 10 (12/8/2013) - Lighting http://linustechtips.com/main/topic/38058-project-cobalt-chromed-copper-piping-laser-etching-cable-sleeving-and-more/page-10#entry595315

Update 11 (14/8/2013) - Chromed copper pipes done! http://linustechtips.com/main/topic/38058-project-cobalt-chromed-copper-piping-laser-etching-cable-sleeving-and-more/#entry605756

Update 12 (16/8/2013) - Loop filled and finishing touches http://linustechtips.com/main/topic/38058-project-cobalt-chromed-copper-piping-laser-etching-cable-sleeving-and-more/#entry616834


Done! on 16/8/2013

PC Builder, Engineer... BACON    Project Cobalt: http://linustechtips.com/main/topic/38058-project-cobalt-copper-piping-laser-etching-and-more/#entry489258

| NZXT Switch 810 | i5-3570k | gigabyte UD-5H | Corsair Vengeance 8gb ram | GTX 670 | 2x 60gb intel 330 series ssd's in raid 0 | 1tb seagate barracuda hdd | Corsair tx750m | XSPC razor GPU and CPU waterblocks | XSPC d5 vario pump | Thermochill Pa140.3 | phoyba 280mm radiator | Chromed Copper tubing |

Link to post
Share on other sites

Update 1- Front and Top Panel Mods

I am modding the front panel becuase i plan to mount a 280 radiator in the front of the case. The ventilation on the front panel is not really sufficient for me. 
 
hHHOsp6.jpg
 
This picture shows the plastic front part of front panl that clips off the front, i have un-screwed it from the dust filter, covered it in masking tape and marked out where im going to drill and cut.
 
4qJ8CPO.jpg
 
I drill the 3 right angle corners because i don't have a demel and i wanted to keep the corner rounded equally. The 4th corner is such a large radius that i will do it with the jigsaw.
 
IUoMPIa.jpg
 
Cut from hole to hole with the jigsaw and then used a combination of flat and round files of various courseness to get the edges square and smooth.
 
tsLzViX.jpg
 
500mm x 500mm black mesh from Kustompc, going to be stuck in all of the gaps that i cut out.
 
78lE7uf.jpg
 
Here i am bending a rectangle of the mesh so that it will fit inside the 5.25" bays and so that i have something to glue to the edges. I did this by hammering the mesh over the sides of a vice that has square edges.
 
BSOtblX.jpg
 
Here is the finished 5.25" bay cover, edges so i can glue it to the sides of the bays.
 
I8gnUbP.jpg
 
Another piece of mesh cut out, this time slightly bigger than the cut made in the first pictures. I have also put it inbetween some planks of wood and used some G clamps to squeeze it together in order to flatten it as the mesh arrived slightly bent.
 
6PbX11Y.jpg
 
When working with the mesh it got a little beat up so i decided to give it a few thin coats of black spray paint just to make sure it was al perfectly black. In this picture you can also see the large piece for the top panel.
 
ejZiuMt.jpg
 
To stick all of the mesh onto the plastic i am using a 2 part epoxy resin, i normally use araldite but this stuff was on sale and works just as well.
 
ASIBL51.jpg
 
Applied the resin liberally and used objects to weight it down while it set, took about 20 minutes to dry and about 24 hours to fully set.
 
oTdYE0I.jpg
 
Top Panel with resin set and Finished.
 
GU4EZy3.jpg
 
On the left is the 5.25" bays finished andon the right is me attaching the front panel back onto the filter frame, i removed the filter and plan to use individual filters in between the fan and the radiators.
 
5lGhRys.jpg
YNpIkCl.jpg
 
Finished the front and top panel mods, next is going to be the midplate in order to create a basement.

PC Builder, Engineer... BACON    Project Cobalt: http://linustechtips.com/main/topic/38058-project-cobalt-copper-piping-laser-etching-and-more/#entry489258

| NZXT Switch 810 | i5-3570k | gigabyte UD-5H | Corsair Vengeance 8gb ram | GTX 670 | 2x 60gb intel 330 series ssd's in raid 0 | 1tb seagate barracuda hdd | Corsair tx750m | XSPC razor GPU and CPU waterblocks | XSPC d5 vario pump | Thermochill Pa140.3 | phoyba 280mm radiator | Chromed Copper tubing |

Link to post
Share on other sites

This looks really good.

I'm very interested to see the rest of your build log.

The titel is already promising.

Keep up this good work!

Thanks, the laser etching will be posted tomorrow (probably) and i hope to have started the copper piping in a few days.

PC Builder, Engineer... BACON    Project Cobalt: http://linustechtips.com/main/topic/38058-project-cobalt-copper-piping-laser-etching-and-more/#entry489258

| NZXT Switch 810 | i5-3570k | gigabyte UD-5H | Corsair Vengeance 8gb ram | GTX 670 | 2x 60gb intel 330 series ssd's in raid 0 | 1tb seagate barracuda hdd | Corsair tx750m | XSPC razor GPU and CPU waterblocks | XSPC d5 vario pump | Thermochill Pa140.3 | phoyba 280mm radiator | Chromed Copper tubing |

Link to post
Share on other sites

Looks awesome nice job very clean!

| Contact Information |
My Teamspeak : Austs1.gameservers.com:9334  |  Steam: Iamtictac456  |  My other aliases include Scruffy and Scruffy Biggems :)


Link to post
Share on other sites

looks good, very clean. I like it!

CPU: i5 4670K, Mobo: Gigabyte Z87X-UD3H, RAM: Corsair Vengeance Pro 8GB, GPU: Asus 280X, Case: Fractal Design XLR2, SSD: 840 evo 120GB, HDD: 2x 1TB Seagate, PSU: Corsair RM750, Cooler: Cooler Master Hyper 212 evo

Link to post
Share on other sites

Chevy symbol ;)? What case was this originally?

i5 4670k| Asrock H81M-ITX| EVGA Nex 650g| WD Black 500Gb| H100 with SP120s| ASUS Matrix 7970 Platinum (just sold)| Patriot Venom 1600Mhz 8Gb| Bitfenix Prodigy. Build log in progress 

Build Log here: http://linustechtips.com/main/topic/119926-yin-yang-prodigy-update-2-26-14/

Link to post
Share on other sites

Chevy symbol ;)? What case was this originally?

its an nzxt switch 810, chevy symbol? where? :)

PC Builder, Engineer... BACON    Project Cobalt: http://linustechtips.com/main/topic/38058-project-cobalt-copper-piping-laser-etching-and-more/#entry489258

| NZXT Switch 810 | i5-3570k | gigabyte UD-5H | Corsair Vengeance 8gb ram | GTX 670 | 2x 60gb intel 330 series ssd's in raid 0 | 1tb seagate barracuda hdd | Corsair tx750m | XSPC razor GPU and CPU waterblocks | XSPC d5 vario pump | Thermochill Pa140.3 | phoyba 280mm radiator | Chromed Copper tubing |

Link to post
Share on other sites

Update 2- The Mid-plate


My Acrylic arrived, 550mmx250mmx5mm, 4 sheets of clear acrylic (Perspex) cost me around £33 including delivery and cutting to size from www.sheetplastics.co.uk. I ordered it slightly bigger than I needed as I knew it was going to be laser cut and I order an extra sheet as the middle layer is very weak so I wanted a spare sheet just in case it broke before I could get it attached to the other layers.


87pKTKV.jpg


I use a VersaLaser 3.50 at my college to etch out the design for the top layer, cut out the edges so all 3 layers will line up perfectly and mark the holes so that they will also line up perfectly.


tfcyXEt.jpg


PK8CDgt.jpg


The laser etches the plastic by essentially burning it away, this leaves the surplus material in the form of a fine powder. I removed this fine powder by washing it under a tap.


UiwRXkz.jpg


As you can see in the image below the laser etching leaves the un-etched part slightly raised by about 0.2/0.3mm, this is important because of what I’m about to do with the plastic later on.


uks9kXK.jpg


The top layer with the textured design is then painted black using a cheap, black acrylic paint that was bought for £5 from a local model shop.


jytm8vQ.jpg


Using a small vibration sanded with a flat edge I was able to apply gentle pressure to the top of the plastic which removed the paint from the raised parts, due to the fact that the sander is unable to reach down into the lower parts the paint remains intact. Some of the laser painted areas had to be touched up with a smaller paint brush. This allows light to pass through the plastic in the shape of the etched design.


LyajV9b.jpg


On the bottom of the 3 layers I applied 4 strips of double sided tape and weaved a 2m blue led strip that has the correct resistors already installed to work with a 12v power source.


M6TGUzh.jpg


I used a 4.5mm drill bit and a cordless drill to drill holes in the marked places on each sheet. I then got 6 M4 nuts and bolts to attach all 3 layers to each other and have the LEDs sandwiched in-between.


Qy4izRF.jpg


On the left you can see the mid-plate bolted together without the LEDs turned on. As seen on the right I took a vibration sander to the edges in order to clean them up as there were a few rough edges and a bit of paint spill over the edges.


vpsEqN9.jpg


Sanding the Back of the top layer down to make it slightly opaque so you cant see the individual LED's. might need to use some frosted vinyl.


WjY557y.jpg


Here are the final pictures of the mid-plate with the LED strip on, not mounted in the case I just messily soldered and electrical taped a Molex plug onto the end so I could give it power from my PSU.


mBotXhe.jpg


i889bEM.jpg


dDEWuo3.jpg


on the photo it appears that you can see all of the individual LED's on the strip however you cannot see them in person.

PC Builder, Engineer... BACON    Project Cobalt: http://linustechtips.com/main/topic/38058-project-cobalt-copper-piping-laser-etching-and-more/#entry489258

| NZXT Switch 810 | i5-3570k | gigabyte UD-5H | Corsair Vengeance 8gb ram | GTX 670 | 2x 60gb intel 330 series ssd's in raid 0 | 1tb seagate barracuda hdd | Corsair tx750m | XSPC razor GPU and CPU waterblocks | XSPC d5 vario pump | Thermochill Pa140.3 | phoyba 280mm radiator | Chromed Copper tubing |

Link to post
Share on other sites

Oh dear Lord, the gorgeousness! It's too much! :wub: :D

BUILD LOGS: HELIOS - Latest Update: 2015-SEP-06 ::: ZEUS - BOTW 2013-JUN-28 ::: APOLLO - Complete: 2014-MAY-10
OTHER STUFF: Cable Lacing Tutorial ::: What Is ZFS? ::: mincss Primer ::: LSI RAID Card Flashing Tutorial
FORUM INFO: Community Standards ::: The Moderating Team ::: 10TB+ Storage Showoff Topic

Link to post
Share on other sites

That is so cool. I wander if I could do that with a side panel.

 (\__/)

 (='.'=)

(")_(")  GTX 1070 5820K 500GB Samsung EVO SSD 1TB WD Green 16GB of RAM Corsair 540 Air Black EVGA Supernova 750W Gold  Logitech G502 Fiio E10 Wharfedale Diamond 220 Yamaha A-S501 Lian Li Fan Controller NHD-15 KBTalking Keyboard

Link to post
Share on other sites

That is so cool. I wander if I could do that with a side panel.

i would like to see that, if you don't have access to a laser cutter you can always use a dremel and an artists touch.

PC Builder, Engineer... BACON    Project Cobalt: http://linustechtips.com/main/topic/38058-project-cobalt-copper-piping-laser-etching-and-more/#entry489258

| NZXT Switch 810 | i5-3570k | gigabyte UD-5H | Corsair Vengeance 8gb ram | GTX 670 | 2x 60gb intel 330 series ssd's in raid 0 | 1tb seagate barracuda hdd | Corsair tx750m | XSPC razor GPU and CPU waterblocks | XSPC d5 vario pump | Thermochill Pa140.3 | phoyba 280mm radiator | Chromed Copper tubing |

Link to post
Share on other sites

Mini Update 1


Bought the copper pipe during my lunch break today.


P7130010_zps81b9dbe6.jpg


And here is the reason you don't buy tools off ebay, this pipe bender is a fake and i would get a better bend by running the pipe over with my car.


P7130011_zps1392300d.jpg

PC Builder, Engineer... BACON    Project Cobalt: http://linustechtips.com/main/topic/38058-project-cobalt-copper-piping-laser-etching-and-more/#entry489258

| NZXT Switch 810 | i5-3570k | gigabyte UD-5H | Corsair Vengeance 8gb ram | GTX 670 | 2x 60gb intel 330 series ssd's in raid 0 | 1tb seagate barracuda hdd | Corsair tx750m | XSPC razor GPU and CPU waterblocks | XSPC d5 vario pump | Thermochill Pa140.3 | phoyba 280mm radiator | Chromed Copper tubing |

Link to post
Share on other sites

Ouch, bender that copper pipe could get expensive  :D   Classic case where investing in the right tools will pay themselves off.  Keep up the good work though!

i thought it was a used inwin hilman bender which is a quality tool but it turned out to be a cheap chinese copy with everything miss-aligned, going out tomorrow to buy a decent bender!

PC Builder, Engineer... BACON    Project Cobalt: http://linustechtips.com/main/topic/38058-project-cobalt-copper-piping-laser-etching-and-more/#entry489258

| NZXT Switch 810 | i5-3570k | gigabyte UD-5H | Corsair Vengeance 8gb ram | GTX 670 | 2x 60gb intel 330 series ssd's in raid 0 | 1tb seagate barracuda hdd | Corsair tx750m | XSPC razor GPU and CPU waterblocks | XSPC d5 vario pump | Thermochill Pa140.3 | phoyba 280mm radiator | Chromed Copper tubing |

Link to post
Share on other sites

Wow man its looking awesome nice job so far can not wait to see more!

| Contact Information |
My Teamspeak : Austs1.gameservers.com:9334  |  Steam: Iamtictac456  |  My other aliases include Scruffy and Scruffy Biggems :)


Link to post
Share on other sites

finally someone is going for copper tubing! I'm curious to see how you're going to connect the copper to the fittings (i imagine it shouldnt be the same like for ruber tubing).

Anyhow, cant wait to see more and learn.


Link to post
Share on other sites

finally someone is going for copper tubing! I'm curious to see how you're going to connect the copper to the fittings (i imagine it shouldnt be the same like for ruber tubing).

Anyhow, cant wait to see more and learn.


ive bought fitting from germany that ive tested and work.

PC Builder, Engineer... BACON    Project Cobalt: http://linustechtips.com/main/topic/38058-project-cobalt-copper-piping-laser-etching-and-more/#entry489258

| NZXT Switch 810 | i5-3570k | gigabyte UD-5H | Corsair Vengeance 8gb ram | GTX 670 | 2x 60gb intel 330 series ssd's in raid 0 | 1tb seagate barracuda hdd | Corsair tx750m | XSPC razor GPU and CPU waterblocks | XSPC d5 vario pump | Thermochill Pa140.3 | phoyba 280mm radiator | Chromed Copper tubing |

Link to post
Share on other sites

Create an account or sign in to comment

You need to be a member in order to leave a comment

Create an account

Sign up for a new account in our community. It's easy!

Register a new account

Sign in

Already have an account? Sign in here.

Sign In Now


×