Jump to content

Meshify C Transplant (1 year maintenance)

For Science!

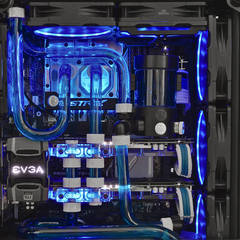
IMG_6423.thumb.JPG.46f2271429cfb0a53e130619c720e34b.JPG


So the time for the annual maintenance of my Define C was upcoming. So i decided to take the opportunity and upgrade my case to a meshify C since a TG upgrade didnt look like it was coming anytome soon for the Define C.


Below is whay my previous systrm looked like (almost 1 year ago) and it has served me well although with a few things that i wasnt happy about.

Old Build

Spoiler

20170615_115445.thumb.jpg.d198c6304afe21ba3c41c2bd509b6821.jpg


Wonky bends in a few places

Uneccesary fittings here and there

Lack of a rear fan

janky reservoir mounting solution


Soi have been working on ironing these issues out and thought maybe some would be interested in the journey too.

Link to comment
Share on other sites

Link to post
Share on other sites

How'd you mount the pump? Also is that a 360mm and a 240?

Main Gaming PC (new): HP Omen 30L || i9 10850K || RTX 3070 || 512GB WD Blue NVME || 2TB HDD, 4TB HDD, 8TB HDD ||  750W P2 ||  16GB HyperX Black DDR4

Main Gaming PC (old, still own) : Intel Core i7 7700K @5.0Ghz || GPU: GTX 1080 Seahawk EK X || Motherboard: Maximus VIII Impact || Case: Fractal Design Define Nano S || RAM : 32GB Corsair Vengeance LPX 

Cooling: EK XRES D5 100mm || Alphacool ST30 280mm w/ Vardars || Alphacool ST30 240mm w/ Vardars || Swiftech 3/8 x 1/2'' Lok-Seal Compressions || Swiftech EVGA Hydrocopper Block || Primochill Advanced LRT Orange || Distilled Water

Folding@Home Rig: 2x X5690s @4.6Ghz || GPUs: 2x Radeon HD 7990 || Motherboard: EVGA SR-2 || Case: Corsair 900D || RAM: 48GB Corsair Dominator GT 2000Mhz CL9

Ethereum Mining Rig: Pentium G4400 || Gigabyte Z170X-UD5 TH || 2x GTX 1060s (Samsung & Hynix) 1x GTX 1070 (Micron), 2x RX480s BIOS modded (Samsung), 1x R9 290X 8GB, 1x GTX 1660 Super = ~ 195 Mh/s

Peripherals: 3x U2412M (5760x1200), 1x U3011 (2560x1600) || Logitech G710 (Cherry Blues) || Logitech G600 || Brainwavz HM5 with @Gofspar Mod 

Laptop: Dell XPS 15 || "Infinity Edge" 4K IPS Screen || i7 7700HQ || GTX 1050 || 16GB 2400Mhz RAM 


Link to comment
Share on other sites

Link to post
Share on other sites

3 hours ago, arnavvr said:

How'd you mount the pump? Also is that a 360mm and a 240?

Yes its a slim 360 and 240, both hardware labs gts.


The pump is an EK D5 with their pump top. its mounted onto the case with some custom janky feet using the UNI HOLDERs and some anti vibration HDD pads. On the case its just held on with some tape and the rigid tubing itself. Its fairly crammed down there so it doesnt move around alot anyway. it could be screwed in via the slots on the uni holder if i wanted to.


20170502_175304.thumb.jpg.b10067dcc7477d51d411a058868df1e1.jpg


Link to comment
Share on other sites

Link to post
Share on other sites

I wanted to also demonstrate that my drain port works quite well. the drain is roughly in the lowest sector of the pc in the basement area.


Its made from a standard male to male dual rotary going to a Tsplitter and a ball valve followed by a 45 degree fitting. 

20170828_094316.thumb.jpg.2d28a97c22040c8e4eac830b93fea5fc.jpg


Upon opening the drain. all the fluid except fpr the bottom of the GPu and some fluid close to the res drains naturally by gravity with no additional help requored. The rest of the fluid comes out with a bit of tilting.


Link to comment
Share on other sites

Link to post
Share on other sites

Gross alert.


I took out all the components and was suprised to see not "so" much dust accumulated on the rad. I have been very bad with dusting my pc so its pretty much 1 year worth of dust. I also made the stupid mistake of having all my rads and fans as intake. that was dumb, but i only realized it a cuple of montha ago when i revisted my build log.


Minor "staining" of the fittings on first impression, but a bit of scrubbing removed it and so it looks fine.


20180209_202432.thumb.jpg.472435cfcdfa0301cbe445d0020f4a8b.jpg


20180209_204621.thumb.jpg.b84c36a72e844d3bef7ed1f1b3425432.jpg


20180209_212339.thumb.jpg.e889ea4b9b9d09d4836a0a618d51b667.jpg


20180209_213636.thumb.jpg.c89e1b3dcbea1fce31c0bf76eac8268f.jpg


Link to comment
Share on other sites

Link to post
Share on other sites

Block dissassembly time.


GPU block had arctic Mx4 which seemed to have good spread with no obvious degradation or tarnishing of the nickel.20180209_214129.thumb.jpg.1245142787254cf354be68b70c528942.jpg


20180209_214122.thumb.jpg.a8b91609f4e064e009707b26d6092ff6.jpg


The thermal pads were still nice and moist and so did not need replacing.


20180209_214045.thumb.jpg.ec2b2878b4719b20ae3382e757f52bb2.jpg


The CPU monoblock had arctic silver 5 on it and was a similar story. All good.


20180209_210607.thumb.jpg.b52d5b576aaa4bee2cd7a3714ec3de07.jpg


20180209_210613.thumb.jpg.9227909327a8482d0faeeaf55a1ec738.jpg

Link to comment
Share on other sites

Link to post
Share on other sites

No real staining observed on the blocks themselves. there was some kind of residue of unknown nature accumulat4d on the fins. but they brushed away veru easily.


You can see in this picture some residue that probably originated from the oring oil that i complained a while ago, but this alsp cleaned off well with a simple wipe.


20180209_221123.thumb.jpg.261d8519c08cec4ac7739b4092ac37b8.jpg


little poops, no problem to remove. fins looks good

20180209_221213.thumb.jpg.79bb9b4dd55884343aaea87e25163f0a.jpg


GPU block looks good too.

20180209_214855.thumb.jpg.d85ad163a4994b9adb3d08c3bf6ec2fb.jpg

20180209_221119.jpg

Link to comment
Share on other sites

Link to post
Share on other sites

So one thing i noticed is that my acrylic block for the GPU was quite cloudy. i dont remember whether it was like this originally or not. So i decided to polish it using Plastx and that workrd marvelously, ending with a almost glass like finish.


before

20180209_224509.thumb.jpg.8dc36fe7cda6e07a5b4cfd9dcbdd99b4.jpg


Before/after

20180209_232402.thumb.jpg.cda0532adaf3b8abe97962525a701c9d.jpg


However since the inside of the block will contact the coolant i made sure to rinse out the inside part of the block with soapy water followed by distilled water.

Link to comment
Share on other sites

Link to post
Share on other sites

So clean blocks. Now you can see there really isnt any tarnishing over 1 year use with EK-Cryofuel (Navy Blue)


20180210_021526.thumb.jpg.099281f92858c95c40d357f18aa46366.jpg


20180210_013954.thumb.jpg.c5952227579bed7f08cfa5daeef47601.jpg


20180210_011421.thumb.jpg.481630859228d67c97ed423e5c531538.jpg


20180210_025014.thumb.jpg.81d215674d6ab8ca671c5f10b33b44d8.jpg


Link to comment
Share on other sites

Link to post
Share on other sites

Cleaned the die, reattach thermal pads. This time ive used thermal grizzly kryonaut.


20180210_030811.jpg


20180210_031149.thumb.jpg.c4ad788c8ab977a3668c1ce99d3368d4.jpg


20180210_034351.thumb.jpg.bd276f76369329d20e8505d3e2ef45cb.jpg


monoblock wacked back on

20180210_040418.thumb.jpg.61509df5366d0ecb89e016583f46b13f.jpg

Link to comment
Share on other sites

Link to post
Share on other sites

My intentions were to maintain some degree of cable management this time around, so I had started to zip tie early to hopefully maintain it as it goes on.

20180210_060629.jpg


Radiators were cleaned by simply running them under the sink followed by distilled water. Same goes for the dust on the rad.

20180210_130926.jpg


Now I can see why Noctua maintained their poop and brown color. When you put the Fractal Dynamic fan against the Noctua Industrial iPPC you really can't tell on first glance which is the Noctua (left). Brand identity is important :p.

20180210_130946.jpg

Link to comment
Share on other sites

Link to post
Share on other sites

One of the big changes in this re-build will be the introduction of Phantek Halos Lux for each fan. This adds ~5 mm onto the fan thickness, making the build even tighter and at the same time, requiring a whole new set of screws to hold the fans onto the radiators. In this case I just got some generic M4 40 mm screws and some washers just in case.20180210_135338.thumb.jpg.154528e6a0759bbd84415a56f11481b7.jpg


This is the 3D printed reservoir bracket I printed previously for this maintenance. Using a UNI-holder I planned to suspend the reservoir in front of the RAM, to clear enough space for a rear fan.

20180210_132331.thumb.jpg.e4e134dd2ec9b24115165dd27b93d8b1.jpg


The reservoir  mount adds another 5 mm onto the fan + Phanteks Halos, so I needed to also get a couple of 45 mm M4 screws to mount the mount + Halos + fan onto the GTS rad.

20180210_134807.thumb.jpg.92fc0858ec02c4b39088f829b841bcd0.jpg


This does however mean that there are this many cables that need to be managed from the radiators alone...ooh boy.

20180210_135847.thumb.jpg.0c476285975b28a8d7f401d6a9702b9d.jpg

Link to comment
Share on other sites

Link to post
Share on other sites

Just to highlight my drain port again in case other people ask. It is constructed in this case from a male-to-male dual rotary fitting, one T-splitter, ball-valve, and another 45 fitting. The 45 fitting is actually necessary in my case becasue the ball-valve from bitspower is a dual rotary, meaning it is incredibly tedious to remove a plug from it.

20180210_141248.jpg


Also wanted to remind that to fit a pump in front of the 360mm rad in the meshify C basement, you need to offset both radiator ports using 2x 90 degree fittings so that the tubing can clear the pump itself.

20180210_141439.jpg


More bends. This time I wanted to achieve a "pseudo-parallel" look. You can see that the tubing only just fits between the rear fan and the top fan. Life would have been easier if either I didn't use the Halos (so that the rear fan wouldn't protrude so much) or if I used thinner tubing.

20180210_185813.jpg


You can see that the reservoir is "just" floating above the GPU. Although there is quite some flexibility since there are fittings coming off the res. I moved the temp sensor to the rear, but it is important to remember to use the port extender, otherwise the recessed port will leak slowly.

20180210_174801.jpg

Link to comment
Share on other sites

Link to post
Share on other sites

Sometimes being Asian and being good with chopsticks can be really useful. Like plugging in the CPU header through the top grill.

20180210_205135.jpg


Filling the new loop. Maintained the blue liquid as voted in a thread I asked previously.

20180210_232758.jpg


The tempered glass in the Meshify C is super dark, but I am confidient that with all my LEDs, it will shine :P.

20180210_234224.jpg


I'm sorry, I have failed you all. You have to be some kind of cable management god to neatly manage this many cables in the meshify C :(. At least my back panel still closes, but I am not proud of the rear.....

20180212_004527.jpg

Link to comment
Share on other sites

Link to post
Share on other sites

Looks fantastic :)

The tempered glass really looks like its not there when the lights are out, and is a big improvement over the clarity of the original Define C.


You may notice that I have all my radiator fans on exhaust. This is partly because the phanteks halos look better this way, but also because previously my Define C was overheating internally with the incoming air from the 360. This time I have 1 intake vs 5 exhaust, but the radiator fans are spinning super slowly (i mean like, 200 - 800 rpm) and the intake is working a little bit harder, so I anticipate the airflow is in fact reasonably balanced. The rear fan does have a filter, so we will see in a few months what the dust situation is.


A little bit pissed that I couldn't get the res --> pump connection straighter. Will do it when I next have an excuse to, will be very trivial.

20180213_233225.jpg

20180213_233147.jpg

Link to comment
Share on other sites

Link to post
Share on other sites

Since I have 2 sets of controllers (one remote controlled, one motherboard) These are the potentials for lighting, although to be honest, I prefer static white on white as the above pictures since its a bit more tame.


White ambient + rainbow accents

2018-02-12_01_07_01.gif.a03c0ef0d0f0e616b78429f1951fd264.gif


Rainbow ambient + white accents


Ambienty only

2018-02-12_01_09_28.gif.ea612cffe4cd741ffd61ac27fcbd41e4.gif


Accents only

2018-02-12_01_08_15.gif.63e42cd1d4fabcbe7d6f3ac197eefdd0.gif


2018-02-12_01_08_57.gif

Link to comment
Share on other sites

Link to post
Share on other sites

Why didn't you go with the R6? 

Main Gaming PC (new): HP Omen 30L || i9 10850K || RTX 3070 || 512GB WD Blue NVME || 2TB HDD, 4TB HDD, 8TB HDD ||  750W P2 ||  16GB HyperX Black DDR4

Main Gaming PC (old, still own) : Intel Core i7 7700K @5.0Ghz || GPU: GTX 1080 Seahawk EK X || Motherboard: Maximus VIII Impact || Case: Fractal Design Define Nano S || RAM : 32GB Corsair Vengeance LPX 

Cooling: EK XRES D5 100mm || Alphacool ST30 280mm w/ Vardars || Alphacool ST30 240mm w/ Vardars || Swiftech 3/8 x 1/2'' Lok-Seal Compressions || Swiftech EVGA Hydrocopper Block || Primochill Advanced LRT Orange || Distilled Water

Folding@Home Rig: 2x X5690s @4.6Ghz || GPUs: 2x Radeon HD 7990 || Motherboard: EVGA SR-2 || Case: Corsair 900D || RAM: 48GB Corsair Dominator GT 2000Mhz CL9

Ethereum Mining Rig: Pentium G4400 || Gigabyte Z170X-UD5 TH || 2x GTX 1060s (Samsung & Hynix) 1x GTX 1070 (Micron), 2x RX480s BIOS modded (Samsung), 1x R9 290X 8GB, 1x GTX 1660 Super = ~ 195 Mh/s

Peripherals: 3x U2412M (5760x1200), 1x U3011 (2560x1600) || Logitech G710 (Cherry Blues) || Logitech G600 || Brainwavz HM5 with @Gofspar Mod 

Laptop: Dell XPS 15 || "Infinity Edge" 4K IPS Screen || i7 7700HQ || GTX 1050 || 16GB 2400Mhz RAM 


Link to comment
Share on other sites

Link to post
Share on other sites

4 hours ago, arnavvr said:

Why didn't you go with the R6? 

That would have been too easy :)

I really like the small footprint of the C-series.

Link to comment
Share on other sites

Link to post
Share on other sites

9 hours ago, For Science! said:

That would have been too easy :)

I really like the small footprint of the C-series.

Nice. I'm running a Nano S with a 280mm+240mm radiator. That was a challenge, but I really like Fractal cases.

Main Gaming PC (new): HP Omen 30L || i9 10850K || RTX 3070 || 512GB WD Blue NVME || 2TB HDD, 4TB HDD, 8TB HDD ||  750W P2 ||  16GB HyperX Black DDR4

Main Gaming PC (old, still own) : Intel Core i7 7700K @5.0Ghz || GPU: GTX 1080 Seahawk EK X || Motherboard: Maximus VIII Impact || Case: Fractal Design Define Nano S || RAM : 32GB Corsair Vengeance LPX 

Cooling: EK XRES D5 100mm || Alphacool ST30 280mm w/ Vardars || Alphacool ST30 240mm w/ Vardars || Swiftech 3/8 x 1/2'' Lok-Seal Compressions || Swiftech EVGA Hydrocopper Block || Primochill Advanced LRT Orange || Distilled Water

Folding@Home Rig: 2x X5690s @4.6Ghz || GPUs: 2x Radeon HD 7990 || Motherboard: EVGA SR-2 || Case: Corsair 900D || RAM: 48GB Corsair Dominator GT 2000Mhz CL9

Ethereum Mining Rig: Pentium G4400 || Gigabyte Z170X-UD5 TH || 2x GTX 1060s (Samsung & Hynix) 1x GTX 1070 (Micron), 2x RX480s BIOS modded (Samsung), 1x R9 290X 8GB, 1x GTX 1660 Super = ~ 195 Mh/s

Peripherals: 3x U2412M (5760x1200), 1x U3011 (2560x1600) || Logitech G710 (Cherry Blues) || Logitech G600 || Brainwavz HM5 with @Gofspar Mod 

Laptop: Dell XPS 15 || "Infinity Edge" 4K IPS Screen || i7 7700HQ || GTX 1050 || 16GB 2400Mhz RAM 


Link to comment
Share on other sites

Link to post
Share on other sites

47 minutes ago, arnavvr said:

Nice. I'm running a Nano S with a 280mm+240mm radiator. That was a challenge, but I really like Fractal cases.

nice! you should finish your build log to show everyone though ;)

Link to comment
Share on other sites

Link to post
Share on other sites

  • 4 weeks later...

Oh dear! I was searching for some builds to give me ideas for my first watercooled system, also is the Meshify C. 

Sadly inow found this after finishing. I built using used electrical hardware but also thought about going SLI but was unwilling or unable to solve the reservoir placement issue. 

Two suggestion: Halos look way cooler on white fans.  I must know, Noiseblocker eLoop 120mm white ;-)

Airflow could have potentially been improved by utilizing the filtered front as intake instead but it would have undoubtedly looked inferior (!). 


Do you have any tips for putting in a GPU backplate after completion without draining? Is it even possible?

http://linustechtips.com/main/topic/334934-unofficial-ltt-beginners-guide/ (by Minibois) and a few things that will make our community interaction more pleasent:
1. FOLLOW your own topics                                                                                2.Try to QUOTE people so we can read through things easier
3.Use
PCPARTPICKER.COM - easy and most importantly approved here        4.Mark your topics SOLVED if they are                                
Don't change a running system

Link to comment
Share on other sites

Link to post
Share on other sites

On 3/15/2018 at 6:20 AM, GER_T4IGA said:

-

Thanks for the feedback :)

Yes Halos would look way better on white fans, but I already have the Noctua iPPCs so I wasn't going to swap them out :P


I used to run front intake on the Rads, but due to the small size of the case and the heat coming from the SLI, the inside of the case heated up extensively. Having the rads on exhaust has dropped my water temperatures close to 10 degrees under heavy load. The big consideration was dust at the time, but since my loop performs so much better now, the fans do not spin very hard at all and so my one intake seems to be producing a balanced airflow so dust build up is very little.


My waterblock requires to be installed with the backplate so not in my case, but also even with EKWB you need to remove a couple of screws, so you might manage, but it'll be difficult.

Link to comment
Share on other sites

Link to post
Share on other sites

  • 7 months later...


IMG_6423.JPG


I'm not worthy of seeing this magnificient piece of art. I want one so bad ?

Ex-EX build: Liquidfy C+... R.I.P.

Ex-build:

Meshify C – sold

Ryzen 5 1600x @4.0 GHz/1.4V – sold

Gigabyte X370 Aorus Gaming K7 – sold

Corsair Vengeance LPX 2x8 GB @3200 Mhz – sold

Alpenfoehn Brocken 3 Black Edition – it's somewhere

Sapphire Vega 56 Pulse – ded

Intel SSD 660p 1TB – sold

be Quiet! Straight Power 11 750w – sold

Link to comment
Share on other sites

Link to post
Share on other sites

  • 3 months later...
On 2/14/2018 at 12:55 PM, For Science! said:

20180213_233225.jpg


Sweet baby Jesus those are some sexy curves! 

AMD Motherboard Tier List  GPU Cooling Tier List  PSU Tier List  A Dive Into Custom Keyboards & Mechanical Switches

NEWCOMERS Remember to ' Reply ' to comments in order for people to see them, this is done by clicking the arrow icon at the bottom of a comment (Quote).

My Builds:

MEGA Desk Build


Blueberry Pi  R9 3950X  Asus X470 ROG Crosshair VII Hero Wi-Fi ATX  Corsair Vengeance RGB Pro 4x16GB 3200MHz CL16  EVGA GTX 1080Ti SC Black Edition 11GB  EVGA P2 850W w/ Blue Sleeved Cables  Cryorig R1 Universal (Blue)  2x Corsair Force MP510 4TB w/ Asus Hyper m.2 V2  Corsair ML Pro Blue LED Fans  Fractal Design Meshify C TG ATX Mid Tower  

Asus ROG SWIFT PG348Q 100Hz IPS G-Sync UW  Dell UltraSharp U3419W 60Hz IPS UW  Custom TOFU96  Corsair Scimitar Pro RGB 


Work Rig  ThreadRipper 3970X  Asus Prime TRX40 Pro ATX  G.Skill RipjawsV 8x32GB 3200Mhz CL16  Nvidia Quadro RTX 6000 24GB  Corsair HXi 1000W  EVGA CLC 360 AIO  8x Sabrent Rocket 2TB w/ 2x Asus Hyper m.2 V2   Arctic P12 Fans  Phanteks P400A ATX Mid Tower 


Plotting Machine 1  ThreadRipper 2990WX  AsRock X399 Taichi ATX  Kingston HyperX Fury 8x16GB 2666Mhz CL18   Nvidia Quadro K600 1GB  Corsair RMx 850W  EVGA CLC 360 AIO ‖ 2x Sabrent Rocket 2TB & 2x Sabrent Rocket 4TB w/ Asus Hyper m.2 V2  Arctic P12 Fans  Rosewill RSV-L4500 4U  5x Dell DS60 60-bay JBOD w/ 1.2PB of HDD Storage  HP 22U Half Rack


Plotting Machine 2  R9 3950X  Asus TUF X570-Plus Wi-Fi ATX  G.Skill RipjawsV 4x16GB 3200Mhz CL16   Nvidia Quadro K600 1GB  Corsair RM 650W  Noctua NH-D15s Chormax ‖ 4x Corsair MP600 Force 1TB W/ Asus Hyper m.2 Gen4  Arctic P14 & P12 Fans  Silverstone FARA R1 ATX Mid Tower


J.A.R.V.I.S.  R9 3900XT  Asus B550-I ROG STRIX Wi-Fi ITX  G.Skill Ripjaws V 2x16GB 3600MHz CL16  EVGA GTX 1080 SC2 iCX 8GB  Corsair SF 750W Platinum  Corsair H100i Pro AIO  Noctua NF-A12x15 Chromax Fans  FormD T1 SFF ITX Case  

LG 75UM8070PUA 4K UHD 120Hz IPS HDR TV  Corsair K63 Cherry MX Red Special Edition Wireless  Corsair Ironclaw RGB Wireless


Archive Server  R3 2200G  Asus B450-I ROG STRIX Wi-Fi ITX  Corsair Vengeance RGB Pro 2x8GB 3200MHz CL16 White  Vega Integrated Graphics  EVGA P2 750W  Prism Wraith Cooler  ITX Open Bench  2x HP SAS Expander  LSI-SAS9211  220TB of HDD Storage


SFF ITX Home PC  i5-7500  MSI B250I Gaming Pro Wi-Fi AC ITX  G.Skill Ripjaws V 2x8GB 2800MHz  Intel Integrated Graphics  Seasonic SSP Flex ATX 300W PSU  Cryorig C7  Velka 3 rev 1.2 SFF ITX Case (Grey)  


Laptop  Dell XPS13 2-in-1 7390 (2020)  i7-1065G7  32GB 3733MHz LPDDR4x  Intel Integrated Graphics  1TB NVME M.2  UHD+ (3840 x 2400) InfinityEdge Touch Display 


Keyboard Collection  GMMK Full Size  TOFU96 90%  ‖ KBD8x MKII TKL ‖ Drop CTRL High Profile TKL ‖ KBD Bella 75% ‖ GMMK Pro 75% ‖ XD84 Pro 75%  KBD67 V2 MKII 65%  KBD67Lite 65%  TOFU65 65%  KBD Blade 60%  Drop Carina 60%  Southpaw75 60% w/ Left Numpad  OLKB Preonic V3 Ortholinear ‖ CosPad XD24  ‖ KBDPad MKII


Key Cap Collection  GMK Boba Fett  GMK Red Samurai  GMK Laser CyberDeck +Novalties  GMK Arch  MaxKey B&W  Drop MT3 Camillo ‖ Matt3o MT3 /dev/tty  KBDfans Biip Torii Ext-2048  ePBT Less But Better +Novalties  EnjoyPBT Dolch  WinMix Mustard  Drop Skylight Horizon & Slate ‖ Glorious Black Aura   


Mechanical Key Switch Collection  Zealios V2 65g  Zealios V2 78g ‖ Zilents V2 67g  Tealios V2 67g  C³ Kiwi ‖ C³ Tangerine  Invyr Holy Panda  Durock T1 67g  Kailh Box Thick Jades ‖ Kailh Box Royal ‖ Kailh Box Heavy Dark Yellow ‖ Kailh Box Heavy Burnt Orange  Kailh Box White  Kailh Box Red  Kailh Pro Purple  Kailh Pro Burgandy  Gateron Ink Black V2  Gateron Black  Gateron Yellow  Gateron Brown  Gateron Green  Gateron Blue ‖ Cherry MX Black ‖ Cherry MX Brown ‖ Cherry MX Red

Link to comment
Share on other sites

Link to post
Share on other sites

Create an account or sign in to comment

You need to be a member in order to leave a comment

Create an account

Sign up for a new account in our community. It's easy!

Register a new account

Sign in

Already have an account? Sign in here.

Sign In Now

×