Jump to content

Vanilla Latte

I have more or less finished this build and entered it into the case mod competition at Quakecon.  Here is my attempt at finally putting the pictures down with words and I will update as I tweak and improve the case more.


Specs for the completed build:

CPU: 4790k

Mobo: Asus Impact VII

Ram: 2x Corsair Vengeance 2400 8Gb

GPU: 1080 gtx founders edition

PSU: Silverstone 500w SFX-L

Harddrives: 3x Adata sp550 512Gb in a RAID 5 (because 512Gb of SSD for 110 bucks?!? Sign me up three times!)


Watercooling:

All Barrow fittings (Highly recommend actually, I got mine from ModMyMods)

All EK blocks (Monoblock, gpu, and ram)

Radiators:

EK 180mm single radiator (with EK 180 fan)

Alphacool triple 50mm (with silverstone fans)

Pump: Alphacool d5

Reservoir: Bitspower


NZXT Hue+ for the lighting in the final build along with some 3 and 5mm leds


Now for the real show!

So I've been building some acrylic computer cases over the last year because my brother has a laser cutter (his company is CWE signs but we have a FB page for my cases (CWEcases)).

Spoiler

A 10 inch cube because no one actually makes a case that is a real cube...
WP_20150722_21_41_20_Pro.jpg

But I've been thinking about incorporating my love of hardlines into a tiny little acrylic build
I wanted something small... watercooled... powerful... quiet... and ideally wall mountable...
I started off with with a mini-itx board and a 180mm radiator, playing around with some configurations I ended up with this layout...
This would be the top that's visible

DSC_0144.JPG
And this would be the basement pulling in air from the bottom
DSC_0145.JPG
The 120mm fan would be an SFX-L powersupply that I didn't have at the time of planning... >.>
And yes the 180mm radiator is larger than the mini-itx motherboard! o.O
I also came into the possession of a triple 50mm radiator because I saw it and thought that it was hilarious and decided to add it to the build....

Spoiler

A triple 50mm radiator by alphacool compared to a dual 120mm radiator by swiftech:

DSC_0123.JPG

Link to comment
Share on other sites

Link to post
Share on other sites

So I drew up the case that I wanted and cut it on the laser, I went to assemble it and I forgot to resize one of the sides...

Spoiler

1463708586035.jpg1463713633110.jpg

But this will work for the first prototype... I made it work
1466876680328.jpg

IMG_20160524_165606.jpg

It turned out ok!
But there is a lot of stuff that isn't right...

Link to comment
Share on other sites

Link to post
Share on other sites

After I got my 1080 in I realized I didn't leave room for the watercooling fittings on the graphics card and didn't know where to mark the holes for the pass-thru's...IMG_20160614_175420.jpg

Or the power cables...
DSC_0156.JPG

but I marked it and made plans to move them and make the appropriate holes.

Link to comment
Share on other sites

Link to post
Share on other sites

I cut another copy of the case!  This time with the graphics card moved over and with holes for the pass thru's to the basement radiator.

_20160616_092539.JPG

Alright!


Crap!  My plans for watercooling my ram don't line up with anything!  I was trying to keep all of the tubing at perfect 90s!

The inlet for the monoblock doesn't line up where I can come from the ram there...

_20160617_112333.JPG

And to make it worse, I'd have to move the triple 50 up because the ram is so tall...
IMG_20160617_075223.jpg

After playing around with fittings I made it work and there was much rejoicing!

_20160620_085733.JPG

So the build continues!


Link to comment
Share on other sites

Link to post
Share on other sites

I get my waterblock in for my 1080 and go to town finishing up the loop!

IMG_20160626_191000.jpg

received_10209466172440763.jpeg


Vertical, because it was designed like this.


received_10209466175080829.jpeg


At this point I realize my power supply cables are too short to actually reach the motherboard...
DARN YOU SHORT CABLES ON SFX POWERSUPPLIES!!!!!!!


I take the opportunity to play with some random LEDs I had left over from past builds.  While I wait for the cable mod extensions to come in.

IMG_20160627_015018.jpg


Link to comment
Share on other sites

Link to post
Share on other sites

Looks fantastic, nice job.

Gaming - Ryzen 5800X3D | 64GB 3200mhz  MSI 6900 XT Mini-ITX SFF Build

Home Server (Unraid OS) - Ryzen 2700x | 48GB 3200mhz |  EVGA 1060 6GB | 6TB SSD Cache [3x2TB] 66TB HDD [11x6TB]

Link to comment
Share on other sites

Link to post
Share on other sites

After my cables came in and I tried a different coolant...

IMG_20160630_074038.jpg


I really wanted to add a flow meter in there somewhere but I didn't have the fittings to do it... I needed a 90 rotary and a straight dual-link fitting so after another order of fittings...

Screenshot_20160711-132920.png


I think I'm starting to like it on its side more than standing....

IMG_20160711_173053.jpg


But it's not perfect, the videocard is slightly leaning, the motherboard is pushing on the back wall too hard, some of my holes didn't quite line up perfectly.  But next is my first attempt at lighting it up with the Hue+ before I recut the case.

Link to comment
Share on other sites

Link to post
Share on other sites

Thanks!  Sorry it's all broken up and potentially a bit disorganized.  All I did was take pictures during this process so I'm having to figure out what went where.

Link to comment
Share on other sites

Link to post
Share on other sites

So in this version of the case I left holes in the top acrylic, under the motherboard and gpu for me to run the lights in.  Basically on the edge of those holes I ran the strips for the NZXT Hue like so:

lighting.jpg

MS PAINT FTW!


But it didn't really light up the case well...

IMG_20160715_223610.jpg

Well I had time for one more cut before quake con, I decided to try to go back to white at least for part of it.


Link to comment
Share on other sites

Link to post
Share on other sites

Moral of the story.  It was the night before quake con, I recut the case.  I had to break the entire computer down again and reassemble it into the new case watercooling and all.  It was a nightmare and...

I HATE MOLEX CONNECTORS!!!!!!


but... but.... but........


It did turn out really well and I am super pleased!

This is a photo taken by one of the judges (Clint Satterwhite).  I had to change the lighting for the photo because of the exposure settings, but OMG it turned out nice.

28618409150_8c3305af23_z.jpg

(Full resolution is in his album of quakecon cases that he posted on reddit)


This is how I had the lighting most of the weekend.

received_10209800934529606.jpeg

received_10209800931409528.jpegreceived_10209800932249549.jpeg


In the end I didn't make the top 3 of my category (scratch build) but I hear rumor I was really close.  I have a few things that I want to do to button it up further and fix a few of its final flaws but here she is in all of her tiny glory.  It's now home and in use but I do plan on getting some better photos as soon as I have access to a better camera than just my phone.  Maybe even a video of it spinning on a lazy susan?

Link to comment
Share on other sites

Link to post
Share on other sites

Anyone interested in specific pictures that I didn't post?  I have no pictures of the innards but if anyone wants I can open it back up and snap some specifics.

Link to comment
Share on other sites

Link to post
Share on other sites

  • 3 months later...

So I know this is old, but I just now got my hands on a DSLR to take some good photos of my own.

IMG_0776.JPG

IMG_0791.JPG

IMG_0841.JPG

IMG_0844.JPG

Link to comment
Share on other sites

Link to post
Share on other sites

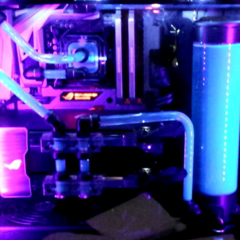
Some vertical shots and a close up of the flow indicator.  I love how the alphacool pump top just lights up and all I did was point part of one of the led strips at it.

IMG_0852.JPG

IMG_0851.JPG

IMG_0849.JPG

Link to comment
Share on other sites

Link to post
Share on other sites

18 hours ago, fredihaberg said:

Dude this looks so nice!

Thanks!  Been a product of joy and frustration.


Also apparently RAID5 is not good for SSDs because the TRIM functions can't work as intended.  So at the minimum I'll have to take one out and switch to a RAID0 or RAID1.  I think I might do an unbuild log to show the internals when I do that.

Link to comment
Share on other sites

Link to post
Share on other sites

40 minutes ago, Arkratos said:

Thanks!  Been a product of joy and frustration.


Also apparently RAID5 is not good for SSDs because the TRIM functions can't work as intended.  So at the minimum I'll have to take one out and switch to a RAID0 or RAID1.  I think I might do an unbuild log to show the internals when I do that.

That'd be cool.. But isn't RAID 0 rather unstable compared to RAID 1? The best combination of both would be a RAID 01, but that requires a lot of physical drives...

I love Small Form factor ITX rigs.

Link to comment
Share on other sites

Link to post
Share on other sites

1 hour ago, fredihaberg said:

That'd be cool.. But isn't RAID 0 rather unstable compared to RAID 1? The best combination of both would be a RAID 01, but that requires a lot of physical drives...

Ya, not sure my plans, recently I took some spare 1TB HDDs and made a NAS with a RAID so it's probably not necessary for me to worry about data integrity on this machine anymore.  Plus I think I want one of the SSDs to go into the NAS as a scratch disk and for jails.  I'm using FreeNAS and it's blowing my mind a little bit.


RAID0 = the data is split between the drives so if any goes you lose it all, but each drive does part of the work making everything faster
RAID1 = the data is mirrored, so a drive can fail

RAID10 = RAID1 of a RAID0 more or less (I would need to pick up a fourth 512GB SSD)

RAID5 (my favorite) = basically a RAID0 with a third parity drive (for each bit on the first drive and second drive, a 1 if they are different a 0 if they are the same) so you can lose any drive and still have the data (or a way to restore it) but you end up with 2/3rds the storage of the drives instead of 1/2 like RAID1 or RAID10.  But because of the parity the trim function doesn't work because the bits still have to all match even if they aren't "used".  I didn't think about that when I used SSDs for it :(

Link to comment
Share on other sites

Link to post
Share on other sites

Create an account or sign in to comment

You need to be a member in order to leave a comment

Create an account

Sign up for a new account in our community. It's easy!

Register a new account

Sign in

Already have an account? Sign in here.

Sign In Now

×