Jump to content

DIY Testbench

29 minutes ago, Kaptain Kek said:

I 100% agree with you. Its not uncommon to have all these tools already.

"There is no audience for your reviews on top tier graphics cards or 1000 dollar phones, not everyone can afford them."

yes like me, no tools.
so can't make this testbench

Link to comment
Share on other sites

Link to post
Share on other sites

5 hours ago, 1988fido said:

it is awesome. I wish i have the tools to do it , I got many old pc's cases that I can use :/

you only need 1 tool. 

dremel%C2%AE4000-9180.jpg


also i would like to say this is by far the best thread on the forum in a while :) 

Rig Specs:

AMD Threadripper 5990WX@4.8Ghz

Asus Zenith III Extreme

Asrock OC Formula 7970XTX Quadfire

G.Skill Ripheartout X OC 7000Mhz C28 DDR5 4X16GB  

Super Flower Power Leadex 2000W Psu's X2

Harrynowl's 775/771 OC and mod guide: http://linustechtips.com/main/topic/232325-lga775-core2duo-core2quad-overclocking-guide/ http://linustechtips.com/main/topic/365998-mod-lga771-to-lga775-cpu-modification-tutorial/

ProKoN haswell/DC OC guide: http://linustechtips.com/main/topic/41234-intel-haswell-4670k-4770k-overclocking-guide/


"desperate for just a bit more money to watercool, the titan x would be thankful" Carter -2016

Link to comment
Share on other sites

Link to post
Share on other sites

On 5/6/2016 at 8:59 AM, Zeokon said:

Free in terms of materials but $200 worth of tools (file, circular saw, angle grinder, drill, screw driver)...Well done. Next video should be how to build a free house and just 3D print the whole thing and forget about the fact that to get a 3D printer of that size costs 100s of thousands of dollars.

A lot of households already have a lot of these tools for other things. So that is worth considering. 

Link to comment
Share on other sites

Link to post
Share on other sites

3 hours ago, 1988fido said:

yes like me, no tools.
so can't make this testbench

Hope you didnt misunderstand my post but well, a lot of people have these already, like a dremel or "fake dremel" could really be the only one needed (and you can get those cheap), it has tips for sanding too. Or you can ask some nearby school, workshop, idk if you can use their spaces and tools, depends on where you live and all that. I personally enjoy these DIY videos.

1 hour ago, Jumper118 said:

also i would like to say this is by far the best thread on the forum in a while :) 

Agree, i havent posted shit here (@ LTT), first post was on this thread, but i have been lurking for some time. I thought about a test bench too, but DIY nas and server case builds are what im looking for at the moment, cant find too many though. But well, i still have feeling that i will just end up buying something like a Fractal Design node.


Anyways, Luke should keep making these :) And hoping he will not cut his arm off. lol.


Sparks are cool

Link to comment
Share on other sites

Link to post
Share on other sites

2 hours ago, Jumper118 said:

you only need 1 tool. 

dremel%C2%AE4000-9180.jpg


also i would like to say this is by far the best thread on the forum in a while :) 

what about the part that makes metal soft and not sharp :/ to remove these ruff edges
and how much does this cost ? xD

Link to comment
Share on other sites

Link to post
Share on other sites

15 minutes ago, 1988fido said:

what about the part that makes metal soft and not sharp :/ to remove these ruff edges
and how much does this cost ? xD

A simple file made specifically made for metal does the trick nicely for smoothing rough edges.


Dremels can be relatively cheap if you're not worried about the brand. If you're looking for name brand, the price goes up a bit, but I assure you it's well worth it. A dremel is one of the best tools I have.

Link to comment
Share on other sites

Link to post
Share on other sites

41 minutes ago, 1988fido said:

what about the part that makes metal soft and not sharp :/ to remove these ruff edges
and how much does this cost ? xD

The whole idea of a dremel is that you can put an type of bit on it. That's why I said it's the only tool you need.  It can do everything.  Just do some research if you are actually interested.

Rig Specs:

AMD Threadripper 5990WX@4.8Ghz

Asus Zenith III Extreme

Asrock OC Formula 7970XTX Quadfire

G.Skill Ripheartout X OC 7000Mhz C28 DDR5 4X16GB  

Super Flower Power Leadex 2000W Psu's X2

Harrynowl's 775/771 OC and mod guide: http://linustechtips.com/main/topic/232325-lga775-core2duo-core2quad-overclocking-guide/ http://linustechtips.com/main/topic/365998-mod-lga771-to-lga775-cpu-modification-tutorial/

ProKoN haswell/DC OC guide: http://linustechtips.com/main/topic/41234-intel-haswell-4670k-4770k-overclocking-guide/


"desperate for just a bit more money to watercool, the titan x would be thankful" Carter -2016

Link to comment
Share on other sites

Link to post
Share on other sites

27 minutes ago, Jumper118 said:

The whole idea of a dremel is that you can put an type of bit on it. That's why I said it's the only tool you need.  It can do everything.  Just do some research if you are actually interested.

thanks xD i thought that is the brand dremel. now i know the name of that tool . i will research

Link to comment
Share on other sites

Link to post
Share on other sites

8 hours ago, 1988fido said:

thanks xD i thought that is the brand dremel. now i know the name of that tool . i will research

They are not the cheapest tool,  but they can do so much I think the investment is well worth it.  As far as power tools go I have a drill,  a jigsaw and a dremel.  I can do 99% of projects with those. 

Rig Specs:

AMD Threadripper 5990WX@4.8Ghz

Asus Zenith III Extreme

Asrock OC Formula 7970XTX Quadfire

G.Skill Ripheartout X OC 7000Mhz C28 DDR5 4X16GB  

Super Flower Power Leadex 2000W Psu's X2

Harrynowl's 775/771 OC and mod guide: http://linustechtips.com/main/topic/232325-lga775-core2duo-core2quad-overclocking-guide/ http://linustechtips.com/main/topic/365998-mod-lga771-to-lga775-cpu-modification-tutorial/

ProKoN haswell/DC OC guide: http://linustechtips.com/main/topic/41234-intel-haswell-4670k-4770k-overclocking-guide/


"desperate for just a bit more money to watercool, the titan x would be thankful" Carter -2016

Link to comment
Share on other sites

Link to post
Share on other sites

Well this is my attempt on building a test bench. 

20160501_164223.jpg

20160501_164715.jpg

Link to comment
Share on other sites

Link to post
Share on other sites

It looks like a complete build but its intended use is a tech bench. My gaming rig is on the other side of my desk. :P

20160430_162615.jpg

20160423_223315.jpg

20160423_163431.jpg

Link to comment
Share on other sites

Link to post
Share on other sites

On 5/6/2016 at 6:28 AM, itvend said:

Did it for lulz :)

20160506_142337.jpg

20160506_142404.jpg

20160506_142435.jpg

20160506_142453.jpg

This is very nicely done. I will reference this later.

Link to comment
Share on other sites

Link to post
Share on other sites

Well, this is a strange old project that I have in mind and I did for resurrect an old pc and a graphic card that had a lot of heat project. 


For starting , the base was an 11 year old Olidata prebuild pc bought in Italy for about 300€. It got a lot of hardware update from me and later on it was abandoned due to my performance needs increased. 

So, back to the project, I took that pc back to test the uppermentioned graphic card of a friend , an ATI Radeon HD 6870 that , from the beginnin , with the stock cooler got 100 °C in a matter of seconds. 


So the first step was to find the origin of the issue and was the stock cooler. that didn't cool the heat pipes enough to stabilize the temperature. so here is what I did : A pair of metal support to old two cpu fans installed directly on the heat pipe (first photo) . The results were impressive (second photo, the result is after a long game session).


After it I put the graphic card in the old olidata, but the airflow on the bottom , due to his m-atx case size was not enough. so .. idea.. I took apart an old dead acer case and I did my personal test bench ! (last photo) 

I'm sorry for the long post, but I hope you will appreciate this Frankenstein build !  

unnamed.jpg

unnamed (2).jpg

unnamed (3).jpg

Link to comment
Share on other sites

Link to post
Share on other sites

13 hours ago, wunic said:

Well, this is a strange old project that I have in mind and I did for resurrect an old pc and a graphic card that had a lot of heat project. 


For starting , the base was an 11 year old Olidata prebuild pc bought in Italy for about 300€. It got a lot of hardware update from me and later on it was abandoned due to my performance needs increased. 

So, back to the project, I took that pc back to test the uppermentioned graphic card of a friend , an ATI Radeon HD 6870 that , from the beginnin , with the stock cooler got 100 °C in a matter of seconds. 


So the first step was to find the origin of the issue and was the stock cooler. that didn't cool the heat pipes enough to stabilize the temperature. so here is what I did : A pair of metal support to old two cpu fans installed directly on the heat pipe (first photo) . The results were impressive (second photo, the result is after a long game session).


After it I put the graphic card in the old olidata, but the airflow on the bottom , due to his m-atx case size was not enough. so .. idea.. I took apart an old dead acer case and I did my personal test bench ! (last photo) 

I'm sorry for the long post, but I hope you will appreciate this Frankenstein build !  

unnamed.jpg

unnamed (2).jpg

unnamed (3).jpg

From 100 degrees down to 63 by adding a few fans? That is incredible. I love seeing "thought to be dead" or given up on components being resurrected. Awesome job on the fan setup on the card and overall the test bench you made looks great!

Link to comment
Share on other sites

Link to post
Share on other sites

58 minutes ago, tbremer72 said:

From 100 degrees down to 63 by adding a few fans? That is incredible. I love seeing "thought to be dead" or given up on components being resurrected. Awesome job on the fan setup on the card and overall the test bench you made looks great!

Thanks you so much ! Yes , of course the idea of add the fans was based on the fact that the heat pipe didn't get the right air flow (checked using a thermometer ) and i tested up the fans in that configurazione (so blowing to the heat pipe) first with zip tie ! 

Thanks again for your complimenti! This was my firt message but this is not my only project of "resurrection" that I made, so I will share all with this community ! :D

Link to comment
Share on other sites

Link to post
Share on other sites

My DIY testbench 

its from a old asus pentium 4 pc that i had  so i made this out of it i really like how it looks 

6f622a25-6029-472d-945b-028f2409b754.jpg

07ae88f8-4116-435a-814b-e870574cac4b.jpg

24f9c490-7e58-499b-8a4c-f39fac9dcbef.jpg

bc881cd9-996f-4381-a665-e4ee858459ea.jpg

c1010b8c-6d2b-41b6-aa78-21894be1944f.jpg

cea397d3-d07b-4d20-9c7f-87c63d544869.jpg

d76c8988-cf08-4096-9955-ec468f6e4c7d.jpg

Link to comment
Share on other sites

Link to post
Share on other sites

saw the video and was actually already working on a homemade testbench so here it is.. for now still got to put maybe some legs 

20160510_180739[1].jpg

20160510_180742[1].jpg

Link to comment
Share on other sites

Link to post
Share on other sites

Not the prettiest but it work real well and 100% free, so it would get a 10/10 from me

IMG_0047.JPG

IMG_0046.JPG

IMG_0045.JPG

Link to comment
Share on other sites

Link to post
Share on other sites

Gotta luv it Luke! re-purposing things is a great way to go, and you get to make it exactly how you see fit. i can not tell you how many times i have wanted to strangle a design engineer for making bonehead mistakes!

Link to comment
Share on other sites

Link to post
Share on other sites

Damn, should have kept my old beige INWin case. It already has a motherboard tray that can be used as a test bench.


350x700px-LL-b6cc3d34_IMG_1062.jpeg

Intel Xeon E5 1650 v3 @ 3.5GHz 6C:12T / CM212 Evo / Asus X99 Deluxe / 16GB (4x4GB) DDR4 3000 Trident-Z / Samsung 850 Pro 256GB / Intel 335 240GB / WD Red 2 & 3TB / Antec 850w / RTX 2070 / Win10 Pro x64

HP Envy X360 15: Intel Core i5 8250U @ 1.6GHz 4C:8T / 8GB DDR4 / Intel UHD620 + Nvidia GeForce MX150 4GB / Intel 120GB SSD / Win10 Pro x64


HP Envy x360 BP series Intel 8th gen

AMD ThreadRipper 2!

5820K & 6800K 3-way SLI mobo support list


Link to comment
Share on other sites

Link to post
Share on other sites

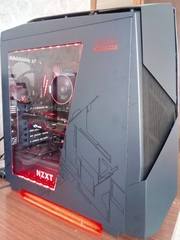
its my franken-skunk !!!

its made by and NZXT case i didnt like too well. and for parts there is å GTX 960 from MSI.

gaming-3 Gigabyte.

i5 4690k.

and for watercooling i used 2 CM Nepton closed loop coolers. took them apart and used one of the pumps as æ pump on the CPU, and the other as a Block for the GPU which is mounted with zopties. and æ jam bottle as reservoir. and some random tubing i found in a store. its å bit getto but it works really well :P

2016-05-18 20.22.54.jpg

Link to comment
Share on other sites

Link to post
Share on other sites

i guess i posted my project in the wrong post, so ill try to share it here....

i needed an open case for easy part swapping in my arcade machine to mame conversion build, i did have my old pc in a

coolermaster storm scout v1 case, the scout case has very limited space for graphics cards, and when i tried to replace the 2

sapphire radeon hd 6870's that i was running in crossfire, with my old sapphire radeon hd 7970 GHz Edition, the hdd cage was in the way, i wasn't about to spend $50+ on a cheap plastic test bench that are found on sites like newegg and amazon, and i wasn't about to spend upwards of $100-$200 USD on a high end metal one from companies like Lian-LI. so with previously working on a custom 

control panel for my mame cab project, i had lots of spare 3/4" MDF and wood screws laying around, i had an old "junk" clear

acrylic case that was popular back in the P4 era, i robbed some parts from it, like the motherboard stand offs,the rear shroud and the

power switch pcb, after a few cuts, a few screws, and some cheap black spray paint, i now have a custom open air test bench style case that was pretty much free. best part is i can now install what ever sized gpu i want to install in my mame cabinet with ease lol

7j1bbBp.jpg

0sTKWx2.jpg

Link to comment
Share on other sites

Link to post
Share on other sites

After watching Luke's vid on this I decided to do the same! I had an old i7 930 X58 machine in an NZXT Phantom (worst case ever) kicking around that my old roommate left behind. Photo dump of the whole process: http://imgur.com/a/HZoau

20160506_163111.jpg

20160506_192413.jpg

20160507_184604.jpg

20160507_231858.jpg

20160508_221422.jpg

20160509_020329.jpg

20160511_203011.jpg

Not as flashy as some here, but I made it my own. I should also mention that I'm a quadriplegic and my hands don't work very well. Watching me use that angle grinder would have made veteran tool-users cringe. I did use gloves and safety goggles though!

Edited by Jac V
speeling
Link to comment
Share on other sites

Link to post
Share on other sites

  • 2 weeks later...

Finally after 2 weeks the 24pin extension cable came in the mail so i could finish my testbech!

I am happy with the result :)

IMG_20160531_194751.jpg

IMG_20160531_194758.jpg

IMG_20160531_194814.jpg

IMG_20160531_194830.jpg

IMG_20160531_194849.jpg

IMG_20160531_194948.jpg

IMG_20160531_195115.jpg

Link to comment
Share on other sites

Link to post
Share on other sites

I've saved this post so I could remember to build one in my job... Using only a old case have build this one. 

IMG-20160607-WA0002.jpg

IMG-20160607-WA0003.jpg

IMG-20160607-WA0004.jpg

Link to comment
Share on other sites

Link to post
Share on other sites

Create an account or sign in to comment

You need to be a member in order to leave a comment

Create an account

Sign up for a new account in our community. It's easy!

Register a new account

Sign in

Already have an account? Sign in here.

Sign In Now

×