Jump to content

Project Rhino - A HEX GEAR R80 prototype build

p0Pe
On 3/5/2016 at 5:17 AM, Vercii said:

Weird feeling that Linus might make his way through here and show this beauty in a video...God it's so amazingly sexy.


Thanks man!


On 3/5/2016 at 10:52 AM, NoobCase said:

@p0Pe Still looking damn nice.


Trick question: how do you plan to orient the fans?


And you NEED to remove that sticker from the PSU... that's pretty unsightly through the acrylic :)


Bottom fans will pull air in, top fans will blow out. I already removed the sticker:D


On 3/5/2016 at 1:24 PM, Abel225 said:

Ohh my god! What a beauty! I love the case I love the cables I love everything! 


Thanks man! I think you will enjoy the final pictures as well then:D


On 4/5/2016 at 10:16 AM, Homicidium said:

Is a MSRP known at this point? The more I look at this case, the more I fall in love with it. 

And don't even get me started on the build itself. :D


On 4/5/2016 at 10:22 AM, NoobCase said:

299£


On 4/5/2016 at 10:58 AM, NoobCase said:

way smaller batch sizes than say fx. Corsair cases and overall quality components used gives such a price.


But then you are also getting a almost fully modular design... you can have the psu in the front, back, bottom or top. Have normal or inverted internal layout etc. the possibilities are very very diverse with these cases. You can't really do that with a H440 or the other "run of the mill" products from the established manufactures.


CaseLabs seems to be the most comparable cases out there. And those have similar price tags.


On 4/5/2016 at 7:23 PM, Homicidium said:

I can certainly understand as to why it costs so much (not sure what I was expecting), but you've still given me a tough pill to swallow :D


It really is the material price that is jacking up the MSRP. For example, the alu profiles is almost 4 kilo´s alone. Most other cases are sheetmetal of very thin metal, and then some injection molded plastic. 


On 5/5/2016 at 10:31 AM, Paragon_X said:

@p0Pe I don't smoke but after seeing this i have to light up a cigarette.

Grab a snickers instead!


Final pictures almost ready! Small teaser!


UvBYRiJ.jpg

Link to comment
Share on other sites

Link to post
Share on other sites

......... argh... with the new 1080 news this case and upcomming X99 motherboard refreshs... most resist urge to build new system.. I don't need it... I don't need it...


AHH.. the easy solution.... not sure I could afford it anyways :) But thats what we have banks for... to help realize dreams right? NO NO NO... stop...


Sorry


Looking awesome as ever... That blue color looks really nice! How bout those Intel Ethernet stickers? They staying on? :) 

Link to comment
Share on other sites

Link to post
Share on other sites

Man the final build looks amazing! I can't wait for you to post the pics in here :D

Watching Intel have competition is like watching a headless chicken trying to get out of a mine field

CPU: Intel I7 4790K@4.6 with NZXT X31 AIO; MOTHERBOARD: ASUS Z97 Maximus VII Ranger; RAM: 8 GB Kingston HyperX 1600 DDR3; GFX: ASUS R9 290 4GB; CASE: Lian Li v700wx; STORAGE: Corsair Force 3 120GB SSD; Samsung 850 500GB SSD; Various old Seagates; PSU: Corsair RM650; MONITOR: 2x 20" Dell IPS; KEYBOARD/MOUSE: Logitech K810/ MX Master; OS: Windows 10 Pro

Link to comment
Share on other sites

Link to post
Share on other sites

Honestly my favorite part of the build is the custom cable comb for the GPUs.

Link to comment
Share on other sites

Link to post
Share on other sites

On 10/5/2016 at 8:16 AM, BerserkBear404 said:

WowO.o This is a work of art:D


thanks man!


On 10/5/2016 at 9:31 AM, NoobCase said:

......... argh... with the new 1080 news this case and upcomming X99 motherboard refreshs... most resist urge to build new system.. I don't need it... I don't need it...


AHH.. the easy solution.... not sure I could afford it anyways :) But thats what we have banks for... to help realize dreams right? NO NO NO... stop...


Sorry


Looking awesome as ever... That blue color looks really nice! How bout those Intel Ethernet stickers? They staying on? :) 


the stickers matches the color theme so they stay:D


On 17/5/2016 at 2:57 AM, Notional said:

Man the final build looks amazing! I can't wait for you to post the pics in here :D


Here they come:D


On 21/5/2016 at 3:08 PM, Nardella said:

Honestly my favorite part of the build is the custom cable comb for the GPUs.


Glad you like it!


3 hours ago, NoobCase said:

@p0Pe Sup m8..!?"?" :) I have a feint idea this build is completed and final shots are ready? :)


Here they are:D


It has been a while under way, and with some complications but I am proud to finally present the HEX GEAR R80 - Rhino project!


NU0qFei.jpg


Specs:


  • Case: HEX GEAR R80 
  • CPU: Intel i7 5960X 
  • Graphic cards: 4 x NVIDIA GeForce GTX Titan X 
  • OS drive: Intel 750 ssd 1.2TB PCIe 
  • Secondary drive: KLEVV Urbane 480 gb ssd 
  • Motherboard: ASUS X99-E WS 
  • RAM: 64 GB KLEVV CRASS DDR4 ram 
  • PSU: Corsair AX1500i 
  • Fan controller: Aquaero 6 
  • Watercooling: EK Water Blocks blocks, radiators, reservoir & pumps 
  • Fans: EK vardar 
  • Fittings: Bitspower 
  • Sleeving: Teleios Sleeving 
  • Tubing: E22 solid tubing


This build was done to test out the thermal capacity of the R80 case, and I know that a lot of you will question why the Titan X was used this close to GTX 1080 release, and the answer is simple, I wanted to put a LOT of heat into the watercooling system to test a "worst case scenario".  Also, the new cards are not using as much power, and the titan x's where available now.
 

CPU is running at 4.4 GHz @ 1.3 Vcore
GPU's are running at 1375 MHz


I will let the pictures do the talking:D


HkEB7gY.jpg


Vyyg6Qb.jpg


76wBIIq.jpg


Jy7jjKD.jpg


fgf8Hzm.jpg


XbRlLdi.jpg


nSWM3Ne.jpg


h8Ehwam.jpg


RlcVNke.jpg


IyFxUzu.jpg


eD44lnl.jpg


9hjRJeZ.jpg


dBn8gT4.jpg


fz8ragN.jpg


PifWS3v.jpg


F6XnvdP.jpg


evza5nE.jpg


BnH4yNl.jpg


2SX0Xie.jpg


TeZNDzR.jpg


HicqKGx.jpg


mDgbQJ3.jpg


mzWO0ju.jpg


UQqznOQ.jpg


mnuAYCc.jpg


9nIjzyb.jpg


Since this entire build was done to show how much you can cool with the R80 case, let’s get some results on the table! Worth noting is that the fans goes all the way up to 2200 RPM, but since I do not think anyone would be satisfied with having their system running at that noise level, I decided to test what the minimum fan speed for acceptable temperatures would be.


The system runs with fans at 500 RPM while Idle, so it is barely audible, but what happens when it get pushed to the max?

First of all I overclocked the CPU and GPUs to their limits to get most the performance possible out of the system. Then I ran a 3D mark firestrike test, which you can see by following the link below:


http://www.3dmark.com/3dm/11648520


The system did not get anywhere near hot on this test as the benchmark is somewhat short. So to get some better real world results, I decided to push the system with a few classic stress testing tools.


CPU stress test – Keyshot


oUJDRWn.png


The first test I did was with the render program Keyshot, which utilizes the CPU to the maximum, to render animations and 3D models. During this test, the system used a whopping 600W. I suspect that the reason this number is so high is because of the overclocked CPU that was fed a generous 1.3 Vcore.


The picture above is the thermal setup where you are able to see all the temperatures in the testing setup. In each box is a description of what the graph shows, and in the right of each box is a number of values showing respectively:


  • The highest value measured
  • The lowest value measured
  • The average value over the time measured
  • The time shown on the graph (not to be confused with total up time – This timer only shows how far back the graph logs)


Looking at the picture above you see that keyshot ran for just about 30 minutes with the CPU reaching a maximum temperature of 72 C° on the cores, and 75 C° on the package. No doubt that this temperature can be improved by lowering the Vcore, or lowering the overclock. It is worth noting that smaller chips like the 6700K would not get anyway near this hot at the same overclock.


Looking at fluid temperature and fan speed, the fluid reaches a max of around 35 C°, which gives it a delta c on 11c from the ambient room temperature with the fans spinning at a max of 1200 RPM.


Graphic card stress test – Furmark


E8XtYlR.jpg


27a5NpZ.png


If we go on to the more extreme benchmark called Furmark, which will stress all grafic cards to the max, you can really see where the 1500W power supply comes in handy. At this test, the system is pulling a whopping 1400W from the socket! I did also try running both Keyshot and Furmark at the same time, but this actually led to a lower total power consumption as well as lower overall temperatures, so this was without a doubt the most stressful test for the system. The graphic cards have been overclocked to the maximum stable clock which was +200 MHz on the core, and +500MHz on the RAM.


Looking at the temperatures, you see that the GPU temperatures reaches a maximum of 61 C°. The fluid temps climb up to just above 50 C°. All this with the fans spinning at a max of 1400 RPM. Turning the fans up a few hundred RPM did lower the fluid temp to just above 40 C°, but again, I where testing with lowest fan speed needed.


Overall real world test – Crysis 3


CWcPZ6w.png


Last test is what I would consider a “real world scenario” with the CPU overclocked to 4 GHz and the GPU’s with the same overclock as before. I turned the heat up in the testing area a bit, now reaching an ambient temperature of 26 C°, and then sat down playing Crysis 3 for three hours straight.

I aimed for a slightly lower fluid temperature so the fans was put to a max of 1500 RPM, giving very fine temperatures on both the graphic cards and the CPU during the entire gaming session.


Conclusion:


The 60 mm thick 480+360 radiator in this build has proven to be more than capable of cooling this entire overclocked system. Thinking about how this system draws almost 1400W from the socket under load goes to show that if you are planning on a SLI system, you will never run into any problems cooling wise and can have your fans running at a very low setting. If you still think that you need more cooling, there is the option of upgrading the case to fit two 420 mm radiators, which would increase the total radiator surface from 100800 cm^2 to 117600 cm^2.

Link to comment
Share on other sites

Link to post
Share on other sites

After seeing the engineering station, I wasn't expecting much out of this build, but God damn, it's beautiful!

ASU

Link to comment
Share on other sites

Link to post
Share on other sites

Fantastic build, @p0Pe! The level of craftsmanship and overall detail is astonishing and quite frankly amongst the best on the interwebs/scene. 


Are you going to provide additional benchmarks with games in terms of FPS?

phanteks enthoo pro | intel i5 4690k | noctua nh-d14 | msi z97 gaming 5 | 16gb crucial ballistix tactical | msi gtx970 4G OC  | adata sp900

Link to comment
Share on other sites

Link to post
Share on other sites

16 hours ago, p0Pe said:


thanks man!


the stickers matches the color theme so they stay:D


Here they come:D


Glad you like it!


Here they are:D


It has been a while under way, and with some complications but I am proud to finally present the HEX GEAR R80 - Rhino project!


Specs:


  • Case: HEX GEAR R80 
  • CPU: Intel i7 5960X 
  • Graphic cards: 4 x NVIDIA GeForce GTX Titan X 
  • OS drive: Intel 750 ssd 1.2TB PCIe 
  • Secondary drive: KLEVV Urbane 480 gb ssd 
  • Motherboard: ASUS X99-E WS 
  • RAM: 64 GB KLEVV CRASS DDR4 ram 
  • PSU: Corsair AX1500i 
  • Fan controller: Aquaero 6 
  • Watercooling: EK Water Blocks blocks, radiators, reservoir & pumps 
  • Fans: EK vardar 
  • Fittings: Bitspower 
  • Sleeving: Teleios Sleeving 
  • Tubing: E22 solid tubing


This build was done to test out the thermal capacity of the R80 case, and I know that a lot of you will question why the Titan X was used this close to GTX 1080 release, and the answer is simple, I wanted to put a LOT of heat into the watercooling system to test a "worst case scenario".  Also, the new cards are not using as much power, and the titan x's where available now.
 

CPU is running at 4.4 GHz @ 1.3 Vcore
GPU's are running at 1375 MHz


I will let the pictures do the talking:D


Since this entire build was done to show how much you can cool with the R80 case, let’s get some results on the table! Worth noting is that the fans goes all the way up to 2200 RPM, but since I do not think anyone would be satisfied with having their system running at that noise level, I decided to test what the minimum fan speed for acceptable temperatures would be.


The system runs with fans at 500 RPM while Idle, so it is barely audible, but what happens when it get pushed to the max?

First of all I overclocked the CPU and GPUs to their limits to get most the performance possible out of the system. Then I ran a 3D mark firestrike test, which you can see by following the link below:


http://www.3dmark.com/3dm/11648520


The system did not get anywhere near hot on this test as the benchmark is somewhat short. So to get some better real world results, I decided to push the system with a few classic stress testing tools.


CPU stress test – Keyshot


The first test I did was with the render program Keyshot, which utilizes the CPU to the maximum, to render animations and 3D models. During this test, the system used a whopping 600W. I suspect that the reason this number is so high is because of the overclocked CPU that was fed a generous 1.3 Vcore.


The picture above is the thermal setup where you are able to see all the temperatures in the testing setup. In each box is a description of what the graph shows, and in the right of each box is a number of values showing respectively:


  • The highest value measured
  • The lowest value measured
  • The average value over the time measured
  • The time shown on the graph (not to be confused with total up time – This timer only shows how far back the graph logs)


Looking at the picture above you see that keyshot ran for just about 30 minutes with the CPU reaching a maximum temperature of 72 C° on the cores, and 75 C° on the package. No doubt that this temperature can be improved by lowering the Vcore, or lowering the overclock. It is worth noting that smaller chips like the 6700K would not get anyway near this hot at the same overclock.


Looking at fluid temperature and fan speed, the fluid reaches a max of around 35 C°, which gives it a delta c on 11c from the ambient room temperature with the fans spinning at a max of 1200 RPM.


Graphic card stress test – Furmark


If we go on to the more extreme benchmark called Furmark, which will stress all grafic cards to the max, you can really see where the 1500W power supply comes in handy. At this test, the system is pulling a whopping 1400W from the socket! I did also try running both Keyshot and Furmark at the same time, but this actually led to a lower total power consumption as well as lower overall temperatures, so this was without a doubt the most stressful test for the system. The graphic cards have been overclocked to the maximum stable clock which was +200 MHz on the core, and +500MHz on the RAM.


Looking at the temperatures, you see that the GPU temperatures reaches a maximum of 61 C°. The fluid temps climb up to just above 50 C°. All this with the fans spinning at a max of 1400 RPM. Turning the fans up a few hundred RPM did lower the fluid temp to just above 40 C°, but again, I where testing with lowest fan speed needed.


Overall real world test – Crysis 3


Last test is what I would consider a “real world scenario” with the CPU overclocked to 4 GHz and the GPU’s with the same overclock as before. I turned the heat up in the testing area a bit, now reaching an ambient temperature of 26 C°, and then sat down playing Crysis 3 for three hours straight.

I aimed for a slightly lower fluid temperature so the fans was put to a max of 1500 RPM, giving very fine temperatures on both the graphic cards and the CPU during the entire gaming session.


Conclusion:


The 60 mm thick 480+360 radiator in this build has proven to be more than capable of cooling this entire overclocked system. Thinking about how this system draws almost 1400W from the socket under load goes to show that if you are planning on a SLI system, you will never run into any problems cooling wise and can have your fans running at a very low setting. If you still think that you need more cooling, there is the option of upgrading the case to fit two 420 mm radiators, which would increase the total radiator surface from 100800 cm^2 to 117600 cm^2.

Ah finally at a PC. Mobile is not easy to delete pictures in quotes on :)


Awesome build again @p0Pe !


Very clean and very elegant looking. The tubing runs you've chosen are immaculate. I really enjoy those clean lines! :)


What is most interesting is the fact that not a lot of customization was done to the case it self. All items can be bought so everybody has the opportunity to make something this great and clean looking.


Now... that SLi bridge though... that needs a bit of modding or replacement :)


And when will you guys do PSU covers? :)

Link to comment
Share on other sites

Link to post
Share on other sites

I know it is too late to check, but I have to wonder about the total weight of all the power cables. There are so many!

Link to comment
Share on other sites

Link to post
Share on other sites

  • 2 months later...
On 23/5/2016 at 6:58 PM, Hackentosher said:

After seeing the engineering station, I wasn't expecting much out of this build, but God damn, it's beautiful!


Haha yeah, it is hard to top that one! I will be starting a new log soon with a build I brought to Computex, and I think that one got close!


On 24/5/2016 at 10:21 AM, Homicidium said:

Fantastic build, @p0Pe! The level of craftsmanship and overall detail is astonishing and quite frankly amongst the best on the interwebs/scene. 


Are you going to provide additional benchmarks with games in terms of FPS?


Thanks man! I will not post benchmarks and game benchmarks. Not really any point as there is plenty of good reviews of quad sli out there that does it way better than I would do.


On 24/5/2016 at 10:52 AM, NoobCase said:

Ah finally at a PC. Mobile is not easy to delete pictures in quotes on :)


Awesome build again @p0Pe !


Very clean and very elegant looking. The tubing runs you've chosen are immaculate. I really enjoy those clean lines! :)


What is most interesting is the fact that not a lot of customization was done to the case it self. All items can be bought so everybody has the opportunity to make something this great and clean looking.


Now... that SLi bridge though... that needs a bit of modding or replacement :)


And when will you guys do PSU covers? :)


Thanks man! The SLI bridge was actually changed for one of the E22 laser engraved bridges. We are working on PSU covers, but they are a bit low priority currently:)


On 24/5/2016 at 6:45 PM, Nardella said:

I know it is too late to check, but I have to wonder about the total weight of all the power cables. There are so many!


Hah I would guess a LOT. Took ages sleeving this thing!


On 24/5/2016 at 11:13 PM, F.A.T. said:

Oh my, absolutely stunning! :D


Thanks! Glad you like it:D


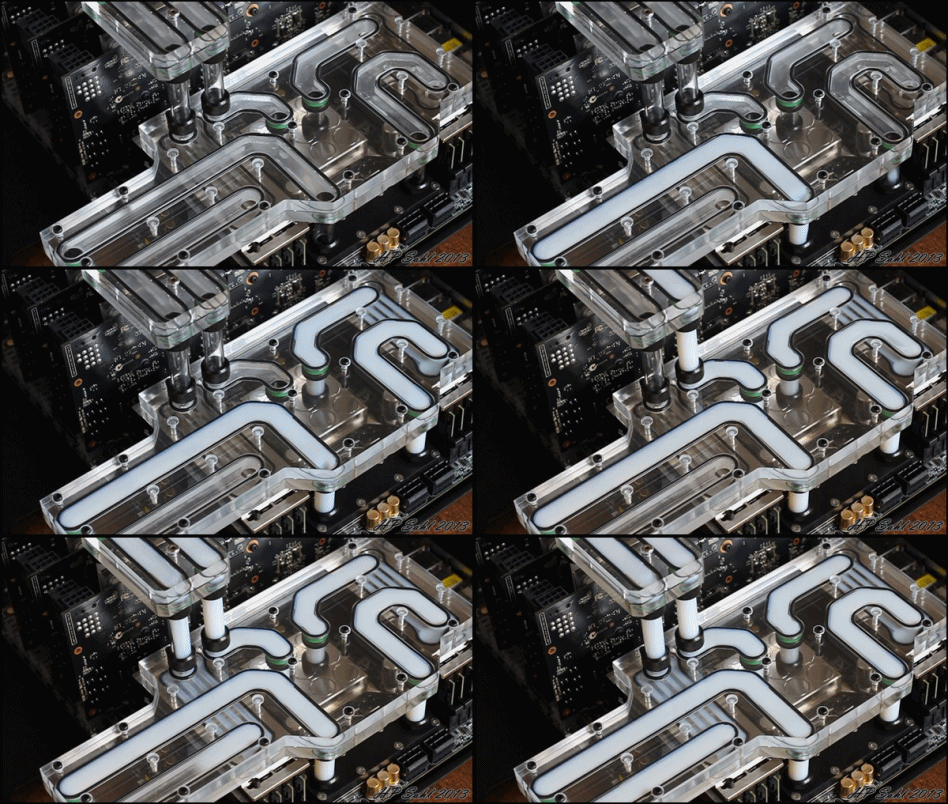
I also finished the video of the watercooling! I hope you enjoy it:


Link to comment
Share on other sites

Link to post
Share on other sites

1 hour ago, p0Pe said:


Haha yeah, it is hard to top that one! I will be starting a new log soon with a build I brought to Computex, and I think that one got close!


Thanks man! I will not post benchmarks and game benchmarks. Not really any point as there is plenty of good reviews of quad sli out there that does it way better than I would do.


Thanks man! The SLI bridge was actually changed for one of the E22 laser engraved bridges. We are working on PSU covers, but they are a bit low priority currently:)


Hah I would guess a LOT. Took ages sleeving this thing!


Thanks! Glad you like it:D


I also finished the video of the watercooling! I hope you enjoy it:


oh god the production value on that video... really nicely done. Pics of the E22 bridge? ;)

Link to comment
Share on other sites

Link to post
Share on other sites

1 hour ago, smicha said:

Masterpiece! Congratulations. 

Thanks man!

1 minute ago, NoobCase said:

oh god the production value on that video... really nicely done. Pics of the E22 bridge? ;)

There is a lot of them in the post with final pics. The only pic where it is not on is the last one ;)

Example: http://i.imgur.com/HkEB7gY.jpg

Link to comment
Share on other sites

Link to post
Share on other sites

1 minute ago, p0Pe said:

Thanks man!

There is a lot of them in the post with final pics. The only pic where it is not on is the last one ;)

Sorry - I did not even look for the updated post :)


Scrap that... how the f... did I not notice that on the posts from the 23rd of may... mmm

Link to comment
Share on other sites

Link to post
Share on other sites

Create an account or sign in to comment

You need to be a member in order to leave a comment

Create an account

Sign up for a new account in our community. It's easy!

Register a new account

Sign in

Already have an account? Sign in here.

Sign In Now


×