Jump to content

[Completed] EmuStation Build - Watercooled Define R5S? w/ Mods

AlanTheEmu

Hi all,
 
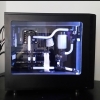
I've been a member of the LinusTechTips forums for sometime now but I've never posted anything so I thought I would share with you all my Fractal Design Define R5 build as I think it's pretty unique (at this moment in time that is :P). I call it EmuStation and it doesn't stand for emulation station as it would be a bit overkill if it was :lol:. Anyhow on wards with the pictures, I don't have any pictures of the building process as I've had most of the PC components for some time and it was originally built inside of a Fractal Design Define R4 which I owned for sometime but I upgraded to the R5 purely for the watercooling potential.
 
Latest Update
 
 System at the start of the thread.
 
PCPartPicker part list / Price breakdown by merchant
CPU: Intel Core i7-4790K 4.0GHz Quad-Core Processor (£265.00 @ Amazon UK)
Motherboard: Asus SABERTOOTH Z97 MARK 1 ATX LGA1150 Motherboard (£173.00)
Memory: Corsair Vengeance 16GB (4 x 4GB) DDR3-1600 Memory (£111.82 @ Amazon UK)
Storage: Samsung 840 EVO 120GB 2.5" Solid State Drive (£55.00)
Storage: Seagate 4TB 3.5" 5900RPM Hybrid Internal Hard Drive (£126.00)
Video Card: Gigabyte GeForce GTX 970 4GB WINDFORCE 3X Video Card (£275.00)
Case: Fractal Design Define R5 w/Window (Titanium) ATX Mid Tower Case (£94.00)
Power Supply: XFX XTR 750W 80+ Gold Certified Fully-Modular ATX Power Supply (£99.00)
Operating System: Microsoft Windows 7 Home Premium SP1 (OEM) (64-bit) (£74.95 @ CCL Computers)
Case Fan: Noctua NF-A14 PWM 82.5 CFM 140mm Fan (£20.00)
Case Fan: Noctua NF-F12 industrialPPC-2000 PWM 71.7 CFM 120mm Fan (£20.00)
Monitor: Asus VS228HR 60Hz 21.5" Monitor (£98.98 @ CCL Computers)
Keyboard: Corsair K70 RGB UK Wired Gaming Keyboard (£148.98 @ Aria PC)
Mouse: ROCCAT KONE XTD Wired Optical Mouse (£75.92 @ Amazon UK)
Other: Phobya Balancer 150 Reservoir (£19.99)
Other: Alphacool HF top w/ Laing D5 Pump (£73.96)
Other: EKWB EK Supremacy EVO (£40.92)
Other: EKWB EK-Coolstream PE 360 (£39.90)
Other: EKWB EK-FC970 GTX 970 (£108.00)
Other: EKWB EK-FC970 GTX WF3 B.Plate (£22.72)
Other: Alphacool NexXxos ST30 240mm (£39.93)
Other: Phobya 8x4 PWM Hub (£5.89)
Other: ScanFx Triple Monitor Stand (£129.00)
Total: £2395.92
 
System at the end of the thread.

PCPartPicker part list / Price breakdown by merchant

CPU: Intel Core i7-4790K 4.0GHz Quad-Core Processor (£262.00)
Motherboard: Asus SABERTOOTH Z97 MARK 1 ATX LGA1150 Motherboard (£180.00)
Memory: Corsair Vengeance 16GB (4 x 4GB) DDR3-1600 Memory (£80.00)
Storage: Samsung 850 EVO-Series 250GB 2.5" Solid State Drive (£73.00)
Storage: Samsung 850 EVO-Series 500GB 2.5" Solid State Drive (£157.00)
Storage: Seagate 4TB 3.5" 5900RPM Hybrid Internal Hard Drive (£126.00)
Video Card: Gigabyte GeForce GTX 970 4GB WINDFORCE 3X Video Card (2-Way SLI) (£275.00)
Case: Fractal Design Define R5 w/Window (Titanium) ATX Mid Tower Case (£94.00)
Power Supply: EVGA SuperNOVA 1000 P2 1000W 80+ Platinum Certified Fully-Modular ATX Power Supply (£152.00)
Operating System: Microsoft Windows 10 Pro Full (32/64-bit) (£0.00)
Case Fan: Noctua NF-A14 PWM 82.5 CFM 140mm Fan (£20.00)
Case Fan: Noctua NF-F12 industrialPPC-2000 PWM 71.7 CFM 120mm Fan (£20.00)
Monitor: LG 27MU67 60Hz 27.0" Monitor (£360.00)
Keyboard: Corsair K70 RGB UK Wired Gaming Keyboard (£130.00)
Mouse: ROCCAT KONE XTD Wired Optical Mouse (£60.00)
Other: EKWB EK-Coolstream PE 360 (£39.90)
Other: EKWB EK Supremacy EVO (£40.92)
Other: EKWB EK-FC970 WF3 (£108.00)
Other: EKWB EK-FC970 WF3 (£74.99)
Other: EKWB EK-FC970 GTX WF3 B.Plate (£22.72)
Other: EKWB EK-FC970 GTX WF3 B.Plate (£19.72)
Other: Phobya 8x4 PWM Hub (£5.89)
Other: Alphacool HF top w/ Laing D5 Pump (£73.96)
Other: EKWB X-RES X3 150 (£39.00)
Other: Monsoon PETG 16/13mm Hardline Tubing (£28.00)
Other: Monsoon Hardline 16/13mm Fittings (£60.00)
Other: EKWB Ekoolant White Concentrate 250ml x2 (£40.00)
Other: EKWB EK-Coolstream SE 240 (£42.00)
Other: Glass Window Mod (£65.00)
Other: Custom PSU Shroud (£20.00)
Other: Custom Reservoir mounting plate (£10.00)
Total: £3034.10

 
Specs (before):
Intel Core i7 4790k
Asus Sabertooth Z97 Mark 1
Corsair Vengeance DDR3 16GB @ 1600mhz
Gigabyte Windforce 3x GTX 970 2 way SLI
Samsung 840 EVO 120GB SSD
Samsung 850 EVO 500GB SSD
4TB Seagate Hybrid SSHD
1TB Seagate Barracuda
XFX XTR 750W
 
Specs (after):
Intel Core i7 4790k
Asus Sabertooth Z97 Mark 1
Corsair Vengeance DDR3 16GB @ 1600Mhz
Gigabyte Windforce 3x GTX 970 2 way SLI
Samsung 850 EVO 250GB
Samsung 850 EVO 500GB
Seagate 4TB SSHD
EVGA SuperNova 1000 P2


post-112743-0-57171800-1423520940_thumb.

post-112743-0-29113100-1423520961_thumb.

post-112743-0-41610300-1423520978_thumb.

post-112743-0-29034700-1423521002_thumb.

post-112743-0-51578400-1423521019_thumb.

post-112743-0-67777800-1423521261_thumb.

post-112743-0-10743500-1423521273_thumb.

post-112743-0-56653000-1423521285_thumb.

post-112743-0-96996300-1423521040_thumb.

post-112743-0-02877500-1423521053_thumb.

post-112743-0-61196400-1423521212_thumb.

post-112743-0-00335800-1423521234_thumb.

post-112743-0-55011100-1423521305_thumb.

post-112743-0-20610400-1423521331_thumb.

post-112743-0-18848000-1423521346_thumb.

post-112743-0-33607000-1423521363_thumb.

post-112743-0-18900400-1423521376_thumb.

post-112743-0-62413300-1423521386_thumb.
 
 
Yeah I took a fair few photos lol  :lol: and sorry not all of them look amazing sometimes the HDR on my camera makes the file to big to upload and I'm too lazy to compress them but everyone should be able to make out everything. Any questions don't hesitate to ask and also feedback would be good too.
Link to comment
Share on other sites

Link to post
Share on other sites

Moved to Build Logs.

15" MBP TB

AMD 5800X | Gigabyte Aorus Master | EVGA 2060 KO Ultra | Define 7 || Blade Server: Intel 3570k | GD65 | Corsair C70 | 13TB

Link to comment
Share on other sites

Link to post
Share on other sites

@AlanTheEmu Welcome to the boards if you follow your topics (right of the title at the top) you will get notified when someone responds even if they don't quote or @ you.


Nice clean build where did you get the rgb leds and white cables I would love to put some in my build. 

I am the one who goes bump in the night... usually making a sandwich.


Case: Phanteks Enthoo Primo White - Motherboard: ASUS X99 Deluxe - CPU: Intel i7 5820k - RAM: 4x4GB Corsair Vengeance 2666mhz ddr4 - GPU: Dual EVGA gtx 980 SSC - PSU: EVGA G2 Supernova 750w - Cooler: Custom PETG Loop on cpu and gpus - Storage: 500gb Samsung 850 evo ssd, 2x Seagate Barracuda 7200rpm 3tb hdd

Link to comment
Share on other sites

Link to post
Share on other sites

@Bosco Thanks for the tip.


The rgb led's I got of Ebay for £10 for 5 meters I think and the white cables are bitfenix extensions I think I'm only going to keep them temporarily for now as they add a lot of room behind the motherboard tray.

Link to comment
Share on other sites

Link to post
Share on other sites

Awesome build! But damn does plexi-glass look terrible. 

Main Rig: http://linustechtips.com/main/topic/58641-the-i7-950s-gots-to-go-updated-104/ | CPU: Intel i7-4930K | GPU: 2x EVGA Geforce GTX Titan SC SLI| MB: EVGA X79 Dark | RAM: 16GB HyperX Beast 2400mhz | SSD: Samsung 840 Pro 256gb | HDD: 2x Western Digital Raptors 74gb | EX-H34B Hot Swap Rack | Case: Lian Li PC-D600 | Cooling: H100i | Power Supply: Corsair HX1050 |


Pfsense Build (Repurposed for plex) https://linustechtips.com/main/topic/715459-pfsense-build/


Link to comment
Share on other sites

Link to post
Share on other sites

@ltguy Yeah the plastic window will probably be a mod for the future, I'm just undecided if I want to wait for Fractal to release R5 side panels and get the standard panel and cut into it and make a large glass window or stick with the current panel and cut a bigger window out and replace the plastic with glass. 

Link to comment
Share on other sites

Link to post
Share on other sites

hey i also own a R5 :D 


how did you make the psu cover  ? 


Thnx bro , 

Link to comment
Share on other sites

Link to post
Share on other sites

Awesome!


I had a local sheet metal company fabricate my psu cover out of aluminium. I just gave them a basic diagram with the dimensions I needed. However you can always buy a piece of plastic like acrylic and cut it to size and make a 90 degree bend in it fairly easily as well.

Link to comment
Share on other sites

Link to post
Share on other sites

Update:


Changes have been made!


Ok so I've made some changes to my system. I decided that I wasn't happy with the pci cable routing and decided to cut a hole in my shroud to get a cleaner look. I also decided to re-paint it as before I used Plastidip and the stuff is good but it was really easy to peel of the edges so I went with matt black spray paint this time around. Whilst preparing the shroud I decided to paint the pci slots and hard drive sleds for a stealth kind of look.


But before the painting part here's what my system looks like without the shroud.


post-112743-0-74767400-1423957911_thumb.

As you can see here the Plastidip is peeling off the shroud due to the way it installs into the case.

post-112743-0-12102600-1423957718_thumb.

post-112743-0-71780800-1423957721_thumb.

post-112743-0-31426100-1423957724_thumb.

Now for the shroud. I already cut the hole out with a 51mm or 2 Inch holesaw.

post-112743-0-98894900-1423957730_thumb.

Now for paint preparation. I used automotive paint for this and sanded down the shroud and other bits with 1500 grit wet and dry sand paper.

post-112743-0-42356200-1423957735_thumb.

I like to warm the paint can up before spraying as it helps reduce runs.

post-112743-0-44393900-1423957745_thumb.

The shrouds first coat.

post-112743-0-11084200-1423957742_thumb.

And the second coat. The third coat was the final coat.

post-112743-0-92439800-1423957748_thumb.

Here are the pci slots and hard drive sleds about to be prepared.

post-112743-0-36797800-1423957757_thumb.

The finished shroud and pci slots.

post-112743-0-68753300-1423957760_thumb.

The finished hard drive sleds. I prefer them over the original.

post-112743-0-67580900-1423957764_thumb.


post-112743-0-24966400-1423957767_thumb.

post-112743-0-08368400-1423957773_thumb.

post-112743-0-63308200-1423957776_thumb.

post-112743-0-30221800-1423957779_thumb.

Ok now for some PC glamour pics :lol:


That's it for now, next I think i'll either get some sleeved psu cables or paint the motherboard armor.

post-112743-0-12102600-1423957718_thumb.

post-112743-0-71780800-1423957721_thumb.

post-112743-0-31426100-1423957724_thumb.

post-112743-0-98894900-1423957730_thumb.

post-112743-0-42356200-1423957735_thumb.

post-112743-0-11084200-1423957742_thumb.

post-112743-0-44393900-1423957745_thumb.

post-112743-0-92439800-1423957748_thumb.

post-112743-0-36797800-1423957757_thumb.

post-112743-0-68753300-1423957760_thumb.

post-112743-0-67580900-1423957764_thumb.

post-112743-0-24966400-1423957767_thumb.

post-112743-0-08368400-1423957773_thumb.

post-112743-0-63308200-1423957776_thumb.

post-112743-0-30221800-1423957779_thumb.

post-112743-0-74767400-1423957911_thumb.

Link to comment
Share on other sites

Link to post
Share on other sites

I like that you painted the brackets. It's ironic that that is how fractal tries to be different, but all it really does is bother consumers

Specs: 4790k | Asus Z-97 Pro Wifi | MX100 512GB SSD | NZXT H440 Plastidipped Black | Dark Rock 3 CPU Cooler | MSI 290x Lightning | EVGA 850 G2 | 3x Noctua Industrial NF-F12's

Bought a powermac G5, expect a mod log sometime in 2015

Corsair is overrated, and Anime is ruined by the people who watch it

Link to comment
Share on other sites

Link to post
Share on other sites

I like that you painted the brackets. It's ironic that that is how fractal tries to be different, but all it really does is bother consumers

Thanks, I personally don't mind them being white but I just thought that there was too much white for my liking, I prefer to have them black mainly because the white then focuses on the loop and the pci cables rather than having the pci slots and hard drive sleds white too.

Link to comment
Share on other sites

Link to post
Share on other sites

Update:


After a few deliveries it's time to change that awful window that comes with the R5. My window needed replacing anyway after I was soldering the LED's in there old position which was on the old window ledge itself since I couldn't place them on the metal panel as the panel couldn't close. Anyway a droplet of solder dripped off the iron and smack bang on my window as I didn't think to cover it with anything. Aside from that the window isn't great you can see the tab cut outs on the viewing side and if you have any form of LED's in the case they will highlight them. The new window is still plastic its clear perspex but its much better quality than the original window. As I don't own or have access to a laser cutter I had to do some case modding to get the new window to fit, it mainly only involved cutting the metal tabs off and smoothing out the edge so it's flush with the perspex.


The cut and smoothed edge.


post-112743-0-46739700-1424540613_thumb.

A comparison of the windows.

post-112743-0-36399600-1424540629_thumb.

The mark on the original window.

post-112743-0-37377200-1424540679_thumb.

Yeah I used strong tape don't judge haha.

post-112743-0-24897500-1424540700_thumb.

The viewing side.

post-112743-0-72613700-1424540715_thumb.

And of course the finished piece it looks a lot better and makes the lighting seem more subtle.

post-112743-0-43765000-1424540729_thumb.
Link to comment
Share on other sites

Link to post
Share on other sites

  • 2 weeks later...

Ok this took a little longer than I had anticipated but it's done. 


post-112743-0-16889000-1426351532_thumb.


This was a real pain to do as i had to make a custom hard drive cage to make everything fit. I was originally just going to keep the 4tb sshd drive and put everything from the 1tb drive onto it. That wasn't the case however as the shroud wasn't able to take the weight of the hard drive and the pump with the reservoir on top when they were empty never mind full of water. So I had to order some more aluminium and drill holes into it bend it and paint it which took a few days itself. The shroud was no walk in the park either. To get the grommet to fit i had to cut a hole approximately the size of the internal diameter and it took an age to get the dremel to cut through it. After that I had to file the remaining few millimeters so the grommet fit properly.


After the custom metalwork was done it was assembly time and the big problem I found with this shroud is if I ever need to change a hard drive or plug in a new psu cable I will have to drain the loop to do so since all that is holding the reservoir onto the pump is a single sli fitting which can move! So to avoid the risk of having my system taking a bath I will need to drain it to get to the drives/psu. I also purchased a new radiator to replace the 280mm one I had as it didn't properly line up with the R5 140mm fan mounts at the front. This time I got a 240mm radiator which fits fine.


This was the only way I can see getting a D5 in this system the only other options were to ditch the hard drives or replace the 360mm radiator with either a 240mm or 280mm one or move it to the front but only get 2/3 of the cooling capability as you only have mounts for 2 fans in the front and if you put it in pull you wouldn't get air from anywhere at the top unless you opened up the 5.25 drive bay slots. The problem was that the R5 is a little too low for the pump and reservoir to be mounted separately on top of the hard drive cage like my old pump/res combo was.


I only have one problem left now and that is to deal with the vibration from the pump as its very noticeable, before the only thing I could hear in the entire system at idle was the psu fan coming on and off and it surpasses that so it needs to be dealt with. I am thinking of upgrading the case for a full tower as well something like the 900d or the phanteks enthoo primo or if I save up a bit a caselabs sma8. I like the R5 but its just too small for what I need and when I eventually get the 2nd GTX 970 in there it's going to be more hassle.

Link to comment
Share on other sites

Link to post
Share on other sites

  • 3 weeks later...

Update:


Hi all, just a quick update, I've made some slight changes to my rig, I felt that the space between the motherboard tray and the front of the case was wasted space and decided to put a piece of acrylic there and use it to stealth mount my 4tb hard drive. I also put my DDC pump/res combo back in as the D5 is annoying me with the vibration. The D5 will be coming back as soon as I get a few more fittings for its mounting position but the DDC will keep things nice and quiet for now. Anyway here's some pics.


post-112743-0-18922300-1427737974_thumb.

This is the empty space I'm taking about.

post-112743-0-51952400-1427738006_thumb.

Draining the loop.

post-112743-0-09762900-1427738033_thumb.

Whats under the shroud. You can see my makeshift HDD cage at the front.

post-112743-0-68154600-1427738063_thumb.

The system as it is at the moment. You can kinda see the new cover.

post-112743-0-36172900-1427738099_thumb.

The back of the cover showing the 4TB SSHD. 


The last thing I wanted to ask is what should I do with this open space in the front of the R5? It's where the 5.25 bays use to be but now its just an open space letting dust in  :(. My idea is too add a mini window there but I would love to see what ideas you guys have so please comment what you think should go there. Here's the pic.


post-112743-0-91089200-1427738116_thumb.


That's it for now updates coming soon.  :D

post-112743-0-18922300-1427737974_thumb.

post-112743-0-51952400-1427738006_thumb.

post-112743-0-09762900-1427738033_thumb.

post-112743-0-68154600-1427738063_thumb.

post-112743-0-36172900-1427738099_thumb.

post-112743-0-91089200-1427738116_thumb.

Link to comment
Share on other sites

Link to post
Share on other sites

May I ask what Noctua fan is that doing your Exhaust? Also what are your Noctua Radiator fans?


Last question, how are all your fans hooked up, are 3 of them to the front fan controller or are only the front two connected to the controller and the back is on the motherboard and the top is somewhere else?


Thanks!


If you mean the fan at the rear of the case its a Noctua NF-A14 PWM and all my radiator fans are Noctua NF-F12 PPC 2000rpm PWM fans.


I connect my fans up to one of these:


post-112743-0-86123200-1427908648_thumb.


Its called the Phobya 8x4 pin splitter hub, it  uses molex power and uses a 4 pin cable to connect to a motherboard header to control the RPM of the fans.

post-112743-0-86123200-1427908648_thumb.

Link to comment
Share on other sites

Link to post
Share on other sites

If you mean the fan at the rear of the case its a Noctua NF-A14 PWM and all my radiator fans are Noctua NF-F12 PPC 2000rpm PWM fans.


I connect my fans up to one of these:


attachicon.gifPhobya 8x4.jpg


Its called the Phobya 8x4 pin splitter hub, it  uses molex power and uses a 4 pin cable to connect to a motherboard header to control the RPM of the fans.


Okay that's really cool and insightful, so you are not using the case controller at all?

Link to comment
Share on other sites

Link to post
Share on other sites

Okay that's really cool and insightful, so you are not using the case controller at all?

No the case controller is 3 pin DC and only has 3 settings anyway its good but I prefer to use PWM when I can as there is more control and you can run fans slower.

Link to comment
Share on other sites

Link to post
Share on other sites

No the case controller is 3 pin DC and only has 3 settings anyway its good but I prefer to use PWM when I can as there is more control and you can run fans slower.

Okay, I really need a new Mobo and CPU but I am waiting for skylake, I am running a GA-Z68X-UD3H-B3 with a i5 2500k and my mobo has 0 fan control D:

Link to comment
Share on other sites

Link to post
Share on other sites

Okay, I really need a new Mobo and CPU but I am waiting for skylake, I am running a GA-Z68X-UD3H-B3 with a i5 2500k and my mobo has 0 fan control D:

Skylake does sound promising so far. That sucks man all the mobo's i've had recently have all had fan control although my asus sabertooth has had the most (6 in total). What about your cpu fan header thats what I use for my hub.

Link to comment
Share on other sites

Link to post
Share on other sites

Skylake does sound promising so far. That sucks man all the mobo's i've had recently have all had fan control although my asus sabertooth has had the most (6 in total). What about your cpu fan header thats what I use for my hub.

Yeah well my mobo came out yonks ago, but I don't want to get something that won't even be suported in half a year and replaced by 1151 chipset. 


Anyway, I love your build and hopefully I will get my PC to that standard someday, but 1 step at a time ;)

Link to comment
Share on other sites

Link to post
Share on other sites

Yeah well my mobo came out yonks ago, but I don't want to get something that won't even be suported in half a year and replaced by 1151 chipset.

Anyway, I love your build and hopefully I will get my PC to that standard someday, but 1 step at a time ;)

Yeah it would make sense to hold it off until skylake. Thanks I love working on it... Sometimes haha. It took a while to get it to where it is today I have some pics of it before it was watercooled that I'll post later. Also if you do make a build log on your skylake build I would love to see it.

Link to comment
Share on other sites

Link to post
Share on other sites

Create an account or sign in to comment

You need to be a member in order to leave a comment

Create an account

Sign up for a new account in our community. It's easy!

Register a new account

Sign in

Already have an account? Sign in here.

Sign In Now

×