Jump to content

A Beginners Guide to PROXMOX

PROXMOX is a powerful hypervisor used for hosting containers and virtual machines. The Operating System is available for free while offering repositories that you can pay for with a subscription. This guide will go over How to install the OS, How to disable the subscription notice and enterprise repositories that aren't free (if you're not interested that is), How to configure your virtual machine pools, How to add a CIFS network server, How to download and install Templates for Containers, and how to install your first Virtual Machine.


proxmox.png.33c1a09d12f8e6ca317dc85162264e8c.png


1. How to Install PROXMOX

Spoiler

You are going to require at least two thumb drive here if you plan to install to a thumb drive. I recommend using one no smaller than 32GB. 64GB+ if you can. If you must 16GB will suffice but you will be very limited in how much data you can put on it. PROXMOX can be downloaded from their website (PROXMOX) as a .ISO file (DO NOT DOWNLOAD IT RIGHT NOW. I'll explain why.). For Windows users Rufus is a very popular tool for creating bootable thumb drives. Unfortunately Rufus will not work with PROXMOX as the installer has the expectation that you've burned the .ISO to a physical CD. When using Rufus the installation will fail not far in and start searching for the CD that isn't there.


There are other .ISO mounting tools for Windows but instead we are going to use a Linux CLI tool known as dd. If you've never used Linux before you can run it off a thumb drive. For simplicity we can use Ubuntu 19.04. For this Rufus can be used to install the Ubuntu.ISO. Once it's installed boot to it from a computer. If you don't press anything once the USB boots it should bring you to the Ubuntu desktop on it's own. If not hit enter on "Try Ubuntu without Installing". This will run a live image of the OS without installing anything. From here insert the thumb drive to be used for the PROXMOX installer.


Using the included browser (Firefox) navigate to the PROXMOX website and download the .ISO (current version 6.0-4). This should land in your downloads folder. To get there look at the task bar on the left of the monitor. The fourth icon down is a folder called "Files". Click this. On the window that pops up click "Downloads". Our .ISO should be the only file in the folder. Now open a terminal by right-clicking in the window and selecting "Open in Terminal". Now we need to find out the drive letter Ubuntu gave our thumb drive. We can do that by using the command:


lsblk

This will list your connected drives, capacities, & partitions. From this find the name of your thumb drive which should follow the structure "sd*".

Once you have that information make sure the thumb drive isn't mounted by using the following command (replace "c" with your drive letter):


umount /dev/sdc

You may receive an error saying your drive wasn't mounted. That's good. We just wanted to make sure that it wasn't.

Next up partitioning the drive. If you have a reason to use a different file system (such as FAT32) that's OK but for this example we're going to use ext4 (replace "c" with your drive letter):


sudo mkfs.ext4 /dev/sdc

Once your drive is formatted you can write your .ISO file to the thumb drive with:


sudo dd if=proxmox-ve_*.iso of=/dev/sdc

NOTE: Where "proxmox-ve_*".iso is the name of your .ISO file and sd"c" is the name of your thumb drive.

NOTE: When you run this command you will not see any output for a little while. Be patient, you will see an output and be brought back to a prompt once it finishes writing the .ISO.


Our PROXMOX USB installer is now ready. Insert the installer and the drive you want to install to then boot the server. You may have to manually tell the system to boot from USB. Once the installer starts select "Install Proxmox VE", then:

  1. Agree to the EULA
  2. Choose a target disk (Here you can also click on Options and choose another file system, or to use RAID)
  3. Choose your Country, Time Zone, and Keyboard Layout.
  4. Choose a Password, Input an E-mail.
  5. Setup your network configuration
  6. Verify that everything is correct and install. Once it's done you'll be prompted to restart.

After the server is done restarting the installation is complete.


2. How to Disable the Subscription Notice and Enterprise Repositories

Spoiler

Once you login to the WebUI that the CLI says to go to the first thing you'll be greeted by is a pesky subscription message. This will pop up every time you login. So let's disable it. If you click OK it will disappear. First lets change from Server View to Folder View. In the very upper left corner beneath PROXMOX it says Server View. Click that and change it to Folder View. Now click on pve in the list beneath it. Look at the column objects that appear to the right of that. The fourth object down is called Shell. Click it. Now copy/paste the following line and hit enter. This will disable the subscription popup.


sed -i.bak "s/data.status !== 'Active'/false/g" /usr/share/javascript/proxmox-widget-toolkit/proxmoxlib.js && systemctl restart pveproxy.service

If you want to you can also disable the enterprise repositories with:


sed -i.bak 's|deb https://enterprise.proxmox.com/debian jessie pve-enterprise|\# deb https://enterprise.proxmox.com/debian jessie pve-enterprise|' /etc/apt/sources.list.d/pve-enterprise.list
echo "deb http://download.proxmox.com/debian jessie pve-no-subscription" > /etc/apt/sources.list.d/pve-no-sub.list

Now if you reboot the server and log back in you should no longer receive the subscription prompt and when performing updates the enterprise repositories should be ignored.


3. How to Configure ZFS Storage Pools

Spoiler

When it comes to setting up your VM/container/etc storage pools PROXMOX uses a file system known as ZFS. To configure our pool we need to learn the drive names PROXMOX assigned our disks. For this we can use:


lsblk

Assuming all the disks are identical in size it won't be hard to tell them apart from any other disks in the system. For use in a virtual machine application it's recommended to use RAID10. With RAID10 you will get exceedingly more IOPS as oppose to RAID5 or RAID6 however if desired these are still configurable options.


In this example I am going to use 8 disks and I'm going to use RAID10. The command to set this up would be:


zpool create PoolName mirror /dev/sdb /dev/sdc mirror /dev/sdd /dev/sde mirror /dev/sdf /dev/sdg mirror /dev/sdh /dev/sdi 

What this has done is created four 2 drive RAID1's and striped them in RAID0 for an effective 8 drive RAID10. Now if you want a little more performance from your VMs you can add a L2ARC and/or ZIL device these will act as a read & write cache buffer. For this you would want a very high speed device such as a SATA SSD, or NVMe SSD. If you are only working with a single SSD particularly if it is NVMe you'll need to partition it if you plan to use it for both read & write. For this you can use fdisk. Go back to the Terminal (How to get there is discussed in 2.) and get the drive letter associated with your SSD. For me that's nvme0n1. Now to create partitions on it use the command:


fdisk nvme0n1

fdisk has quite a few functions but for simply making a partition its just a matter of hitting a few key letters. Starting with the write cache about 20GB would be as big of a buffer as you'll need but of course this may vary with your exact workload so adjust accordingly. To add this to the drives config would be:


g
p
n
p
1
[enter]
+20G
[enter]

To create the read cache would be a matter of repeating the list starting at "p". Now if this is a small drive you can choose to fill the rest of the drive for the 2nd partition. Alternatively you can reserve a space for whatever else you may want to do with the drive. Now with lsblk we will check the name each partition was given. For me that's nvme0n1p1 & nvme0n1p2 where nvme0n1p1 is 20GB and nvme0n1p2 is the remainder of my SSD. To attach these partitions to our pool I'll use the commands:


zpool add PoolName log /dev/nvme0n1p1
zpool add PoolName cache /dev/nvme0n1p2

If you would like to verify the pools configuration you can use the command:


zpool status

To connect our pool to the PROXMOX WebUI so we can use it there go to data-center -> storage -> add -> zfs

  • ID = Give the pool a name
  • ZFS pool = What we created in the Terminal

After it has finished being added we're done.


4. How to Save a .ISO file on PROXMOX

Spoiler

PROXMOX supports storing .ISO files on the boot device itself (why a larger boot drive isn't a bad idea). To upload .ISO files to the server go to:


Folder View -> Datacenter -> Storage -> Local -> Upload

From here browse for the .ISO file then click Open, then Upload.


5. How to Bond a Network Interface Port

Spoiler

Before we start setting up Containers and Virtual Machines we need to bridge our NICs (Network Interface Cards) this will allow us to assign virtual Ethernet ports which our Client OS's will need in order to gain network access. In order to do that navigate to:


Datacenter -> Nodes -> [ServerName] -> System -> Network

In here we want to Create a Linux Bridge. When we assign this to our client they will be linked to the same LAN as the servers own network. This enables easy port forwarding or access for other network clients. This also however makes it easier for anything malicious inside the Client to make it's way out to other devices on the LAN so it's important to consider the application before assigning a Linux Bridge. To get started go to:


Create -> Linux Bridge

In here there's a number of configurable parameters. What you'll want are to setup:

  1. Bridge IP (can be the same as the physical interface),
  2. Subnet
  3. Default Gateway (not required),
  4. IPv6 (not required),
  5. Weather or not it starts when PROXMOX starts
  6. If you plan to have it handle traffic from multiple VLANs (not required)
  7. Then assign the Slave port (Bridge ports) which will be the Name given to the physical port you want it to utilize (such as enp129s0).

After that hit Create and if it went well you'll have an interface that we can assign to our clients.


NOTE: Multiple Containers & VMs can be assigned to the same Bridge


NOTE: When you go to make your containers & VMs if you're using 10Gbit NICs you'll need to choose paravirtualization during their setup as Intel E1000 is only 1Gbit. Linux is pretty good at having a driver for this so your 10Gbit NIC immediately works inside the VM. However Windows 10 lacks this and a virtio driver will need to be downloaded before you can use it.


NOTE: If Jumbo Packets are necessary after you configure your NIC you will find that enabling it in your VM/Container doesn't yield results. This is because the physical interface that PROXMOX controls is still set to MTU 1500. To adjust this we need to edit the interfaces file. We can do this by going back into Shell and running:


nano /etc/network/interfaces

and modifying the configuration of the appropriate interface with:


pre-up ip link set enp129s0 mtu 9000

Where enp129s0 is the name of your NIC.

Example with edit:


auto vmbr1
iface vmbr1 inet static
        address  10.0.0.1
        netmask  255.255.255.0
        bridge-ports enp129s0
        pre-up ip link set enp129s0 mtu 9000
        bridge-stp off
        bridge-fd 0

Then re-start the server or bring the interface down and back up again with:


ifdown enp129s0 && ifup enp129s0

From a Windows client on the same network which has also been configured with Jumbo Packets you should then be able to run the CLI command:


ping X.X.X.X -l 8972 -f

If the ping runs though normally then Jumbo Packets are working end-to-end, but if you get the error:


Packets need to be fragmented but DF set.

Then there is a problem somewhere in the chain and you'll need to recheck your configuration. Beyond that you now have your Network Bridges ready to use.


6. How to Add a CIFS Network Server

Spoiler

Adding a CIFS share can be used for backing up files, booting .ISO files over the network, restoring VMs, container images, among other functions. It's very useful when managing a cluster of VMs. To set one up go to:


Datacenter -> Storage -> Add -> CIFS

In here we will configure the:

  • ID = How the server will be represented in PROXMOX
  • Server = Input the servers IP
  • Username = The account to use on the CIFS server
  • Password = The account password
  • Share = The folder you want PROXMOX to have access to
  • Nodes = If you have multiple PROXMOX servers
  • Content = Here you decide what you want the server to host for PROXMOX. We only want "ISO image" right now
  • Domain = If applicable

Once you'd added this successfully check your servers share folder. You should see the directory "template" and inside will be "iso". Inside here you can add all of your .ISO files for whatever you may want to install. .ISO files may not only contain OS installers but miscellaneous files for use in a virtual CD drive you may attach to your VM after it is installed.


7. How to Download and Install Templates for Containers

Spoiler

Containers are a very nice feature in which unlike a VM which isolates it's resources from the host OS and kernel, containers share many resources with the host and share the host kernel. This allows easier access to things like drive resources, network adapters, and PCI_e devices. It also doesn't isolate RAM that could be utilized for another system process. On top of this it allows for better performance for the hosted OS. The only downside is containers are CLI only. Some do have WebUI's but none have a fully functional GUI. If your use case doesn't rely on a GUI though, lets say you want the server to double as a File Server, or an E-mail server then it's a better option than using a VM.


To get started we first need to download what PROXMOX calls templates. These are images for many different CLI Linux distributions. These will download to your boot USB which is one reason why you'll want one of moderate size (though they can be stored elsewhere if you have somewhere setup for them). When you do the actual installation however you will be able to choose the pool of drives you configured. From the main WebUI page navigate to Templates:


Datacenter -> Storage -> local -> Content -> Templates

From this list you can chose whatever distro you prefer for the applications you want to run. Select one and click Download. Once it's done it's ready to install whenever you want. To begin this click "Create CT" at the top-right corner of the page. There are many configurable options here, most are self-explanatory but to go over some of the things that make installing a container unique they have you configure your root password, any SSH access, and interface IP before the OS is installed. The tab Templates gives you the list of distros you downloaded. The tab Root Disk gives you the option of where to install the container. Be sure to select your pool, by default it will install to your USB.

Once you are done configuring everything else click Finish. Your container will be setup and you'll find it at:


Datacenter -> LXC Container

With that you've installed your first container. From here you can start it up and use it.


8. How to Install Your First Virtual Machine

Spoiler

A Virtual Machine is similar to a Container at least in the way you interact with it but it's everything you can't see which makes it vastly different and depending on your application may be your best option as oppose to a Container. As opposite to a container VM's isolate their resources from the host, Memory, CPU cores, Storage, and even the Kernel. All of them are virtually partitioned off from the rest of the system. This allows for a much higher level of security if the plan were to expose the client OS to anything potentially malicious. VM's also offer the benefit of supporting GUI OS's (like Microsoft Windows) and some WebUI OS's that cannot run in Containers.


To install a VM we're going to need either a physical CD or to use a .ISO file. For this example we're going to use the CIFS share we configured in Step 6. Alternatively installing the .ISO files locally on the server (as discussed in Step. 4) is an option.


In the top-right corner of the WebUI click "Create VM". Like before there are quite a few configurable options. Many self-explanatory. When you get to the OS tab the left options column where it says "Storage:" you'll select the CIFS share you configured that contains our .ISO files (if they were stored locally you will select "Local"). Then click the drop-down menu next to "ISO Image:". This will contain all of your bootable .ISO files.


Under Hard Disk be sure to select your storage pool or else it will try to install to your USB. After setting up CPU, Memory, & Network you can Confirm and Finish. It will create it. When you start your VM for the first time it will run though the installer.ISO you set it up with. Once you're done installing your OS you can go though:


Hardware -> CD/DVD Drive

to remove or change it. Like mentioned before you can make your own .ISO files containing anything you want after the OS is installed. It will act like any CD in a CD-ROM drive.


You've finished installing your first Virtual Machine.


9. Hardware Pass-Through

Spoiler

PROXMOX supports the ability to pass hardware devices such as GPUs, HBAs, USB devices, among other things through to VMs. The setup is quite involved though.


9.1 - IOMMU Groups on Hardware

Spoiler

To begin we need to enable IOMMU Groups. How to enable this on the hardware is going to vary depending on the platform. From the BIOS you will need to find and enable:

  1. When using Intel
    1. VT-d (Device Pass-though Support)
  2. When using AMD
    1. IOMMU
    2. Enumerate all IOMMU in IVRS (applies to multi-die processors)


9.2 - IOMMU Groups within PROXMOX

Spoiler

In order to make PROXMOX recognize the IOMMU Groups it needs to be told to look for them. To do that we need to edit GRUB. From a Console which can be accessed by going to:


Folder View -> Datacenter -> Nodes -> <name-of-node> -> Shell

run the command


nano /etc/default/grub


Only one line here needs to be edited and what you append to it depends on your platform:


GRUB_CMDLINE_LINUX_DEFAULT="quiet splash"

This needs to be edited with either:

  1. intel_iommu=on
  2. amd_iommu=on

It will look like one of these after the edit:


GRUB_CMDLINE_LINUX_DEFAULT="quiet splash intel_iommu=on"
or
GRUB_CMDLINE_LINUX_DEFAULT="quiet splash amd_iommu=on"


After this Ctrl+O to Save, then Ctrl+X to quit. Next run:


update-grub

Then restart the server.


9.3 - Verifying IOMMU Groups

Spoiler

After the server finishes rebooting we're going to create a script. To start re-enter the Shell and run:


nano ls-iommu.sh

Now copy/paste the following code into the editor. This can be done with Ctrl+C then Ctrl+Shift+V.


#!/bin/bash
for d in /sys/kernel/iommu_groups/*/devices/*; do
  n=${d#*/iommu_groups/*}; n=${n%%/*}
  printf 'IOMMU Group %s ' "$n"
  lspci -nns "${d##*/}"
done

Now Save (Ctrl+O), and exit (Ctrl+X)


Next add the execute permission with:


chmod 744 ls-iommu.sh

Then run the script with:


./ls-iommu.sh

If IOMMU Groups were enabled successfully there should be a long list of output. This list is all of your devices and the number at the beginning is the IOMMU group it falls into.


If nothing shows up or if there is an error then the configuration will need to be double-checked.


9.4 - Blocking the Kernel Driver

Spoiler

With IOMMU Groups working there's only one more thing stopping a hardware device from being passed-though to a VM and that's that the Kernel has already loaded a driver for the device.


There are three methods to making the Kernel let go and each method works for different circumstances.


9.4.1 - Blacklist the Driver

Spoiler


Blacklisting a driver is the process where-in a driver is stopped from being loaded by the Kernel at system startup system-wide. This is useful in this application if there are multiple hardware devices that all use the same driver and the host doesn't need any of them.


First we have to verify what drivers the device uses. This can be done with:


lspci -vnn

Search for the device you want to pass-though (this includes all of it's functions ie. .0, .1, .2, .3) and write down the Kernel Driver it states each function is using.


To blacklist a driver run:


sudo nano /etc/modprobe.d/blacklist.conf

This will bring up the blacklist configuration file.


To the end of the file append the drivers required for each function of the device starting with the word "blacklist". One per line. For the GPU being passed-though in the example below it would appear as the following:


blacklist radeon
blacklist amdgpu
blacklist snd_hda_intel

Lines starting with "#" are commented out. This is good for identifying why the drivers have been blacklisted.


Ctrl+O, Ctrl+X, then restart the computer.


 Both Method 9.4.2 & 9.4.3 rely on the vfio-pci driver which for a default PROXMOX install is not set to run by default.


To load the drivers manually run:


nano /etc/modules

To the file append the lines:


vfio
vfio_iommu_type1
vfio_pci
vfio_virqfd

Save the file (Ctrl+O), and Exit (Ctrl+X). Now update initramfs:


update-initramfs -u -k all

Now run:


lsinitramfs /boot/initrd.img-5.0.15-1-pve | grep vfio

NOTE: Your kernel version may differ. The version can be checked with the tab key after typing:


lsinitramfs /boot/i

To verify the drivers will be loaded on next boot.


9.4.2 - Override Device Driver Based on Device ID

Spoiler

The Device ID is a hardware identifier assigned to a device by the vendor. This usually appears as a string of eight characters separated in the middle by a colon.


NOTE: In the event of using multiple identical hardware devices where you only want to pass-though one. This method will not work.


First to find the hardware Device ID run:


lspci -nn

This will list every device on the system and it's Device ID.


It's important to not just pass-though the device itself but all other functions that are a part of said device as well.


To perform the vfio-pci driver override a .conf file needs to be added in the modprobe.d directory:


nano /etc/modprobe.d/vfio-driver-override.conf

Add the following line to the file replacing XXXX:XXXX,XXXX:XXXX with the Device ID's associated with the device,functions to be passed-though.


options vfio-pci ids=XXXX:XXXX,XXXX:XXXX

Save, exit, now:


update-initramfs -u -k all

And restart.


9.4.3 - Override Device Driver Based on Device Address

Spoiler

The last option which will work with identical devices when one or more is for the host and one is for the VM is assigning the vfio-pci driver based on Device Address. The Device Address is the first identifiable set of characters for an entry when running the lspci command. The format is XX:XX.X.


To assign the vfio-pci driver using this create a file using the command:


nano /etc/initramfs-tools/scripts/init-top/vfio-driver-override.sh

Within this file copy the following lines replacing instances of XX:XX.X for the Device Address(s) associated with your device.


#!/bin/sh
PREREQS=""
DEVS="0000:XX:XX.X 0000:XX:XX.X"
for DEV in $DEVS;
  do echo "vfio-pci" > /sys/bus/pci/devices/$DEV/driver_override
done

modprobe -i vfio-pci

NOTE: For your hardware it's important to use the correct prefix. The prefix is the 0000: coming before the Device Addresses in the above example. Across different platform configurations the prefix can be 0001:, or 000a:, etc. You can check what prefix your hardware uses by running the command:


ls -l /sys/bus/pci/devices

After verifying and applying the correct prefix save and exit the file. Then run the commands:


chmod 755 /etc/initramfs-tools/scripts/init-top/vfio-driver-override.sh
chown root:root /etc/initramfs-tools/scripts/init-top/vfio-driver-override.sh
update-initramfs -u -k all

Now to verify the that script will run at system start run the command:


lsinitramfs /boot/initrd.img-5.0.15-1-pve | grep vfio

If the script will load at startup it will show up as an entry underneath our vfio drivers.


Now restart the server.


If either the 9.4.2 or 9.4..3 methods were used the vfio-pci driver can be verified by running:


lspci -vnn

Locate the device and it's sub-components. Their Kernel drivers should be vfio-pci.


9.5 - Passing Through the Hardware

Spoiler

If everything above was successful create your VM (if you have not already) and go to:


Your-VM -> Hardware -> Machine

Now change:


i440fx -> q35

The Q35 Chipset comes with a virtual PCI_e bus which we will need for the PCI_e device to interface with the VM.


Now:


Add -> PCI Device

In here click on the drop down for Device. If everything has worked properly a list of all the PCI_e hardware devices will populate the list. Find the device you want to pass though and click on it.


All Functions is great when it's a GPU you want to pass-though. It makes it so you don't have to go back and find the other functions that are a part of the GPU.


Primary GPU. Rather self explanatory.


Press Add.


After starting the VM you should see the hardware device as if it were connected to a native OS.


This concludes the PROXMOX Beginners Guide. If there's anything that needs revising or if you want something added just let me know.

Link to comment
Share on other sites

Link to post
Share on other sites

  • 10 months later...

Do you run Proxmox now? I have some special Case and dont know what the best solution will be.

From AT. :x

Link to comment
Share on other sites

Link to post
Share on other sites

3 minutes ago, Required said:

Do you run Proxmox now? I have some special Case and dont know what the best solution will be.

ask them so we can help


Link to comment
Share on other sites

Link to post
Share on other sites

13 minutes ago, Required said:

Do you run Proxmox now? I have some special Case and dont know what the best solution will be.

I still run PROXMOX on one of my servers. What is it you're looking to do?

Link to comment
Share on other sites

Link to post
Share on other sites

Maybe you read a other tread about that. I want create my own Map with Qgis.

The can put them out as Tiles to upload them on my Server later. That need A LOT of CPU Power.

A friend of mine gave me his Blade Server who have 4 CPU. (Yes CPU not Cores...)

The ESXi support in the Free Version only 2 CPU.  So... the Blade Server will consume A LOT of Power.


Is there a way to run like a full Version of VM Ware to move a Virtuall Pc between 2 Server?
So I could prepare the Virtual Machine (Download the current Raw Map Data) and before I want to export the Map I boot the Bladeserver and move the Machine to them and export the  map with all 4 CPU.

From AT. :x

Link to comment
Share on other sites

Link to post
Share on other sites

5 minutes ago, Required said:

Maybe you read a other tread about that. I want create my own Map with Qgis.

The can put them out as Tiles to upload them on my Server later. That need A LOT of CPU Power.

A friend of mine gave me his Blade Server who have 4 CPU. (Yes CPU not Cores...)

The ESXi support in the Free Version only 2 CPU.  So... the Blade Server will consume A LOT of Power.


Is there a way to run like a full Version of VM Ware to move a Virtuall Pc between 2 Server?
So I could prepare the Virtual Machine (Download the current Raw Map Data) and before I want to export the Map I boot the Bladeserver and move the Machine to them and export the  map with all 4 CPU.

I'm a little confused by what it is you're asking. Are you trying to use ESXi or are you looking to use PROXMOX? My knowledge of anything related to VMWare ESXi is very limited.


If you're using a free or open source hypervisor or other GNU/Linux distribution it will give you access to all 4 physical processors without licensing. PROXMOX would likely enable this without you having to pay anything.


With PROXMOX and this should also be possible on ESXi is the exporting of virtual machines. When a VM is exported you can import it onto a different server if that answers your question. Be aware the format used on the export has to be supported by the receiving server so I can't say you can export a ESXi VM and import that to a PROXMOX server easily. I know someone here who could give you better guidance in that regard.

Link to comment
Share on other sites

Link to post
Share on other sites

There is a full version of VM Ware when you will pay for it "here is some info"(note you take licenses from them per ... core)  (https://www.vmware.com/support/support-resources/licensing.html). 


question for you @Required what do you need:

  • live migration?
  • failover? 
  • replacation?
  • on proxmox or on VM Ware?
  • Running a vitual machine with lots of cores/CPU for less but great power? Like Proxmox where you can create your own VM same as VM Ware, only for less.


Link to comment
Share on other sites

Link to post
Share on other sites

On 6/14/2020 at 12:14 AM, Windows7ge said:

or are you looking to use PROXMOX?

Yes sure.

On 6/14/2020 at 12:59 AM, jjdrost said:

Running a vitual machine with lots of cores/CPU for less but great power?

Well its a belittle difficult.
What I mean is prepare everything on a Virtual Machine who is on a "low power" Server and before I export the Tiles I move them on the other Machine with the 4 CPU. So the Bladeserver run only when I want export Tiles not when I prepare then. VMWare have such feature to move Virtual Machines between the different Server.

From AT. :x

Link to comment
Share on other sites

Link to post
Share on other sites

36 minutes ago, Required said:

Yes sure.

So what exactly are you asking if it's capable of? VM migration? Recognizing 4 sockets without a licence?

Link to comment
Share on other sites

Link to post
Share on other sites

6 minutes ago, Windows7ge said:

Recognizing 4 sockets without a licence?

That question should be solved.


So the remaining question is if its possible to move a Virtual Machine between 2 Server without problems on the fly?

From AT. :x

Link to comment
Share on other sites

Link to post
Share on other sites

1 hour ago, Required said:

That question should be solved.


So the remaining question is if its possible to move a Virtual Machine between 2 Server without problems on the fly?

Ripping a quote from the PROXMOX support forums:

Quote

without downtime, the only possibility is to add the new server to the cluster, migrate, and the remove the server from the cluster
with downtime, the easiest method is to backup & restore

You can create a PROXMOX cluster which should enable live migration. If you can afford to shutdown the VM then backup & restore is your other option. PROXMOX can do both.


Now if you're asking if this can be done ESXi -> PROXMOX and vise versa. I'm going to wager neither are possible but I can poke someone who would know a lot more if that's your goal.

Link to comment
Share on other sites

Link to post
Share on other sites

  • 1 month later...
On 6/13/2020 at 2:40 PM, Windows7ge said:

I still run PROXMOX on one of my servers. What is it you're looking to do?

between Proxmox 6.2+ and the older 5.4+ versions, which one is more stable and would I still need to follow the instructions to the letter regardless of what version?

Link to comment
Share on other sites

Link to post
Share on other sites

19 minutes ago, Bendy_BSD said:

between Proxmox 6.2+ and the older 5.4+ versions, which one is more stable and would I still need to follow the instructions to the letter regardless of what version?

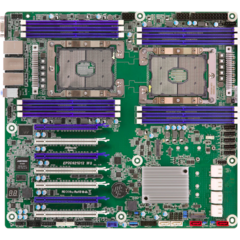
For your hardware pass-though project on the Asrock Rack EP2-C602-4L/D16?


I can't say for certain. Currently I have the server running V6.0-4 and have hardware pass-though configured. I haven't played with 6.2-1.


It's safe to assume most if not all of the steps will remain the same across the versions. We're not doing anything too fancy here and the settings are fairly standard. What I would be worried about changing is if you need to keep a GPU for the host & pass another to a VM that are identical and run on the same driver but since PROXMOX is a WebUI and your motherboard has built-in VGA & IPMI I don't think you'll need to.


What else are you looking to do?

Link to comment
Share on other sites

Link to post
Share on other sites

On 8/4/2020 at 5:10 PM, Windows7ge said:

For your hardware pass-though project on the Asrock Rack EP2-C602-4L/D16?


I can't say for certain. Currently I have the server running V6.0-4 and have hardware pass-though configured. I haven't played with 6.2-1.


It's safe to assume most if not all of the steps will remain the same across the versions. We're not doing anything too fancy here and the settings are fairly standard. What I would be worried about changing is if you need to keep a GPU for the host & pass another to a VM that are identical and run on the same driver but since PROXMOX is a WebUI and your motherboard has built-in VGA & IPMI I don't think you'll need to.


What else are you looking to do?

I got an error when running:

update-initramfs -u -k all


output:

update-initramfs: Generating /boot/initrd.img-4.15.18-10-pve
root@mymachine:~# lsinitramfs /boot/initrd.img-5.0.15-1-pve | grep vfio
/usr/bin/unmkinitramfs: 45: /usr/bin/unmkinitramfs: cannot open /boot/initrd.img-5.0.15-1-pve: No such file
/usr/bin/unmkinitramfs: 38: /usr/bin/unmkinitramfs: cannot open /boot/initrd.img-5.0.15-1-pve: No such file
cpio: premature end of archive


at this point what should I do?


EDIT:

*facepalm*  I'm a doofus, everything's fine, just had to tweak it a little bit.

(insert epic facepalm here)

Link to comment
Share on other sites

Link to post
Share on other sites

@Bendy_BSD Used the wrong kernel version in your command eh? I've done that.


Let me know if anything doesn't work. I assume you went with version 6.2? I'll be glad to hear if my guide still works on the latest version.

Link to comment
Share on other sites

Link to post
Share on other sites

9 hours ago, Windows7ge said:

@Bendy_BSD Used the wrong kernel version in your command eh? I've done that.


Let me know if anything doesn't work. I assume you went with version 6.2? I'll be glad to hear if my guide still works on the latest version.

heheh yeah. >u< my bad.


I will use 6.2 last because i'm beginning to start my long process of elimination by using your steps from 6.0 all the way up to 6.2 (just to eliminate any variables and to also help my friend who's rocking the same mobo as me lol.  tl;dr, she and I are roommates and she wants to do a homelab for her college assignment to go above and beyond so I assigned myself the responsibility of helping her.  I essentially gave her my parts list on pcpartpicker and $1,300 isn't too bad. And she asked if windows hyper-v is better and I said, "well, both Proxmox and Microsoft's hyper-v are good if you just want to run virtual servers. but Proxmox is where the money's at if you want to allocate physical devices to virtual machines with near bare-metal performance" that and Proxmox is customizable. :P)


hopefully, I don't have to update the bios on my mobo (not to say i'm afraid of bricking it by accident, but because I don't have a spare bios chip laying around nor a jtag programmer lol.) and that the newer versions of proxmox can suffice. :)

Link to comment
Share on other sites

Link to post
Share on other sites

3 hours ago, Bendy_BSD said:

heheh yeah. >u< my bad.


I will use 6.2 last because i'm beginning to start my long process of elimination by using your steps from 6.0 all the way up to 6.2 (just to eliminate any variables and to also help my friend who's rocking the same mobo as me lol.  tl;dr, she and I are roommates and she wants to do a homelab for her college assignment to go above and beyond so I assigned myself the responsibility of helping her.  I essentially gave her my parts list on pcpartpicker and $1,300 isn't too bad. And she asked if windows hyper-v is better and I said, "well, both Proxmox and Microsoft's hyper-v are good if you just want to run virtual servers. but Proxmox is where the money's at if you want to allocate physical devices to virtual machines with near bare-metal performance" that and Proxmox is customizable. :P)


hopefully, I don't have to update the bios on my mobo (not to say i'm afraid of bricking it by accident, but because I don't have a spare bios chip laying around nor a jtag programmer lol.) and that the newer versions of proxmox can suffice. :)

From as far as I have read Hyper-V does not support hardware pass-though. At least not GPU. Then there's the fact Windows in general just has unnecessary overhead. PROXMOX uses QEMU/KVM which is amazing and has great tools such as CPU pinning and hugepages for making VMs feel like bare metal along with all sorts of hardware pass-though.


Only other option I would see them having is going with VMware ESXi which does have a free standard liscense which would get the job done for a school project.


Something I want to explore is MxGPU or vGPU which enables you to have 1 physical graphics processor service multiple virtual machines. I have my eye on the Radeon Pro WX 3100 but as I'm currently seeing it both hardware and Proxmox support is really iffy so buying one will be a gamble not in my favor.

Link to comment
Share on other sites

Link to post
Share on other sites

3 minutes ago, Windows7ge said:

From as far as I have read Hyper-V does not support hardware pass-though. At least not GPU. Then there's the fact Windows in general just has unnecessary overhead. PROXMOX uses QEMU/KVM which is amazing and has great tools such as CPU pinning and hugepages for making VMs feel like bare metal along with all sorts of hardware pass-though.


Only other option I would see them having is going with VMware ESXi which does have a free standard liscense which would get the job done for a school project.


Something I want to explore is MxGPU or vGPU which enables you to have 1 physical graphics processor service multiple virtual machines. I have my eye on the Radeon Pro WX 3100 but as I'm currently seeing it both hardware and Proxmox support is really iffy so buying one will be a gamble not in my favor.

Nice!  And speaking of tools, I'm writing a bash script that will automate the entire set up process for PCI-Passthrough (for Proxmox only at this time) and this includes adding the default IDs and any extra IDs that the user chooses to add to the vfio-ids. :)

though, there is one part of the script I'm getting hung up on:  say example I run:

lspci -nn | grep Marvell

0d:00.0 SATA controller [0106]: Marvell Technology Group Ltd. 88SE9230 PCIe SATA 6Gb/s Controller [1b4b:9230] (rev 11)
from here I want to ONLY isolate the vendor and device id ( 1b4b:9230 and nothing else ) so that it can be added to the vfio-pci ids= list.

would I have to use a grep command or is there another program that proxmox has in it's library by default that can help me with that? (or even better a shell script I can use? lol)

Link to comment
Share on other sites

Link to post
Share on other sites

1 hour ago, Bendy_BSD said:

Nice!  And speaking of tools, I'm writing a bash script that will automate the entire set up process for PCI-Passthrough (for Proxmox only at this time) and this includes adding the default IDs and any extra IDs that the user chooses to add to the vfio-ids. :)

though, there is one part of the script I'm getting hung up on:  say example I run:

lspci -nn | grep Marvell

0d:00.0 SATA controller [0106]: Marvell Technology Group Ltd. 88SE9230 PCIe SATA 6Gb/s Controller [1b4b:9230] (rev 11)
from here I want to ONLY isolate the vendor and device id ( 1b4b:9230 and nothing else ) so that it can be added to the vfio-pci ids= list.

would I have to use a grep command or is there another program that proxmox has in it's library by default that can help me with that? (or even better a shell script I can use? lol)

Unfortunately this goes outside of what I've researched myself.


I'm confused as to how you would plan to tell the system what hardware device you want to override with vfio-pci. You would still have to know or manually look-up the Device ID of the specific device you want to pass-through. Otherwise if you write a script that just scans the system for Device Ids the system doesn't know which one you want. What I would probably do here if I wanted to automate it is:

lspci -vnn
echo -n ',XXXX:XXXX' > /etc/modprobe.d/vfio-driver-override.conf
update-initramfs -u -k all

I've also found just blacklisting the driver works. It doesn't load the vfio-pci driver into the device but as far as I've seen it works fine either way. That way all other device that need that driver just don't load at start-up and are ready for pass-though.

Link to comment
Share on other sites

Link to post
Share on other sites

59 minutes ago, Windows7ge said:

Unfortunately this goes outside of what I've researched myself.


I'm confused as to how you would plan to tell the system what hardware device you want to override with vfio-pci. You would still have to know or manually look-up the Device ID of the specific device you want to pass-through. Otherwise if you write a script that just scans the system for Device Ids the system doesn't know which one you want. What I would probably do here if I wanted to automate it is:


lspci -vnn
echo -n ',XXXX:XXXX' > /etc/modprobe.d/vfio-driver-override.conf
update-initramfs -u -k all

I've also found just blacklisting the driver works. It doesn't load the vfio-pci driver into the device but as far as I've seen it works fine either way. That way all other device that need that driver just don't load at start-up and are ready for pass-though.

Ah, damn. >.<

the reason why I asked is because not all NVIDIA nor AMD GPUs the same.   in my case I have a 960 or in this case the value of 10de:1401 for the GPU and the audio is 10de:0fba.   I used a prefix of 10de: so that the system will know what vendor to look for and it will automatically add it to a predefined list so it goes like this (kinda):

root@myserver:~# lspci -nn | grep 10de:
03:00.0 VGA compatible controller [0300]: NVIDIA Corporation GM206 [GeForce GTX 960] [10de:1401] (rev a1)
03:00.1 Audio device [0403]: NVIDIA Corporation GM206 High Definition Audio Controller [10de:0fba] (rev a1)


but in the shell script it will look like this:


# this will grab the NVIDIA GPU card... hopefully.
lspci -nn | grep 10de: >> $HOME/PROXPCIPASSTOOLS/devices-to-grab.txt

# this will grab the AMD GPU card... hopefully.
lspci -nn | grep 1002: >> $HOME/PROXPCIPASSTOOLS/devices-to-grab.txt


it puts the two predefined device vendors in a text file as a way of storing information, and that includes the device ids (as shown above) to which another program that's built into proxmox will take out everything except the device id and vendor id of the associated devices so it will go from this:


03:00.0 VGA compatible controller [0300]: NVIDIA Corporation GM206 [GeForce GTX 960] [10de:1401] (rev a1)
03:00.1 Audio device [0403]: NVIDIA Corporation GM206 High Definition Audio Controller [10de:0fba] (rev a1)

07:00.0 VGA compatible controller [0300]: Advanced Micro Devices, Inc. [AMD/ATI] Pitcairn LE GL [FirePro W5000] [1002:6809]
07:00.1 Audio device [0403]: Advanced Micro Devices, Inc. [AMD/ATI] Cape Verde/Pitcairn HDMI Audio [Radeon HD 7700/7800 Series] [1002:aab0]


to:


10de:1401

10de:0fba

1002:6809

1002:aab0


and from there it will be echoed and arranged appropriately (hopefully by using sed or a different program) so that it will go from (within the vfio-pci ids):


options vfio-pci ids=


to


options vfio-pci ids=10de:1401,10de:0fba,1002:6809,1002:aab0


it's a multi step process but it ensures that the correct ids go into the config file.


speaking of blacklisting drivers, i had a weird issue where the kernel module would be nouveau but the driver in use would be vfio, from some of the vids i've watched it's supposed to be vfio for the kernel module and driver right? or is it ok as-is?

Link to comment
Share on other sites

Link to post
Share on other sites

9 minutes ago, Bendy_BSD said:

-snip-

So you want a fast way of bundling all the devices associated with a hardware device (say a GPU that has a audio pass-though device) since both have to go together due to IOMMU groups.


That's a little beyond me unfortunately.


In a situation like this I would probably just blacklist the drivers. If any of these devices share a driver with a device the host needs to hold onto I'd use pass-though via device address.


17 minutes ago, Bendy_BSD said:

speaking of blacklisting drivers, i had a weird issue where the kernel module would be nouveau but the driver in use would be vfio, from some of the vids i've watched it's supposed to be vfio for the kernel module and driver right? or is it ok as-is?

Using my desktop as an example are you asking if it's suppose to be similar to this:

Kernel driver in use: vfio-pci
Kernel modules: radeon, amdgpu

or like this:

Kernel driver in use: vfio-pci
Kernel modules: vfio-pci

Assuming I'm interpreting your question correctly.

Link to comment
Share on other sites

Link to post
Share on other sites

1 minute ago, Windows7ge said:

So you want a fast way of bundling all the devices associated with a hardware device (say a GPU that has a audio pass-though device) since both have to go together due to IOMMU groups.


That's a little beyond me unfortunately.


In a situation like this I would probably just blacklist the drivers. If any of these devices share a driver with a device the host needs to hold onto I'd use pass-though via device address.


Using my desktop as an example are you asking if it's suppose to be similar to this:


Kernel driver in use: vfio-pci
Kernel modules: radeon, amdgpu

or like this:


Kernel driver in use: vfio-pci
Kernel modules: vfio-pci

Assuming I'm interpreting your question correctly.

gotcha. (the device address thing I mean.)

you have to admit this is a cool idea though right? :)

and that's correct.  the last time I tried doing pci passthrough (using ubuntu 16.04 lts back when I first tried it in 2018) it said that the Kernel driver in use is vfio-pci but the kernel modules were something else.  And when I ran the vm it didn't use the gpu that I tried to passthrough and the IOMMU groups are separated (no need to use ACS override patch), I know the hardware supports VT-X and VT-D and the CPUs as well.  what could probably be the problem?

Link to comment
Share on other sites

Link to post
Share on other sites

28 minutes ago, Bendy_BSD said:

gotcha. (the device address thing I mean.)

you have to admit this is a cool idea though right? :)

and that's correct.  the last time I tried doing pci passthrough (using ubuntu 16.04 lts back when I first tried it in 2018) it said that the Kernel driver in use is vfio-pci but the kernel modules were something else.  And when I ran the vm it didn't use the gpu that I tried to passthrough and the IOMMU groups are separated (no need to use ACS override patch), I know the hardware supports VT-X and VT-D and the CPUs as well.  what could probably be the problem?

The idea of automating the process did roll around in my head when I first started experimenting with pass-though but I ran into the roadblock you did of finding a way to distinguish what I want to pass-though from other hardware. In most use cases though you're only passing though a handful of devices so the process to do it manually usually isn't time consuming but if you'd like to try automating it anyways you have my support. For whatever that's worth :P


The kernel modules are simply the drivers that are available for that hardware device. vfio-pci from my experience does not automatically appear in the list but can be manually assign to over ride the default kernel modules. What's important is that the driver currently in use be vfio-pci or that no driver be loaded at all.


As for your question. What were you using at the time for software & hardware? Did you verify IOMMU was enabled and working in the OS?

Link to comment
Share on other sites

Link to post
Share on other sites

31 minutes ago, Windows7ge said:

The idea of automating the process did roll around in my head when I first started experimenting with pass-though but I ran into the roadblock you did of finding a way to distinguish what I want to pass-though from other hardware. In most use cases though you're only passing though a handful of devices so the process to do it manually usually isn't time consuming but if you'd like to try automating it anyways you have my support. For whatever that's worth :P


The kernel modules are simply the drivers that are available for that hardware device. vfio-pci from my experience does not automatically appear in the list but can be manually assign to over ride the default kernel modules. What's important is that the driver currently in use be vfio-pci or that no driver be loaded at all.


As for your question. What were you using at the time for software & hardware? Did you verify IOMMU was enabled and working in the OS?

Thank you so much man. :)


Gotcha. 👍

At the time I used the same mobo as I am currently (ASROCK EP2C602-4L/D16) and CPUs (Intel Xeon E5-2650s) and IOMMU was enabled and I was using virt-manager qemu-kvm.  I could of sworn that there was a third package that I was using that was required for this application of virtualization but I'm not sure.  OS: Ubuntu 16.04 LTS (xenial) and as for the kernel version.. I don't remember.


Also, I'm getting really close from getting the output that I want. :)


so far this command works but I still need to refine the output:


lspci -vn | cut -b 15-23


I'm getting soooo close.  I just have to figure out how I can filter out the rest of the bs output. :)

Link to comment
Share on other sites

Link to post
Share on other sites

20 minutes ago, Bendy_BSD said:

Thank you so much man. :)


Gotcha. 👍

At the time I used the same mobo as I am currently (ASROCK EP2C602-4L/D16) and CPUs (Intel Xeon E5-2650s) and IOMMU was enabled and I was using virt-manager qemu-kvm.  I could of sworn that there was a third package that I was using that was required for this application of virtualization but I'm not sure.  OS: Ubuntu 16.04 LTS (xenial) and as for the kernel version.. I don't remember.

A script that I think would be nice would be one that sets up most of the necessities from a clean install. One that preps the system for pass-through.


Is pass-though working currently? I can think of hardware or BIOS limitations but if it works right now it had to have been a Ubuntu software configuration or even kernel limitation.

Link to comment
Share on other sites

Link to post
Share on other sites

Create an account or sign in to comment

You need to be a member in order to leave a comment

Create an account

Sign up for a new account in our community. It's easy!

Register a new account

Sign in

Already have an account? Sign in here.

Sign In Now


×