Jump to content

The Pure Solid State Server Build Log

Over the next couple of days I'm going to be building my next server and I thought anybody who has a similar interest might like to come along for the ride.


IMAG0376.thumb.jpg.f95a11d318d4f4bde31ffc66f2b36ee5.jpg

(The pictures are 4208x3120 so you can view them in a new tab for a larger image)

There is so much equipment I found it difficult to get it all in one shot. Here is a run down of the core components:


CPU: 2x Intel Xeon E5 2698 V3

Motherboard: Supermicro X10DRi-T

RAM: 2x NEMIX 64GB 2400MHz ECC RDIMM

PSU: Athena Power AP-RRP4ATX6808

HBA: 3x LSI 9201-16i (live product page N/A)

5.25" drives: Athena Power BP-SAC1425AVL12

Chassis: iStarUSA D-410

CPU Cooler: 2x Noctua NH-D9L


The remaining small pieces I will go over as I build but this is an immediate run down of the bulk of the system. Everything except the processors were purchased new. I have actually not verified that that CPUs work properly. I'm going off the sellers word so we will get to find out together if it's going to POST at all.


For right now I'm going to start by installing the 5.25" drive caddies.

Link to comment
Share on other sites

Link to post
Share on other sites

Oooooo

Use this guide to fix text problems in your postGo here and here for all your power supply needs


New Build Currently Under Construction! See here!!!! -----> 


Spoiler

Deathwatch:[CPU I7 4790K @ 4.5GHz][RAM TEAM VULCAN 16 GB 1600][MB ASRock Z97 Anniversary][GPU XFX Radeon RX 480 8GB][STORAGE 250GB SAMSUNG EVO SSD Samsung 2TB HDD 2TB WD External Drive][COOLER Cooler Master Hyper 212 Evo][PSU Cooler Master 650M][Case Thermaltake Core V31]

Spoiler

Cupid:[CPU Core 2 Duo E8600 3.33GHz][RAM 3 GB DDR2][750GB Samsung 2.5" HDD/HDD Seagate 80GB SATA/Samsung 80GB IDE/WD 325GB IDE][MB Acer M1641][CASE Antec][[PSU Altec 425 Watt][GPU Radeon HD 4890 1GB][TP-Link 54MBps Wireless Card]

Spoiler

Carlile: [CPU 2x Pentium 3 1.4GHz][MB ASUS TR-DLS][RAM 2x 512MB DDR ECC Registered][GPU Nvidia TNT2 Pro][PSU Enermax][HDD 1 IDE 160GB, 4 SCSI 70GB][RAID CARD Dell Perc 3]

Spoiler

Zeonnight [CPU AMD Athlon x2 4400][GPU Sapphire Radeon 4650 1GB][RAM 2GB DDR2]

Spoiler

Server [CPU 2x Xeon L5630][PSU Dell Poweredge 850w][HDD 1 SATA 160GB, 3 SAS 146GB][RAID CARD Dell Perc 6i]

Spoiler

Kero [CPU Pentium 1 133Mhz] [GPU Cirrus Logic LCD 1MB Graphics Controller] [Ram 48MB ][HDD 1.4GB Hitachi IDE]

Spoiler

Mining Rig: [CPU Athlon 64 X2 4400+][GPUS 9 RX 560s, 2 RX 570][HDD 160GB something][RAM 8GBs DDR3][PSUs 1 Thermaltake 700w, 2 Delta 900w 120v Server modded]

RAINBOWS!!!


 QUOTE ME SO I CAN SEE YOUR REPLYS!!!!

Link to comment
Share on other sites

Link to post
Share on other sites

21 minutes ago, JacobFW said:

Very cool project.  For work?

No, just an extreme hobby. I don't doubt I could find use for it in a future occupation though so kind of nice to have.

Link to comment
Share on other sites

Link to post
Share on other sites

3 minutes ago, CUDAcores89 said:

Will you use it to take over the world?

If it POSTs...we'll see.

Link to comment
Share on other sites

Link to post
Share on other sites

So I have half the bays installed and I wanted to stop to mention why I bought these ones specifically. They don't use the standard SATA interface.

IMAG0378.thumb.jpg.840bcf796283f6634d1e1e87f8ed0c8b.jpg

That port is known as SFF-8643 and it's usually used for SAS interfaces which these caddies actually support. I can plug in SAS or SATA devices. The reason I went with these specifically is because 10 cables to manage is a heck of a lot easier than 40.


I also have to say the quality of the chassis could be better. (What did I reallyt expect though)

IMAG0380.thumb.jpg.8ddc7405491c38c743eeff8f4e8be154.jpg

It's not super noticeable in the picture but it's more noticeable in person. There are uneven gaps in between the caddies. The gaps themselves don't bother me. In fact it just makes for better airflow to the components behind the caddies. I hate the fact they're crooked & uneven.


Also it appears this one caddie arrived damaged. Can you see how this sled is slightly recessed compared to the others?

IMAG0381.thumb.jpg.9dbef2f0ac29f9e17a70236061929dc6.jpg


It's because on that one this little nub of plastic had broken off

IMAG0382.thumb.jpg.1bd6ab1d0a1c3ae1fe4e132a6c3e8f9b.jpg

If that bit comes off nothing else keeps it from moving backwards. Although it sucks I'm not too concerned because once I put a SSD in it it should come back out where it is suppose to line up.


Alright back to work.

Link to comment
Share on other sites

Link to post
Share on other sites

If I can allow myself to ignore the gaps I have to say it looks quite nice. Intense even.

IMAG0383.thumb.jpg.6c981f1379c9883389a65c369fb08924.jpg


Opening up the back I have to say I much prefer the view from behind. The colored fan wires mixed with black & chrome is beautiful.

IMAG0385.thumb.jpg.5c944e8dd28f444e5e6ea56dd157de95.jpg


The next things I'm going to take care of are changing out the two fans (left & right) with some Noctua NF-F12s. They are just a couple that I have on hand. I haven't decided yet if I'm going to grab some of the Industrial 3000RPM fans to put in here in the future. We'll see how the temps are and go from there.


I'm also going to go ahead and install the PSU.

Link to comment
Share on other sites

Link to post
Share on other sites

IMAG0386.thumb.jpg.7938027d276ed6d516edb2d0cb0b19e5.jpg

So I had never worked with a mini-redundant PSU before and I have to say using it in this chassis scared me about four times because each time I thought "OK, I need to remove this bracket..." & "OK, I need to screw it in there..." It ended up as "The bracket is permanently attached..." & "The screw holes don't line up..." or "This extra bit of metal is in the way".


As it turned out I was just doing everything wrong. I did have to remove a bracket which was an inconvenience because it has this little button attached to it. I'm not sure if it's like a reset button for the PSU or what.


This is the current state of system.

IMAG0393.thumb.jpg.27a9b6726ec58a4a5a13fba990b0e149.jpg

It's finally starting to look like something just a little bit. I went ahead and ran the SSF-8643 to SFF-8087 cables because if I waited until after I got the fans in running them would have been impossible.


That power supply took up a lot of time. I'm going to stop for the night. If I don't get too many interruptions I might get to power it on for the first time tomorrow.


We'll see.

Link to comment
Share on other sites

Link to post
Share on other sites

The next thing on the job list is to prepare some of the components for the motherboard. Starting with the RAM I ordered the EVERCOOL EC-MC-CO.

IMAG0394.thumb.jpg.32cfce9bb7d5aafde2cbc9a2efe9e48f.jpg

They're very basic heatsinks. They may not be necessary but I know some RDIMM memory gets quite hot. Some does not. Being on the safe side I got them.


Unfortunately the tape that comes with them is extraordinarily thin and testing it the heatsink makes no contact with the memory chips.

IMAG0395.thumb.jpg.ce1cc23213832e3fec95e5a6b20dfe2b.jpg


So I ordered some of this.

IMAG0396.thumb.jpg.f878bfb5f5b0ee878e8fc41e13027807.jpg

This is 5589H-10 which could be better known as a thermal pad material. One side appears to be sticky the other is not.


I wanted some that was about 0.75mm thick but I couldn't find any. The best I could do was either 0.62mm or 1mm and I wanted to make sure contact is properly made. So we will find out very soon if 1mm is too thick. I hope the material is compressible.

Link to comment
Share on other sites

Link to post
Share on other sites

I think they look quite nice.

IMAG0397.thumb.jpg.0c48affa53c8ad330ab8f251d88a15df.jpg


They did turnout a little V shaped and that's after some modification. It was worse.

IMAG0398.thumb.jpg.c79faf9e63fa67673383ac4ff620530f.jpg

You can also see the bottom most chips aren't really covered but I'm not too worried about them.


To get this fit I had to remove the small tabs at the top and bottom of the heatsinks

878578198_IMAG0399-Copy.thumb.jpg.6422134589c236f4b36e081700b8278e.jpg

(left - modified, right not-modified)


Due to the thickness of the TIM those tabs prevented the heatsinks from interlocking and sitting on top of the stick properly so I removed them.


Next up is the TIM for the CPUs I'll get that started and post back.

Link to comment
Share on other sites

Link to post
Share on other sites

20 hours ago, Windows7ge said:

CPU Cooler: 2x Noctua NH-D9L

Nitpick: those have fans on them, meaning that they are not solid-state and thus your title isn't quite accurate!

Hand, n. A singular instrument worn at the end of the human arm and commonly thrust into somebody’s pocket.

Link to comment
Share on other sites

Link to post
Share on other sites

9 minutes ago, WereCatf said:

Nitpick: those have fans on them, meaning that they are not solid-state and thus your title isn't quite accurate!

Solid State as in storage. Also if you look around a bit more there are many more fans than just those.

Link to comment
Share on other sites

Link to post
Share on other sites

11 minutes ago, Windows7ge said:

Solid State as in storage. Also if you look around a bit more there are many more fans than just those.

I noticed. Woulda been a lot cooler, if you'd managed to make a truly solid-state server!

Hand, n. A singular instrument worn at the end of the human arm and commonly thrust into somebody’s pocket.

Link to comment
Share on other sites

Link to post
Share on other sites

1 minute ago, WereCatf said:

I noticed. Woulda been a lot cooler, if you'd managed to make a truly solid-state server!

That would be quite the challenge because a lot of things in this server are going to get very hot.


Also there's always the PSU. Although there are some server PSU's that don't have fans they're specifically designed to go into chassis that provide the cooling from chassis fans so even if I went out of my way to create a true solid state server one component or another would suffer greatly.

Link to comment
Share on other sites

Link to post
Share on other sites

Moving onto the CPUs the TIM I'm using is Panasonic Graphite EYG-S1431ZLAA

IMAG0400.thumb.jpg.c9a3ecb7ee823d78ae1bb787567acb87.jpg


It's basically a bulk material version of the IC Graphite material LTT featured except it costs a lot less, performs just as well and you can cut it to whatever dimensions you want.


IT is fragile though so there are limitations to how intricate the cuts are you can make. This was attempted with an exacto knife.

IMAG0401.thumb.jpg.067b38fad8544b4e8646f7002e117d99.jpg

It rips easily, so the edges don't look great.


To explain the small tabs around the perimeter it is to keep it from moving around when I put the cooler on.

IMAG0402.thumb.jpg.2ec82816c4465d013f3fad32ab0ccf1a.jpg


Next we can start assembling the motherboard.

Link to comment
Share on other sites

Link to post
Share on other sites

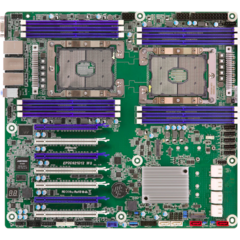
So this is the Supermicro X10DRi-T it is a dual socket LGA2011-3 motherboard using the C612 chipset. One of it's greatest features is a built-in dual port Intel X540 10Gbit NIC.

IMAG0403.thumb.jpg.c515f66311acf4dc4c5d478697279a04.jpg

Something to note is the socket CPU cooler mounting holes. This is known as narrow-ILM and you need the mounting gear to use it.


The NH-D9L does not come with this equipment.

IMAG0406.thumb.jpg.6c9b4107881afd75c05886bd65335c20.jpg


However a simple e-mail to Noctua will get you the narrow-ILM mounting gear. They didn't charge me anything.

IMAG0405.thumb.jpg.5ec60d7fed5f79dd376c9b5089a835c4.jpg


An additional component I'm adding because I only have two sticks of RAM are the modCover DDR Port Silicone Rubber Dust Cover

IMAG0408.thumb.jpg.8215b1cec80de0acc79c6fa84539c4b5.jpg

They're soft, stretchy, & flexible. I only bought them because the RAM is understandably expensive so I only bought 2 sticks. The system is going to have unused slots for a long time and this will just keep all the dust out.


and with that the motherboard is finished.

IMAG0409.thumb.jpg.c778b51436223f38c60e0aea4b6f191a.jpg


Next up is installing the I/O shield, standoffs, motherboard, and expansion boards.

Link to comment
Share on other sites

Link to post
Share on other sites

Interesting. The I/O shield seems to have this metal mesh padding on it. I can only assume it's to keep out interference.

IMAG0410.thumb.jpg.77f52212e273f61ea73a71df241a3028.jpg


We have a problem. Three of the standoff holes don't have pegs underneath them. Damn it iStarUSA.

IMAG0411.thumb.jpg.c355b9b1554abf2b0ce3a6f33f09ce64.jpg


I noticed rummaging though my odds and ends of computer gear that 2 standoffs screwed into each other is basically the same height of the server chassis standoffs.

IMAG0412.thumb.jpg.8a3906b085adcd95fc8e5f40f59cd6c0.jpg


There we go. This should solve it.

IMAG0413.thumb.jpg.e0218bad360a5b380ab5c2e8e53b0985.jpg

If I ever go tugging on the board for any reason I'll just have to be careful in those areas.


Unrelated to that issue I ordered a StarTech SATA Removable Hard Drive Bay for PC Expansion Slot

IMAG0415.thumb.jpg.1398be290b568e41344b9bdaaed13182.jpg

As if forty 2.5" bays isn't enough I want the boot drive away for the storage drives so this lets me mount a 2.5" drive in a rear PCI slot.


And with that everything is installed.

IMAG0416.thumb.jpg.463a0fedce01e2eae4260b8807112738.jpg

All that's left is to plug everything in, cable management, and see if it POST's.

Link to comment
Share on other sites

Link to post
Share on other sites

Alright, everything's plugged in. I just have a couple of cables I need to tuck in somewhere but before I do that it's time to see if it will POST because if it doesn't we'll be ripping it apart again to troubleshoot.

IMAG0417.thumb.jpg.6ec4915c6b782874a31c069333ea8862.jpg

Here we go...

Link to comment
Share on other sites

Link to post
Share on other sites

We have a POST! @CUDAcores89 Maybe I will take over the world. Starting with the forum. ?

IMAG0418.thumb.jpg.6b0924de2a8edb39a60b1bf6892e9e96.jpg


Both 64GB sticks of RAM & CPU's are detected.

IMAG0419.thumb.jpg.cf4a90c01c49a9362e2b2038417b5810.jpgIMAG0420.thumb.jpg.027ad8a8803397394198728c3573cf0a.jpg

This didn't come without something going wrong. The cheap Microsoft keyboard I was going to use here mysteriously died causing me to believe every USB port on the server was dead. Great omen.


Now the RAM is rated to operate at 2400MHz but it got underclocked to 2133MHz so I'm going to need to fix that. Servers don't have X.M.P. profiles so I have to do it and the timing manually. Shouldn't be too much work.

Link to comment
Share on other sites

Link to post
Share on other sites

16 minutes ago, CUDAcores89 said:

I hope you have your RAM installed correctly. Because you only have two DIMMs install one for each cpu. Do not install the ram all on one cpu because then more information will have go to through the QPI (looks like you did the proper thing).


Also is this RAM RDIMMs or LRDIMMs? These two memory standards are not iterchangeable so if you have RDIMMs, you can only add more RDIMMs and if you have LRDIMMs, you can only add more LRDIMMs in the same system. Looks like they are RDIMMs but im guessing you never plan to install 2TB of RAM in this thing so that doesnt matyer as much.


Good job on the build, looks quite expensive.

This isn't my first dual socket system so I'm aware of which slots should be occupied per socket. It's also marked on the sink screen and mentioned in the manual.


They are RDIMM. I was looking at the LRDIMM (128GB sticks) but what research I did on the memory concluded that when using LRDIMM there's a trade off. To double the memory you lose some performance. That wasn't worth it. Current thoughts are that 512GB is a milestone goal and from there I may or may not go for 1TB.


I have no idea what it cost. I just bought the parts over a period of 5 months until finally I had everything I needed.

Link to comment
Share on other sites

Link to post
Share on other sites

It is now past midnight so I'm done for today.


I currently don't have the planned boot drive for the server but I'm going to throw a temporary install of Windows Server 2016 on an spare SSD just so we can do some initial testing. If you guys have any tests you'd like me to run on this thing (like Cinebench) besides a quick burn-in let me know. I'll go over them later.

Link to comment
Share on other sites

Link to post
Share on other sites

That's a lot of threads.

IMAG0421.thumb.jpg.17ceba5f928878f35ddfc9a6d9aa6b02.jpg

With the server apparently stable I tried to run a stress-test with AIDA64 but ADIA64 couldn't handle it and kept (not responding). I'll have to find a different tool.


Now that the server is assembled and booting properly next comes the networking.

IMAG0422.thumb.jpg.6712faa9fa61661ae4d66a5609ffd9cf.jpg

So these are both STP Cat6a cables. According to the labeling that runs the length of the wire it's SFTP cable specifically.

As unnecessary as shielded cable is in my application I've decided to use it for no more reason than I wanted to try it out. I've never played with STP cable before.


The plan here with these is to hopefully utilize Windows native SMB3.0 Multi-Channel to create a single virtual link capable of 20Gbit.

If it works and if I manage to saturate it I plan to bump it up to 40Gbit by buying a dedicated Intel X540 NIC.


Right now I need to run these two cables and make two cables using Cat5e patch cable for the 1Gbit NIC (local network/internet access) & then dedicated IPMI so I can manage the server without having to sit in-front of it.


Unfortunately this will require me to climb up into the ceiling to run the cable and I don't feel the strength to do that today. I also have to work tonight so we'll see how things go tomorrow. I'll get everything plugged in, setup & running (network-wise) and come back with performance results.

Link to comment
Share on other sites

Link to post
Share on other sites

2 hours ago, Windows7ge said:

That's a lot of threads.

IMAG0421.thumb.jpg.17ceba5f928878f35ddfc9a6d9aa6b02.jpg

With the server apparently stable I tried to run a stress-test with AIDA64 but ADIA64 couldn't handle it and kept (not responding). I'll have to find a different tool.


Now that the server is assembled and booting properly next comes the networking.

IMAG0422.thumb.jpg.6712faa9fa61661ae4d66a5609ffd9cf.jpg

So these are both STP Cat6a cables. According to the labeling that runs the length of the wire it's SFTP cable specifically.

As unnecessary as shielded cable is in my application I've decided to use it for no more reason than I wanted to try it out. I've never played with STP cable before.


The plan here with these is to hopefully utilize Windows native SMB3.0 Multi-Channel to create a single virtual link capable of 20Gbit.

If it works and if I manage to saturate it I plan to bump it up to 40Gbit by buying a dedicated Intel X540 NIC.


Right now I need to run these two cables and make two cables using Cat5e patch cable for the 1Gbit NIC (local network/internet access) & then dedicated IPMI so I can manage the server without having to sit in-front of it.


Unfortunately this will require me to climb up into the ceiling to run the cable and I don't feel the strength to do that today. I also have to work tonight so we'll see how things go tomorrow. I'll get everything plugged in, setup & running (network-wise) and come back with performance results.

good luck not criticizing but just next time use solid core cable in a loft/patch panel. as it tends to be more reliable than stranded core from my research  (that one you have) nice work so far though! ? 

Please quote or tag  @Ben17 if you want to see a reply.

If I don't reply it's probly because I am in a different time zone or haven't seen your message yet but I will reply when I see it ? 


Link to comment
Share on other sites

Link to post
Share on other sites

13 minutes ago, Ben17 said:

good luck not criticizing but just next time use solid core cable in a loft/patch panel. as it tends to be more reliable than stranded core from my research  (that one you have) nice work so far though! ? 

It would be stranded based on its flexibility. At my house here though this install won't be in the wall or include a patch panel. It just drapes down the wall leading up to a drop ceiling which next to it is the effective network closet where there is no patch panel and it just plugs directly into the 10Gbit switch. Not professional at all. The Cat5e cable will be solid core though if that means anything to you. So reliability here isn't a concern as the wires aren't going to be constantly unplugged and re-plugged or moved around very much. I'm pretty sure if I wanted solid core I would have had to buy it in bulk and terminate it myself. UTP Cat5e is easy enough but STP Cat6a would be a bit challenging to do right so I just bought a pre-made cable.

Link to comment
Share on other sites

Link to post
Share on other sites

Create an account or sign in to comment

You need to be a member in order to leave a comment

Create an account

Sign up for a new account in our community. It's easy!

Register a new account

Sign in

Already have an account? Sign in here.

Sign In Now


×