Search the Community
Showing results for tags 'wooden case'.
Found 12 results
-
Hello. I am attempting to make a Mini-ITX PC that will be for to carrying out to things like LAN Parties, Showcasing Files at other places, and other 2-PC functions that would help with my (rather unwieldy) ATX PC's issues of taking on everything alone, including travel damages. I got ahold of this wooden Case from CYBERWOOD and I'll be making it the starting mold for the build https://www.amazon.com/CYBERWOOD-Computer-Ventilated-Expansion-Component/dp/B0BJDJHG15/ref=sr_1_3?keywords=CYBERWOOD&sr=8-3 Since I am a noob on proper allocation, I would like the opinions of the internet to be heard before i start shopping around for gear. Budget will be at $1000 to $1200. I live out in this plateau corner of USA, Pacific Northwest. This Puts me of range of an actual computer parts store barring Best Buy, so i will be mostly relying on online shopping. I will of course be using it for big eater games like ARK Survival Evolved, Halo Infinite, and Elden Ring. I will also be using it to run things like VSDC Video Editor and Game Servers for whenever my ATX pc is occupied. Other than the case and some additional housing for a possible AIO, I'll basically be starting from scratch. I DO, however, want to avoid using NVIDIA due to their obvious pricing issues if I can. So it will either be all AMD with a 6700XT or all Intel with an ARC Card, and I want them to be the best Graphics Card of their respective Series. No need for a new mouse and keyboard, though I want to get a KVM to easily switch from pc to pc at home, along with a better monitor, one that allows me to play at 1440p at ~100hz. Current pc rig is carrying an ROG Asus RX580 8GB OC and a Ryzen 5 3700X (Wraith Prism is still on there, absolute nightmare to get out as it takes the CPU out of its socket), on an AORUS PRO WIFI X570 motherboard. It is a good PC for 1080p things, however it doesn't seem to like doing a lot of high power things, like holding an OBS stream while playing a big game like Halo Infinite. the dang thing crashes on its own too (of course, I do not know everything about trying to run OBS, so if seems a matter of correctable human error, let me know. I would like to stream at 1080p with at least 60 fps). Depending on the situation ill most likely the start shopping spree at around Cyber Monday, as it will take time to get ahold of the right things at a good price.
-
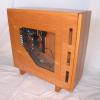
Budget (including currency): ~$500 CAD Country: Canada Games, programs or workloads that it will be used for: Various 3D CAD applications and video editing (a bit of KSP after work :P) Other details : - Existing parts to bring over: Quadro P4000, My old TV - Upgrading from i7 2600k with 16G RAM Final Build: Ryzen 5 3600x 16G DDR4 @3600mhz Quadro P4000 1tb PCIe4 NVME WB Black I figured that a few of you might enjoy this build I am quite happy with how it turned out and am writing this post from it right now. I own a company (TimberWolf Cycles) which makes custom high performance bicycles out of wood and so I have more tools for working with wood at my disposal which is why this case ended up being built this way. The purpose of the machine is general CAD work as well as some video editing which I plan to do more of for the business as time goes on. I generally leave my workstation on a desk at my shop but fairly frequently take it home, or (when not limited by COVID) would use it to show prospective clients the design of their custom bike. A laptop able to work hard enough for me would be quite expensive and I don't really need that level of portability. I also own a 2012 MacBook pro which is fine for word processing and emails or meetings when CAD work is not involved so I am not in need of a laptop. A desktop however has too many bits to carry when going place to place which led me to the idea of the "LAN Party Rigs" of my youth . The original "THE RIG" was just a regular ATX Case with a handle bolted on the top and a screen bolted to the side with a bent steel cover slipped over the screen when left in the shop. The was great! because I could just grab the handle and toss the machine in the car on the way somewhere. Problem is, it was HEAVY! Like 4 2010-era enterprise grade hard disks and a 750W PSU heavy plus the steel case, the screen, the surge protector I crammed inside, yada yada. It was also getting old and while the I7 2600k still packs a pretty good punch for these workloads, NVME was out of the question and PCIE 2 was a bit of a bottleneck for the Quadro P4000 I had acquired the year before to replace my aging (not well) Quadro 4000. I debated just refiling the case with new components but to really maximize the benefits of the upgrade, decided to give it some flair! I decided to build THE RIG MKII the other way around essentially. Rather than mount the screen to the case, I would mount the case to the screen. This let me shrink the case, and use a bigger screen in the form of my modest Samsung 30" TV that I didn't need and is bright and has a nice wide viewing angle which will be helpful for showing things to customers. I had to modify the TV Stand to tilt the TV up a bit so it would be comfortable to view from a desk, and also move the centre of the support back to keep it under the centre of mass of the combined unit. The case itself would have to stay thin for this to work out well so I chose an unconventional but very practical component arrangement that resulted in a 1U thick case. I didn't want the machine to be loud so commercial 1U PSUs were out. I ended up dismantling a PSU and placing the fan adjacent to the circuit board to draw air out of the case and over the heat sinks. I left space for an ATX board beside that but I would argue there would be very little reason to ever put a full ATX board in this thing and there would be no way to use the extra PCIe slots anyway. As it is, I use the X16 slot and one X4 slot for my WIFI card (I know you can get boards with WIFI obviously but this one came up for sale and the guy tossed in a WIFI card which actually is essentially a riser for m.2 letting me put in a wireless AX later if I like. Both slots are obviously connected via riser cables. The GPU which is really the heart of this machine is turned on its side overtop of the expansion part of the board with the fan facing the back of the case. This lets it draw its own fresh air and gives it its own exhaust. It can run full bore in this crazy tight case without warming up the case much at all. A sweet 1U CPU cooler with heat pipes keeps the profile low and also draws in fresh air directly but exhausts into the case. The PSU fan (which sucks air out of the case) is sized for a higher flow rate so even at max CPU fan speed the case is below ambient pressure. There are two small intakes near the VRMs that draw in make up air and keep those cool. All said and done, the GPU idles at 35C in a 21C room and the the CPU at 39C and each peak at 79C when fully loaded so I am very happy with the airflow design. The goal was never overclocking and the temperatures are very reasonable. The other motherboard temperatures including the PCIE4 NVME drive sit very steady at 40C to 45C no matter the load. The consistency of this temperature is optimal for NVME drive life. But what about shielding in a wooden case?! Most of you wouldn't likely care but I figured since I had unboxed the PSU (removed its shielding) and am building a nice stable workstation, I should shield both the PSU area of the case and the MB area. I did this with a combination of stainless wire mesh on the intakes, a fan grill on the main exhaust, and a lot of copper foil tape with conductive adhesive. I also used a more open mesh between the PSU and the MB to ensure that dust was less likely to collect inside and more likely to collect on the intake screens where I can vacuum it (remember I build wooden bikes so there is lots of dust at times!). The case is made of poplar core plywood with mahogany veneer and closed with MANY tiny brass screws which electrically connect the shielding. Inside the PSU area I did the other 120VAC connections including the leads to power the TV and a standard household socket on the side for my second monitor at the office, or a laptop charger or whatever. On the top of the case, I put the on-button (a button that used to be the engine start button in my old car made from a defrost button painted red) and the totally unnecessary RGB button from the PSU. Also on top of the case I put two front panel USB3 ports for thumb drives and a marine panel mount quickcharge 3.0 module wired into the 12V from the PSU. The Molex connector to power that was harvested from the ancient 128mb hard drive that I found had escaped many a tech purge . A very rare external port to add is found on the bottom which is a SATA3 data and power connector that I use with a cable I made up to connect a standard internal type optical drive if I want to burn a DVD for the old folks in my life etc. If you have any questions or want to build something like this yourself, jump in on this thread and I would love to chat (yes I also use an Orbweaver Chroma for CAD shortcuts... Sacrilege!) Tossed in a pic of the latest bike in progress for the the curious among you

- 7 replies
-
- 6
-

-
- wooden pc
- wooden case
- (and 4 more)
-
 Hello, My name is Michael, but I go by High Voltage anymore....so, I was browsing the internet and found that this site, which I'd never taken the time to register an account on till today after about a year knowing of this site, had articles about people asking this same thing here, that being about wooden pc cases....well, My situation is a tad unique in respects to what I'm after and the cost efficiency of a wooden hand made case being too sweet a deal to possibly just pass up as "not going to do it for this or that reason" because the alternatives that would work for what I'm after (mainly space savings by popping two full sized pc systems into a single case, and the storage drive bay requirements for a high density backup server needing something far out of my cost afordability range) being toooo perfect to not consider a custom hand made case, at which point something using mdf board is just perfect for affordability to me. soo, my curiosity is a few of the following things: 1. does anyone know of any thermal simulation software (free and or open source) that one could run either in a windows vm, or on linux natively, to be able to test the termal dynamics of any possible case/fan cooling setup I could try and make a 3d mockup prototype of before sitting down, buying the materials and making the thing before I know if it would even be a viable temperature setup option? 2. does anyone have any recommendations for how to make a dual system single case design for a HUGELY populated (disk wise) storage server for down the road as I add more drives to the thing? because it would have a high end backup server of my own building with the eventual possibility of 20+ hdds, AND a high end editing rig for video and audio editing for podcasts and other video projects I manage (note, 20 core xeon cpu and eventually dual 1080ti's and to begin with dual 970s for the gpus once that system is built finally).....so, cooling and temperature simulations are a hugely requested helpful plus to test the thermals of these two systems 3. the cases I have looked at and was originally pricing out at doing prior to thinking on building the case by hand out of mdf board, were these: http://www.mountainmods.com/ascension-duality-mirror-black-powder-coat-original-top-p-463.html http://www.mountainmods.com/ascension-cyo-custom-computer-case-p-483.html http://www.mountainmods.com/u2-ufo-duality-mirror-black-powder-coat-solid-top-p-390.html the original design idea for the system to have both computer systems inside of were based on those, and the original case labs Magnum tx10-D Dual pc system, that has since been discontinued, but those were the inspiration for this idea for a pc case, however I'd like to take these designs and flip them on their head a tad, and instead make them in place of dual vertical pc systems, make it a dual horizontal pc system for the case, using either the 120mm fans on those cases as hard drive fan bays, or make dedicated vertical hard drive cages tower style with dedicated fans in front of them, maybe use a 3x 5.25 bay to 5x 3.5 hdd bay adapter style thing for hot swap capabilities with dedicated fans, but hot swap is not a requirement for me, more so the cooling is than the hot swap abilities, but thats for later either way, I just need some thoughts on what all you guys think I should try to do, given the situation here... anyone able to bounce some ideas for possible design design attempts around with me please?? budget is as low as possible, preferably not much more than 100-200$ USD monitors are not an issue at all either, the backup server will be using a spare quadro card I have lying in a drawer, and the editing server will use either some spare 970s in that same drawer for now and eventually have the 1080tis for hardware accelerated gpu rendering, monitors range in sizes and resolutions that I have at my disposal so thats not an issue either nor can I pinpoint the exact resolution they will be using and as for the peripherals, I have all of those as well in storage for spares, keyboards and mice. as for the why I'm upgrading, I'm not really, just re-purposing spare parts I have at my disposal for the xeon cpu, ram, and motherboard as well as the other spare parts. I'd be very much appreciative if someone could help me with that...
 -
Hey Guys, I'm new here. Actually, I'm thinking to build a wooden PC case. Can anyone please let me know the pros and cons of a wooden PC case.
-
 Hello everyone, So I found a 1934 wooden radio case in pretty decent shape to use it for an htpc/web browsing rig. One of the goals of the project was to leave the case as untouched as possible (no additionnal drill/hole in the front, which explains the disc drive location at the back). Face before building Back before building Half built I rapidly varnished the interior and wooden parts (unvarnished wood produces more dust), as well as the exterior lightly, trying to keep the original color. Unfortunatly I suck at varnishing and made a crap job The insides as seen from the back, before "cable management" and gpu installation It does look really messy, but in the end after a bit of cleaning up, the airflow is good enough. Frontside, almost done. The back, with half the back panel installed. Back shot of the computer turned on. ( ͡° ͜ʖ ͡°) You can see the small 9cm outake fan and the disgusting wood work around the back plate. The gpu doesn't get a lot of breathing room/airflow, so if I was to put in anything larger it'd require to mount it vertically and redesign the left side of the back panel. The insides as seen through the front opening. Frontside, without the dust filter. You can see both drives mounted vertically through the front opening. There is one usb 3.0 port in the front, as well as, from left to right : - headset plug - Led control knob (just has an on/off effect, but looks cool as a knob) - Main On/Off power button (push) - Front fan speed control knob - another headset plug, both front plugs can be used as the same time I used a mix of used parts I had around (cpu, gpu, ram) and of new components (mobo, psu) > i3 2100, I just had this around, still good enough for general browsing I guess > H61 Biostar mobo, not my usual go-to brand, but lga 1155 boards got a bit hard to find where I live so I settled with it > AMD HD7750 1GB gpu, arguably the weakest part of the build, I might swap it for anything else that comes around eventually > 450W Cooler Master 80+B half modular psu > 8GB of Kingston's HyperX Blu DDR3 @ 1333mhz > 20cm fan as front intake > 9cm PWM fan (plugged in serial with cpu fan) as outake, not ideal but it works > Basic DVD reader/burner, I had it around > 120GB Kingston V300 SSD, OS drive > 750GB WD Blue 2.5', storage drive The lighting effect is produced with four O.5amp UV blue led strips glued on top, I ordered those without connectors and soldered them in serial to the control knob and a fan connector, then plugged it on the mobo. The knob is designed for fan speed control and is too powerful to provide a proper dimmer effect, and just acts as an on/off switch (I'm still pretty happy with it). The front intake fan is covered by an air filter that happens to fit the front opening quite nicely. It is removable and magnetic. Thanks for reading !
- 2 replies
-
- 1
-
-
- wooden case
- bad woodworking skills
- (and 3 more)
-
I apologise if this has been already asked, but please bear with me, I am a newbie to PC case design. I am building a PC case in wood. The motherboard I am using will be the Asus x470 Rog Strix Gaming-F motherboard. It comes with a prefitted IO shied.I have searched to find the sizes of the IO shied cutout and most of them show the cutout to start from lower than the motherboard, like this: I realise this might be how it works for seperate IO shields. I also know the motherboard will fit into the standard cut-outs. But I find that this prefitted IO starts right at the level of the motherboard, and not below it. So, if I do a standard cut-out, will I find a gap in the bottom of 6.35mm? I mean, should I change the cut-out size for the motherboard? Anyone has worked with these preinstalled IO shields? I am attaching an image that shows the IO shield. Thanks!
-
I'm trying to ship this case but I cannot find the right way to ship the damn thing any suggestions? It's 20*20*20 in
-
I'm building a wooden PC case and I wanted to liquid cool it but I'm not sure how I would mount the radiator any suggestions?
-
A little backstory: I'm graduating from college next year and since my girlfriend is finishing her Masters in accountancy and is going to be making significantly more money than me (Forestry) I plan on building a shop and getting all the hardware needed for woodworking (I severely enjoy working with my hands). I plan on mainly making cabinets, hidden storage shelves, stuff like that. I have looked around to see if other wooden PCs are being created and all the attempts have been fairly ugly or are voltas pre-built. I guess my question is if an actual wooden PC case with standoffs, power supply basement, shielding, grounding, integrated glass side panels etc. was available would people be interested? I think wooden PC cases should be a thing so let me know what you guys think.
-
Hello everyone! Last year I told myself I wanted to build a wooden pc case. Not because I really needed it, but because I wanted to see if I was able to do it. Bear in mind that I am a complete noob in woodcraft and everything related to wood, this was my first attempt to build something with it! I tried to use sketchup, but I wasn't successful at it so I said "Well, I'm just going in with an idea and some drawings, I don't need projects!". I was super wrong, of course, so I asked my bro for help with autoCAD and did what you can see in the first photo attached (sorry, it's in Italian). I bought some spruce because I read that it is easy to work with (2nd photo) and, given the lack of proper tools at home, I asked a friend of mine if I could use his grandpa's laboratory, where I made the side panels (3rd and 4th photo). Unfortunately that laboratory is far from home and after that first time my friend left for Trieste to graduate, so that wasn't an option for me anymore. Enter my dad, who had started to support me after he saw that I was making some progress. He brought a working bench in the basement and went shopping with me to buy some drill bits for wood, a vise and a jigsaw. The project requires 4 light panels 1.5 cm wide and 2 dark panels 3 cm wide: to darken those 2 I used impregnating paint and it worked out fine (even though I would have preferred an even darker tone). At the center of the front panel there would have been a giant green back lit power button (The effect I had in mind was this http://goo.gl/hVPZ0t), while on the top panel there would be the usb ports along with a backup button (https://goo.gl/Gw4bgb) and two of the four Linus Tech Tips Limited Edition fans I bought for the occasion. Those two were supposed to expel air, while the other two in the back were supposed to suck air inside. The rear panel had two fans and a metallic part that I tore apart from an old case and spray-painted black (because it is so slick this way ) because I couldn't replicate in any way a panel so precise that the mobo I/O and the PCI Express cards would fit in without problems. Also the mobo is screwed to a metal plate that I also tore apart from the same old case, painted black and screwed to the actual wood side panel. On the side panels I wanted to do some hexagon-based decorations, because I really like hexagons. The side panel were supposed to interlock with the front one (that's why it was thicker) and the one without the mobo could be opened to make the hardware accessible. However, at some point I had to change the arrangement of the panels to make it more feasible: if you look at the finished product, you'll see that the part that was supposed to be on top switched to front, the front to bottom and the bottom to top. This choice was the consequence of various errors I did while trying to build the case: firstly, I should have made interlocks that went all the way, not just halfway, in the front panel. I didn't realize it soon enough, but half-way interlocks are a nightmare, requires expertise and special tools that I don't have. Secondly I was careless with the wood, so I ended up breaking multiple times the rear and front panels (when I say front I mean in the final product): I glued them together but of course they became weaker. Finally I should have planned it a lot more thoroughly, given that I had to make several changes in the middle of building it which seriously undermined the case. The final case has the thick panels on the top and bottom. The bottom one is the one with the halfway interlocks, while the top one can be opened with hinges to access the hardware. The flow of air is pumped in the front and expelled in the back. A metal grid guards the fans from curious fingers. A lot of self-threading screws have been used to keep everything in place. I am happy to be sharing this first project with you guys, I learned some useful things and I will certainly try again eventually! If you are interested this is the hardware I mounted inside: ASUS Z170A Intel i7 6700K Nvidia GTX970 2x 8GB Corsair Vengeance 3000 MHz 256GB Corsair Force LS SSD (Data) 256GB Samsung 840 SSD (Win10 + Ubuntu + MiniData) 1TB WD Blue Backup HDD 4x 120mm Linus Tech Tips Limited Edition Noctua Fans 650 W power supply
-
 Hello all to this awesome forum.. I am nick,new to this forum.. I was looking for a custom build pc case..something that i can say.."i made this" So after hours of research i came up with a decent idea.. I will build a simple wooden case without fan holes or extra small holes.. A sealed case in fact is what i want to build with as little holes drilled as possible. Thermal insulation will be applied inside the case. The idea is to have a parallel channel outside the case(rectangular plastic tube 6x10mm) which will circulate air inside the case with 2 fans,one on each side of the channel.. But as we know that wont be enough..so inside this tube i will fit 2 quite huge heatsinks(150*70*37mm,they also need some trimming to fit snuggly inside the tube) and i will put 6 peltier devices to cool the heatsink. An arduino microprocessor will control the temps to be 20c inside the case by regulating fan speeds and the amperes going through the peltier device. Note that the cpu fan and gpu fans wont be removed for even better performance! I would like to hear your ideas about the project..but please dont mention condensation for 2 reasons.. The temps will be adjusted to a point that no condensation will occur and secondly..it will be a sealed case and any moisture the inside air has will be frozen in the heatsink and the heatsink is outside the case so this wont be real problem! Thanks..and share your opinion..i really need all the help i can find!
 -
I made a build on the old Linus Tech Tips Form. when it got switched over it was lost. i haven't been able to remake it since i have been busy with school. I created the topic on January 23,2013. I am building a wooden computer case from scratch. I'm planning on using it as a media PC in my living room. I know it's over kill for a media pc but i eventually want it to have a ASUS Maximus V Formula i5 3570k 660 a couple terabytes of storage the top and front have two types of wood that are glued together. I used wooden dowels to keep the boards in-place and to keep them even. the front of the cause will be on a hinge to open and close (i'm thinking of using a piano hinge) to allow access to the optical drive. I will be using threaded rods and metal plate to hold the optical drive. the threaded rod is attached to the top of the inside of the case by welding a nut to a washer and putting epoxying the washer to the top. the reason i did this is so that i can unscrew the rod to use it to hold something else up. i'm thinking i will use it to hold my hard drive too and yes i will use some kind of rubber damper so the hard drive wont vibrate the whole case. the side of the case has three holes that were routed into it. the holes will be used for air inlets once i put fans in behind the holes. the side panel has a big hole in it because i cut out part of it so i could make a door using invisible hinges. the door will have a Plexi-glass door.i sill have to plan out where to put the glass and what shape it will be. For the motherboard tray i built it out of metal and wood. i bent the metal down so it formed an open box than i screwed wood in to the metal. i used the wood because it will be easy to cut for cable management and i mounted the bracket to the wood and the case. I am using a pvc tube to make the motherboard standoffs. In order to mount the rear I/O ports bought a danger den 7 slot I/O Shield. In order to mount it i routed out the hole in the back and went down to hardware store and bought some black wood screws to mount it.