Search the Community
Showing results for tags 'powermac'.
Found 15 results
-
Here is my build in its current form. You can go back and view my posts for previous iterations of this build but this is where it has gotten to over the last few months since I built it. I absolutely love this project as it has grown! First thing to know is that two of these systems were built at the same time. One for my buddy to use for his YouTube channel This one is not mine, it is the twin!!!! I picked up two PowerMac G5s (both working mind you) in case I messed anything up on the first one. I did not so now I still have a working PowerMac G5. Lol. Starting off we have disassembly. Note that I don't have a lot of pictures of this progress as I have impulse control issues and wanted it apart ASAP. lol. This is a challenging computer to take apart but well worth doing as this case is amazing! The case I had was pretty beat up with scratches and stuff so I had to do a lot of sanding to get them out. After disassembly, I took to a small test fit by placing an old mother board in the case to figure out where to cut out for IO in the rear of the case. A quick sharpie line and some dremel time were in order after that.

-

Powermac G4 no chime; no display
Bruce boy posted a topic in Linux, macOS and Everything Not-Windows
Hey, I have a Power mac G4 MDD, yesterday i was trying to install Leopard on it, it kept on saying things like "Install failed and couldn't verify "Essentials" package" and a bunch of others, i searched it up and some other forum told me to reseat my ram in different places and see how it goes, that didn't work, it kept on coming up with the same messages. So then i gave up on it for a day and now it has no chime, and no display. I have tried another AGP card, resat the ram in different positions, tried ram from another working system, and booted with no drives plugged in. Help is much appreciated. --Bruce -
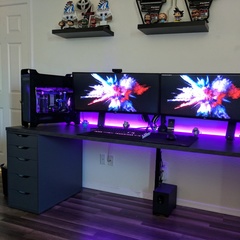
Hi all! This is my modded Powermac budget/mid workstation. Mainly for Linux dev work. Triple boot: Ubuntu, MacOS (openCore), Windows.
-
 I wanted to push watercooling to the most. Silent. Level. possible. While gaming and also for working. Quite a challenge and a lot to learn. Thoughts on water-cooling: It always depends on the use-case if water-cooling is more silent than air-cooling. My personal experience: Air-cooling is more silent in idle load scenarios (when you just do some easy tasks like browsing or office) Water-cooling is more silent for constant high load (e.g. when you are gaming/working for long times) Tricks to get the water-cooling as silent as possible: Configure the BIOS to turn off the radiator-fans in Idle load scenarios. That leaves only the pump running. Undervolt the pump (to e.g. constant 7V). This works best, if you can plug the pump into a fan or pump header and assign a constant (lower that 100%) speed to it in the BIOS. If your BIOS does not allow that, you could use a resistor-adaptor to slow it down. This project started before my 26 PowerMac G5 Case Modding Project
 -
So, I am officially crazy... I bought 26 Powermacs (G5) And I modded them ALL They are now ready for ATX and mATX Mainboards… But why 26? Did I mention I was crazy?! (And they were only sold together…) I modded G5 Cases before – They kind of became my passion. This time I wanted everything to be perfect: - Keep as much of the original design as possible - Cut as less as possible - Since it is impossible to find a G5 Case without dents and scratches, I wanted to paint them, freshly. I am done now and it is time to share my experiences: It was a rough 6 months from start to finish. The project kept me busy during all of the winter. I worked every weekend on it, till late. I need to apologize… …to my family for occupying their workshop, guest rooms and garages …to my friends for neglecting them during the last months …to the dogs and the cat for waking them up from their afternoon nap every now and then (because of the metalwork-noise). I hope to be able and show everybody that it was worth it - And that someone out there is appreciating the work, as well. Back me up, guys - Spread the love :-) I believe in Apples high quality and the unique design of Sir Jony Ive My mods include a preinstalled power supply (and even watercooling on some) Countless hours of work and high-quality components & tools were used Of course, you can come and have a look if you are near the South of Germany (or the North of Switzerland).
-
right now im trying to plan out the build and im trying to track down a power mac g5 model for solid works so i can make some custom plates. i need to plan it out first as it takes my water jet company a couple weeks to cut them out for me. so what my question is -> does anyone have a solid works or cad file of a power mac g5. im really trying not to make that model myself, its been around for years and i cant seem to find any on google the goal is to design a panel that is flush mounted and welded or bonded in so that it looks like it came that way.
-
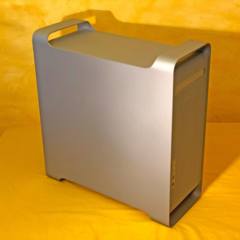
This is a guide to disassemble* a 2005 Apple PowerMac G5. The main reason I am doing this is to mod the chassis to support ATX components so I can transfer my components into this classic case. This guide is preparing my G5 to receive a kit from The Lazer Hive which will allow me to install my current rigs Motherboard, GPU, and 120mm radiator. Tools you will need: 4mm 9” Ball-Hex screw driver, 3mm Hex screw driver, T-10 screwdriver, T-8 screwdriver, PH 1 screwdriver, #0 Jewelers Phillips head Screw Driver, 9/32nd- inch nut driver**, 1/4th- inch nut driver**, flathead screw driver (any size or length), pliers This teardown does not include instructions for HDD removal as my G5 had none, this teardown also does not include many visuals as to how to remove the top shelf. ** In the absence of nut-drivers you may use pliers to remove select nuts and screws, especially if you strip them (like I did about 3 times) Lay your Mac on its side such that the side panel is facing toward you Open the latch at the rear Remove the side panel Remove the plastic air guard Remove the front fan assembly by pulling directly up on it and the tab Disconnect the front speaker and fan assembly cables Remove the front speaker and fan assembly by pulling directly up on it Remove the plastic dowel and pin keeping the G5 shroud in place Pull the G5 shroud horizontally to the left and lift up to remove it Remove the air guide directing air over the CPU heat sync Disconnect the rear fan header Unscrew the GPU PCIe bracket screw Unlock the GPU from the PCIe slot and remove the GPU by pulling directly up Apply pressure to the two tabs on the rear fan assembly and remove it by pulling directly up Remove the screws securing the GPU support bracket and remove it by pulling up (mind the tabs) Remove the screws securing the PCIe divider to the chassis and the logic board Remove the PCIe divider by pulling up after the screws have been removed Remove the RAM by releasing the locks on the modules Remove the 8 3mm Hex screws from the heat sync assembly Remove the dual Philips head screws Use the 4mm 9” Ball-Hex screw driver to remove the captive screws in the heat sync Remove the heat sync Lift the metal bracket for the front fan assembly Release the clips on the back of the metal bracket and remove the fan cable Remove the fan header from the Motherboard Remove the screws securing the front panel board to the Motherboard Pull back and away on the front panel board to free it from the chassis Remove all connections from the Motherboard Use the T8 screws to unscrew the leads from the PSU Undo the sudo-standoffs the CPU heat sync used Use the #0 Philips head to unscrew the 9 screws securing the rear fan grill to the chassis Remove the grill assembly You can now lift up the Motherboard, remove it from the chassis Unscrew the two screws securing the PSU shroud and remove the shroud Remove the 4 T10 screws on the bottom of the chassis securing the PSU Remove this standoff to enable removal of the PSU Remove this nut to allow removal of the plastic liner in the chassis Remove the 5 screws securing the fan and HDD caddy to the shelf of the chassis Unlatch the optical drive and remove it by simply pulling up Remove all the 3mm Hex screws from the top shelf Remove the C-clip and push remove the pin holding the latch mechanism in place Remove the latch mechanism Unscrew the T8 screws on the back side of the shelf and remove the shelf Remove the bottom HDD caddy, mind the PCB. Remove the two screws securing this fan in place Remove the 7 screws securing the top HDD caddy to the chassis Unravel the WiFi antenna from around the lip of the chassis Remove the 3 screws securing the antenna assembly and use a flathead screw driver to pry the back from the chassis Unscrew the 15 T8 screws Success! After all this I still cannot decide on where to put my PSU. I can put it in the front, in the shelf, or I can cut the bottom shroud and plop in there……..
-
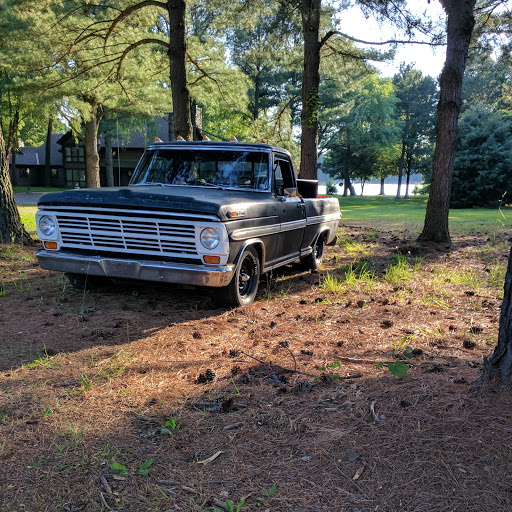
Starting a new build log / project here I picked up an old (yet functional) power mac G5 Its a tad beat up externally but sound inside boots to the point of chime but no further - i suspect bad os / hdd as everything else works The specs at the moment are: CPU : PowerPC 970fx (G5) x2 RAM : 2 GB (2 x 1GB sticks) PC3200 DDR HDD : 160 GB original apple HDD, (and a bent sata data pin 250 gb HDD) GPU : nVidia GeForce FX 5200 Ultra - 64MB vram It also came with a tc powercore audio card - a type of sound effect card as far as i know - if you know more about it let me know! Here is the page with what i can find as the stock hardware https://everymac.com/systems/apple/powermac_g5/specs/powermac_g5_2.0_dp_2.html A view of the internals without the side perspex or panel, somewhat dusty but not terrible as far as power macs go these days The top green card is the tc powercore sound card, with the nvidia gpu underneath Current Goals -Clean up current parts and case in place -Get os installed and setup -Upgrade ram with spare -GPU upgrade -Migrate system to ssd boot and large hdd -Case Swap to stripped, painted and re assembled mint chassis -Case lighting/mods? I've got an older g5 with a non working psu, so have some spares to experiment on. I've got more ram to put in already, but not known if working, aiming to reach 8GB, the max it can fit What would be peoples suggestions to do moving forward with the system? Ive looked at getting a higher end gpu for the agp slot but finding mac specific ones is hard If people have copies of the lion 10.5 osx that would be very much appreciated due to not having an os yet... either that or gonna try getting a from of Linux , probably a fork of Ubuntu or Debian onto the system
-
~JETSTREAM~ A custom Powermac G5 case mod project. Back with another custom build case mod project (help, I can't stop! ). Shortly after finishing Project Stalker v2.0 I picked up a cheap Powermac G5 PC for $80. This is potentially going to replace the S340 of my main gaming rig - depending on how well this turns out. Have tons of ideas for this and still haven't finalized the internal layout yet (that will be revealed later on). All I can say at this point is that it will be quite different than what most people do with these G5's when they do a standard PC hardware conversions in them. The emphasis will be on air flow, low temps and low noise - all air-cooled. One thing is for sure; this is the most ambitious case mod/build I've taken on yet and it's going to take a long time to complete. There may be weeks/months between updates (though I hope not...). Jetstream (air currents in the atmosphere) is a working title for this project. Feeling pretty good about it, but other suggestions are welcome. Specs will be: *i7-4790 (can get one brand new for $300 CAD - which right now is basically = to 40% off) - Yet to be purchased. (Currently running an i5-4570) Cryorig H7 CPU cooler - Yet to be purchased. Asus Z97-E Kingston Hyper-X Black 2x4GB 1600 *Kingston Fury-X White 2x4GB 1600 - Yet to be puchased. Samsung 840 120GB SSD *2x 500GB SSD's or 1x 1TB SSD - Yet to be purchased (going all SSD's for this build as HDD's are a pain to deal with, take up too much space and are slow ). Asus Strix GTX 980 OC 4GB EVGA 850GS fully modular PSU Basically most of the parts listed are from my current main gaming rig, except for those parts not yet purchased (duh) lol. This will serve as a bit of an upgrade for this system, more or less. Thing is huge and weighs just shy of 40lbs as-is. Can't wait to grab the Dremel cutter, roll up my sleeves and get dirty again! First things first, have to gut this thing and get it all cleaned up - see what exactly I'll be working with. A few tags from those who followed the Stalker project: Next update coming soon. Thanks for looking.
-
 Me and my father recently gathered together a number of faulty PowerMac G5's, 5 to be exact. They've come from various homes, one was ours, one was a friends, the other three belonged to a client of my fathers. We spent a weekend working through them and working out what to do with them. Long story short we did a lot of hardware swapping and got 3 of the machines to boot to OSX fine, but the other two are now left with the mostly dead parts. (I've got a couple of photos taken of what we did and could put them up if anyone's interested) From this I almost immediately decided i was going to mod one for myself to use as a case for a windows machine. I've always loved apples tower designs, especially the G4 and G5 eras. To get any similar build quality from a standard case its not exactly cheap either. My goal for this build is to create a workstation machine that's most capable with multi-threaded CPU tasks and multitasking. It'll be mostly used for audio editing/DAW workloads and recording amongst other audio applications as well as some fairly infrequent rendering and photo/video editing. The catch is the budget, I'm a lowly student living on not really alot so ive managed to scrape together around £700 to spend on this, perhaps a little more. I'll just need to eat tinned ravioli and beans for the next few months, no big deal. Here are the parts ive got for the rig so far: 2x Intel Xeon x5650 Intel S5520HC Motherboard 12x4gb Samsung DDR3 ECC 1066mhz (Its even got fancy metal heatspreaders) 1050w XFX Pro 80+ Gold HD 8990 (Was going to be a 750ti originally with a smaller PSU, but found this online for £170 so i had to go for it) Nothing final on storage, was thinking a combination of 3 drives as a final product, will probably have to settle for 1 to begin with. 250gb sandisk ssd for boot drive, 1-2tb hybrid drive as a scratch/work disk, 4tb 5400rpm drive for mass storage. Now fitting all of this in is going to probably be a bit of a headache. Ive got a rough idea of how it'll fit together after measuring everything up and it should work. Its most likely going to be kind of ghetto, but i want to do my best to keep it looking as clean as possible inside and out. That means reusing a number of the fan assemblies, the DVD drive, the front panel I/O and power button, potentially even the old Heatsinks. Ill keep this updated with how things are getting on as more parts come in and the project progresses, with pictures of course. Here's a shot of the G5's in the meantime, the case to be used with its side off on the right. I'm open to feedback too, let me know what you think!
 -
(Note: I've been working on & off on this mod since april last year so I've already got a lot of updates which i copied from my other blog, hope you won't mind ) So I wanted to try my hand at a G5 case mod for a while so I finally got myself one: resources/examples I'm using: How I got it: The tray is in Cutting to (the) c(h)ase Mounting the tray: Watching paint dry: Reassembly: Cut out a hole for the PSU: Mod complete: Skills learned so far: painting drilling filing sanding cable crimping not keeping budget under control :rolleyes: water cooling
-
This is my first thread at LTT forums after a lot of forum stalking. Be gentle. So this is my dilemma. A friend has a free Powermac case I could have but would require extensive modding to fit an upgradable pc. Or I could buy a Corsair 450D which I like for the filtered intakes and aesthetic. I'm interested in modding no matter the case I choose, but I'm not sure if Im ready for the work it seems would be required to get a pleasing pc case out of a powermac. Does anyone have experience in modding a G5? And if so, would you say it is worth it? All opinions welcome and thank you!
-
Hi Everybody and Nobody I have a simple but dumb question before buying my G5 to mod it! is there space in the case to fit a human inside??(JK) is there space for a 360mm radiator in the bottom? thanks for everything but nothing
-
Disclaimer: I would like to apologize ahead of time if there is a better place to post this. This seemed like the best fit for my question. Anyways, I recently bought a PowerMac G5 case that I am beginning to mod and hopefully will turn into my main rig. I have plans to water cool this rig but since the case is basically gutless, there are almost no places to mount a radiator. I am currently planning on mounting a triple rad (if it will fit) into the bottom of the case but i think the air would flow better in the case if I could mount it vertically. My main problem is that I can't drill into the back of the case since it is also the outer wall of the case. Any tips on where to mount the rad?
-
[MOD am I in the appropriate thread?] I am working on making a sort of ghetto build working with a G5 loop. I have the radiator intact and the pump. I have already managed to rewire the pump to run on 12v. Anyone have any advice on what I should do? I hope to be able to post pictures soon. Some of the things I currently have: radiator powermac g5 cooling fans (Yes I know they sound like a jet engine) pump (already rewired to work; I will also post the pinout to my particular pump) Some other useful details is that all the existing fittings are 1/2 Big Question: What are some of the things you expect I will need in my project? [edit photo] http://imgur.com/XpWVMDY


.png)