Search the Community
Showing results for tags 'custom'.
-
How do I fix this? there's a literal stream of micro bubbles. Temps seem ok but i know they could be better. I'm at 25-30 cpu idle, 25-35 gpu idle, 40-55 cpu heavy load, 40-60 gpu heavy load. Cpu is 12700k oc to 5.0, gpu is 3080 oc +75 core +115 memory. iv bled it checked concentration, ph around 9. 10000000_7591201840919147_2625494337336888498_n.mp4
-
 i us the Sweet-Ambar-Blue-Dark-v40.tar.xz as my shell theme an my legacy app theme an kora for my folders an icons but i miss the native transparency of the Tokyonight Dark Borderless Gnome Shell Theme which i always wanted about 15% more transparent but could never figure out what lines an values in the config files to change to do so id like some help an advice if not just tell me which lines an values in what config file an where to change in the Sweet-Ambar-Blue-Dark-v40.tar.xz theme file to achieve this please this would be a great help to me an the look of my gnome desktop. id like it to look like this
 -
Fish gills work in a funny way, the water flows from the more oxygenated area to the less oxygenated end. This means that the difference in oxygen between the water and the gill is at a consistent and low gradient instead of a big spike and then a loss of efficiency. I'm looking into water-cooling my next build, not because I want it to be colder but because I want it to be quieter. To that end I imagine if you had double the rads you could run the fans at half the speeds to make it very quiet under long term load. I also very much enjoy making compact builds that can sit on my desk and not take up a huge footprint, but water-cooling is very much the antithesis of that, especially with any case that supports more than one rad. To bring all that together, what if I stacked multiple rads (like 5) together in a chamber not side by side but with the vents end to end, and placed fans in-between them. Running in series with the hot water into the last rad and running the cold water out of the first. This should like a gill let heat transfer consistently through the whole stack at low fan speeds and also be very dense. I could laser cut a case where the pc components are in a compact stack in the top with no fans, and pipe the cpu and gpu coolant into a different chamber with one intake and one exhaust opposite. My question is would it work or just be a waste of money?

-
Hello I need a little help deciding what to go with building a custom hard line set up. I'm using a new amd am5 chip, the only things I really care about aesthetically is id like to use a reservoir with rgb and maybe use frosted hardline tubing. I'm not interested in a aio I want something that looks really cool. Is there a pc part picker like website I can easily layout everything I'll need to order? Specs Amd Ryzen 9 7900X3D ASUS Prime 650 Plus Thermaltake tower 500
-
 I need to find a 12inch screen, so looking for pointers as I am struggling. I'm building what could be considered an all in one. I have my granddad's old CRT that was bought in 1971 or 72 and is a 12 inch 5:4 black and white unit. I used to play mega drive on this when I was little and I want to breathe some life into it instead of putting it into landfill as it's been around longer than I have. I've built a cheap and cheerful micro atx i5/gt980 pc for emulation, and 3d printed board mounts and fan shrouds etc. I need a non industrial/pos (point of sale- not piece of $hit!) screen as I want decent colour and contrast etc to fit the aperture which is 8x10 inches with an almost 12 inch diagonal. Best fit so far has been something like the surface pro 4 display (12 inch 3x2) but finding a hdmi/dvi driver board is near impossible. I've been looking at tablet screens as I can't find anything else that fits in terms of size, reasonable resolution and most importantly screen ratio. I originally posted in r/buildapc but I need more detailed recommendations and can't post images there so I'm spreading the net in the hope that someone has an idea... Any help is appreciated.
- 4 replies
-
- 1
-

-
- 12 inch
- crt conversion
- (and 4 more)
-
Finishing up a mod for my Razer Huntsman Mini. I have been sick and tired of wires on my desk for a very long time, and technology to replace all cables does exist now, so I figured this was the time to make my dreams real. The basic idea is to attach a wireless charge mat to the bottom of my keyboard, and place Qi charging pads underneath my desk mat. I have already cut a piece of foam to hide my Logitech Powerplay mat, so I had a good idea that this would work. In practice, this idea loses its legs fairly quickly, because you not only have to attach a wireless charging receiver, but also a battery and some way for the keyboard to transmit key presses in a mostly latency free way. Oh, and I really didn't want to wind up spending more money on this mod than the keyboard itself was worth, and ideally I didn't want to spend more than about $50. Finding a suitable Qi charging receiver was actually really easy, apparently these exist as phone accessories for people with phone that don't have wireless charging. You can find ones like this one I used on Amazon for about $13. My solution was this- using a Raspberry Pi Zero W, I installed VirtualHere server, a USB over LAN software that's actually free so long as you're only using one device, and attached the Pi W to a large dual-cell battery bank. I wound up using this one which I already had lying around, but a newer one with USB C charging could be beneficial. The most important thing here is that the battery bank continuously provides power. Some battery banks switch over from the cell to the USB charging port, resulting in the Raspberry Pi turning off and rebooting every time you remove it from the wireless charging mat. Next I cut a hole in the bottom of a wooden prototype case that I could pass the wireless receiver's USB plug through. Finally, I cut two holes into my desk mat in the spots I most commonly use my keyboard. One hole was cut in the center for typing, and the other in the top left for gaming. Quick note here, the angles that the Huntsman Mini normally allow you to adjust the keyboard from 6 degrees to 9 degrees (nice), but I found that I needed the keyboard raised at a 15 degree angle to fit every part underneath the faceplate. I don't really notice the difference, but some people might, so I wanted to let you know. The final step was officially putting the thing together. I unscrewed the face plate of the Huntsman Mini, which was remarkably easy, and then I had a fabricator model and 3D print a new case for the keyboard. The final result looks absolutely fabulous, with 4 screw mounting points in the corners and lot of open space for placing each component. The purple model is one of the prototypes, but the internal design is exactly the same as the final product. Once I had every component in place, I marked out empty spaces that I could fill with cheap metal tire weights like these to add some more weight to the keyboard. Make sure to cover all of the exposed metal with tape so that the circuitry doesn't short. The last thing anyone wants next to their fingers is a lithium ion battery that's shorting out! (Fun fact, depending on how you place the weights, you can create your own cable channels for the USB wires that need to be run. I don't know how to solder, or the internals would be much more space efficient.) With all of the internal parts placed, the last thing to do is close everything up! This post mostly focuses on the physical mod, but setting up the Raspberry Pi with VirtualHere is really simple. They have a guide posted here for how to install the server program on a Linux machine, and guides for how to automatically start a program on boot exist all over the internet. One last thing to take care of is to install the VirtualHere client on your windows machine, and follow this guide on how to set a program to start on boot in Windows 10 so that VirtualHere is detecting keyboard inputs before you have to log in. (A keyboard isn't worth much if you can't log into Windows with it lol) Once your software is configured, you're basically good to go! The best thing about this is that using USB over LAN is pretty seamless as long as you don't plan on taking your keyboard out of your house. Plus, now your keyboard has a computer inside of it, so the options for taking work on the go are pretty cool as well! And to address concerns over latency, 2.4ghz signals are already what most wireless peripherals use to transmit, and in games I have noticed no discernable delay between using a wired keyboard instead of this wireless solution. Otherwise, that's it guys! I added a small LED that illuminates to show when the keyboard is charging, and some small marks on my mouse mat to act as guides for setting the keyboard down, and the mod was complete. This mod could theoretically work for any keyboard in existence and only costs about $40 so long as you already have a couple of USB cables laying around. Obviously there are some improvements to be made, such as using fast charging Qi pads, adapters, and a battery bank that accepts USB C charging, as well as a way to check the battery percentage of the keyboard, but each of those add-ons adds cost, and the idea here was to create this mod for as little extra money as possible. I think I was pretty successful, but let me know what you think!
- 1 reply
-
- 2
-
-

-
- keyboard
- wireless keyboard
- (and 3 more)
-
So I've a pretty new PC builder, just built my first tower about a month ago now after switching away from Mac and so far I'm loving it! Just had a question about my power supply, and swapping out cables. So I bought a Radeon 7900XTX, and it didn't come with any kind of PCIe splitter/adapter, which I think is the standard for most GPUs? It also h as three 8 pin connecters, so because of that I ended up needing to use 2 different two pin connections to the power supply, resulting in one end of the cable just not being used and hanging under the GPU all ugly. So naturally, I wanna swap it out for something more visually appealing. Only thing is, I've heard from a few sources that you shouldn't swap around PSU cables with cables not meant for your specific unit because it can harm it, but I also know custom cables are a very common thing. Am I getting my wires crossed, or is there information that I'm missing? Can I just get any PCIe to three 8 pin cable and chuck it in there without any issues? Or should I stick with 2 separate cables? Not sure how much power can go through just one and this GPU naturally consumes a lot of power, so I wanted to ask and get a crystal clear answer because risking anything. It sounds like a basic question but hard to phrase in a simple Google search. Thanks in advance!
-
 I took the input from you guys and reading reviews to create this build. Mainly going to be playing games like MSFS, STALKER, Arma, DCS. Did I miss anything important or did I do a good job of combining suggestions and reading reviews? PCPartPicker Part List: https://pcpartpicker.com/list/3qsKh3 CPU: AMD Ryzen 7 7800X3D 4.2 GHz 8-Core Processor ($389.99 @ Amazon) CPU Cooler: Thermalright Peerless Assassin 120 SE 66.17 CFM CPU Cooler ($34.90 @ Amazon) Thermal Compound: Noctua NT-H1 3.5 g Thermal Paste ($8.94 @ Amazon) Motherboard: Gigabyte B650 AORUS ELITE AX ATX AM5 Motherboard ($189.99 @ Amazon) Memory: G.Skill Ripjaws S5 32 GB (2 x 16 GB) DDR5-6000 CL30 Memory ($104.99 @ Newegg) Storage: Crucial P5 Plus W/Heatsink 2 TB M.2-2280 PCIe 4.0 X4 NVME Solid State Drive ($119.97 @ Amazon) Video Card: Sapphire PULSE Radeon RX 7900 XTX 24 GB Video Card ($949.99 @ Amazon) Case: Fractal Design Pop Air ATX Mid Tower Case ($89.99 @ B&H) Power Supply: SeaSonic FOCUS PLUS 850 Gold 850 W 80+ Gold Certified Fully Modular ATX Power Supply ($109.99 @ Newegg) Operating System: Microsoft Windows 11 Home OEM - DVD 64-bit ($121.98 @ Other World Computing) Monitor: Gigabyte M34WQ 34.0" 3440 x 1440 144 Hz Monitor ($409.99 @ Newegg) Keyboard: Logitech G512 CARBON RGB Wired Gaming Keyboard ($95.00 @ Amazon) Mouse: Logitech G502 HERO Wired Optical Mouse ($39.99 @ Amazon) Headphones: Logitech Pro X 7.1 Channel Headset ($89.99 @ Amazon) Speakers: Logitech Z200 10 W Speakers ($39.99) Total: $2795.69 Prices include shipping, taxes, and discounts when available Generated by PCPartPicker 2023-11-12 13:21 EST-0500
 -
I've made a step by step on painting your Noctua fans for newbies or anyone this technique is good and cheap and wont effect airflow or noise Things you need Fans Cardboard box Knife Chop sticks something to that effect Can of spray paint To read this guide fully before you start First get everything together set up your box and start breaking down the fans here I've used 2 NF S12's, a NF P12, and a NF S12B Apply medium pressure to the back of the blades and that fan will come right off Next un pick the cables from there restraints And pull the motor from its mount Turn over the fan and peel the sticker off (you may need the knife) Watch out for this small round metal piece under the sticker its a magnet Now place one chopstick through your screw hole And start spraying LESS IS MORE use very short sparys, do not put the can too close 8 inches (20 cm) is as close as you ever want to be and keep your hand moving, start the spray away from the fan and finish away from the fan try and only spray each part once you only need one coat this is also important when you have to touch up as to not change the profile of the blades or any sizes so it will fit back together If you make a small hole in the top of the box you can place it here to dry Now for the fans if you rest them against the back at a slight angle only the small tip of 3 blade touch the box so it will be fine to spray REMEMBER LESS IS MORE if you don't get complete coverage don't worry you can sort it later Once the fan is dry the technique I used was to hold the inside dowel and spray one fin at a time at a right angle to the fan, this prevented any paint from getting on the inside and saved me taping it up, it also made it very fast this whole process took me only 15 mins including taking photos Once everything is dry check over all parts for any touch ups needed there should be loads if you were careful about using as little paint as possible, fix these with a very low pressure spray aimed at the area and I will repeat but do not put the can too close 8 inches (20 cm) is as close as you ever want to be Now everything is dry and painted we will put it back together its very straight forward just what you did before but in reverse On some models the NF S12 in this case,there is a rasied chip on the pcb that must relocate through the rectangle hole, the others have the hole but i assume this is because all the shrouds are the same Then just re seat your cables push them in with your finger nail (dont use a blade as you will remove the paint) And there you go
- 21 replies
-
- 9
-
-
-
- noctua fans
- noctua
- (and 2 more)
-
 basically, I've been trying to create a fan curve that isn't the silent mode in smart fan as the silent mode still ramps ramps up fast from 40c which is my idle lol. Anyway, I've been trying to customise it but it won't let me at the points just aren't moving. My fans are 3 pins so I have to control them in the bios as they don't have PWM which is annoying. I've got an Aorus b550 elite matx mobo. I can't use software to control the curve due to it being 3 pin.
 -
I want to build it myself I do not ming buying stuff from different places Budget: I do not really know how much these things cost Keycaps: Type tactile or linear I do not care about RGB but it needs to look good Hot spot I will be happy to answer any question
-
About a year ago an idea hit me right in the head about putting a screen into a guitar, from there the idea snowballed into a whole project that has been in the development for quite some time now, but now it's finally turning into reality. This development process really kicked my butt from the start with all the logistical ideas on how things would connect, what parts to use both in the guitar and what computer should I put in. In later stages a lot of time was spent on making my own computer case that would allow me to insert and remove the computer with relative ease, as if you want to upgrade parts down the road. This project also got me into 3D printing since that was the best way to make such small case with all the necessary features, as it did allow me to rapidly demo out ideas and concepts. The current build details include these parts (can be subject to change as the project goes on): PC: - Minisforum UM560 (16Gb ram + 512Gb M.2) - choose just because its a powerhouse of a pc, has decent cooling solution that alows me to exaust the head out with relative ease, also fits perfectly in the guitar body thickness wise. it also has a display port type C on the front that is going to be used to power the display in the guitar. LED stuff: - Micro LEDs APA102 - 200 LED/M - found LEDs with great density and width that fits perfectly into the edge binding of the guitar (tested how it's going to turn out before hand, light is not that well defused, but that is to be expected when there is only 2mm of resin between the LED and the outer edge so I can live with it) - ESP32 board - I am using two of these to power and control LEDs in the neck and body separately that i can later combine in to one using WLED, planing on having it soundreactive, that can be done through WLED or LEDFX DISPLAY: - WaveShare 7 inch QLED display: I am using it since it's about the biggest display I can fit between the bridge of the guitar and the neck and it has a decent way of mounting it GUITAR PARTS: Bridge: GHOST ResoMax NV - The only reason I'm using this bridge is because of the display that's in between the bridge and neck, there is no place for normal guitar pickups. But there is also another problem when it comes to picking up noise from the LEDs or the computer it's self, that's why I choose a bridge that has pizza pickups in it that allows me to pick up the sounds the string produce with no noise from the LED light. The plan is for this guitar to have the ability to be played as a normal guitar, have on board recording capabilities, casual gaming/working, RGB edge binding that reacts to the music you're playing on the guitar, or the music on the PC its self. here are some progress fotos so far! Guitar body before the edge binding is on and unpainted Computer case End goal for the body So much testing It fits, it sits
-
 Greetings to all! So I have been working on something like this for awhile. First off I want to build a motherboard from scratch. Now before all the negative people start blowing up the comments section about how "You can't do this" or "Its not feasible", I know this is going to take time and money. I GET THAT! What I want to know is 1. What is needed to make a custom motherboard in a specific design and size (I need it to fit inside a tube smaller then a mac pro trash can but bigger then a water bottle, Thats for width and height but for length I'm thinking between 10" - 14".) 2. I need it to have a modern day CPU (Intel) along with a GPU (Maybe one from a macbook pro, if you have ever seen one) and also laptop ram or SO-DIM (I think thats the technical term for it.) I will worry about cooling later. 3. Through all this I want to learn how to make and build a motherboard and understand how it works! So time for what I have found on my adventure! I know you can use sights like this to make small PCB'S: https://easyeda.com But the problem with that is I have no idea what half the stuff on a motherboard means and does. (Hence why I have number 3.) So I need you guys to lead me and help me. I have a place to design it, I have the time, I have the money, Now I just need you guys to lead me in the right direction! Hopefully you guys will have fun with this as I hope to as well! -wiredbrother P.S (I am a engineer I create custom cases. I have been designing a new type of computer and it should be very cool. One of the things it will include is a flexible screen. Anyways I am off, See you guys soon!)
 -
Has anyone tried to watercool their DDR5 ram sticks? What product did you use? I can’t seem to find ones. And the ones I do find say it doesn’t fit them right but will work. I thought about the EKWB. But those don’t fit. So I’m wondering if I need to worry about the heat sinks fitting or not.
-
 Hello everyone, I am in the process of setting up an eGPU for my 2017 MacBook Pro using an Nvidia Tesla K10 GPU and an EXP GDC Beast. I am running Windows through Boot Camp on my MacBook Pro. My issue is related to power. The Nvidia Tesla K10 requires both a 6-pin and an 8-pin power connector, and I am not sure if my current power supply unit (PSU) can provide the necessary power and has the correct connectors. I initially thought my PSU was a Corsair 750W model, but it turned out that was not the case. Unfortunately, I don't currently have the exact model details for my PSU. Here is what I have tried so far: I've tried various combinations of connecting just the Beast, just the Nvidia K10, and also tried rigging the Beast together with the GPU. However, none of these attempts have been successful. Does anyone have any suggestions for how to proceed? Would it be advisable to get a new PSU, and if so, what specifications should I be looking for? Any help would be greatly appreciated. Thank you in advance! Best regards, plyght UPDATE: I might have found the solution, BUT haven't tested yet: https://www.amazon.com/gp/product/B089YSVN1S/ref=ewc_pr_img_2?smid=AR8SH30BZZHQN&psc=1 Basically, you have to use the EXP GDC Mini PCIE cable to HDMI that came with it, get an external SSD Enclosure, use the adapter linked above, and voila! dm or comment if you need help
 -
So I got a Asus ROG strix 4080 and upgraded from a 750 PSU to my new 1000 Corsair. After some troubleshooting I thought my PSU was DOA but after getting a replacement Corsair PSU I'm having the same issues. Help. I wanna use my 4080 but I'm at my wits end. I get motherboard lights but when I press power button I get no change.. even the start button on my Mobo gives no change. Again. Help. Asus maximus hero xi Wifi Mobo 64 gig ddr4 ram 9th gen i7, 1151
-
Budget (including currency): 500 (Total price: 520) US dollars Country: The US Games, programs, or workloads that it will be used for: Beamng.drive, Minecraft. etc I got the 1080ti for free from my uncle, I got the PSU for free from a friend I have 2 fans zip-tied to the front until my new fans arrive. I have them controlled by a fan curve which controls its volts (no PWM) It's a bit loud when under load because the front fans are not a good brand Just salvaged them from a couple of old-timey PSUs I had laying around heres a Userbenchmark run I did: https://www.userbenchmark.com/UserRun/61749939 I know how much you guys hate them, I just like to see how they rate it And yes I'm using the stock cooler, it keeps it under 70C for me I need to re-apply thermal paste on the GPU, and clean it. The paste is coming soon so I'll do that soon foot pics you creep
-
So im looking at building my own offline security camera system using POE, and having it feed to a computer from switch to pc directly, and using a program to stream and record all the foods from the IPCameras, im wanting to have upwards of maybe 12? cameras, what kind of system would i need for something like this?
-
Hey all. I recently found photos of a old PC build I made 7 or 8 years ago using a Behringer Amp and converting it into a PC case. I no longer have it due to a house move and not having space to keep it, which was a shame as it was a good looking build IMO. USed a 200mm fan in place of the speaker at the front and used a sheet of aluminium to create a new top plate to fit the PSU. Thought it would be cool to post up hear and see what people think. I originally used this for my bass which I'd owned since i was 16. It was damaged by some old house mates during a huge fight at 3am, including the bass guitar. I was gonna throw it out, but I couldn't bring myself to do it. A few months later I lost my job and had to sell a lot of stuff to make rent, including my gaming PC at the time. I had some old spare PC parts to use in the meantime, but lacked a case. I then found this amp and thought "This would make for an aweome looking retro build", so I ripped out the old guts of the amp and went from there. I can't remember the parts i used. It had an old core duo I think and a old ATI HD something. Later I switched out the parts to an i5 second gen and a GTX 750 ti so I could play fallout 4. Shame I got rid of it in the end, but such is life.
-
Hello again! Anyone have any good sources I can check out for buying parts for my custom liquid cooling build? I keep going back to EKWB’s website but their CPU and GPU blocks keep going out of stock and I love their custom made blocks was wondering if there’s any other sources out there worth looking at. Thermaltake and Cosair wasn’t too impressed with. Optimus was the same as EKWB out of stock on a lot of things but their CPU block looked nice. Idk how to use Bitspowers website just seemed really confusing lol. Thanks in advance! also if anyone wanted to know my current setup. mobo - Gigabyte X570 I Aorus Pro CPU - Ryzen 7 5800X3D GPU - MSI RTX 4090 gaming x trio Case - Thermaltake Core P1
-
Does anyone know if there's a 3d print file somewhere of a bracket to surface-mount a typical atx power button? Or if something like this already exists for purchase? Horrible paint mock-up included below!
-
 So I've been building a workstation rig on the cheap, however I've run into a problem where the battery and motherboard use the old BTX form factor rather than standard ATX, but rather than trying to hack up a case to mod it for BTX, I'd much rather work with a company (or an individual) who can do it professionally. Does Anyone have any leads on someone to work with for this?
 -

Radeon 7970 Sapphire Dual X - Titanfall mod
Squabba posted a gallery image in Members Albums Category
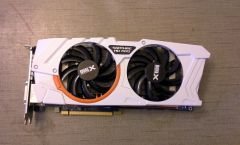
From the album: Titanfall Special Edition PC
-
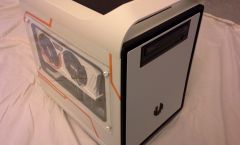
From the album: Titanfall Special Edition PC