Search the Community
Showing results for tags 'painted'.
Found 16 results
-
Hi, I'm Philipp and i've bought an refurbished Dell Latitude XT3, only problem so far .....someone painted it in black with Hammerite ore something and the Company that sold this Laptop didn't noticed it. Some ideas how to remove this stuff without damaging tue palmrest, the Aluminium or the touchpad ? Thanx for Answers and sorry for my maybe bad english, Philipp

-
I recently decided to repaint my two R9 295x2s, but after some searching I could only find one other person who had done it, and they had made a post on here in 2015(found here). The original plan was to go straight ‘black,’ really it was iron, for most of it, and have some red grills. Well, that turned into painting the front plates, the insides of the letters (it triggered me that the other person who painted one of these cards left the letters stock) and eventualy the backplate once I have a design for them. Note that this is my first time painting really anything at all, so they look rough around the edges of course. I get that red and black is overused, but the scheme works great with my next motherboard and my also recently painted/modded case. This took about 4/5 days and about 16 hours of actually doing something, which includes the time for case painting, and they turned out better than I’d expected, but I still think stock was cleaner and more pleasing to the eye. Here are some images I took before painting them. Sorry, I didn’t have time to set up good photos of the painted cards, I will once the system is back together again.
-
I have a Bose Soundlink AE2 headphones any reccomendations on someone who can custom paint it? I want the blue trim to be white, look at attached pic if you dont know what i mean. (Dont say colorware as they dont support my model of headphones)
-
My Targaryen-themed Corsair 750D build: CPU: 5930K @4.5GHz cooled with an Swiftech H240 X2 Mobo: Asus X99-A RAM: 32GB of GSkill DDR4 SSDs: 500GB Samsung 850 EVO (OS and apps) and 3x 300GB Intel 320s in RAID-0 (game drive) HDD: 4TB WD Red (behind mobo tray) Video cards: SLI MSI 980TIs: the top is a Gaming G6 with Corsair H90 liquid cooler and the bottom is a Lightning (obviously) PSU: Corsair AX1200i The front is a fade, painted with red plasti dip. I have some more touches to add to the outside, and then the interior is next, cables and such.
-
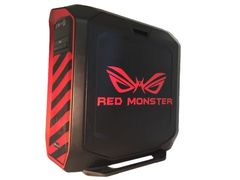
Hi Guys So yesterday I took screwed off the parts, wich I wanted to spray. I took everything and went to my grandfathers paintshop and started. Before I talked to him in order to get a template for me and a friend of mine. (the top one is mine) so here we are after 3 Minutes of painting and maybe a preperation time of 15 minutes and the time it needs to dry. After we take of the paper wich covered the rest of the side panel, it looks like that. So after it dried we removed the foil. And voila. It's not perfect but it looks awesome and I'm proud of myself I didn't just paint the side panel. I also sprayed the mesh covers. I wanted to have strips on it. So we covered the surface wich should stay black with special tape. after we were finished with that, we sprayed the mesh covers. Then removed the tape. So then we're almost finished. I also painted a part red in the front and back. I didn't take a before pic so heres just the after. We have finally painted everything. So I put the parts back on again. LADIES AND GENTLEMEN I PRESENT YOU THE RED MONSTER. And here one from the back Sorry for my bad english And please dont judge my photoshop skills on the last two pics. I hope you liked it and thanks for reading/watching/looking at my pics. All pics made with my awesome iPhone 6 Plus I will also upload a video on here if that is possible and if not one on Youtube which you can watch if you like to. I will also post updates on the PSU Shroud when I get it or make it. Noaboa
-
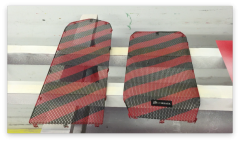
From the album: RED MONSTER
Corsair 780t mesh cover top and front with red stripes on them.© Noaboa
-

From the album: RED MONSTER
Corsair 780t mesh cover top and front with red stripes on them.© Noaboa
-
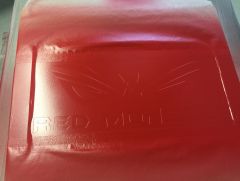
From the album: RED MONSTER
© Noaboa
-
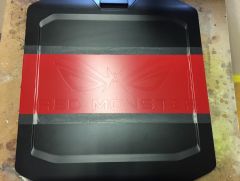
From the album: RED MONSTER
The side panel painted red. -
Hi Guys, The result of my first attempt painting my GPU using PlastiDip. Cheers!
- 39 replies
-
- 22
-

-
http://i.imgur.com/QDygeSB.jpg http://i.imgur.com/pFCiiTW.jpg Just got my backplate from EVGA and painted it white to match the system. I think it looks quite nice. Sort of adds a "floor" to the build.
-
Welcome to my Corsair Vengeance LP painting mod-log! Today I will be showing you the process of how I painted my RAM to make it white. The RAM is a 4x4GB kit (16GB total) of Corsair Vengeance LP 1600MHz CL9 DDR3 1.5v. This mod was inspired by the white corsair Vengeance LP RAM seen in this image: When I first bought my RAM a few years ago I did not have a set colour scheme for my system, so I just bought a quad channel set of black. Recently I have been pushing my PC towards a full-white colour scheme, and white ram was on the list. I first considered buying 32GB of dominator platinum as an upgrade, but I didn't have an extra $600 to spend on RAM. Instead of buying two kits of the white RAM I posted a picture of above (which is basically the exact same as what I currently have, except with a black PCB and lover operating voltage) I decided to just plastidip mine. I followed this useful video tutorial to know what it would be like when I started this project. It gave me a pretty good idea of the process. Here are the pics! This is just after removing the heat spreaders from the RAM. The thermal adhesive was hard to remove, and just like the video, it took a long time to get off of the RAM chips. The heat spreaders were easier because I just had to soak them in alcohol and rub it off. To paint with plastidip, the thing you are painting cannot touch anything else or it will get stuck. The plastidip would have glued my heat spreaders to the cardboard, so I used cable marrets hotglued to the bottom (where there will be no paint) to hold the pieces of the cardboard. Then I started painting. A few light coats at first to get the base layer stuck on the metal... 10 coats later...starting to look white! In the mean time, the bare DIMMs sit inside my PC... Here they are, ready to be re-clothed! Here I am using double sided tape to secure the RAM to the heat spreader. Before you comment on this, be patient and wait till the end of my post, I will explain more there Finished painting! On the DIMMs: See this gap? The adhesive tape I used was a bit thicker than the stock thermal pads, which makes the heat spreaders sit apart from each other. Solution? RC car tire glue. Strong, instant, transparent. The process of gluing... A few drops are more than enough strength. And the finished product! You can see the glue because of the glare. When it is inside the case, it is almost invisible IRL. No more gap! All DIMMs finished. I feel proud. This is what they look like inside a PC: Keep in mind this is my old case. I recently switched to an NZXT S340, and it looks much better there. S340 mod-log coming soon! And last one! Ok so that was a long process... Let me explain why I used double sided tape to secure the heat spreaders on to the RAM. 1) The guy in the video used double sided tape, and has not had any issues for the past 4 years or however long that video has been up. 2) RAM doesn't get very hot unless you overclock it. 3) RAM heat spreaders are mostly for looks, although they do dissipate a bit of heat. Many budget kits come with no heatspreaders because its not necessary. 4) I do not have ANY place near me that sells thermal pads. So I have noticed my ram does get hotter than before, about 50C when before it was at about 40C, but RAM can take pretty high temperatures, 70+C safely. I have decided that when I get a chance, I will order some proper double -sided thermal adhesive from this site I found called DAZMODE which is located in Canada. When I get the thermal adhesive I will replace the tape I used. For now, the temps are safe and nothing will be damaged, but in the long run I will feel better having the heatspreaders doing some work, even if they are 50% covered in paint, t will still help dissipate the heat. Overall I think it was a successful mod, and I really like how it looks. I think I have some special feelings towards matte-white paint :lol: If you have any questions let me know! Thanks for visiting, and look forward to my upcoming S340 mod-log!
-
Hi : ) Welcome to my H100i mod! After years of wanting a white AiO liquid cooler to match my colour scheme, all I found on the internet were unsatisfactory results. Some of the solutions people have done before are these: "Wrapping" the H100i's tubing with some white tubing cut along the side. I decided against this option because the H100i's tubing thickness is perfect, and putting some 1/2" ID 3/4" OD tubing over it would look horribly thick. "Modding" the H100i by removing the stock tubing (obviously voiding the warranty and potentially ruining the H100i) and replacing it with some regular custom loop tubing. I also decided against this because it is difficult to bleed air from an AiO that is not meant to be taken apart, and possibly having a leak. For some reason I have found 0 images of a painted H100i no matter how hard I looked for hours. So I decided that this would be my best shot at success: As most people know, PlastiDip is a special paint that is flexible, and creates a sort of rubber coating on any material, including rubber tubing. This is the only paint that will work for this since the H100i tubing will need to bend and flex when getting installed. So I began the preparations. Here is the H100i after being take out from my PC: This is my PC with a spare cooler I had, because I needed it to be up ASAP to keep my servers running. Now I began wrapping the H100i with paper and tape to prevent paint from going where I did not want it. I also chose to paint the top of the CPU block, because I wanted something to stand out in the centre of my motherboard, not just the white tubing going into a black motherboard. I chose not to paint the radiator because you cannot see it when the side panel of my 800D is on. So I finally began painting. But I made a mistake. I followed the instructions on the paint can to add a layer until it appears wet. This is what happened: Hundreds of bubbles appeared on the surface. The more layers I added the worse it became. I finally decided to start from scratch and NOT follow the instructions on the paint can. Here is the process of removing PlastiDip - it is rather enjoyable. So I began again. Thank god I bought two cans instead of one. I knew buying extra would come in handy... This time I sprayed light powdery layers and let them dry 30 mins in between. Soon I was satisfied with the finished product. It has a matt white (not glossy) finish that I really like. Glossy finishes make dust really noticeable, especially in pics. Matte for the win! And finally I remove the paper and tape. Behold the white H100i!!! And now with the fans on So overall this has been a pretty successful project. I would have liked to paint the sides of the H100i too not just the top, but the small cracks, crevices, and connector plugs deterred me from doing so. Maybe in the future I will give it a shot Now for the finished system pics: Let's turn the lights on (my white balance makes the white LED lighting look kinda blue...) Thanks everyone for coming by!
-
So I decided to paint one of my fans yesterday. Not the shroud, but the blades. It was a a standard NZXT 140mm case fan. Black frame w/ white blades that I wanted blue instead. So I painted it! I also decided to paint a few screws and prep the PCI slot covers on my case to also be painted the same shade of blue. What follows are the work shots I got of everything and the finished fan and screws. I apologize for the crappy quality of the images, they were all taken with my phone and then I had to downsize them for the forum. Materials used: Scotch Blue Painters Tape X-acto Knife Krylon Fusion Paint (Blue) The Fan The Screws The PCI Slot Covers taped and ready To anyone who has anything to say about painting fan blades: I know the paint job is not perfect, it was my first time painting anything like that. But there is no degredation in sound or increase in performance. It was not a precision engineered fan to begin with so paint didn't add much of anything. There is a little bit of noise that is barely audible but it has always done that and i wont hear it with the rest of the system on anyways. I would not attempt to paint a fan that has specifically engineered blades (such as Corsair SP/AP, Silverstone AP123s, Cougars, etc...). Make sure to leave feadback. There will be an update to this thread tomorrow sometime when I get the PCI Slot covers painted.
-
Hey there this is not that good of a mod as it failed to a degree but I thought I would share it with you guys anyway. I am doing an 'all white' build soon for my sister (who doesn't have a large budget) and decided to experiment a little with cheaper options but also make it look good as my first gaming PC was about NZ$3000 First off i disassembled the fan from the aluminium fins and spray painted it with a primer coat, then again with two coats of white spray paint (just a random non heat-resistant spray). This also meant pulling out the 'snap on' pegs, one of which broke during the process. I have yet to fix something to the top of the cooler in place of the intel sticker, so I have just cut a simple white paper circle for the sake of hiding internal components for a photo. The 4-pin cable was rather painstakingly sleeved with some of Lutro Custom's white 550 Paracord and held in place with standard 3/16" heatshrink. This however made the cable much larger than its previously un-sleeved state and required me to cut/accidentally break some of the cable guides (the one on the top and side) which resulted in some paint flaking. Overall the experiment didn't go that great, but I love the all white finish (albeit a rough one) but I am wondering if anyone here has experience painting components would like to share some advice.
-
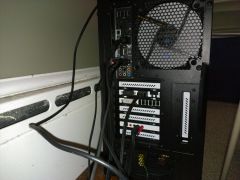
From the album: My PC
Something different about those PCI covers...