JokuTyyppi
-
Posts
400 -
Joined
-
Last visited
Content Type
Forums
Status Updates
Blogs
Events
Gallery
Downloads
Store Home
Everything posted by JokuTyyppi
-
 It has now been running untouched since my last update and it has been great! Just thinking about getting RPI 2 to speed up owncloud a bit... It is a shame that RPI 2 didn't come with gigabit ethernet either, and that would have been my main reason to upgrade to it.
- 72 replies
-
- 1
-

-
- raspberry pi
- raspberry
- (and 2 more)
-
Just making a backup of my main pc:s ssd with linux so if anything goes wrong, i can go back to 8.1
-
BTW there is no 200decibel The theoretical maximum is something like 194, and that is LOUUUUUUDDDDDDDDDDDD
-
Zenbox - A Tiny HTPC Build [Finished! April 6th, 2015]
JokuTyyppi replied to Razbit's topic in Build Logs
PROGRESS THUMB _ / (| ( : __ \ \_____ (____) ` | (____) | | (____) .__ | (___)__. |_____ LOOKING GOOD THUMB _ / (| ( : __ \ \_____ (____) ` | (____) | | (____) .__ | (___)__. |_____ -
This just the right way to kill and humiliate the consoles! Starting from the inside Nice!
-
Good to hear My sata -> usb adapters are stolen from existing external drives but you can get them from t.ex eBay or from your local pc hardware stores
- 72 replies
-
- 1
-
-
- raspberry pi
- raspberry
- (and 2 more)
-
Thank you! It is amazing how capable that small AND cheap computer is. Of course the speed isnt anything special, about 10mb/s but that is fine for me In addition to being a Samba server it is also hosting one website for my mothers work and running an owncloud server which I use with my schoolwork to keep everything synced with different computers. It is overclocked to 900mhz wihout touching volts, it helped a bit with the loading speed of the owncloud web view.
-
It is intake and I have thought about putting some kind of filter to it. It will just look less nice, but it is probably worth it I'll try to find something today, I think i have some filters left from my main pc
-
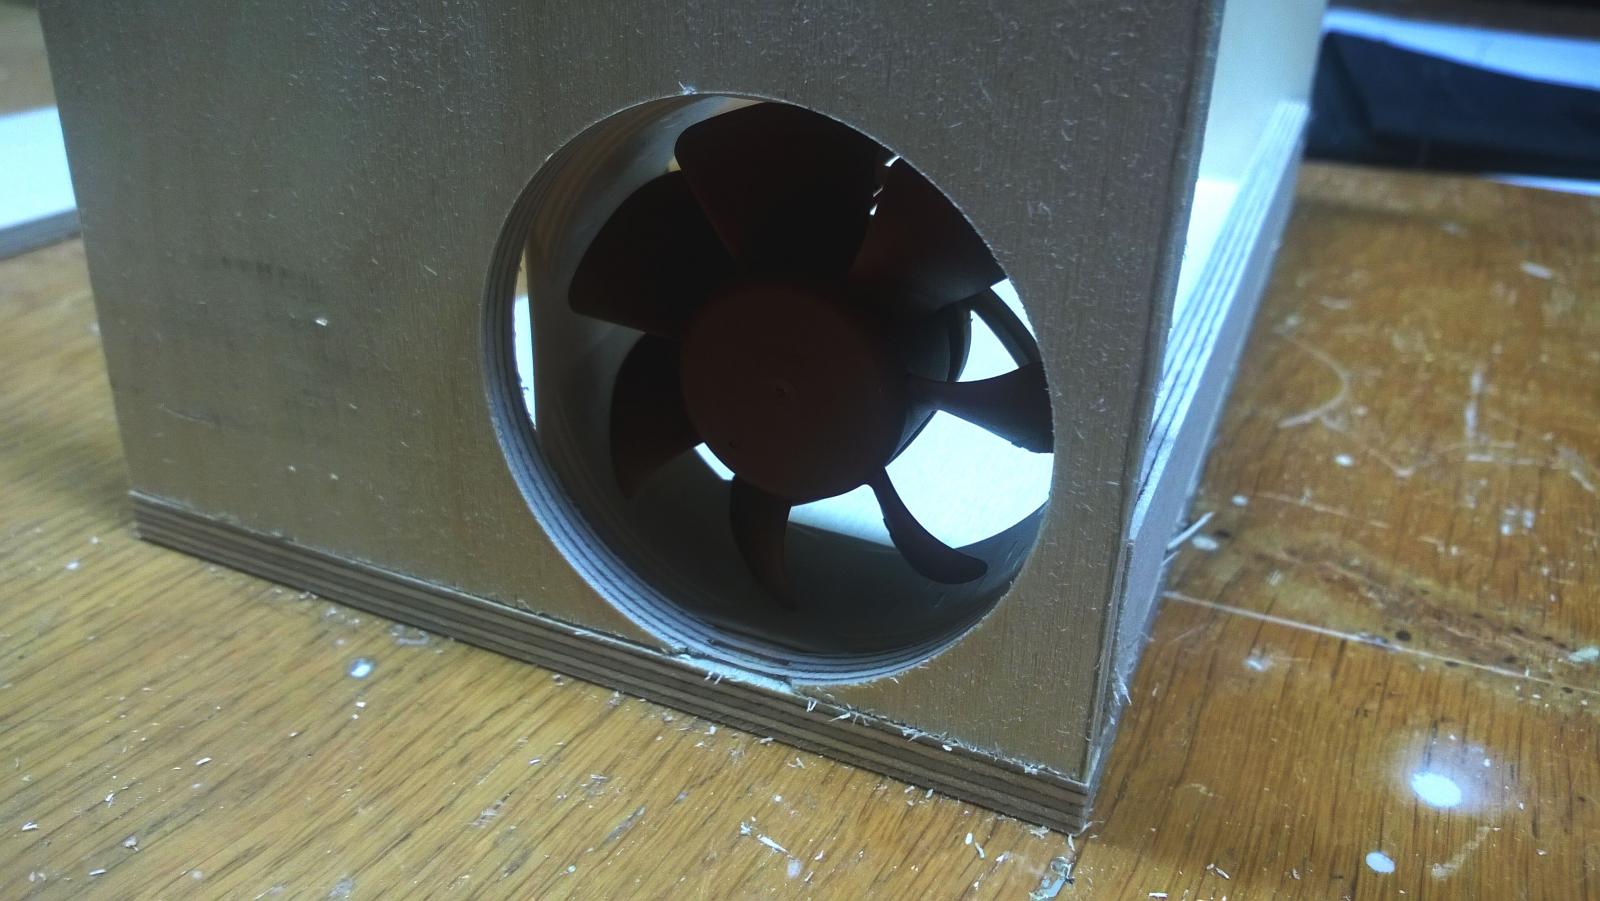
Thanks! I think it looks pretty good too, although there are some gaps here and there and the hinges are not the same model You see, I don't like noise When I was shopping the fan for this I was comparing some arctic cooling fan and noctua, both 60mm. It was a tough decision as the noctua was 15€ and Arctic Cooling was 3€. I thought that I will get mad at noise so Noctua was the way to go. There are still FOUR low noise adapters before the fan I could just have bought one bigger resistor instead of using the noctua ones. Would have been much cleaner and cheaper.
-
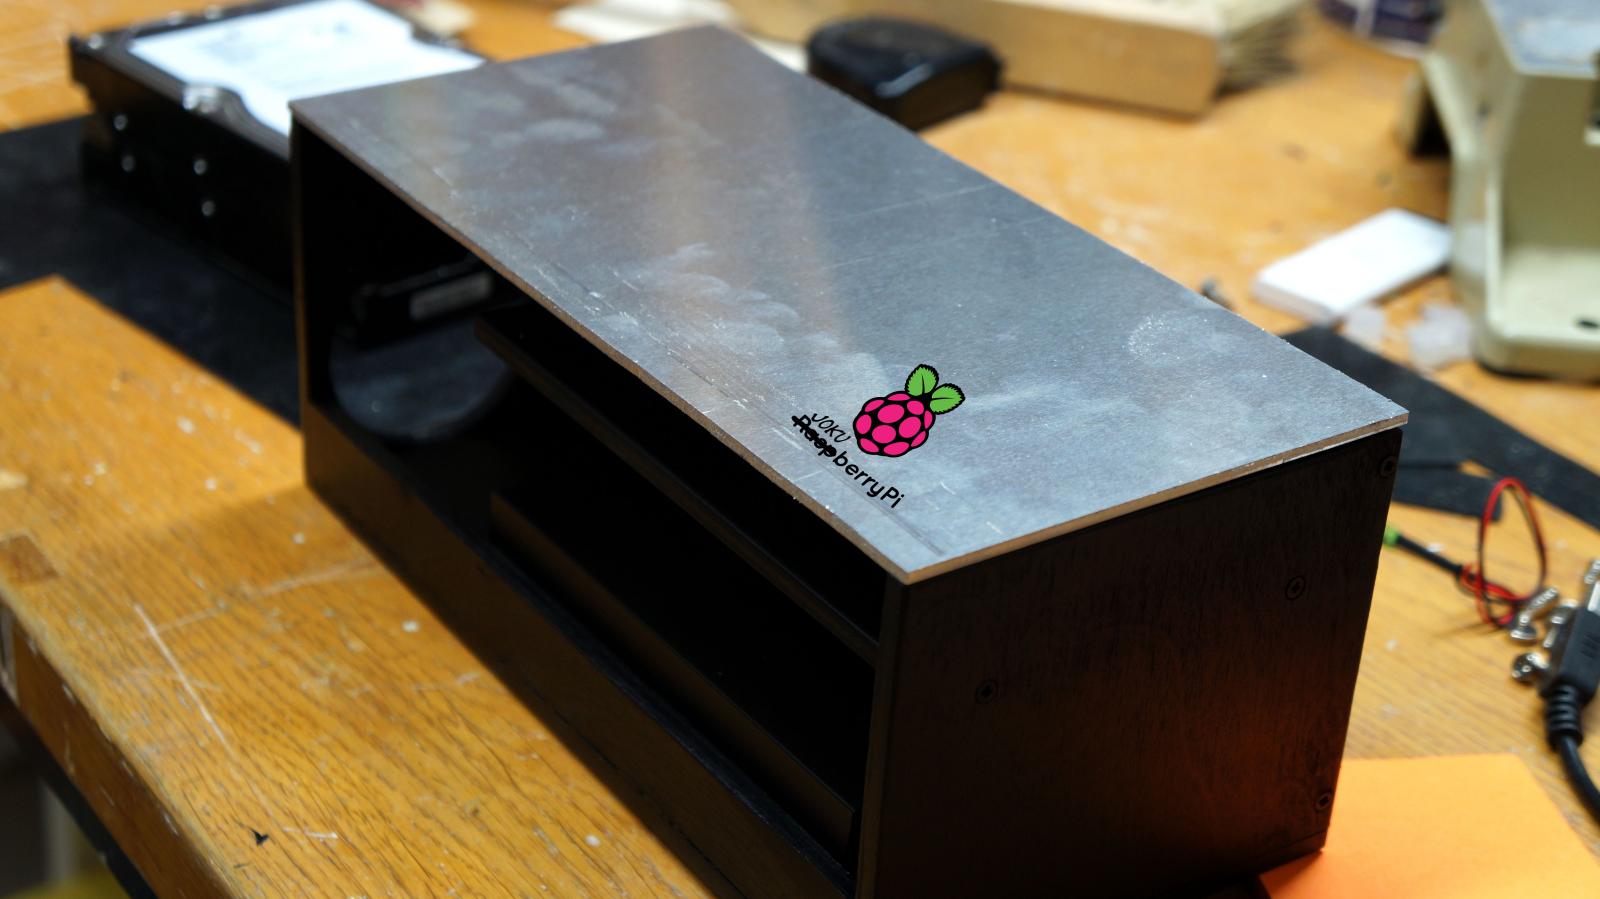
[uPDATE 20.2.2015Final] My Raspberry Pi home server is now finally completed First it was just about trying out something new and more reliable than just our home router with a hdd but after keeping it running for about a year, I decided that it is really going to stay and it needed a nicer case and most importantly, only one psu instead of four I wanted to make it as compact as possible, while still remaining some kind of airflow inside. I think the hardest part was actually the aluminum top and front as making it look nice took a ton of time and a LOT of nerves There were some nasty complications with the varnish on the aluminum so the finish is not as beautiful as it was but I am definitely not going to take the varnish off for third time, it is a real PIA. Thanks to my friend Razbit for providing some of the electronics, soldering those small wires straight to the pcb and making some things not so f*cked up In future I might change the model B Pi to some other small form factor pc that has a gigabit connection but it is not going to happen anytime soon Feel free to comment! Here are some pics: See u around
- 72 replies
-
- 4
-
-
- raspberry pi
- raspberry
- (and 2 more)
-
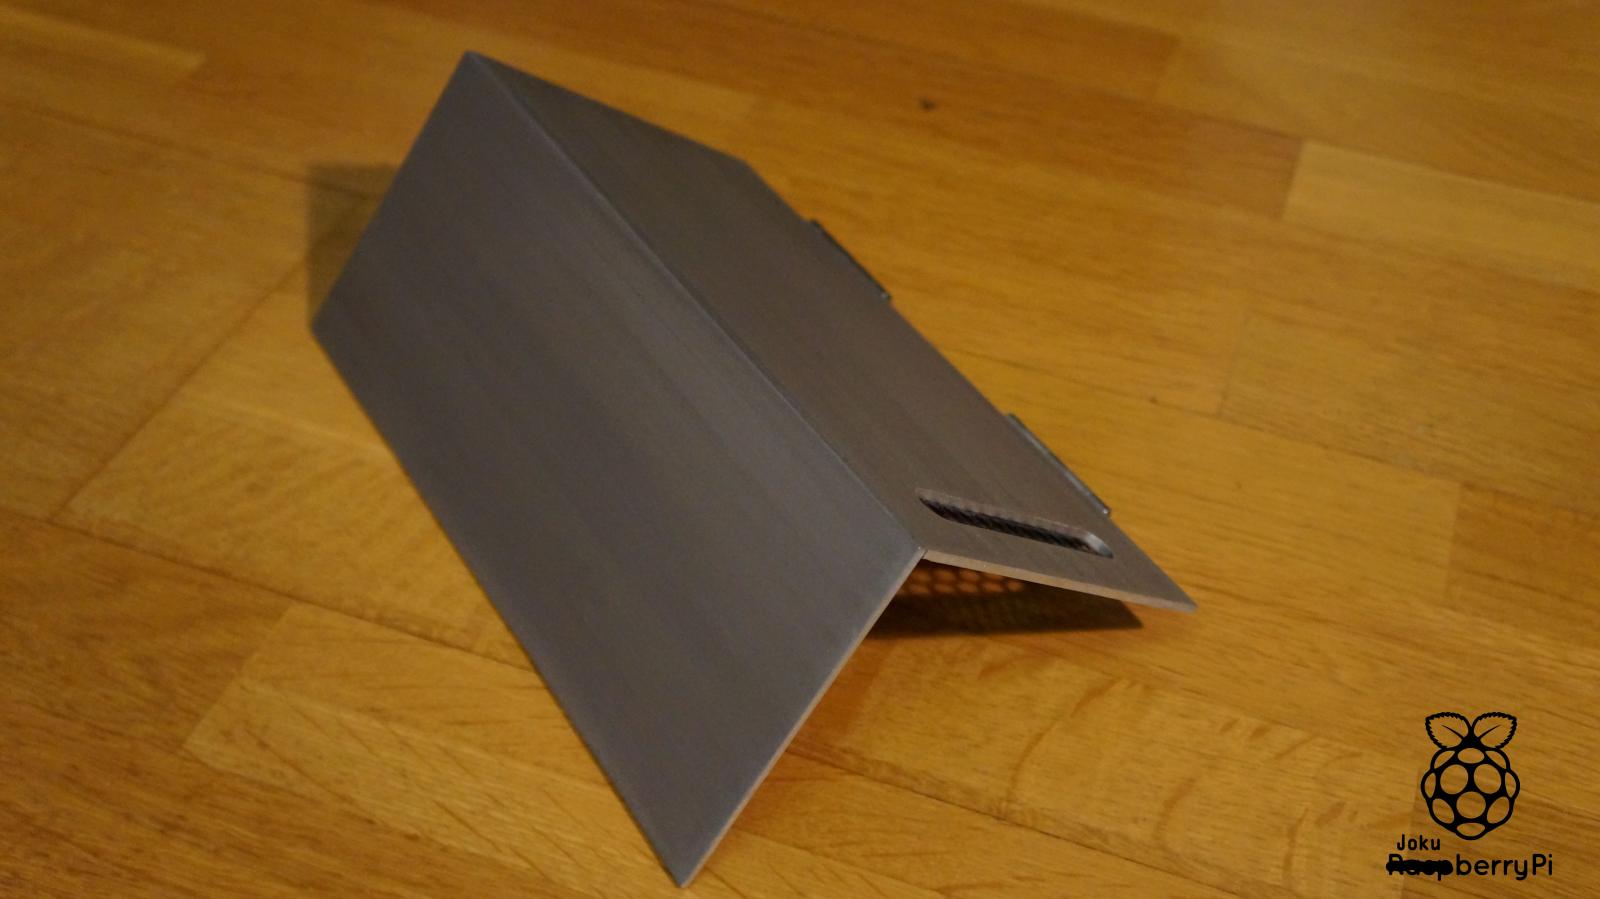
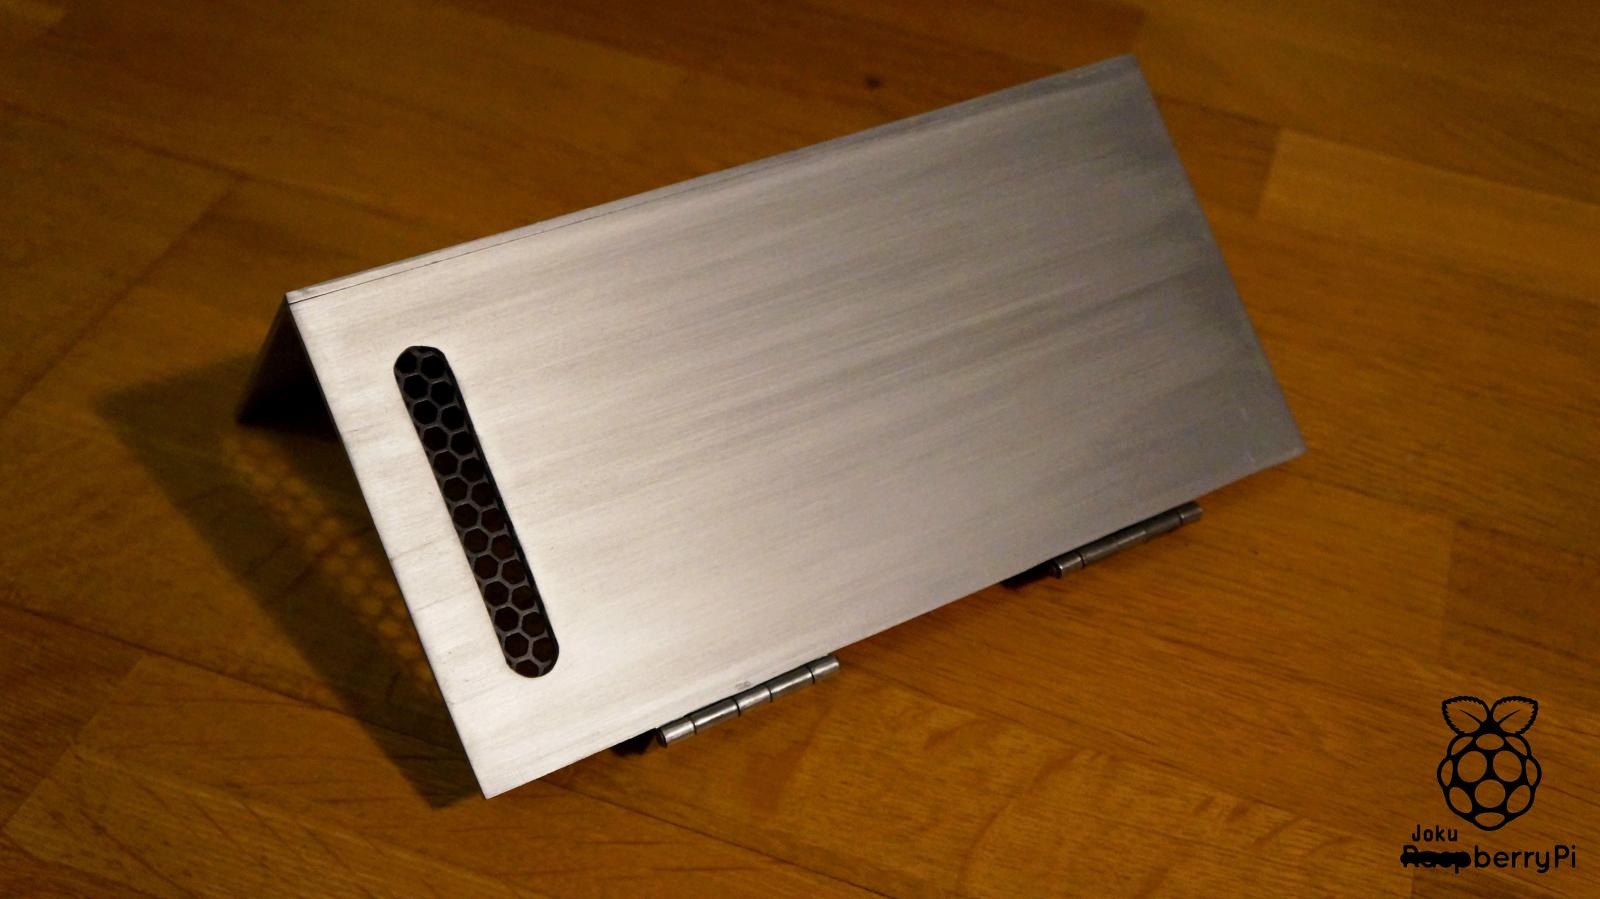
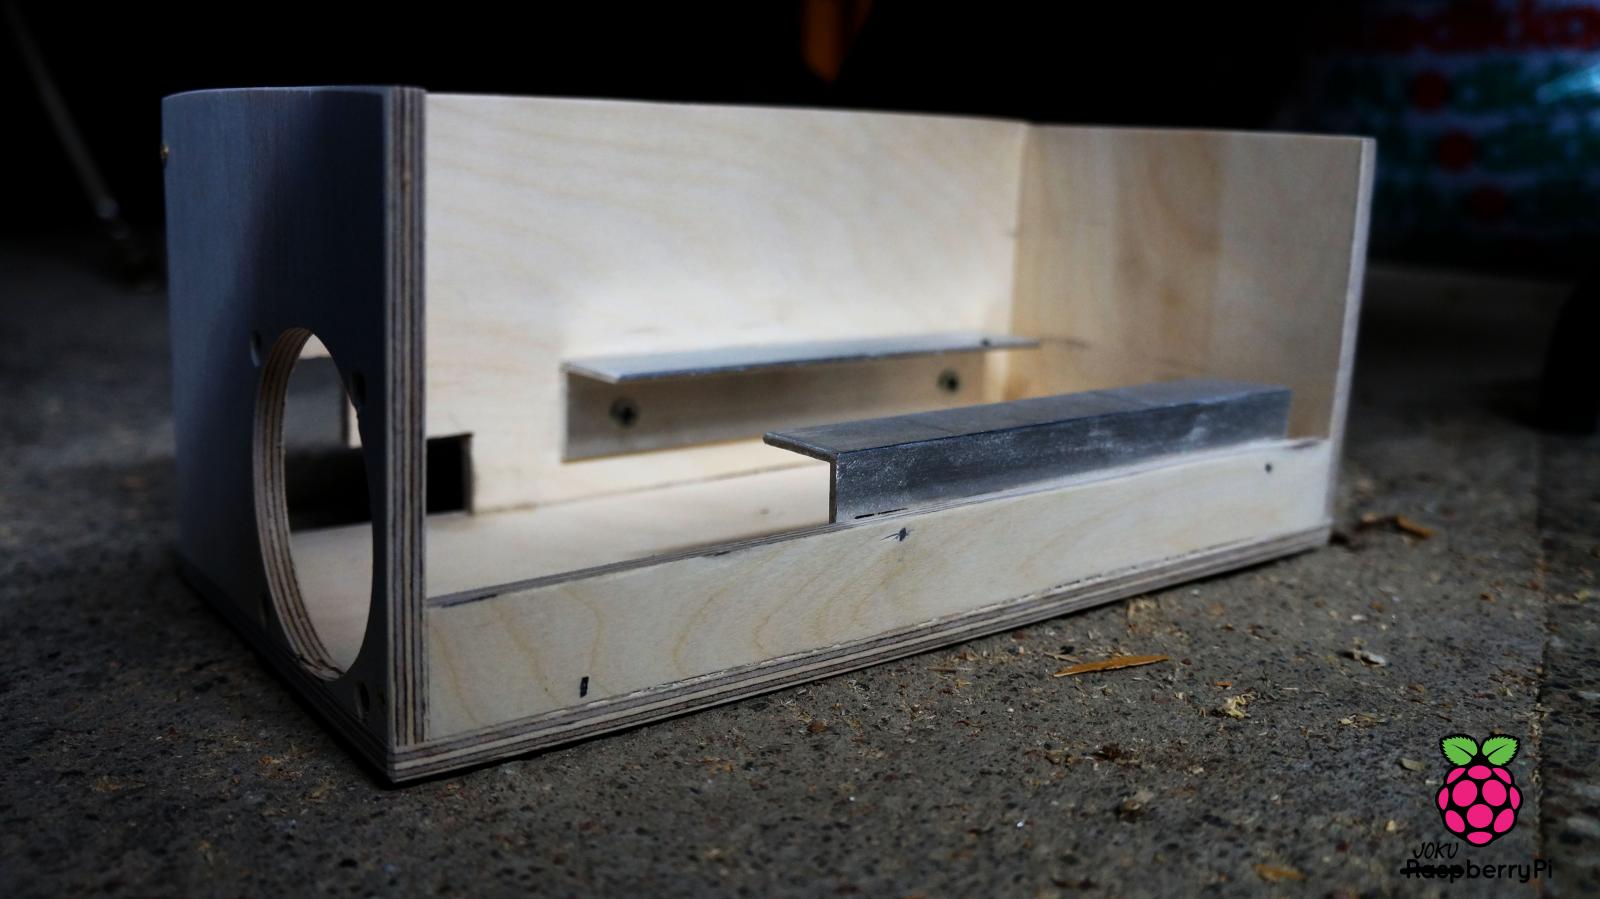
[uPDATE 20.2.2015] Hello again, the aluminum cover is now finished and is being glued to the rest of the build right now. I just decided to give you some pictures before showing off the finished build tomorrow. I think the aluminum came up pretty nice for what kind of equipment I had It is not perfect, but looks pretty damn good to my eye at least On the other hand, the wooden part of this build is not quite straight I tend to do things a little (but luckily only a little ) f*cked up and I have a motto that I never get anything straight ( In terms of things, not people ) Sooo there will be some gaps between the aluminum and the rest, but you'll see tomorrow I hope ' So here is the aluminum top and front cover:

- 72 replies
-
- 1
-
-
- raspberry pi
- raspberry
- (and 2 more)
-
Yeah, even 80c wouldn't be much for a high end gpu A stock 780 for example would easily do 80c or an Amd R9 290x is 95c out of the box with reference design cooler So you are fiiiine
-
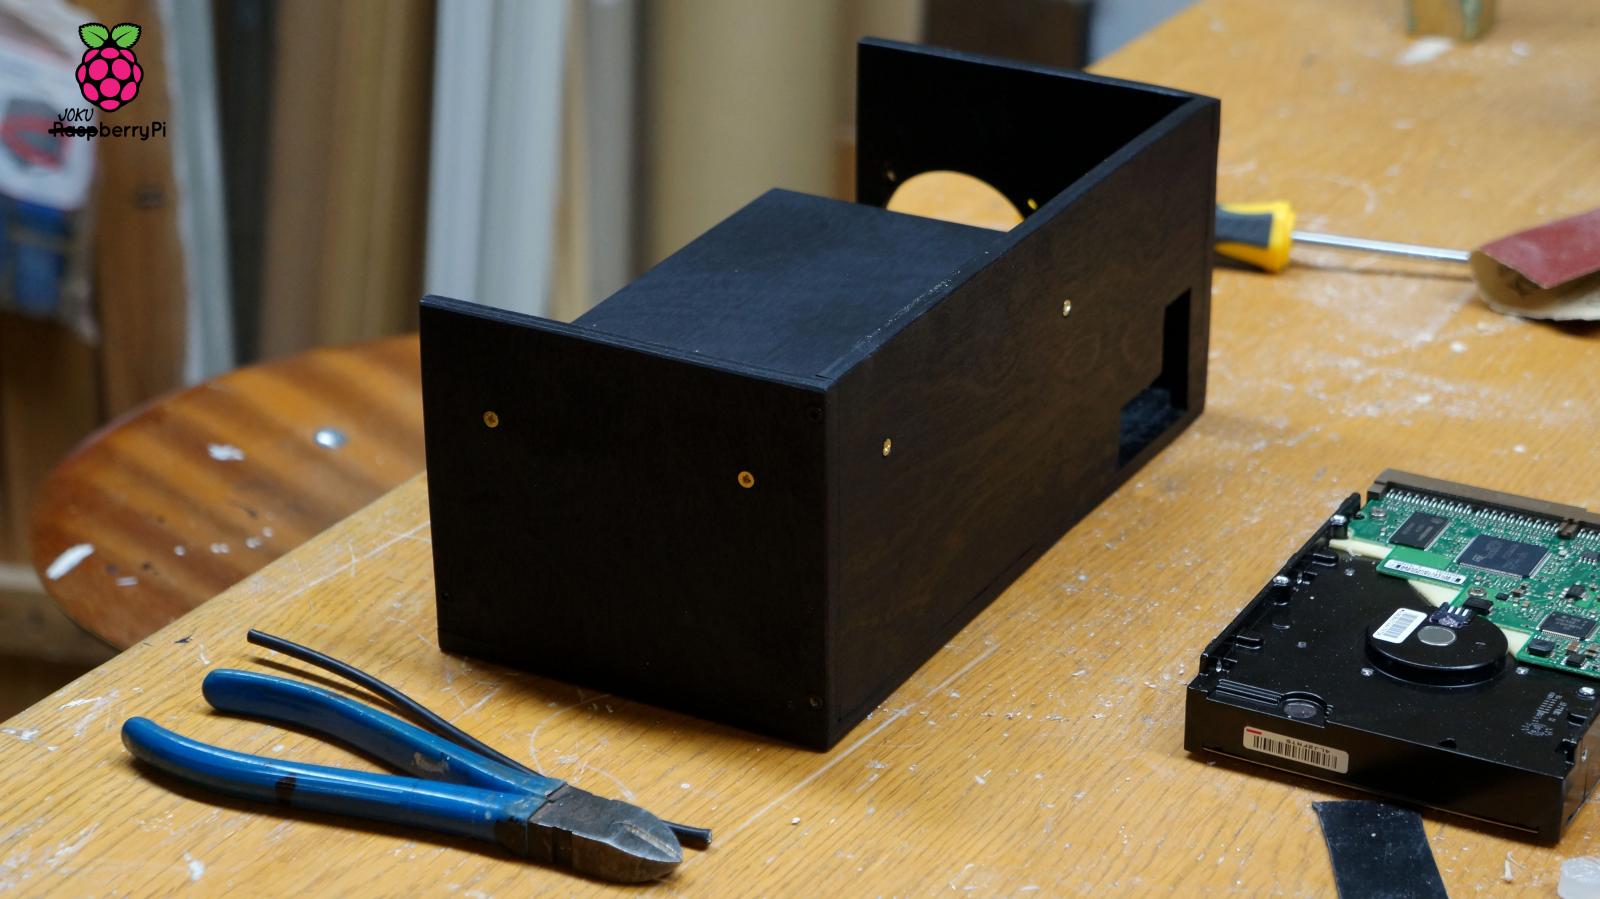
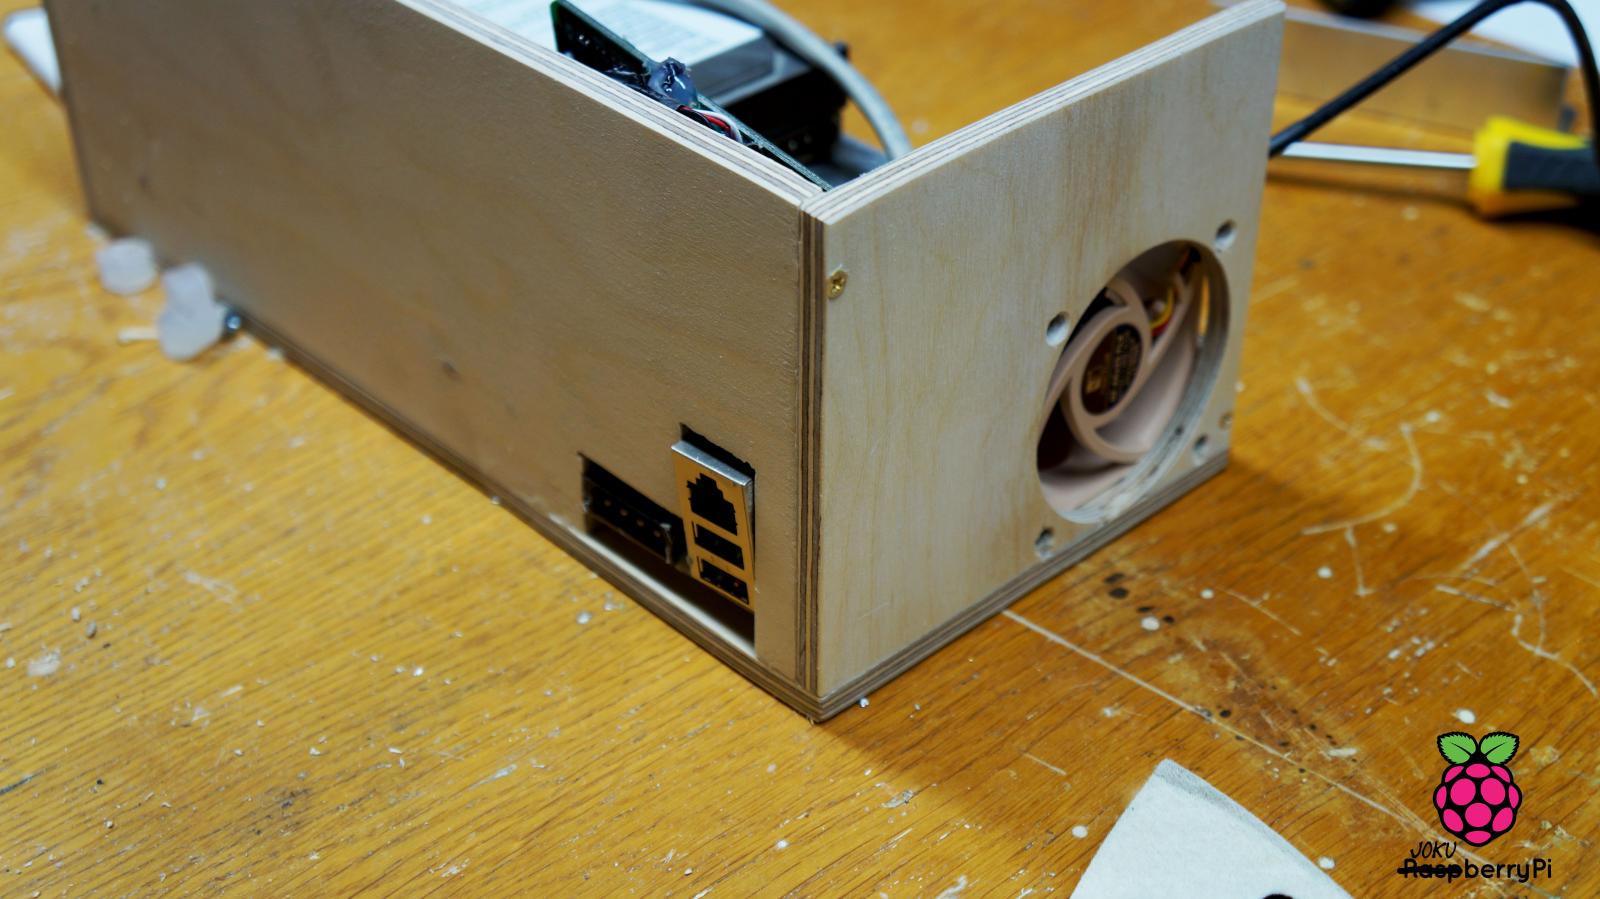
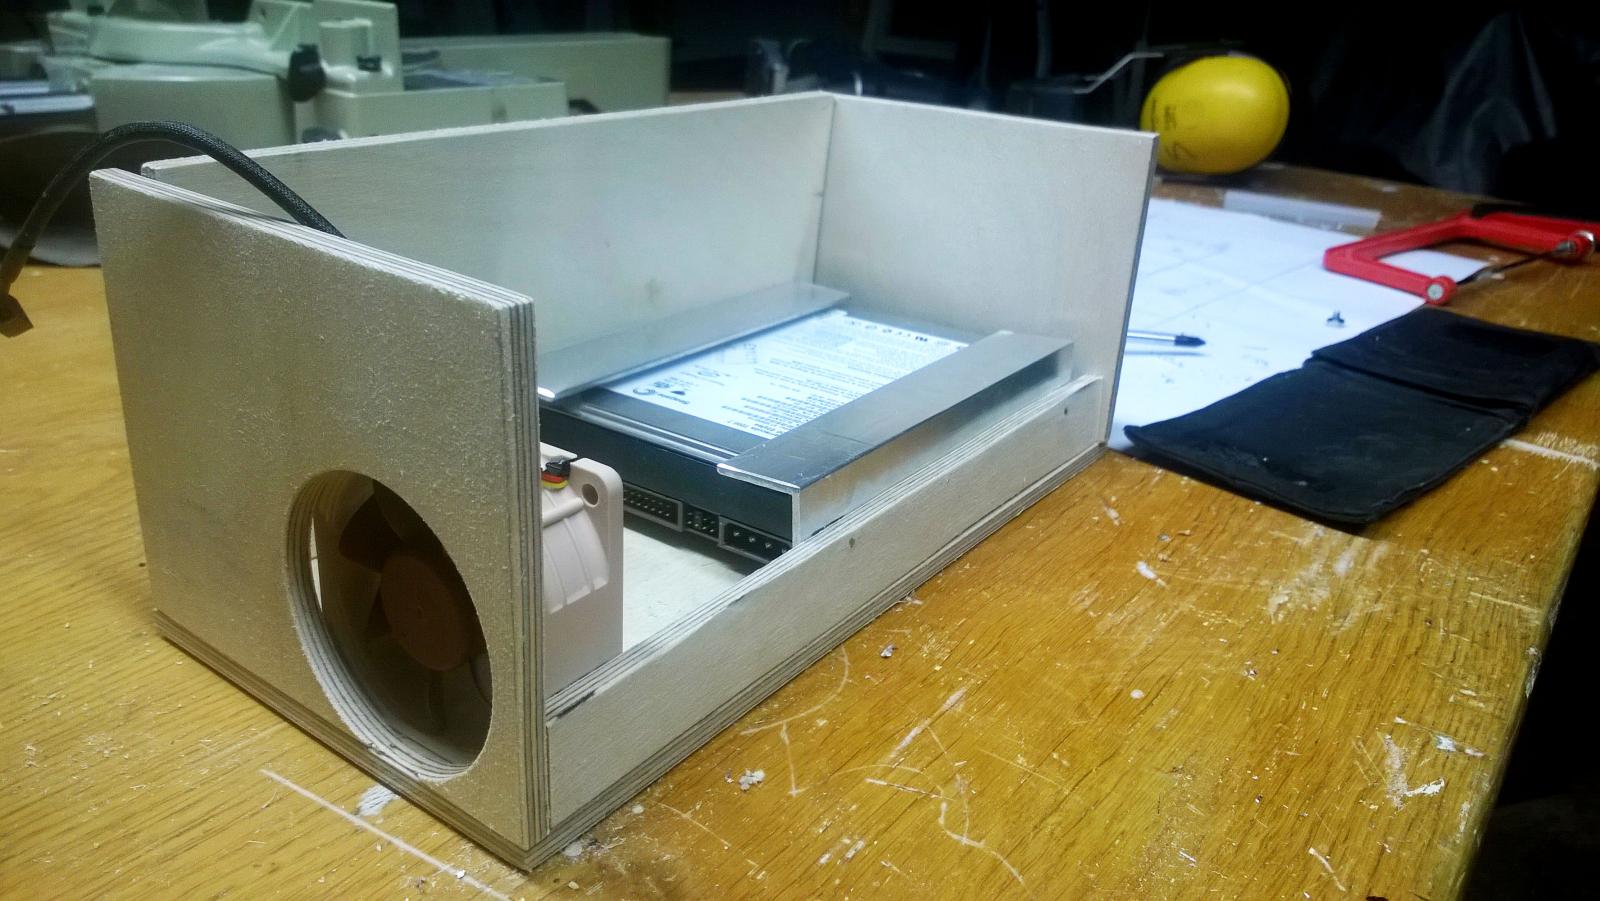
[update 7.2.2015] Everything is finally ready except the aluminum which is still waiting to be etched and brushed. I have already installed the components in to the case to see if it is working and IT IS! I think it is quite awesome to have all of those things powered with only one psu and have them crammed in such a small case Sorry for the pictures not being that beautiful as the thing was running when I took the pics and it isn't placed where it'll permanently be when ready. There is a switch for the second hdd so that it won't run all the time and is safe from some spikes in electric network
- 72 replies
-
- 4
-
-
- raspberry pi
- raspberry
- (and 2 more)
-
[uPDATE 3.2.2015] The wooden part is now painted and the electric thingys are sent back to Razbit. Also a wooden plate for the Pi itself has been created and painted. Aaaand last but not least I just cut the top aluminum. I am planning to just sand paper it so it would be like brushed aluminum. First I thought I would paint it black but now that the whole case is black, aluminum must be, well, aluminum
-
Sorry to tell you this but... I think you got ripped off quite bad But good thing is that now you have done something about that horrible, horrible dell devil inside that case.
-
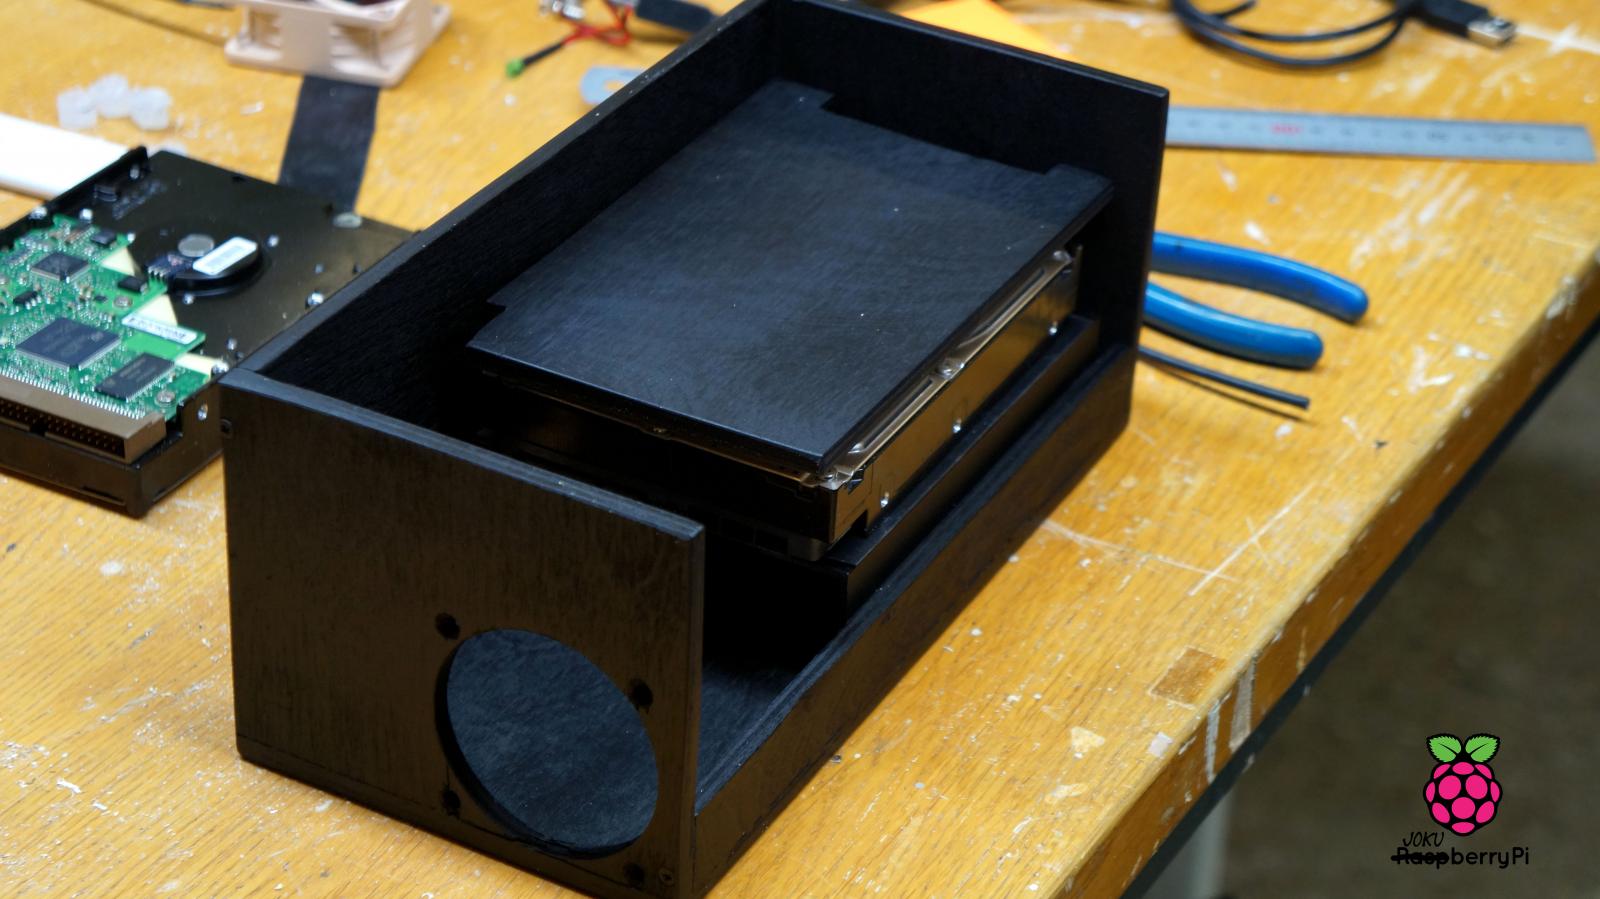
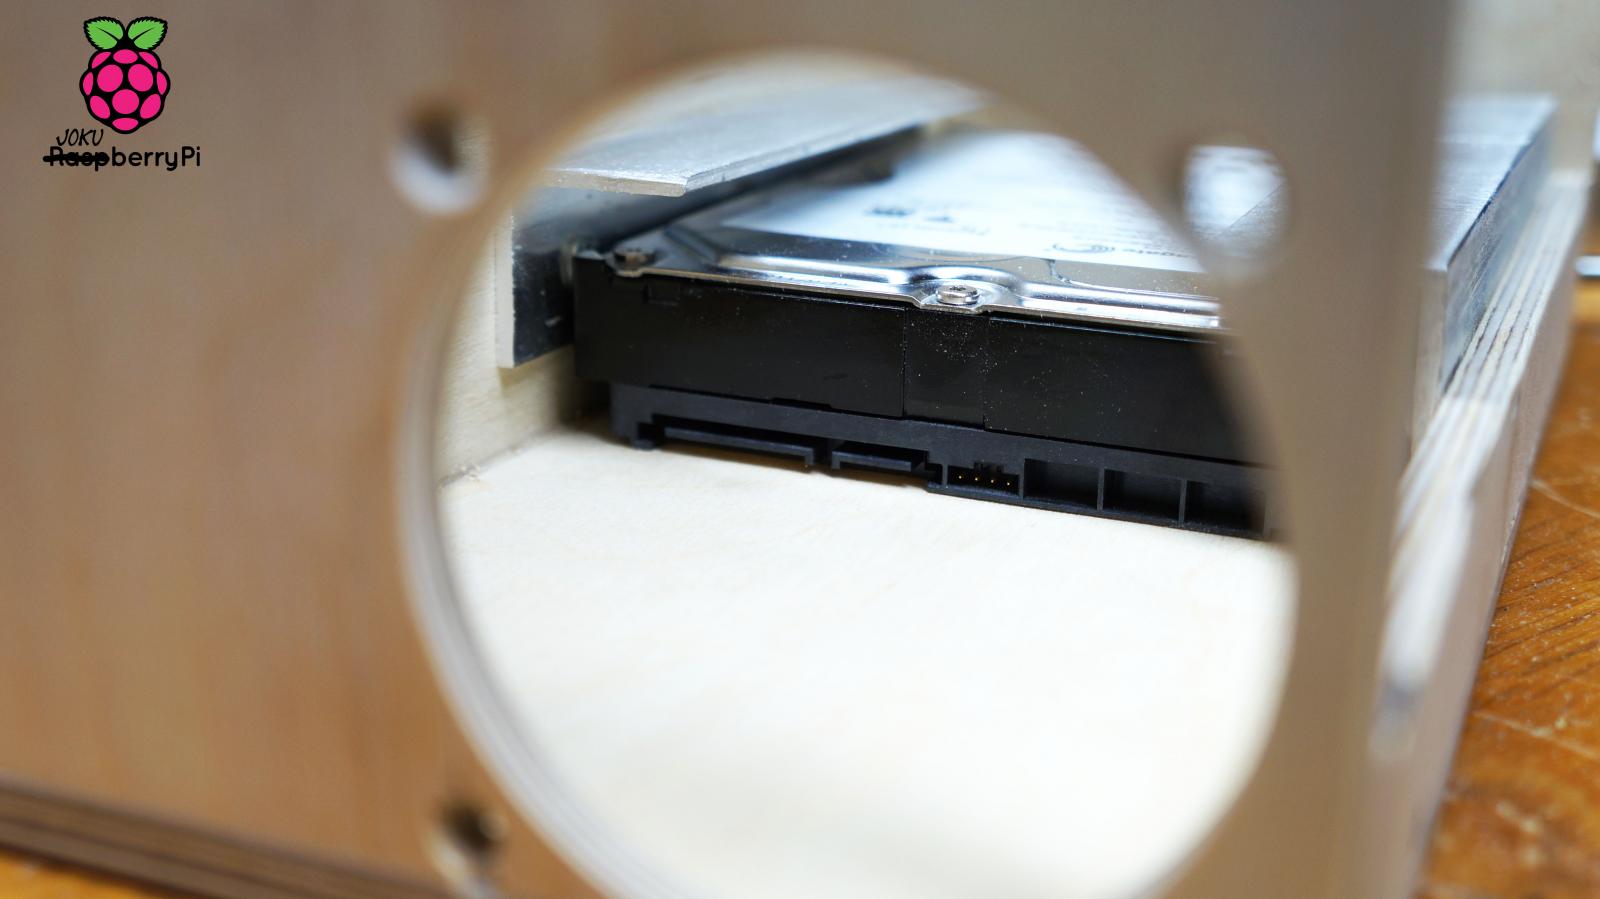
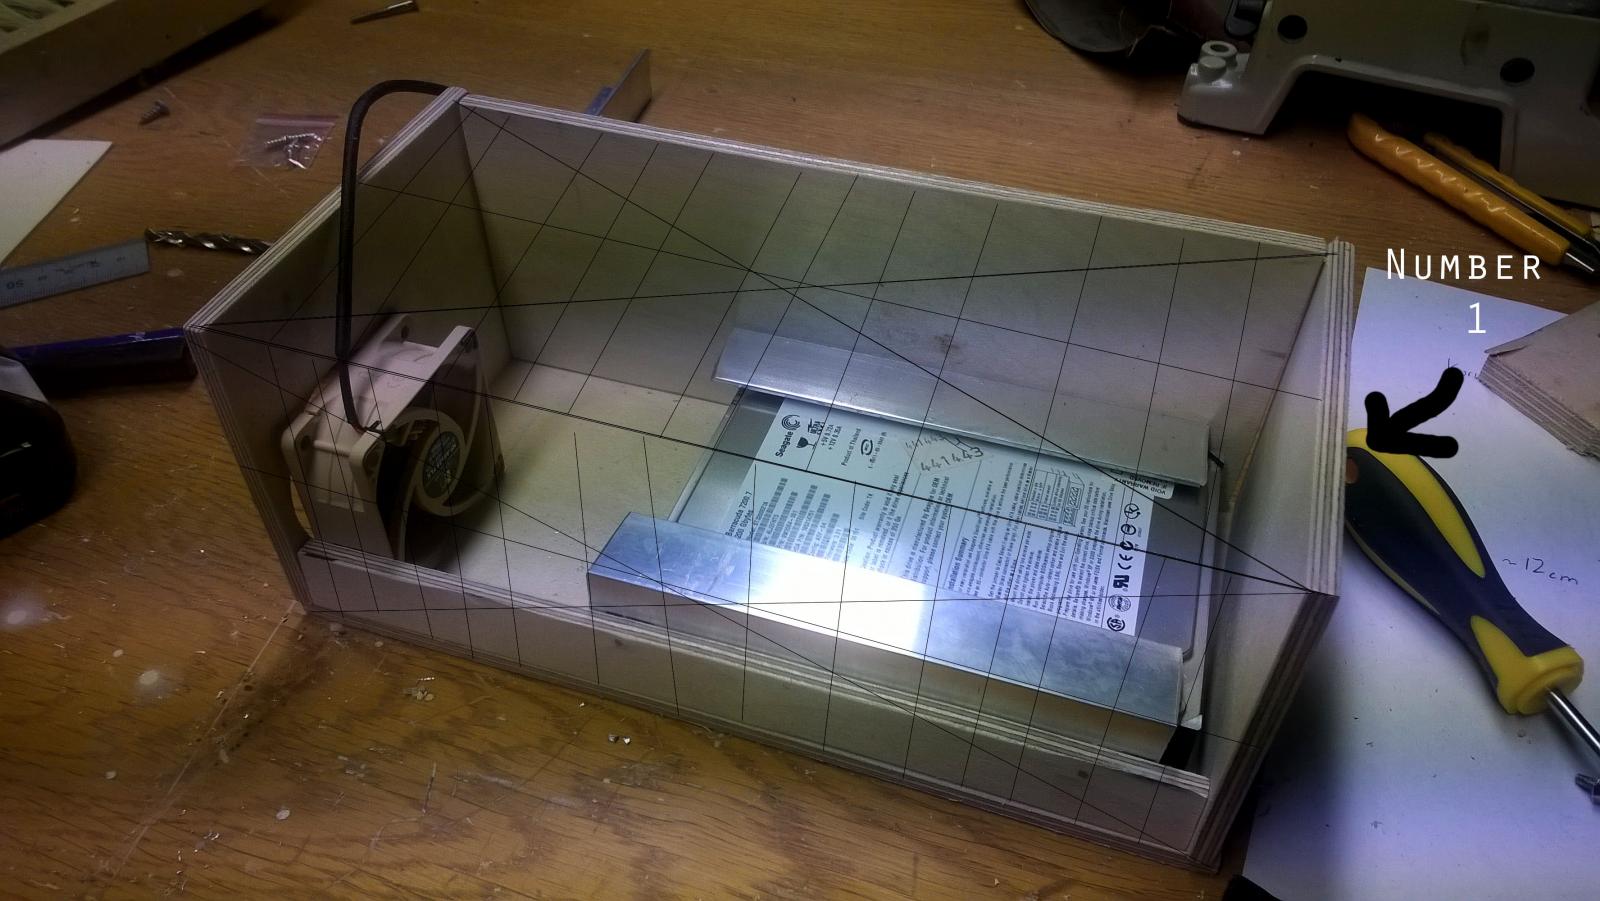
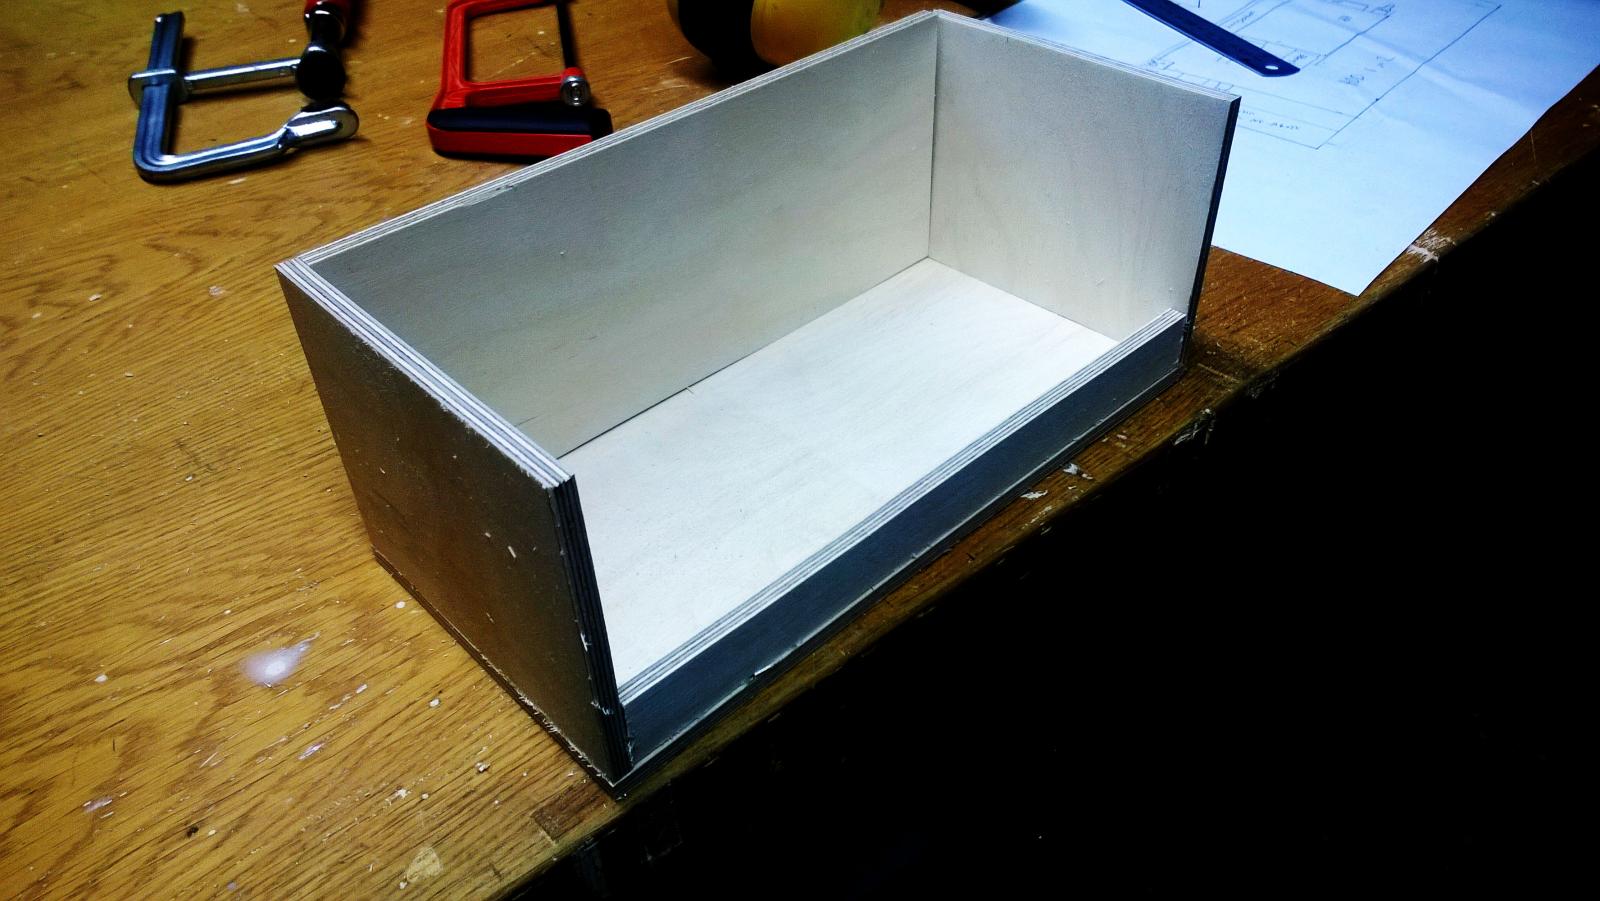
[uPDATE 29.1.2015] Now the wooden pieces are put together and it is waiting for a paintjob and the aluminium top and front covers. It is going to be a really tight fit with the Usb-hub and the Sata -> Usb adapters. I have also bought a WD Red 2tb and migrated all the files there. The secondary hdd will be stolen from my main pc (WD Green 2tb). The original 1tb drive that was with this Nas had 19500 hours on it!! I thought it would be time to switch to a new one I'll let the pictures talk as I'll have to continue reading for tomorrows history exam... The barebone case [ This is how the backpanel IO is going to be. It is not attached to anything in that pic so it is not straight. You see how tight it is? And those drives aren't the ones to be in this system. Seagate: No thank you!
- 72 replies
-
- 1
-
-
- raspberry pi
- raspberry
- (and 2 more)
-
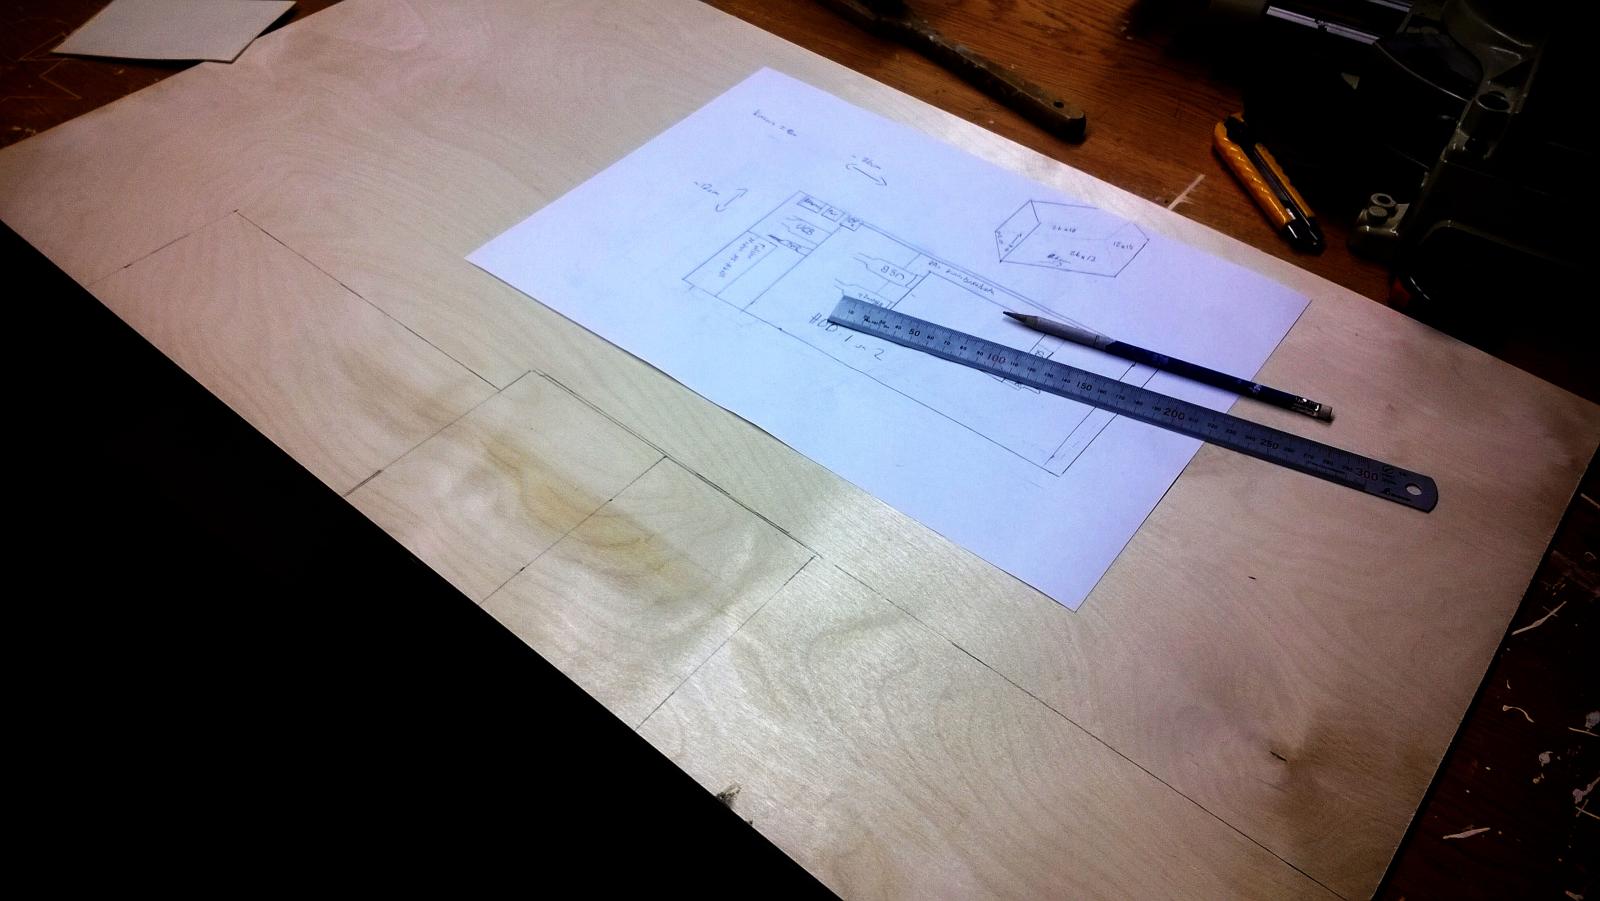
[uPDATE 25th Jan 2015] I was a lazy b*tch today and didn't do that much but managed to make a hole for the fan and some kind of mounting system (not finished) for the drives. Haven't been able to attach the pieces together yet, as my friend Razbit is still making the circuit board for the power and ethernet ports to the back of the case. After I get its dimensions I can attach the wooden pieces together and start sketching some aluminium. Not so sure about next weeks progress tho... I have an exam week ahead which may slow the progress a liiiiitttle but luckily not for long Tomorrow I think I will go and get one more 2tb drive and steal one from my main pc to upgrade RPi from 1tb to 2tb Nas Fan hole Overall image right now. That drive there is just an example, not going to use an ide drive Side number one (marked in the picture) will be also openable so that i can just slide the drives in and out. The area where i draw those ugly lines, will be of black painted aluminium.
- 72 replies
-
- 1
-
-
- raspberry pi
- raspberry
- (and 2 more)
-
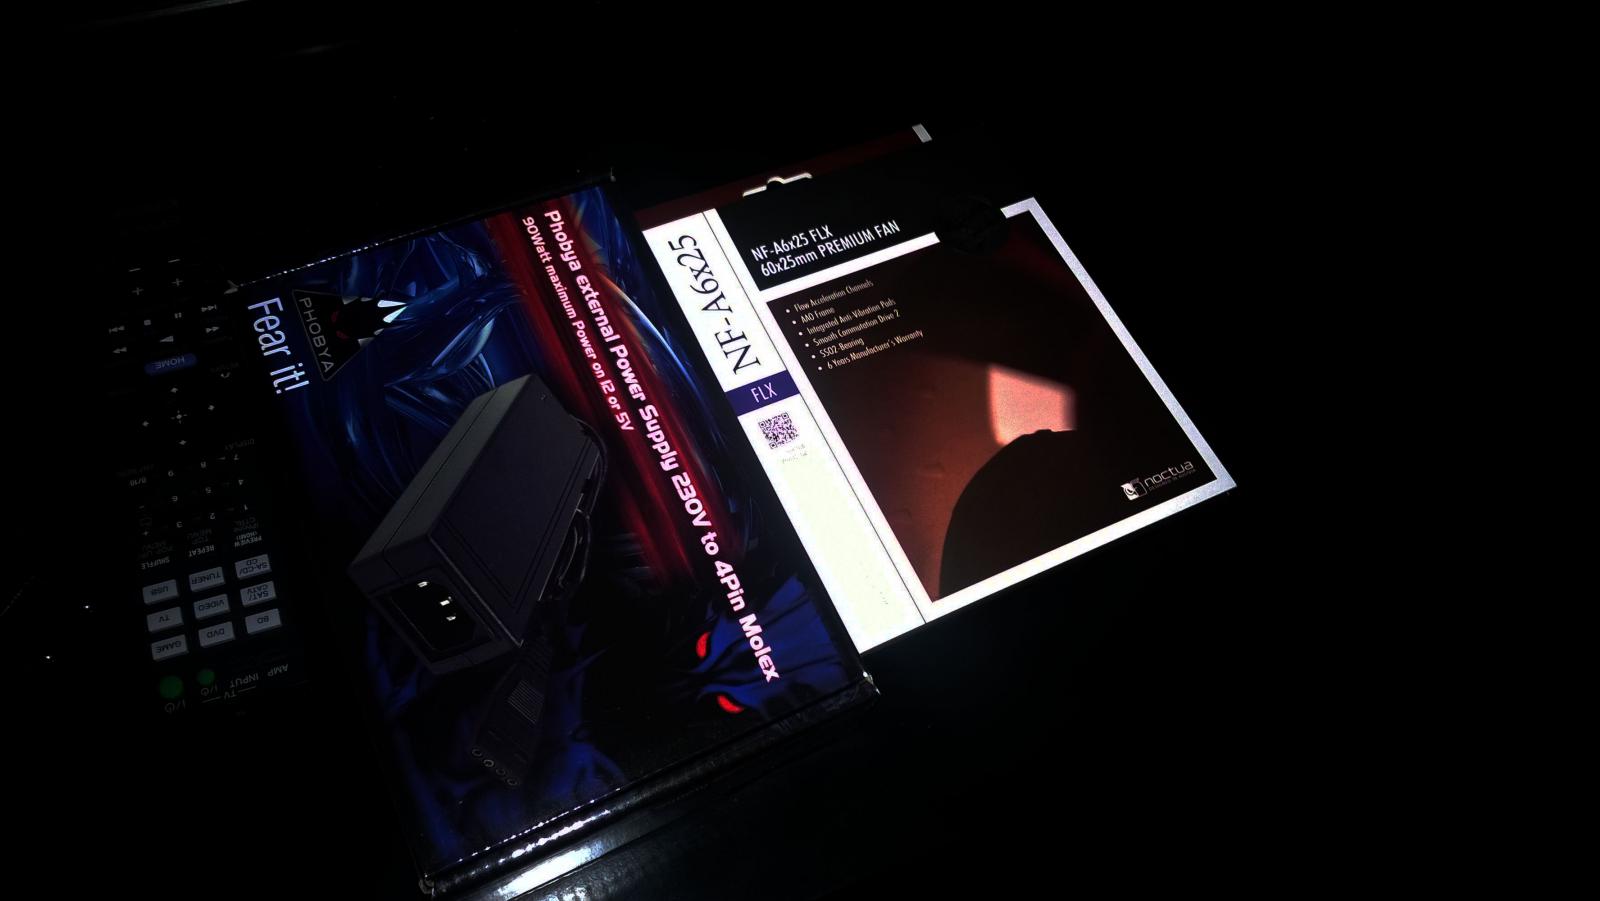
[update FINALLY] Finally a Real update. RPi has been fine but I wanted to do something about the big and bulky case I had it lying in. Also the massive number of FOUR transformers... From now on there will only be one nice Phobya psu which looks like a laptop psu but only has a molex connector in the other end. Molex is handy because it delivers five volts for RPi and 12v for the two hdds and one Noctua 60mm fan. I will try to make the case as compact as I can and it should also look good The main frame will be made out of wood but front and top will be aluminium. Not sure about the colors yet tho. I fetched some wood, psu and the fan today. Here are some pics of them, nothing spectacular yet Psu and Noctua NF-A6 Some sketching Here is how i plan to place the wooden pieces. The sides without wood will be made out of aluminium Thanks for reading, stay tuned for more
- 72 replies
-
- 1
-
-
- raspberry pi
- raspberry
- (and 2 more)
-
[RPi PSU] Can I cut an USB cabel and... Read more
JokuTyyppi replied to JokuTyyppi's topic in Power Supplies
The one i am looking into is some Phobya psu (like what you find on a laptop) that has in the other end one molex connector where i am planning to solder wires for the HDDs and for the Pi. Total amperage is 5A on that psu -
Hello! I am finally continuing my Raspberry Pi NAS project that i started about a year ago. Now it needs a new power supply that could power two hdds, a fan and the Pi itself. So, my question is that can i cut the usb cabel in half and connect the cutted end to a molex 5v connector? Is it the same thing as connecting it into a normal phone wall charger? Yes, I know it is a little DIY but that is the point You will see the result later on in the build logs section of the forum I am not that good with how the electricity works YET Thanks
-
Apple will be soon designing its own processors for its entry level Macs
JokuTyyppi replied to RedRound2's topic in Tech News
The only thing that makes this interesting and a good idea is that it will make other manufacturers to move to ARM also and we (customers) will get a better battery time and better performance/$/heat/power efficiency. For instance linux is totally ready to be run on ARM. B) -
Yep, 280 is fine. And anything will do. That cpu can handle about anything you throw at it
-
[WIP] Razmac G5 [Update July 30th, 2015: Assembling the system]
JokuTyyppi replied to Razbit's topic in Build Logs
Some nice progress! -
[WIP] Razmac G5 [Update July 30th, 2015: Assembling the system]
JokuTyyppi replied to Razbit's topic in Build Logs
And now u broke my G5 :'( No, just kidding, it is gonna be awsum!