


minibois
-
Posts
28,442 -
Joined
-
Last visited
Reputation Activity
-

 minibois got a reaction from seon123 in Creating my own custom keyboard, but I need to create a custom PCB, how to get help?
The Keyboard Atelier is a Discord for custom designed keyboards (including PCB and case design): https://ai03.com/designer-resources/ (it's the link on the right).
There are also heaps of different tutorials and other information resources out there, including ai03's keyboard PCB guide: https://wiki.ai03.com/books/pcb-design/page/pcb-guide-part-1---preparations
Or from Keyboard Atelier community member harky: https://guide.zykrah.me/
Or Sleepdealr's RP2040 (different MCU) guide: https://github.com/Sleepdealr/RP2040-designguide
And much much more, some not even specifically keyboard related (because PCB information is relevant, whether it is for this PCB or not).
After a few projects and some informational threads I've made on this forum about keyboard's and specifically their PCB's I know my way around a keyboard too.
The DRC errors you often run into with keyboard PCB's can usually be ignored, as they are actually just non-issues (such as 'overlapping pads', like you'd have on the rotary encoder/switch in the top right of the board). Without knowing what the errors are, it's difficult to say what's going on.
You can post a screenshot of the DRC errors and I could give some guidance as to what they mean and why they're there?
I suspect some of the errors you have are legitimate, because I do see some issues in the PCB screenshot. The traces for the ISO Enter appear to be going through a hole on the board and/or are not connected and the diode top right of the ISO Enter is going to interfere with the stabilizer.
-

 minibois got a reaction from NinthTurtle1034 in How to calculate price per GB?
When I make such purchasing decisions, I typically like to use Google Spreadsheets (or similar) to easily see the different options and their comparative pricing.
For example, when I was looking to get a new SSD I made a sheet that had the capacity, price, speed, etc., but also things like the price/GB and price/speed.
A simple version of that sheet would look like this:
You fill in columns A, B, C and D and it will automatically fill out column E.
The formula in E2 and E3 is:
=ROUND(DIVIDE(D2,C2),2) This basically divides the price, by the capacity, so I know how much each GB costs (and it rounds it to 2 decimals).
The Average cell just takes the average of the rest of column E.
So in short, you divide the price, by the capacity.
So 1TB for 150 currency = 150 / 1000GB = 0.15 currency per GB.
A 4TB hard drive, will show as (roughly) 3.63 TB in Windows, because Windows uses a different system.
They use Gibibytes (GiB), Tibibytes (TiB), etc., where they use the 1024 = 1, instead of 1000 = 1 system.
But anyways, that might not even be relevant to think about.
If you compare all drives by the GB/TB the manufacturer shows, you have an equal comparison.
-

 minibois got a reaction from dinkostinko in Can't make headphone work on monitor jack
Maybe this is an obvious question, but have you turned up the volume in the monitor's settings?
If your monitor has one of those joystick controls, by default if you push it to the right it should show the volume setting (and a mute option, by pressing down).
-
 minibois got a reaction from SpookyCitrus in Can't make headphone work on monitor jack
Maybe this is an obvious question, but have you turned up the volume in the monitor's settings?
If your monitor has one of those joystick controls, by default if you push it to the right it should show the volume setting (and a mute option, by pressing down).
-
 minibois got a reaction from GuiltySpark_ in Can't make headphone work on monitor jack
Maybe this is an obvious question, but have you turned up the volume in the monitor's settings?
If your monitor has one of those joystick controls, by default if you push it to the right it should show the volume setting (and a mute option, by pressing down).
-
 minibois got a reaction from rrats in What happened to Anthony
According to the credits, he co-wrote (together with Jake) the Macbook M2 review from 9 days ago
-
 minibois got a reaction from mrchow19910319 in What happened to Anthony
According to the credits, he co-wrote (together with Jake) the Macbook M2 review from 9 days ago
-
 minibois got a reaction from LinusIsAMillionare in Why is my ram running at 1066 MHz?
Let me first mention the 1066Mhz means it runs at 2133Mhz.
What I mean by that, is that the 3000Mhz or 2133Mhz base speed is actually MT/s, as DDR RAM can transfer two things per cycle. Making it effectively 1066Mhz, but it can do two things.. So manufacturer just simply label it at 2133Mhz.
Anyways, yes.. DOCP is the AMD ASUS equivalent to Intel XMP and should enable the RAM to its high speed setting, but it does often happen it can't find a fit speed profile, meaning you might have to tune the memory yourself.
Set the memory speed to 3000Mhz (or 2933Mhz/3066Mhz which is sometimes the listed speed), set the voltage to 1.35V and set the timings manually yourself according to how they are specified on the memory manufacturer's website. See if it runs stable and you can tweak from there if you like (try to get lower timings for example).
-
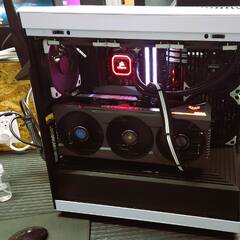
 minibois got a reaction from CommanderAlex in Using Corsair fans without the commander pro?
That fan issue sounds rather annoying 😅
I don't have experience with RGB fans, other than with some Corsair options, so not sure what RGB fan set to recommend.
As for normal fans, I have had great experiences with Arctic P12 fans, which can be had well within your budget for a 5-pack.
-
 minibois got a reaction from Cringe123 in Using Corsair fans without the commander pro?
Corsair fans have two cables on them, a PWM cable (which is standard) and an RGB cable (which only goes with Corsair equipment).
You can plug the RGB wire into the RGB Hub, which goes to the Commander Pro and then to your motherboard USB and control RGB with iCue like that.
Then you can plug the PWM cables into your motherboard directly, into the SYS_FAN connectors (provided you have enough fan headers) and control the fan speed with a fan curve in your motherboard's BIOS.
When it comes to Corsair fans, the RGB has to be done with Corsair hubs (unless your motherboard has J_RAINBOW I think? don't remember how that all works), but the fan speed is a standard PWM cable.
-
minibois got a reaction from seon123 in Haalp changing qwertz to qwerty?!? Broke my screw driver
This keyboard is not hotswappable, so when you took out the keyswitch you must've put a LOT of force into it, ripping the switch from the soldered pad it was attached to.
That is why you can't seat it anymore, it's because the switch has some of the soldertin on it, so it doesn't fit in the whole. Plus, even if you did seat the switch, it wouldn't be attached to the board.
This can only be repaired by soldering the switch back in.
-
 minibois got a reaction from Cabbageonion in Haalp changing qwertz to qwerty?!? Broke my screw driver
This keyboard is not hotswappable, so when you took out the keyswitch you must've put a LOT of force into it, ripping the switch from the soldered pad it was attached to.
That is why you can't seat it anymore, it's because the switch has some of the soldertin on it, so it doesn't fit in the whole. Plus, even if you did seat the switch, it wouldn't be attached to the board.
This can only be repaired by soldering the switch back in.
-
 minibois got a reaction from da na in Haalp changing qwertz to qwerty?!? Broke my screw driver
This keyboard plate doesn't support ANSI (the horizontal wide) Enter keys, only ISO (upside-down L) Enter. You can't put a keycap where it should go.
As for the stabilizers, I seems you're pushing on the wrong side.
You push on the circled blue bits and then lift it up:
This video (timestamped at 0:28) shows off the process well:
What keyboard is this? Do you know for sure it's hotswap? Because I see some soldertin on the keyswitch which you normally only see with soldered keyboards.
-
minibois got a reaction from seon123 in Haalp changing qwertz to qwerty?!? Broke my screw driver
The Ducky One Two Mini is not hotswappable.
Hotswap means you can take out the keycaps (the things you type on) and replace them without desoldering. This board is not hotswap, so that is not possible.
So I don't know how much force you put on the Enter keyswitch to pull it out, but I'd be surprised if that key still works (consistently) afterwards.
Keycaps have printing on them to show what key they are suppose to be, but in Windows you can choose the layout you want to use and that actually decides the keys' actions.
You can add another language (i.e. English US International or any other QWERTY input language) and then set your keyboard layout to that, from within Windows Settings' Time and Language tab.
-
 minibois got a reaction from spacehunter0413 in [IQ Test Card?] What's the purpose of Quadro P600? Why not 1050?
Usually Quadros are preferred when it comes to professional 2D/3D modeling programs, as they are specifically supported in these programs. Often the performance on Quadro cards is better than their GeForce counterparts in these programs, but it really depends on the situation.
This video is a couple years old, but should explain shed some light on the situation:
Actually there was. Off the top of my head, the worst of it was from May to about December of 2017 and availability of graphics cards only became better in 2018.
The RX 480/580 was miners favorite cards, shortly followed by the GTX 1060. But all the rest of the cards - especially RX 470/570 and GTX 1070 - were bought too, as people scrambled to get cards.
Here is a video about mining in that time from LTT:
They even started out the video talking about the lack of availability.
-
 minibois got a reaction from H713 in Non-soldering 3.5mm headphone plugs/jacks
You could look for a repair cafe or hacker space in your local environment, where they will probably have soldering irons (among other tools/supplies) for repairs. Repair cafés also often have volunteers which can help you out with the repair (but usually these places are rarely open), while hacker spaces may be more 'hands-off' in their approach.
https://www.repaircafe.org/en/visit/
https://wiki.hackerspaces.org/List_of_Hackerspaces
I don't have experience with solder-less connectors, but I'd imagine you need one with a larger strain relief and a good way of attaching the wire, since the connection is less secure than a soldered one.
-
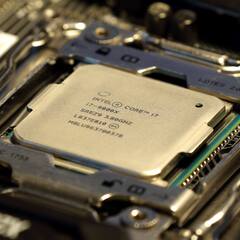
 minibois got a reaction from stellarshy in Is it possible to use the Intel LGA 1700 stock cooler on an older 115X motherboard?
From what I've seen, no it's not possible.
Some ASUS LGA 1700 motherboards - like this PRIME Z690-P - provide mounting options for both LGA 1700 and LGA 115X/1200 cooler and you can see there are four distinct (but still somewhat overlapping) holes provided:
That to me shows using an LGA 115X/1200 cooler on LGA 1700 is not possible without modifications (like these extra holes), so I'd assume the opposite is true too (as the LGA 115X/1200 boards don't have the hole spacing of LGA 1700).
-
 minibois got a reaction from Levent in Corsair TX650m repair
Don't work on power supplies unless you absolutely know what you're doing, certain components can be lethal when dealt with the wrong way.
You can visually see a damage board in the PSU, but you can't know how that damage got there (it could've come from another part of the PSU) and there are other components you can't visually see if they are damaged.
Only replacing that board could fix it, or not and make for a dangerous situation.
If you are under warranty, get in contact with Corsair and see if this falls under warranty, otherwise get it replaced.
-
 minibois got a reaction from Fasauceome in Corsair TX650m repair
Don't work on power supplies unless you absolutely know what you're doing, certain components can be lethal when dealt with the wrong way.
You can visually see a damage board in the PSU, but you can't know how that damage got there (it could've come from another part of the PSU) and there are other components you can't visually see if they are damaged.
Only replacing that board could fix it, or not and make for a dangerous situation.
If you are under warranty, get in contact with Corsair and see if this falls under warranty, otherwise get it replaced.
-
 minibois got a reaction from Captain Insano in Broken Pokemon Red Chip
NorthridgeFix did a video last months on repairing a car keyfob with a missing pin (without removing the chip), which is probably relevant to your situation:
He ended up using a rotary tool to remove some of the outer plastic of the chip, which exposed a chip pin to solder a jumper too.
First he tried the rotary tool on a donor to see if it works, that starts at 2:34. Then he did it on the real chip at 3:25, finally soldering a jumper cable at 5:30
I reckon that's your best bet, but still no confirmation that would work.
-
 minibois reacted to Peter Vaughan Truslow in Define R5 3D printed SATA backplane - free STLs and IPT files
TLDR at the top: 3d print it yourself. I'll cut to the chase. It's all available here. the correct extension to order is included in the post on printables. print out of ABS or PETG if you can.
A few months ago I discussed on reddit how Fractal design should make an add-on backplane for the define R5, since it is still a go-to entry-mid level home server case. I contemplated doing a PCB design myself, but decided to see if I could find some off the shelf hardware to 3d print a bracket for to make it work. I settled on this extension initially, but only bought one. I decided on This one instead since the cost per was less. They seem to be exactly the same, or close enough, but my final fitting adjustments were based around the 2 pack. I found lots of sellers on aliexpress that carry them, but figured a few extra dollars was worth getting it this week rather than in two months.
The extensions mount to the frame with #4-40 machine screws and nuts. M3 should fit but would be tight, M2.5 would probably be better. The extensions are modified slightly, using a knife to scrape off the two tabs in the power section and one in the data section where it interfaces with the drive. This is unnecessary but reduces the insertion force and force needed to remove a drive, which I prefer, since the drive sleds already hold the drives positively inserted.
The backplane frame snaps into the cutouts in the sides of the drive cage where the rails for the drive sleds end, and seems rigid enough. I wanted screws, but there aren't many options without modifying the cage. I wanted to avoid adding holes to the cage, since this would be hard to reproduce accurately.
The drives must be mounted to the cage where the end of the drive is almost flush with the end of the cage. This means that the front and middle screws are used, which is not ideal for high capacity WD drives that don't have middle screws. There are 3d printed extensions for the drive sleds that are a friction fit and address this issue.
The clearance on the backside of the backplane frame is huge. Easily enough for fitting any kind of sata cable or sata power cable, no need for right angles. SATA cables without the lock are ideal, since they use the bumps for retention, which is the only option as these extensions don't have anywhere for the clip to interface. In my case I didn't have enough cables of that type so I used hot glue to keep it in.
Currently only the 5 drive cage has been done, but I might do the 3 drive section too. It looks like it should be straightforward to add that one.
If anyone makes it for themself, please post your results.
-
 minibois got a reaction from Alvin853 in Query on USB-C port and Thunderbolt port for my home set up
1. & 2. Yes
3. The display charges laptops up to 96W (if the laptop supports charging over Type C)
-
minibois reacted to Alvin853 in Query on USB-C port and Thunderbolt port for my home set up
1 and 2 should be a definite yes, 3 will depend on the laptop, the monitor will be able to provide charging power on the USB-C input, but not every laptop can be charged via USB-C connection. Some laptops require higher charging power then USB-C is capable of (or used to be, the USB-PD standard was recently increased)
-
 minibois got a reaction from Origami Cactus in Photoshop depixelation
When enlarging this part of the image you can use an upscaling algorithm. Instead of 'None'/'Nearest Neighbor' you can use Linear/Cubic/Lanczos/etc.
Alternatively - and this is what I'd really recommend - just trace the image in a vector program (i.e. Inkscape or Illustrator) and export it to a raster image (at your desired resolution) to import it to Photoshop again to work on it further.
Even more alternatively to that, if you want the rest of the image at a better resolution, you could use an upscaling program (like Waifu2x), but that may require some more tweaking of the settings to get right.


