P.S. if anyone knows how to set the ram to what its supposed to be please let me know lol and how you can find out exactlyt what ram is in there thanks
Its the first time I build a computer, and not without any trouble...
(The problem was that I didnt plug one of the extensions of the Motherboard)
But here are the final results!!!
Specs:
Ryzen 5 3600 with Stock Cooler (for now)
Asus ROG STRIX B450F
MSI RX 5700 MECH OC GP
Kingston HyperX 3200Mhz CL 16
Kingston A2000 250GB M.2 SSD
Seagate Barracuda 1TB 7200RPM
Kolink Enclave 700W G FM
MSI MAG Vampiric 010X
It is indeed a major jump from my i5 6300HQ quad core and GTX 1060, I went from 1069 points in CineBench R20 to 3768 points, with no overclock. Just -0.06250 Voltage Offset
Never had the courage to build one by myself but I finally did it!
This is my first time posting on this site. I've only recently discovered the LTT channel a couple months ago but I became a huge fan immediately. I was 18 when the original Xbox launched and it was the first console I ever bought for myself. Watching the video and looking at some other people's builds really inspired me to give it a go as well, if only for the nostalgia of having what would appear to be an OG Xbox in the living room.
I didn't really like the looks of some of the cutouts for the I/O that some of the builds had, so I decided to use some USB and HDMI extension hubs I found on amazon.jp and keep the cutting on the back of the case to a minimum. I also saw that every build like this used an ITX board. I'm sure I'm not the first person to do it, but I found an ATX board that hit every wicket for what I wanted on the motherboard. The first couple of pictures are how I arranged it in the upper casing. I didn't really have to do that much trimming around the rims of the case to make the two halves come together with the mobo in place, it fit in just right. The PSU and GPU were mounted in the RF tray easily enough; you cant really tell to well from the pictures, but I have about 15mm of space between the RF tray and the edges of the PSU/GPU for fans. Cable management was without a doubt the most difficult part of bringing it all together. There was very little space before closing the two halves of the case together to move cables away from the CPU cooler and GPU fans. With the learning curve of figuring out what cables need to get adjusted where, closing it up took a full hour.
I have an old copper-full motherboard. Can anyone tell me which Pentium processor this is? I have no idea. (This has been answered)An old Hard Drive I had found in a large metal server next to the trash.
Part 2 edit on 1/7/18 because this topic seems popular.
I've got a couple other things not in the pictures, didn't want to drag them out of storage.
Haven’t built a new rig in 7 years. Most recent upgrade to the old build was a GTX 1660 if that tells ya anything. Didn’t even know m2 ssds existed until recently! Finally picked up interest and had funds to do so recently figured it was time. Just finished it today and updated the BIOS. Waiting on the monitor and a fan controller before I really set it up. Any tips or recommendations would be appreciated.
Specs:
Fractal Design Meshify C2
Gigabyte AORUS Elite Wifi
Ryzen 3700x
Fractal Design Celsius S24
Corsair Vengeance RGB Pro 16GB
Intel M2.2280 1TB SSD
MSI TwinFrozr RTX 2060 Super
Seasonic Prime Ultra 650W 80+ Platnium
LG 27GK75B 240hz 1080P
Its pretty much a dell optiplex 3010 with a aftermarket psu and discrete gpu
Specs
RAM:12GB DDR3 1333MHZ
CPU:Intel Xeon E3-1230 V1 sandy bridge 3.2ghz up to 3.6 4C/8T
GPU:RX 550
Storage:500GB Seagate and 1tb HGST
PSU:Rosewill RD 450Z
Case:Rosewill FBM-01{I cut the side panel and put plexi glass in it}
FANS
Intake:120MM Rosewill
Exhaust120MM fan from the psu
92MM Delta fan{Loud}
Overall its a solid system to play games on a budget but its airflow is sub par and dust magnet
Here is a starter build I just finished on the cheap thought I would share it.
Athlon 3000G
ASrock B450M-HDV
8Gb DDR4
GTX 970
1tb HDD
Thermaltake smart 500W
Windows 10 pro
Built this from parts I got out of system that where being scrapped only part I paid for was the CPU and could not say no for $15.00 I think it came togeather nicely yes the CPU is bottleneck for the GPU but I think winning for $15.00 pc build.
So a day after I bought the Cooler Master Q300L one pops up on FB Marketplace for $20. The I found a B250M for $10 that supposedly had a bad ram slot (no post). Perfect for the free i5-6600 we had. Gave her the POS PSU we had and were putting in our 4 year olds machine. GTX 770 that was just moved to the Plex server. Worst of all a stock Dell cooler with no backplate!
Once she gets a cooler, PSU and a GPU upgrade this will be an alright machine for awhile.
This is contrast to the i5-3570 Dell with RX460 we gave her a few months ago when she wanted to start gaming with us. Originally I started working that into this case but needed some stuff and that board popped up.
At the age of 15 I build my first PC, I had no idea and no references, but in the end I managed to get it working. I have been a gamer for as long as I can remember, but I mostly played on console as a kid and the PC was a distant second. In the mid 2000's I got my first job, and some cash I could spend how I saw fit, this is when I really got into PC hardware, building, gaming and overclocking. Over the years I held on to a lot of my hardware, I built computers out of spares parts so my friends could use them when visiting, started overclocking to get the maximum performance possible, and even started building PC's on the side for a little extra cash. The past few years I have even started to collect older hardware, checking they work and cleaning them up, so now I have quite a large colection of hardware which will hopefully continue to grow going into the future.
Enough back story and on to why I have started this thread. In this thread I will be taking a look at older mid and high-end pc gaming hardware, and seeing how it performs. I will comparing hardware available within a specified year, and to hardware in preceding and superseding years, so we can see progression over the years. Testing and comparing hardware of the same year isn't so hard, but it becomes difficult when comparing hardware released many years apart, many things changed over the years such as operating systems, drivers, resolutions and APIs.
I want to see what the average users experience would have been with the hardware, I don't think its going to be possible to set strict rules for testing, I believe testing will have to be flexible in order to best portray the average user, so its likely I will have to make some judgment calls. The tests will be carried out as period correct as possible, this of course means that the cpu's, gpu's and ram must have been available within in the specified year, this includes using operating systems available at the time. I may at times have to simulate different hardware by altering its settings, this will only be done if I believe will achieve accurate results. Its fair to say many users would have used their PC's for many years before upgrading, keeping this in mind and my desire to avoid software and driver issues, I will be using updated drivers, games and operating systems. For the testing I will be using a wide range of games and benchmarks spanning
many years and technologies, this I hope will give a good overview of what the hardware is capable off. As games and benchmarks are updated over the years, performance and scores may be affected, so for this reason I will only be using software that is no longer being updated. I will be using MSI Afterburner whenever possible to track frame rates, average, minimum, maximum, 1% lows and 0.1 lows.
Games I own with benchmarks I believe are no longer being updated:
Fear
Resident Evil 5
World in Conflict
Call of Pripyat
GTA 4
Metro Last Light
Batman Arkham Origins
Warhammer Dawn of War 2
Crysis
Counter Strike Source
Total War Rome 2
Unreal Tournament 2003
Comanche 4
Serious Sam
Half Life 2
Benchmark Software I believe are no longer being updated:
Before I jump into testing I wanted to reach out to the community for ideas and advice, any help would be much appreciated. Let me know about games, benchmarks or hardware you would like to see tested and I will look into adding them to the list.
I wont be doing the testing in any sort of order, what I test and when I test it will depend on circumstances such as what parts I have available, and how I feel. I continue to add new part to my already large collection every week, so I hope one day we will have a large comparison database to look over. I'm currently trying to figure out how to compile all of this data so its clear and easy to ready, hopefully by the time I have a decent amount of data I will have figured this out.
I decided I wanted a test bench to make live easier, unfortunately I cant find any in my area and getting one shipped to me would be incredibly expensive, so I build one.
First I ripped the insides out of an old case
Then I sanded it down and cleaned it up
Of course was very flimsy so I had to strengthen it up, and I made a cut out behind the cpu
I added some wood so I could mount a radiator, screwed on a plate with ssd mounting holes, and added a couple of buttons, then painted it
I will be testing a lot of power hungry hardware, so I also went with a large PSU. Now its all assembled and ready to go.
People talk about airflow management but I think everyone has been doing this wrong all this time. Conventional wisdoms like mounting fans on radiators, or having exhaust fans etc, it's just wrong and I have a build to prove it:
Repeating the video description here, the fan speed on this build is controlled by the front panel speed for the demonstration, and it is on MAX SPEED. This is as noisy as it will ever get.
I'm also not sticking some super lower power stuff in there, what you're looking at is a 7980XE and a 2080TI. Admittedly I am not overclocking the crap out of them but they are running above stock.
So what about the thermals, am I just constantly butting up against 99 degrees and throttling? Absolutely not, a general figure I can give is 70 degrees maximum for GPU at 500w CPU+GPU power draw at 23 degrees room temperature. CPU thermals will depend on the interface, delid, lapping, LM etc, because that's going to be the biggest bottleneck.
I'm sure this level of silence and thermal performance can also be done on a huge elaborate loop maybe with dual 480 rads or something. While a loop is required, I am using a pretty basic EKWB kit.
To explain what I did here, I'm going to point out the top three problems conventional fan placements have:
1. Wasted airflow. If you get air into your case and it just flows directly back out without cooling anything, you're generating noise for no thermal gains.
This is extremely common with the standard front intake top exhaust case layout. Think about that top corner, what's going on there? The front fan sucks in air and it immediately goes back out the top, you've basically generated some noise for nothing.
2. Sub-optimal temperature difference. When air flows past a fin, the amount of heat transfer is determined by the difference in temperature, if you put a radiator at your intake, the air you take in have reduced cooling effect on everything else in the case, this again make you generate more noise with no thermal gains.
Look at this here, we've got these radiators on the intake, which means your hybrid cooling cards are no longer hybrid they're basically just running on one 120mm rad, because the hot air isn't going to cool the rest of the air cooling heat sinks all that much.
And then look at that traditional read exhaust fan, what's the point of that? Aren't you just sucking cold air out? Wouldn't it be better if all your available air either go through the top radiator or the graphics cards?
3. Aerodynamic disruption. Placing fans right up against something, whether it's a solid piece of glass or a semi-permeable structure like a radiator makes it far less efficient, even for the best fans.
To see how much of a difference this makes all you have to do is take off one of your fans, turn on the computer, and hold the fan either in open air, or up against its regular position. If you're running any significant fan speeds, the difference will be very noticeable. You're making a lot more noise, but defiantly less air. All those impressive fan specs you see on Noctua's website, well most of those are for open air operation, not up against a radiator.
I basically designed a build specifically to eliminate all of these problems, and there is exactly one case not just compatible, but perfect for what I'm trying to do here:
The Cooler Master SL600M
Now if you read the reviews, you'll notice that it doesn't have the best reviews, a common complaint is high CPU temperatures, which is to be expected, as the graphics card is not only blocking the air path to the CPU, but also pre-heating the air, exacerbating the 2nd problem I mentioned above. However, the solution to that, is just forget about how the air interacts with the parts inside, but focus on the entrance and exit, because those are the spots where we can be certain all the air will have to go through.
There's two giant 200mm intake fans, so we know air must come in here, and then since the front panel is closed, and there's no exhaust fan on the usual spot, we know the air must exist through the top side, where a radiator mount is conveniently located. At first I still had the traditional mindset of sticking fans on radiators so I had the fans over the radiator to suck out the heat, it worked but noise did not reduce compared to my previous build with the same 360rad and fans.
But then it dawned on me, that there's just no reason to have those fans, if I just seal the case such that all air must escape through the radiator, then I will get an airflow through the radiator because the bottom fans are constantly taking in air, there's no where else for the air to go!
There is actually no attempt from CM to seal the case for this use case, there's a huge gaping hole around the power switch which I had to cover up with cardboard. If I didn't do this none of this would work because the air would just go through those holes rather than through the radiator which has more resistance. There's also the issue of expansion card brackets. Most cards for cooling reasons will put exhaust grids on their brackets, but we can't have that in this build because the air will just escape through those grids rather than through the top radiator.
Now let's look back at our three airflow problems and see how they've been solved:
1. There is no wasted airflow at all, because all air must escape through the top radiator, which cools the CPU and GPU, so we do not generate any unnecessary noise.
2. The air that gets to the top radiator will barely be carrying any heat because well, the CPU and GPU's heat are in the radiator, so we get maximum heat transfer.
3. While there is an air filter against the bottom fans, there's basically zero obstruction near the fans, so they can operate very close to their open air performance.
In fact, by doing this with this specific case we get some more additional benefits:
4. Because the intake fan is 200mm, and max fan speed is only 800RPM, the noise to airflow ratio is extremely high and unmatched by any 120mm or 140mm fan.
6. Because of the huge intake area of 2x200mm fans, intake airspeed is very low. Not only does this mean low noise, it also sucks in less dust/particles. the filter doesn't need to be cleaned for at least half a year or more.
7. There's only two fans in the system (the one 120mm you see behind the panel is for back-up when the side panel is open), and it is extremely easy to set up an almost ideal fan curve to further minimize dust build-up (because noise is already minimal). I just stick a thermal probe in the radiator (or if you want to be fancy, a water temperature probe), and all you need to do is change the fan speed with the water temperature. You get an extremely gradual ramp, and you get exactly what your system needs for keeping cool.
Again, this is at max fan speeds, and I'm placing the phone right against the exhaust port. You can see on the graph the noise peak is at ~150hz, a very subtle low frequency humm, if you have good enough ears to even hear it.
The main reason most DIY cases don't do this is probably the requirement on sealing. The approach is actually not uncommon with purpose designed machines like this Mac Pro. While it doesn't have a water loop, there's similarly no fan on the CPU or GPU heat sinks. Instead the fans are at the front, which gets tunnelled to the heatsinks. This way you don't reduce the efficiency of your fans.
Other examples of this are the trash can Mac Pro, and the new Xbox Series X, the ideas are the same. You somehow make a tunnel with all your heatsinks inside, and all you have to do is put one fan at the start or end of the tunnel to cool everything in the tunnel. No wasted airflow, and your heatsinks always get the coldest air possible. Could even take some slight advantage of the chimney effect.
This is an experimental build I just made, while the thermal and acoustic performance of this is nowhere near as good as the big build. To my defence, there is only room for a 120mm rad and this machine, and despite being ITX, I think is as good as any full sized build with 120mm AIO. The airflow is less clean on this, but there's still no fan on the AIO radiator, the air pressure will find its way out of the system so it doesn't need to be linear.
So Again I've completely sealed the case with packing tape, except for the 120mm AIO radiator, and the exhaust port of the blower 5700xt. Yes the blower 5700XT, and I actually specifically picked the blower because the regular third party rack cooler design would just allow air to escape through the rear bracket without passing through much of the GPU's heatsink. The 2 140mm RGB fans are both intake, and once the air gets in, they can only escape either through the GPU blower, or the CPU radiator.
This is ITX and I'm working with only 2 140mm fans but thermals/noise efficiency is actually better than open air. And the reason is quite simple, I am effectively using 2x 140mm fans to push one blower 5700xt and one 120mm radiator. If it was just open air, I'd only have 1x 120mm and 1x ~50mm fan to do the same thing. So another way to think about this approach, is it allows you to mount more or bigger fans on your radiator than you other wise could, and run those fans at increased efficiency.
The interesting thing is I got this case second hand, and the original owner gave me a mesh side panel and told me to use that to improve thermals. The fact that Phanteks sells that just means most builds in this case have worse thermals than open air. Also just from watching Gamer's Nexus, I get the impression that the accepted norm is that almost any case is not as good as open air. However by actually using fans correctly here, I have somehow achieved better than open air performance in an ITX case. Of course it won't beat a proper third-party rack cooler plus bigger AIO on open air, but that's not the point.
I'm not trying to pick on anybody here, it's a sick build I love it but I'm just taking a random example to illustrate the problem.
So he's got a radiator on the intake, which seems to be quite common now days. Provided the CPU isn't that hot so the pre-warming effect won't be too significant, the GPU is air cooled so it still has to work extra hard than if the radiator was at the exhaust. Just this one placement difference reduces the thermal/noise efficiency of your GPU. There's three exhaust fans up top but they're too far away to be sucking the GPU's exhaust out so I'd guess they're sucking out a lot of the air from the radiator, but since your CPU is so efficient, you're moving a lot of air to cool a not very hot CPU, wasting existing airflow capability.
Another stunning build, but this dual rad on both intake/exhaust layout is also pretty common and it doesn't maximize thermal/noise efficiency. The first obvious problem is fans against the radiator, so i already talked about that. But then if we think about this, you are basically taking the exhaust air of the first rad into the case, which is bad for the passively cooled components, and then you run that through the second rad, which will be no where near as efficient as the first one, but it costs just as much and generates just as much noise?
I'm not sure how much I can do better with a traditional case like this, because this is definitely partially the case's fault, there's really no room to mount unobstructed fans other than the traditional exhaust spot, which is not only unnecessary but counter productive since again, you'd rather have more air go through your radiators than through nothing. I guess what I would do here is just have one radiator as before, remove the fans, and put all other fans on intake, but then there's no dust filter on some of these so that's gonna be much harder to maintain.
This looks psychedelic and interesting, but there's just massive inefficiency going on here, a lot of air will escape before they even get a chance to touch anything, especially through that top hole, And even if that was filled with a 360 rad instead it's not much help because the air through that fan will have generated the noise of 2 120mm fans, but without cooling much of anything except 1/3 of your CPU.
Looking at all these builds here, I realize mine is seriously lacking in aesthetics, and that's going to be the focus point of mk.2 I am currently planning. No more cheap EK kits and industrial black tubes, this time I'll be using full EK Quantum line of parts. However I am in a big bind here, there's no way I'm going to buy another 2080ti at this point, so most likely the build won't be finished until next-gen GPUs come out, until then I'll probably just run some generic card with stock cooler, it won't look very impressive. I also haven't decided on if I wanna do hard tube, while that looks good it'll be such a pain to change anything, like for example upgrade the CPU.
In terms of cooling, it'll mostly be the same as before, single 360mm rad. While there is space on the bottom intake for radiators, like some builds have done, I don't think I'll actually do that because I think that will give me overall worse thermal/noise ratio because I won't be able to use the 200mm fans. Unless I just stick a thin 360 rad over the 200mm fans, but then I might as well just make the top radiator thicker, it's effectively the same thing, which is exactly what I'm going to do. Instead of the old 38mm rad on top, I'm ordering a 45mm rad. Now there's technically no room but I found the radiator rack can be raised and not interfere with the outer cosmetic shell. So I'm going to just use some MB standoffs to raise the radiator further up so it can be thicker. The bottom panel above the fans will now be filled with the flat radiator I really really love, and hopefully it'll cover up the ugly I/O and fan headers at the bottom of the MB.
=======================
There's an additional complication with the 2nd problem with conventional fan placement I mentioned towards the beginning. That is, paradoxically, stronger cooling is less efficient.
What do I mean by this? Well think of a given CPU cooler and air flowing past it, if the flow is constant, the amount of thermal transfer happening here is NOT constant, it depends on the temperature difference between the air and the cooling fins. This means the hotter the fins, the more cooling you can do, and this usually means higher CPU temperatures. Therefore, in reverse, if you have a big 360mm rad on your 65w CPU, and it's 55 degrees under load, all that means is you are pushing a lot more air to cool 65w, than if the radiator was 120mm and the CPU is say, 75 degrees under load. Basically, you need exponentially more airflow (and therefore noise) to cool the same thermal power, if you want to keep your heatsinks cool.
There is a way around this, and that's to reduce the temperature delta between the cooling fins and the thing you're trying to cool, it works because you aren't changing the temperature of your cooling fins, so you maintain the same amount of heat transfer between the fins and air, but you still make what you're trying to cool, cooler.
So for the efficiency minded builder, you need to keep your priorities straight:
1. Do not try to achieve unnecessarily low temperatures, cooling fetish is a real thing but you gotta remember the reduction in performance is exponential as your heat sink gets cooler. Just what kind of temperatures are good well that's a whole new can of worms we won't get into here.
2. First thing you do to improve cooling is to improve the thermal interface, better paste, liquid metal, delid, lapping etc... Because these methods of reducing temperature are "free" and don't require more air flow / noise. This is one of the reasons why water cooling is so ridiculously good, you can minimize the temperature delta between lots and lots of cooling fins, and your CPU. Where as an air cooler's fins get colder very quick as they get more distant from the CPU.
3. Increasing surface area of cooling fins. Air is just the worst at conducting heat, so a few millimetres between two cooling fins usually means there's like 1 millimetre of air in the middle that's not getting any heat transfer. So even with the same amount of flow, there's usually ways to dump more heat into it before the air leaves. This could mean denser fins, thicker rads, bigger rads, those all have their own pros and cons obviously, but find ways to dump more heat into the same amount of air. Average temperature of all the exhaust gas should ideally be as high as possible, that's a sign of an efficient cooling system.
4. Increasing airflow should always be the last resort. Higher fan speed is less efficient, more flow separation, more vibration, more noise, but not as much more airflow. More speed also means the air has less time to contact the fins, less heat transfer per unit volume of air. The ideal situation you want to have is a big radiator at high temperatures, and a uniform, slow airflow through it. Not a jet engine with a small heat sink inside.
This build is pretty well under way, So i will post a few current work log pics and then play catch up Don't worry there's still a ton of modding left.
First off a big thanks to Mwave for jumping on board and supporting this build with some much needed hardware.
A quick back story.
I wanted a specific case and when it became obvious that the extreme cost and getting it sent from OS was proving to be a big fail i decided to just make what i wanted myself.
Hypercase will be scratch made from Plex. No CNC or LASER work or fancy CAD programs or drawings..... just whats in my head and my hands. I'm sure some of you can relate to that last part
NO water cooling i'm having alot more fun nowadays with air coolers "it's still cool to air cool" !
Currently the mod is at the final stages
So how did we get here ?
It started with 4 basic parts..
A base section
Just a single cut and bent piece of plex
A matching top section.
This was made from 3 parts , 2 x bent sides and a single flat top. Then reinforce with inner braces
Next was to make the spine. This was made from much thicker plex and will be triple layered later to add more strength and design.
The 4th part was the motherboard tray. This will be a suspended type and will be adjustable


 69gb reacted to Gamingisamust in Build is done i want to thank everyone for helping me out :)
 69gb got a reaction from sub68 in Whoosh - The Airplane and Airline Thread
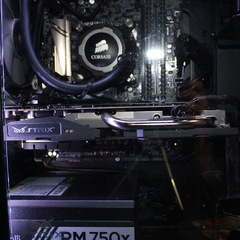 69gb got a reaction from GDRRiley in Whoosh - The Airplane and Airline Thread
 69gb got a reaction from handymanshandle in Whoosh - The Airplane and Airline Thread
 69gb got a reaction from OJTheAviator in Whoosh - The Airplane and Airline Thread
.png "Funny")


