


1van
-
Posts
225 -
Joined
Reputation Activity
-

 1van got a reaction from thekingofmonks in Guide: Running CoffeeLake/Refresh CPUs on Sky\KabyLake motherboards.
Related:
-
1van got a reaction from thekingofmonks in Guide: Running CoffeeLake/Refresh CPUs on Sky\KabyLake motherboards.
8. Links
9. Useful Items
-
1van got a reaction from thekingofmonks in Guide: Running CoffeeLake/Refresh CPUs on Sky\KabyLake motherboards.
4. BIOS Modification
5. Flashing the Modified BIOS
6. First Start
7. Troubleshooting, Bugs, and Features
-
1van got a reaction from thekingofmonks in Guide: Running CoffeeLake/Refresh CPUs on Sky\KabyLake motherboards.
Hello guys.
I used a search engine and found that the possibility to run CoffeeLake processors on Sky\KabyLake motherboards was brought up here before, but did not receive a wide coverage, even though there are many people who have good Z170/270 motherboards and want to upgrade their obsolete 4C/8T i3s i7s.
Many such cases.
The modification itself is more than a year old, but it's better late, than never?
To those who are interested, I present the translation of this guide below. Thanks to all the people who made this modification possible and to the all people who contributed to this guide. I am not a native speaker, so corrections are welcome.
0. Before You Begin. Disclaimer
You are responsible for your actions and consequences thereof. There is no guarantee that everything will work as it should or work at all.
1. Highlights
2. BIOS Dump and Personal Data Extraction
3. CPU Preparation
-
 1van got a reaction from eng_redaesm in Guide: Running CoffeeLake/Refresh CPUs on Sky\KabyLake motherboards.
Hello guys.
I used a search engine and found that the possibility to run CoffeeLake processors on Sky\KabyLake motherboards was brought up here before, but did not receive a wide coverage, even though there are many people who have good Z170/270 motherboards and want to upgrade their obsolete 4C/8T i3s i7s.
Many such cases.
The modification itself is more than a year old, but it's better late, than never?
To those who are interested, I present the translation of this guide below. Thanks to all the people who made this modification possible and to the all people who contributed to this guide. I am not a native speaker, so corrections are welcome.
0. Before You Begin. Disclaimer
You are responsible for your actions and consequences thereof. There is no guarantee that everything will work as it should or work at all.
1. Highlights
2. BIOS Dump and Personal Data Extraction
3. CPU Preparation
-
 1van reacted to agentlupus in Guide: Running CoffeeLake/Refresh CPUs on Sky\KabyLake motherboards.
@1van Thanks. I just wanted to make sure as there is not much information on the Internet about running Xeons on B150 chip.
Edited post to hide images.
I've maganed to successfully flash image with disabled ME and disabled warning. It flashed flawlessly via fptw64 and board booted. I had programmer recommended in the guide as a backup.
Installed this E3-1240v5 Xeon and it booted. So far works nicely with all installed systems (w10/hackintosh/linux).
So simply disabling ME did the trick on the newest BIOS for this mobo.
Did this due to used E3-1240v5 costs about 40% price of used i7-6700.
Images to prove:
Thank you again.
Regards,
Karol
-

 1van got a reaction from agentlupus in Guide: Running CoffeeLake/Refresh CPUs on Sky\KabyLake motherboards.
@hackalova pls put images under spoiler (eye icon). Btw I'd try to unlock "FD locks" and see if it'll avoid the boot message that you were getting. I'm 100% sure that i7-9700 does not require disabling the ME, so the culprit is somewhere else.
@agentlupus pls put images under spoiler (eye icon).
Xeon E3-1240v5 is Skylake so you'll only need to disable the ME (people say the version did not matter) and probably apply the "MSI Abnormal ME warning" fix in the "Extras" tab. As for the flashing, MSI boards do not require a programmer, flashing it via AFU software will work, see item 5.5 of the guide.
However if the modded BIOS fails you could still need a JSPI programmer to "unbrick" the board. The JSPI pinout for MSI is shown in the guide as well (item 5.6 of the guide). I haven't used such Xeon CPUs myself and I won't be able to check the BIOS for you.
-
 1van got a reaction from BiotechBen in How to mount amplifier bellow desk?
Btw not a bad idea. The amp won't get hot at low to mid power, it'll save space, and it'll lift the monitor up so the center of the screen is in better position to your eyes, helping with a "nerd neck".
I'd be more cautious not about overheating of the amp, but about dropping or spilling something in the vents.
-
.png "Funny") 1van reacted to Hairless Monkey Boy in How to mount amplifier bellow desk?
1van reacted to Hairless Monkey Boy in How to mount amplifier bellow desk?
Is your desk in the bathroom, or....?
-
 1van got a reaction from WhitetailAni in Guide: Running CoffeeLake/Refresh CPUs on Sky\KabyLake motherboards.
@Remiix_Dripgxd Judging by your question it does not look that you've read and understood the guide. If you proceed like this the chance is high you'll just brick you board or even damage it. I won't be able to help you.
There is a video above where the guy mods his Asus Z170 Deluxe, with all the steps shown, including flashing.
-
 1van got a reaction from Mark Kaine in Expensive mistake / lesson, due to stock AMD thermal compound
The problem is not with the stock thermal compound. Many aftermarket compounds get very stiff when cold.
As several people replied already, you should have removed the heatsink when it is warm (a short stress test would do), and not by pulling up, but by twisting/sliding first.
It's always easy to blame hardware for your own mistakes.
-
1van reacted to erikbarbarik in Guide: Running CoffeeLake/Refresh CPUs on Sky\KabyLake motherboards.
Thank you for this guide. I was planning on putting together a whole new build but was put off by the crazy prices of GPUs (other components seem to have increased steadily in price as well compared to the last time I built a PC which was way back in 2016). I still wanted to scratch my upgrade itch and after reading this guide and seeing the success of everyone posting in this thread I gave it a shot and everything worked!
I started with a i5 6600k + gigabyte z170n gaming 5 motherboard and I was able to swap in an i7 8700 (non k). I used the F23f bios and a modded version of efiflash to flash the bios onto my motherboard. I followed the pinmod guide and covered the pins as indicated for gigabyte boards, I also shorted the 2 pins just to be sure.
I set an undervolt of -0.15 using adaptive voltage as previously mentioned in this thread and everything seems to be working great.
From 4c/4t to 6c/12t, hopefully this lasts me until the end of 2022/2023 when all the new stuff comes out.
Current specs:
Intel i7 8700
Gigabyte z170n gaming 5
G. Skill Ram @ 3200 cl16 2x 8gb
MSI Gaming X GTX 1070
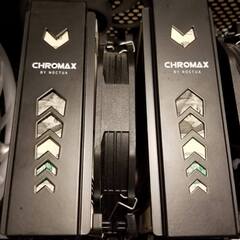
CPU Cooler: Noctua NH-L12 in dual fan configuration
-
1van reacted to Notsag in Guide: Running CoffeeLake/Refresh CPUs on Sky\KabyLake motherboards.
Hola, tengo una z270 msi gaming m3, me gustaría actualizar a procesadores de 8 nucleos, es posible?
-
 1van got a reaction from Levi990e in Guide: Running CoffeeLake/Refresh CPUs on Sky\KabyLake motherboards.
@EYFHRFortunately there is a ported BIOS for this board (a port from MSI Z370A). The original one is tested, but it is dated 2019 so it does not include the recent CPU microcodes. I have updated the microcodes, please check the attached (this one has not been tested).
Pinmod is still required!
Even though MSI boards can be flashed via FPT (see the guide), it is better to have a programmer available if something goes wrong.
Z170APRO_CFL_2019.zip Z170APRO_CFL_UPD.zip
-
 1van got a reaction from Orof in Guide: Running CoffeeLake/Refresh CPUs on Sky\KabyLake motherboards.
@SirGunther there might be still a problem with ACPI or other patches, because of your antivirus interference, path naming etc. Try to use the most modern CoffeeTime version and add it to antivirus whitelist. Everything should be green, without any errors. Sometimes Flashback does not work, especially if you tried flashing several modded bioses already. It might have left some "wrong" parts from previous bioses. Try getting an SPI programmer (CH341A).
@Orof thanks for the report! Please put images in spoiler tag (eye icon in the editor).
-
1van reacted to Orof in Guide: Running CoffeeLake/Refresh CPUs on Sky\KabyLake motherboards.
Hello dear forum members!
It has been a long time (6.5 years) since I installed Xeon processors on the LGA771 boards that work to this day.
Today I upgraded the 6700K I had so far to the 9900K on the Z170 board (which is not officially supported).
Note that there are some updates (due to the update of CoffeTime software to version 0.92) and additional distinctions that I discovered during the attempts to install the processor. Each motherboard requires a different installation, but for the sake of clarification to the guide here I will mention the highlights for Gigabyte boards
1. First download the BIOS files and the Coffetime 0.92 software as shown in the manual, along with the FlashProgrammingTool (FPT) software. Place them in folders on drive C.
2. Prepare the BIOS using the software with administrator privileges, as shown in the following image:
Note that both the ME and the VBIOS + GOP must be updated so that they can work with the processors (as well as the appropriate microcodes, and make sure it is saved!). In the EXTRA label I added a memory expansion to 128 GB. Also important - in MAC1 add the MAC address of your Intel network card and keep the number for yourself (can be found in the network card properties)
3. If your operating system is installed on NVMe, and the NVME is in MBR format and not GPT - you will need to convert it to GPT before executing the mode, using RECOVERY mode with MBR2GPT command:
3. Excellent, you have the BIOS, the SSD drive in the appropriate format and you are ready to flash the bios. Before that please make sure you have a backup BIOS (before flashing) on an flash disk if you need to back up to the previous BIOS (as I did). Now comes the step of using FPT to flash the BIOS (in other boards the way may be different, like using Programmer). It is important not to disconnect the computer from the power supply at this stage otherwise the BIOS will be Corrupted. Once the flash is complete, you are ready to install the CPU.
Shut down the computer via FPT only using the fptw64 -greset command, and before the computer turns on after the restart turn it off and do not let it turn on. Disconnect it from the power supply and remove the battery.
5. Before installing the CPU, you will need to cover some of its pins according to the board (Gigabyte covers the most), and connect some of them (depending on the board):
Here is the mod I made using stickers from kind seller of Aliexpress who also brought tweezers:
6. Install the processor on the board. Put the cooler on for a moment and make sure the board goes up (if you can, I used the board's number bulbs to make sure it goes up) before you put everything together (if it does not go up you may not have flashed/customizes the BIOS properly, or you may not have put the microcodes properly). If it comes up, turn it off and reassemble the computer.
7. Make sure the cooler is seated properly and turn on the computer, enter the BIOS
8. Great, you're almost done! In my case the CPU was at too high a voltage (1.4VCORE) which put a load on the VRM and they also crash. This is of course not normal and the VCORE should be lower. In the BIOS use Adaptive Vcore and download at least 0.07-0.1V (in my case, play with it to see that the CPU does not get too much voltage) and check the stability. Monitor the temperature of the VRM and CPU using HWinfo. my board VRM temps do not exceed 70c under full load, the the CPU is cool as well.
9. Congratulations!
PS - My old Mugen 2 (which still cooled the Q9300) cools this processor well (better than 6700K! Thanks to the fact that the processor is soldered to IHS as opposed to 6700K) and is silent. I get higher and more stable frames with the computer, my brother can encode movies at 2x higher speed, and I can be with a quiet mind for a few more years until I have to upgrade. The computer is stable after I have fixed the voltages. Was very enjoyable and worth it! Just make sure you have a board with VRM good enough for that and be prepared for the complexity of the process.
Too bad Intel did not let us just install the CPU in a normal way (because as you can see, it works great), but for that there is Modding
I would be happy to assist with any question / request!
Regards,
Or Cohen
-
1van reacted to Remiix_Dripgxd in Guide: Running CoffeeLake/Refresh CPUs on Sky\KabyLake motherboards.
Thanks for everything, that video really made everything super easy, it turned out That just renaming the cap file made the flash unbelievably easy. from there, 2 pieces of Kapton tape and a piece of copper tape to insulate and short the processor pads and everything ran as if intel actually intended it. my 9700k is running cool and smoothly at a 5.2ghz overclock under water. This all proves to me that intel is a pack of money hungry bastards, there's no reason this couldn't have been made to work from the factory.
-
 1van got a reaction from ZachNap in Guide: Running CoffeeLake/Refresh CPUs on Sky\KabyLake motherboards.
@ZachNapI'd place it properly, just to be sure, even if it may not be as dangerous as misplacing the piece on the right side. Thanks for the feedback.
-
1van reacted to ZachNap in Guide: Running CoffeeLake/Refresh CPUs on Sky\KabyLake motherboards.
Thank you for creating this guide, I successfully got an i5 9600k running in my gigabyte z170n gaming 5 mini itx motherboard. I've never done anything like this before and I'm super glad that everything worked on my first attempt.
I also created a to-scale template for the pin mod that I used to cut out all my pieces of kapton tape. I have a PDF of the template attached below along with a picture of my cpu with the pin mod.
While typing this I notice that I actually misplaced the piece of kapton tape on the left side. My computer seems to be running fine, I'm not sure if it's okay to leave it like that or if I should take the cpu out and fix that.
PinModTemplate.pdf
-

 1van got a reaction from Kronos77 in Guide: Running CoffeeLake/Refresh CPUs on Sky\KabyLake motherboards.
Hello guys.
I used a search engine and found that the possibility to run CoffeeLake processors on Sky\KabyLake motherboards was brought up here before, but did not receive a wide coverage, even though there are many people who have good Z170/270 motherboards and want to upgrade their obsolete 4C/8T i3s i7s.
Many such cases.
The modification itself is more than a year old, but it's better late, than never?
To those who are interested, I present the translation of this guide below. Thanks to all the people who made this modification possible and to the all people who contributed to this guide. I am not a native speaker, so corrections are welcome.
0. Before You Begin. Disclaimer
You are responsible for your actions and consequences thereof. There is no guarantee that everything will work as it should or work at all.
1. Highlights
2. BIOS Dump and Personal Data Extraction
3. CPU Preparation
-
1van reacted to BlastingKap in Guide: Running CoffeeLake/Refresh CPUs on Sky\KabyLake motherboards.
Just wanted to leave a thanks here for the guide. Picked up an i7 8700 and it's been fun getting it to work in a z170 maximus hero.
One thing i wish i'd realized sooner is that the stock voltages for the non-k parts are waaaay too low. I've essentially had to 'OC' the 8700 up to stock speeds by adjusting voltages and power manually. SVID and Auto anything was a complete mess and it couldn't even reach the Windows login screen.
Methods/Tools used:
- kapton tape for the two isolated pins
- a very small strip of conductive tape for the SKTOCC pins
- a CH341A to flash the bios
- a cheap chip puller (almost destroyed the legs on the poor DIP chip without it)
- stock BIOS v2202 (as it came highly recommended)
- the russian coffeetime tool (v0.85) - picked the experimental 'inject all' option for Asus.
Lessons learned:
- The CoffeeTime tool ships with the 64-bit version of cecho. I ran the tool in an old Win7-32bit VM and had to replace it with the 32-bit version.
- The AIO Tool from Win-raid has no config menu. It also needs to be executed close to root folder - I ran into a bunch of MMTool crashes due to path length exceeding the maximum. Even when it worked I was stuck on POST code 31 with a skylake CPU installed. It's possible the AIO tool doesn't keep skylake support?
- CH341A windows software sucks. If you can run it on linux do that. I had problems flashing (read/verify would fail) until I tried v1.31 'Free' version.
- All of these tools trigger virus scanners and unpacking them will get a bunch of their files quarantined/nuked instantly. Likely false positives but if you like to be cautious just use a VM or a PC that's isolated from the net.
- If you care about your boar'd SN and MAC address, make a backup of your OG BIOS with the programmer before you start!
- Even after dialing up the vcore to 1.4v, couldn't obtain an all-core sync higher than 3.5GHz. Turns out the Auto CPU Core Cache Ratio is also garbage and I had to dial in 34 min and max. I could then drop the vcore down to 1.3v and achieve a stable system (Prime95 - Blend - 30mins). Cache Ratio of 36 or higher wasn't stable without putting in more vcore than i was comfy with running 24/7.
-
 1van got a reaction from BlastingKap in Guide: Running CoffeeLake/Refresh CPUs on Sky\KabyLake motherboards.
4. BIOS Modification
5. Flashing the Modified BIOS
6. First Start
7. Troubleshooting, Bugs, and Features
-
1van got a reaction from BlastingKap in Guide: Running CoffeeLake/Refresh CPUs on Sky\KabyLake motherboards.
Hello guys.
I used a search engine and found that the possibility to run CoffeeLake processors on Sky\KabyLake motherboards was brought up here before, but did not receive a wide coverage, even though there are many people who have good Z170/270 motherboards and want to upgrade their obsolete 4C/8T i3s i7s.
Many such cases.
The modification itself is more than a year old, but it's better late, than never?
To those who are interested, I present the translation of this guide below. Thanks to all the people who made this modification possible and to the all people who contributed to this guide. I am not a native speaker, so corrections are welcome.
0. Before You Begin. Disclaimer
You are responsible for your actions and consequences thereof. There is no guarantee that everything will work as it should or work at all.
1. Highlights
2. BIOS Dump and Personal Data Extraction
3. CPU Preparation
-
-
 1van got a reaction from Gix7Fifty in New cooler for i9
i9-9900K has a thermal interface limitation of about 200W. I.e. no matter what cooler you install, the CPU die will only be able to pass about 200W to it, due to the thermal interface between the die and the heatspreader.
Check Der8auer's videos on youtube for confirmation.
If you don't plan to delid the CPU, both your existing AIO or a NH-D15 are fine, no need to change.


