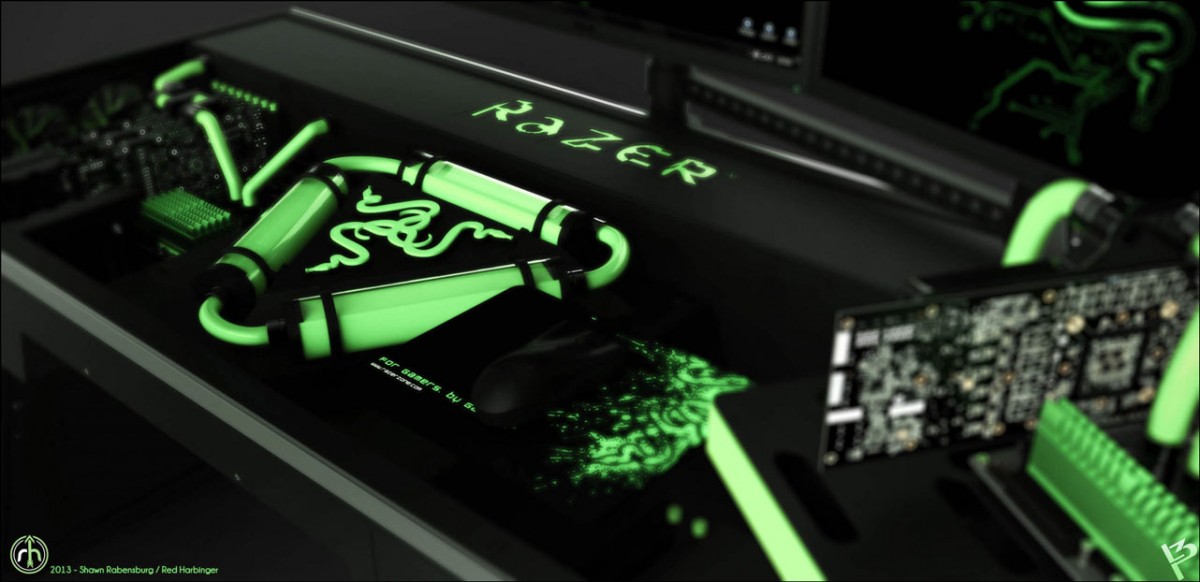
So I may be a little late starting this build log (I ran out of internet so I couldn't post anything) but here we go. Little About Me: Because I feel I should, I thought I might start with a little about myself. I am a 16 year old living in Auckland, New Zealand (Yes that place does exist) with a passion for modding. All credit to inspirations such as Peter Brands (Maker of the Red Harbinger and the original L3P D3SK) who gave me the idea for this build and my goal is to demonstrate that builds like this don't require a enormous budget (Although they can if you want them to) And if all turns to **** and the desk ends up being a waste of time in my defense this is my very first water-cooled PC, looking back this was a really stupid idea after all. Early Stages Like any other computer build this desk mod started off as an idea,
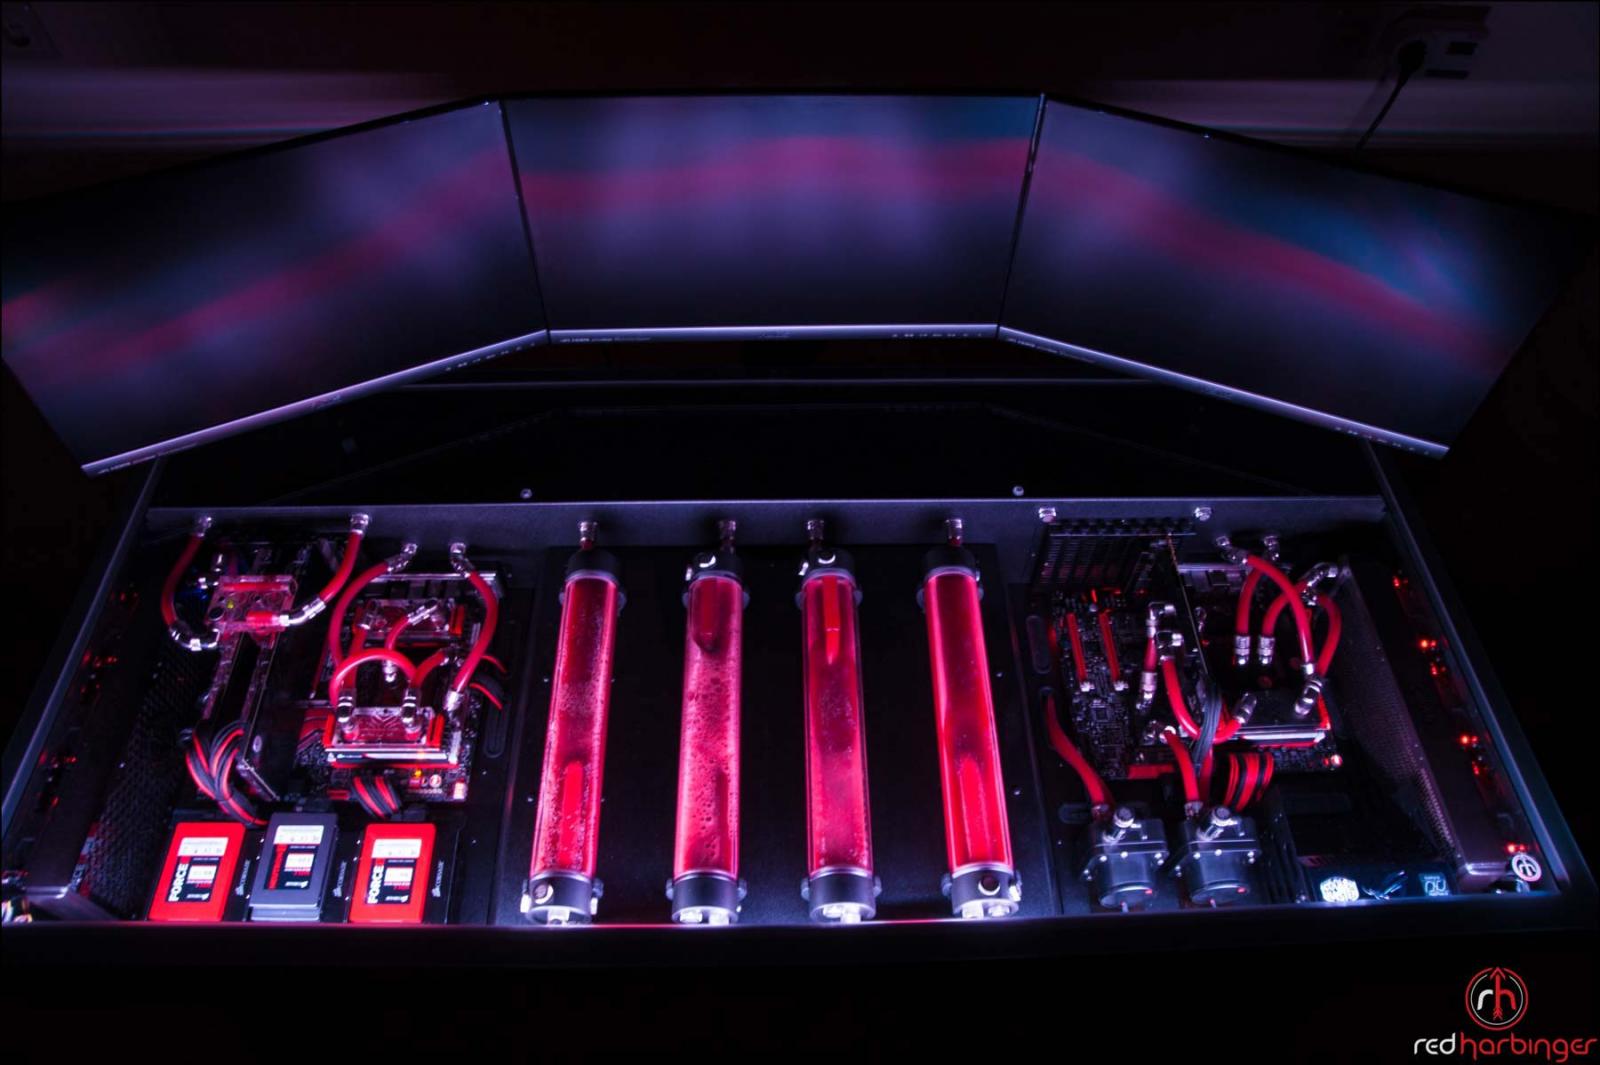
I really liked this concept of having two computers in one desk as on top of it looking god dammed sexy I regularly host LAN's or have friends over so it will be great for anything multiplayer or cooperative. The idea oh having the reservoirs in the middle just adding to this sex appeal
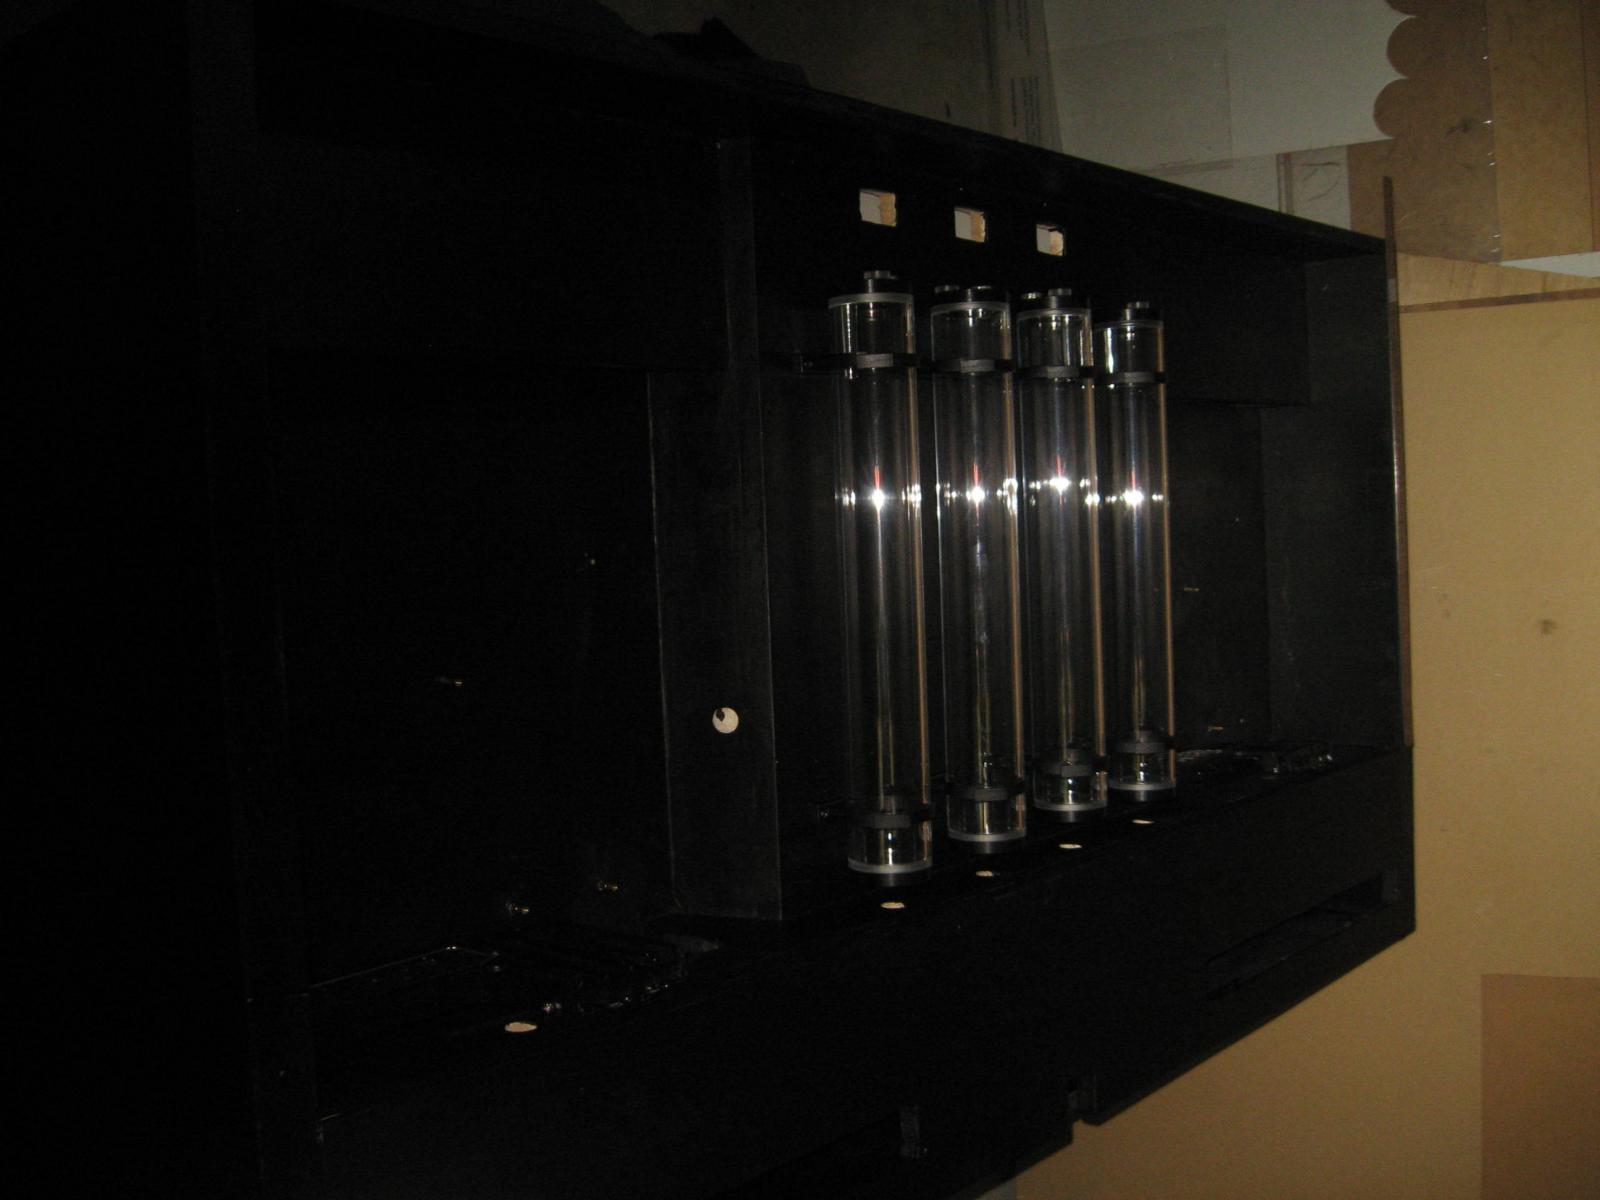
While I have 100% respect to this build it made me realize how much I wanted the 4 tube reseviors running down the middle and so with that in mind I went into the next phase:
Designing
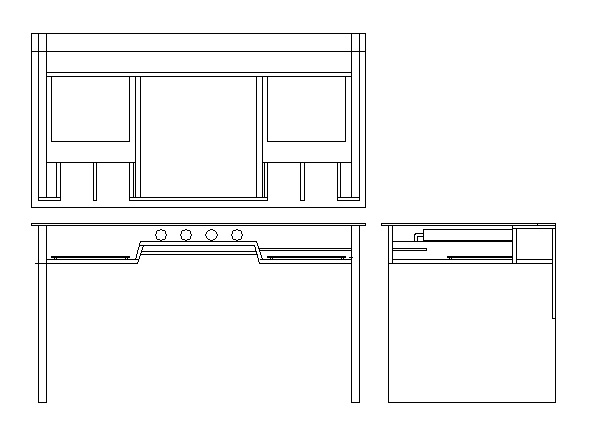
Taking into account what I learned from seeing previous builds I wanted to design something that I feel combined had the best of everything, and so using a program I learned in middle school (Yes Turbocad) I set into the design phase.
It took me about 5 hours to come up with this design, keeping in mind I knew next to nothing hammering two bits of wood together let alone the required structural integrity. However there was one problem...Glass
it was obvious to me that I needed a glass top to show off my sexy components however looking around glass is VERY EXPENSIVE to get it custom made with the lowest quote being $500 NZD ($396 USD) and so the design had to me made in ratio to whatever piece of glass I could aquire.
For the next few weeks I was constantly on TradeMe (New Zealands equivalent of ebay) searching for glass desks. coffee tables dinging furniture anything with a reasonably sized pane of tempered glass until I found something that suited me perfectly, 1500x700x8 glass desk, with glass 8mm thick. and for 37 NZD ($29 USD) it was an absolute steal. I immediately urged my parents help me bring it home-a dogy affair where we had to strap the legs to the roof while the glass rested over my head in the back seat.
Anyway we got the glass home safe, and I adjusted the plans to suit.
What to Use
Next step was deciding what to use. And this is where I am lucky. By trade my Dad is and engineer has built many houses meaning to say he has ALOT of wood to spare. A quick tour of the farm found us exactly what I was after, 3 sheets of 2x5m kustomwood and a wooden door to use as legs. (Bogan I know). Once we got all the materials together it was time to get cutting and and assembling.
I'm sorry but this just had to be said. Part of the reason that I wanted to do this desk build is so that I can have some experience in the workshop and not be completely useless in future. Therefore I ordered my Dad to keep and eye on me so I don't balls it up THAT'S IT after that it was up to me to do the cutting gluing and screwing.
Building
Now i'm sorry about this but when I started I didn't really have plans of making a build log hence I apologise in advancnce for the complete lack of photos. Also I was limited to a cheap $50 digital camera so the photo's that I do have aren't the best
Long and boring story short it took me about a week to cut out the wood, during this process I was limited just a handsaw and a circular saw and so some of the cuts aren't the straightest but meh overall for a first timer I wasn't too unhappy. Once cut the Kustomwood was screwed together (With PVA glue of course) I dirlled holes for cabel/tubing management and primed my baby ready for its first coat.
Again sorry for the lack of pictures during this process
After the primer I had the choice between three different types of black paint: -Tire Paint (Yes the stuff you use to paint car tires)
-Blackboard Paint
-Or Metal Primer
Now I wanted a matte finish with a ever so slight sheen so I decided to use the tire paint for the first coat, and the metal primer (After it had been thinned) as the second coat. Leaving me very pleased with the results.
FAQ, What are the holes in the front for?
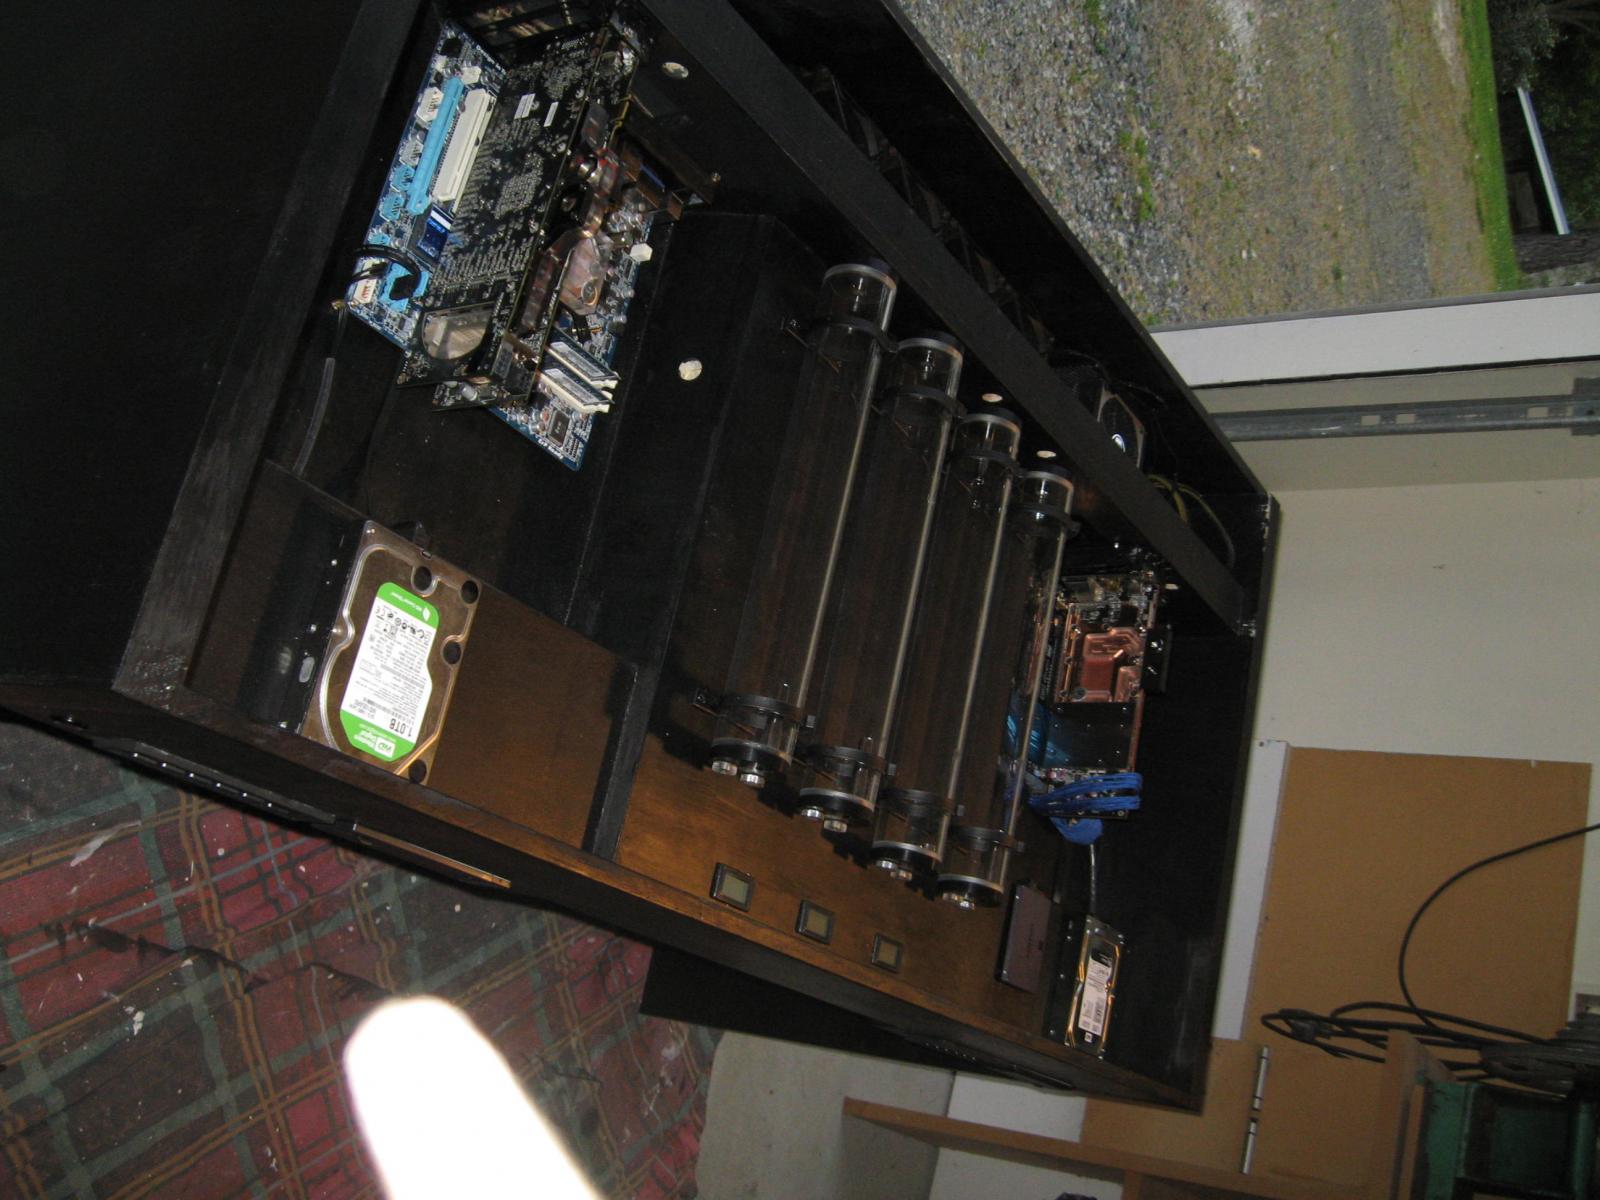
The rectangular cuttouts in the front are for 5.25" drives and the circular hole is for the two power buttons.
What are the rectangular holes inside the desk for?
I'm not gonna lie I balls'ed up quite a bit here, this is a place for the rear IO to go however instead of being a small rectangular hole for the mobo IO leading to the GPU IO (http://www.dansdata.com/images/jullls/pc6100back480.jpg) I accidentally glued this back piece of wood in the wrong way forcing me to make one giant hole
What are the rest of the holes for?
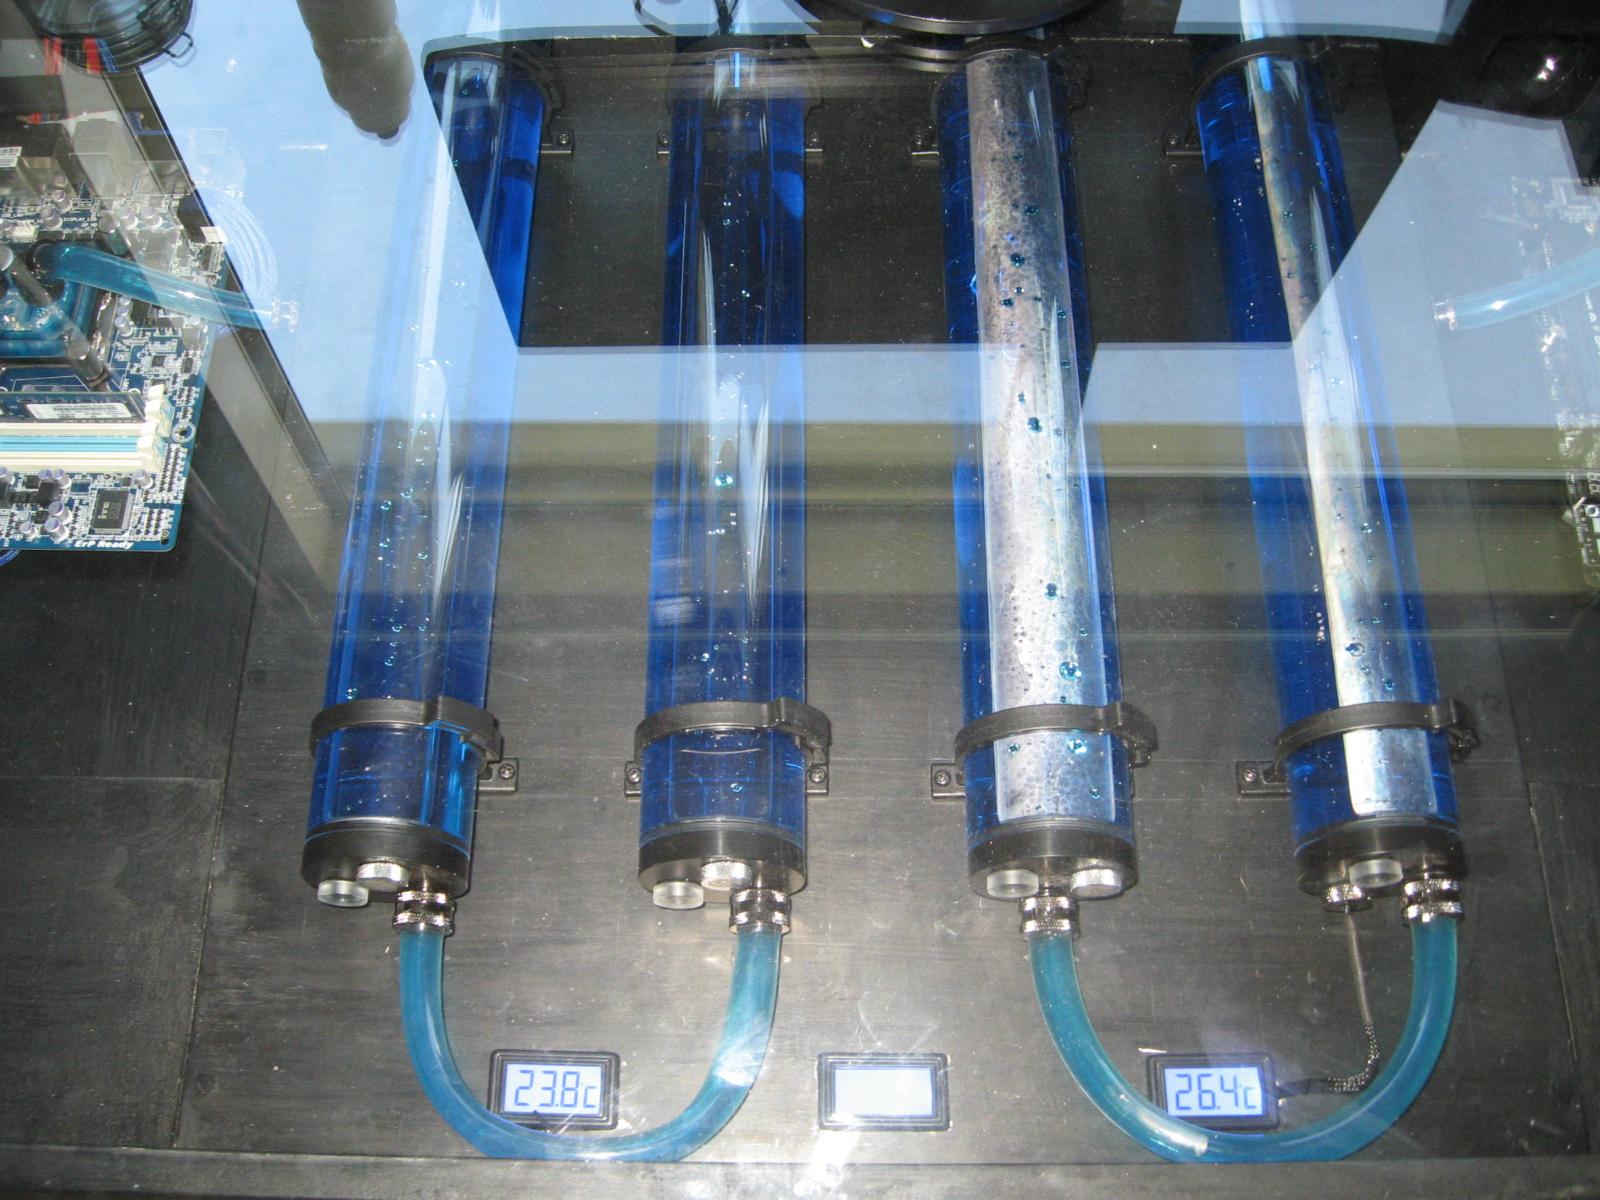
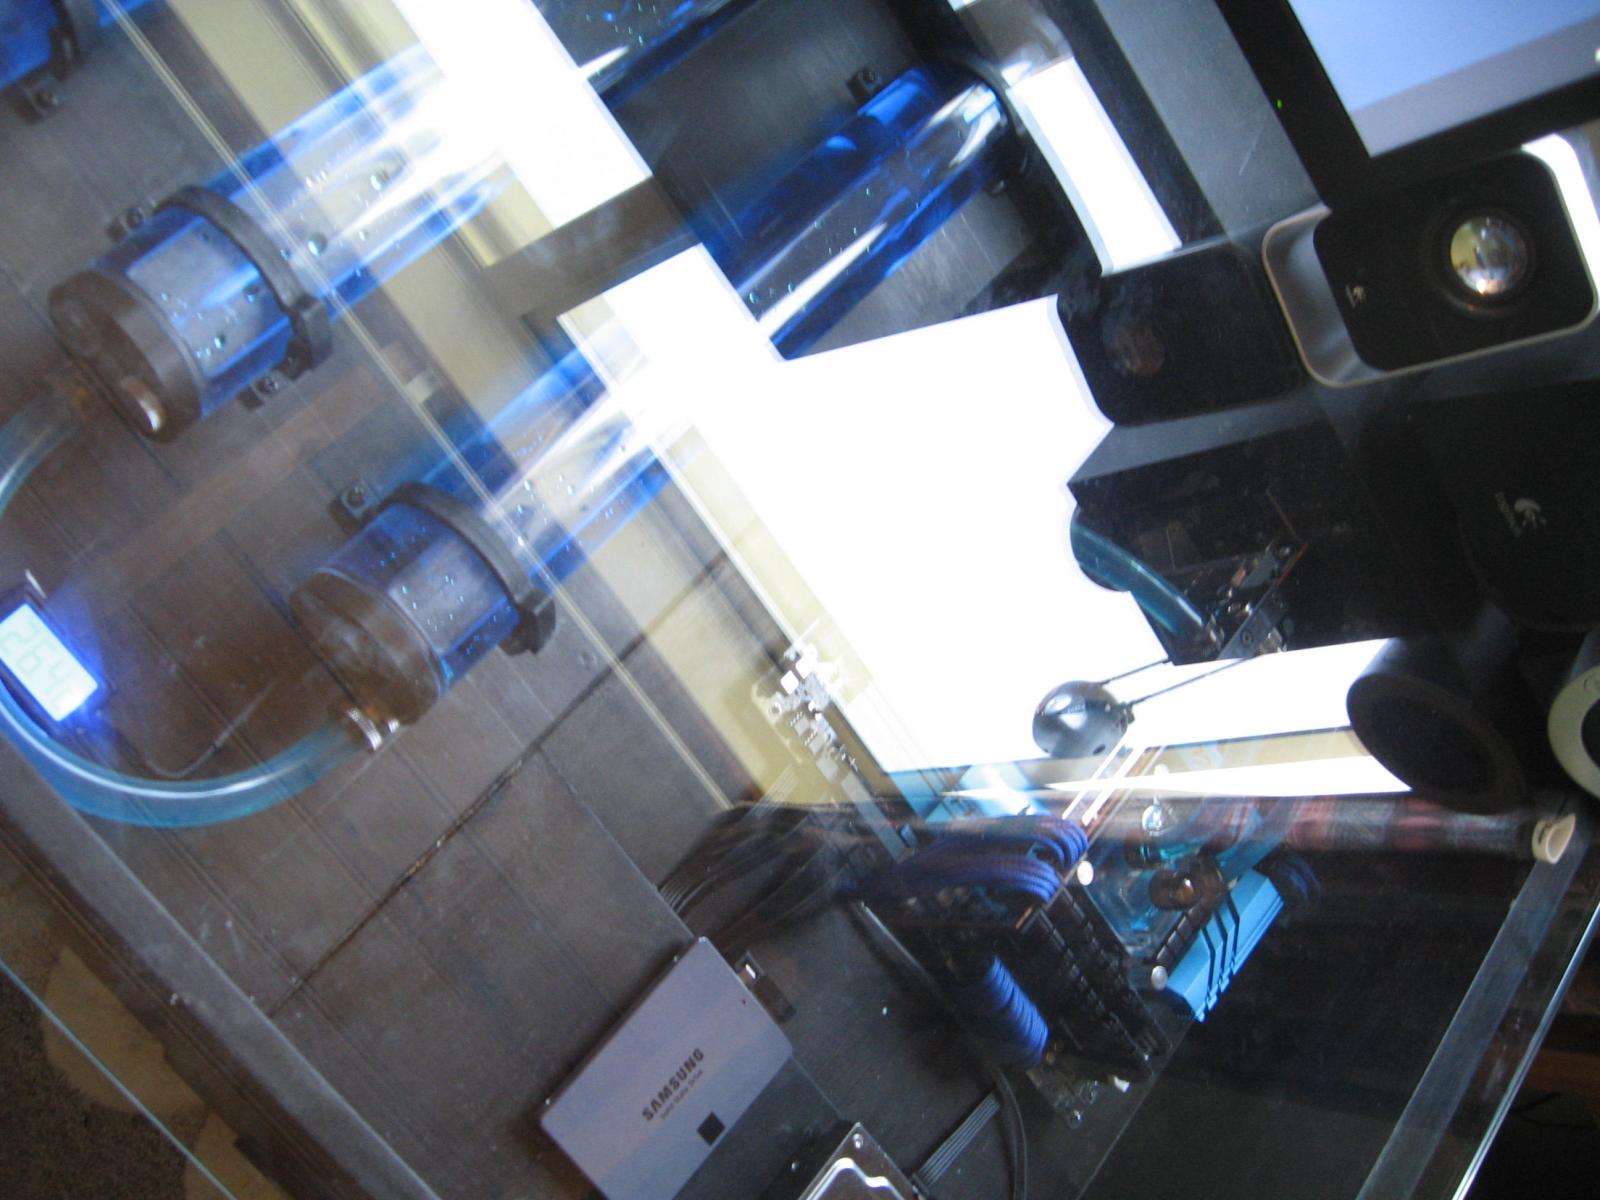
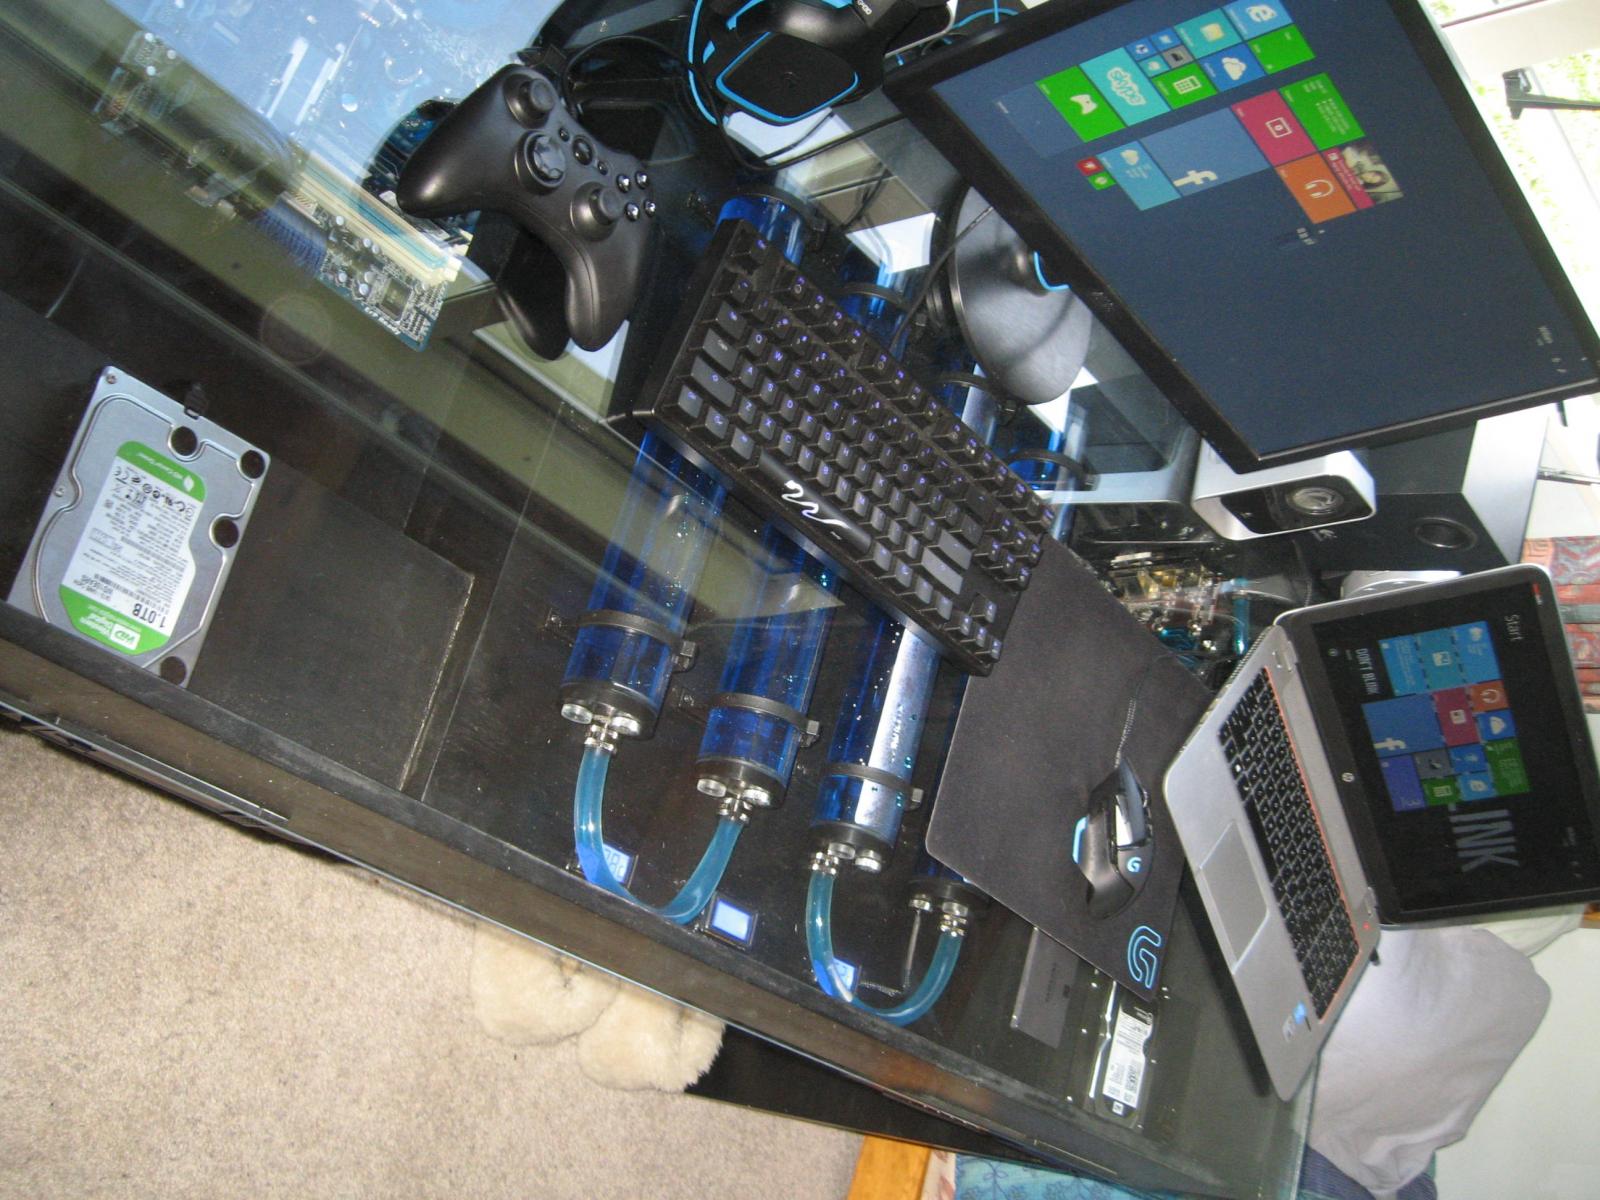
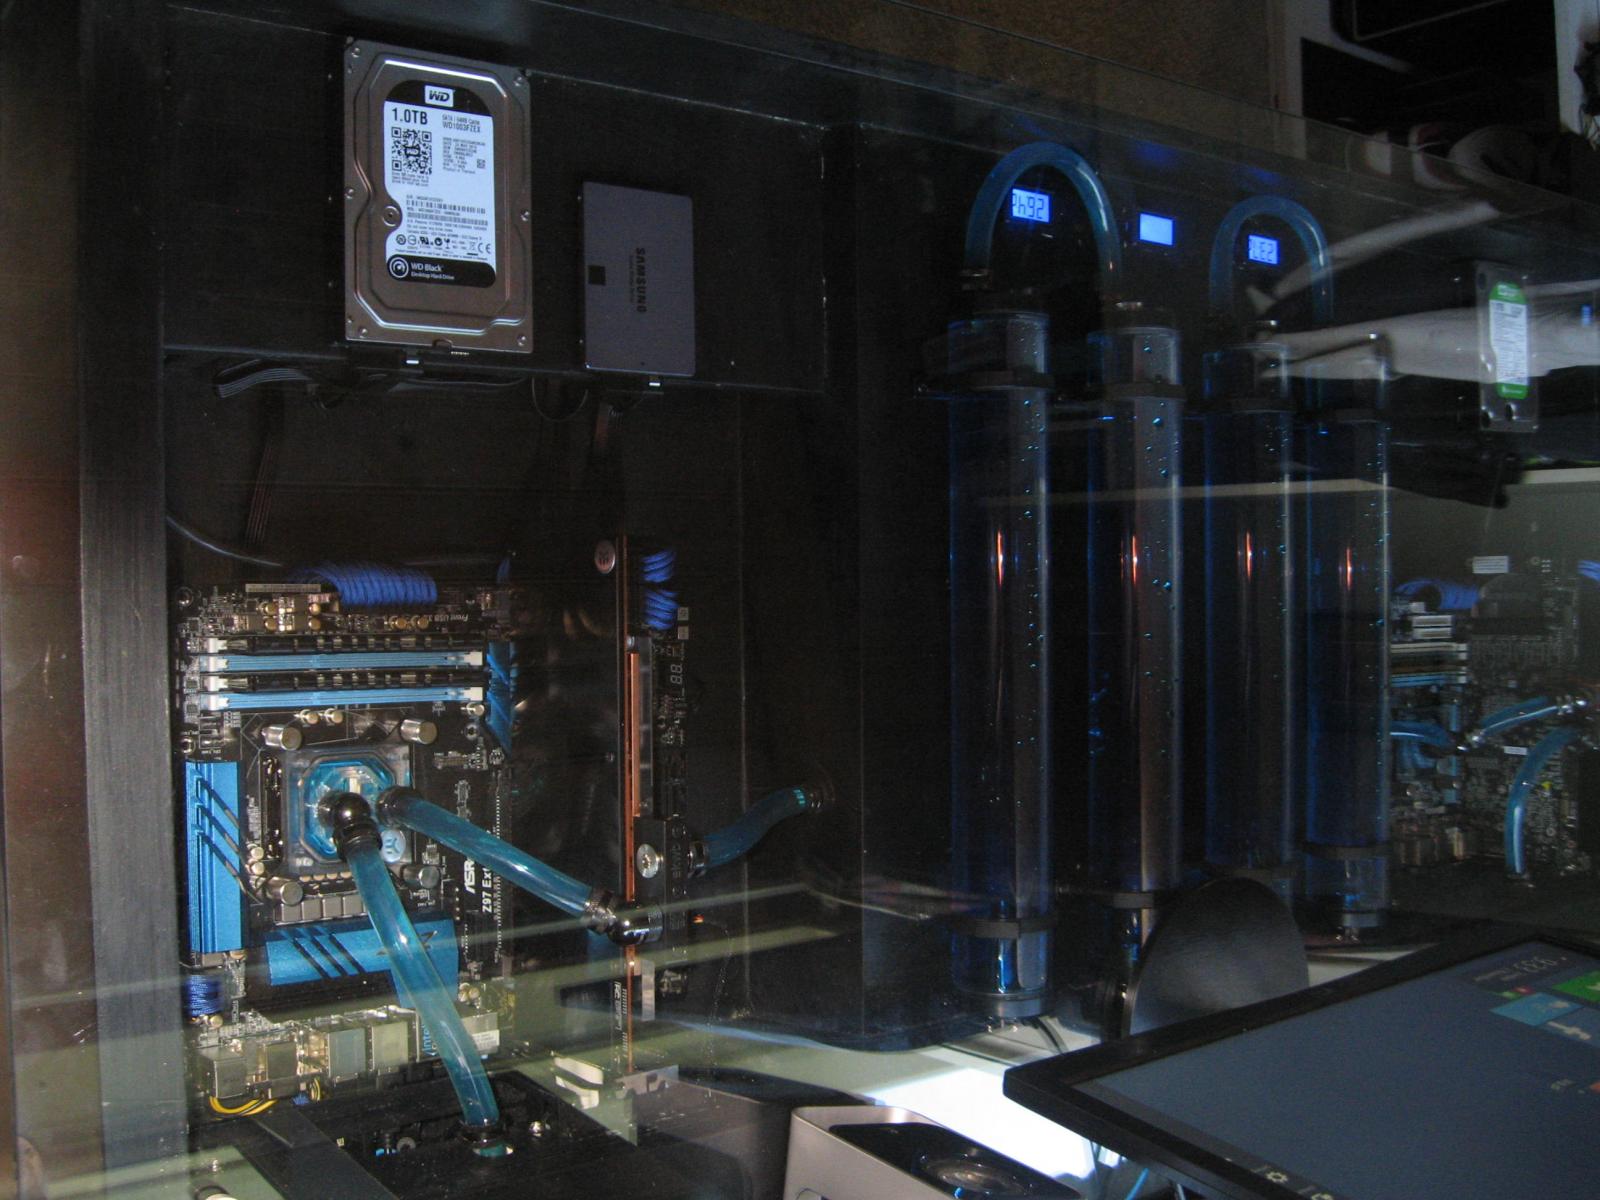
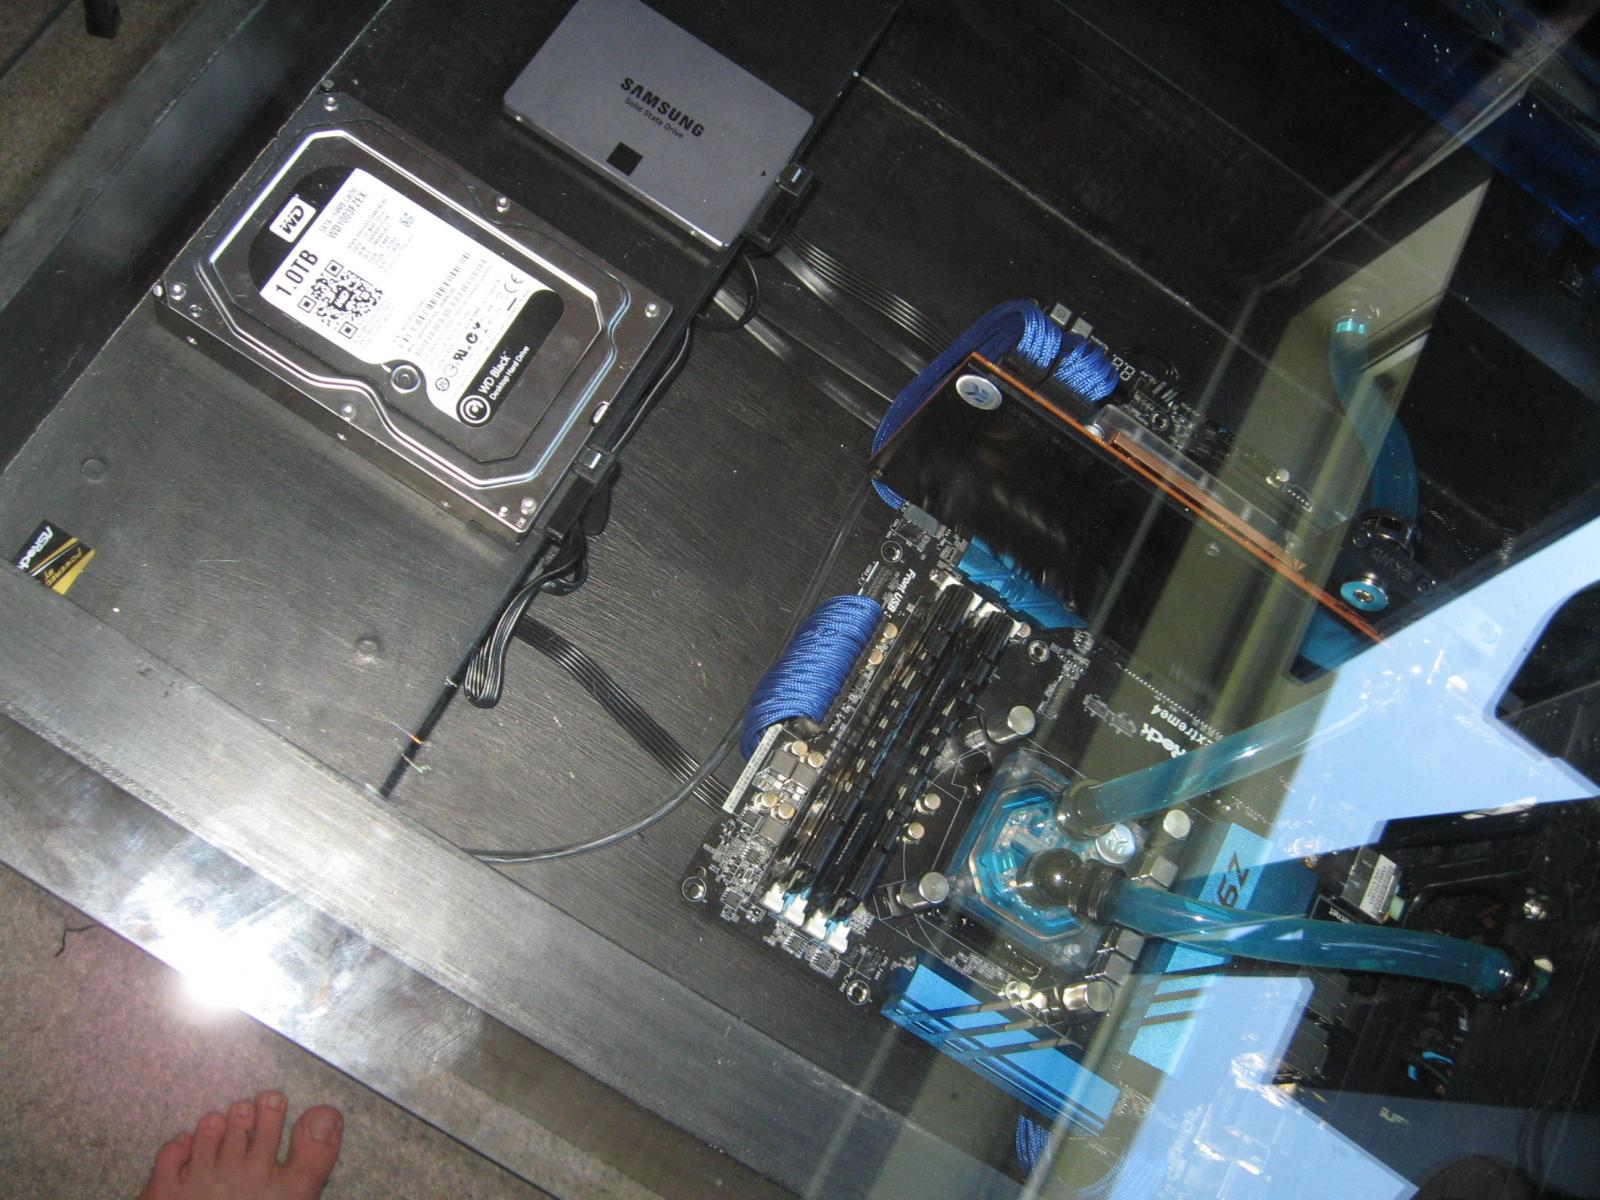
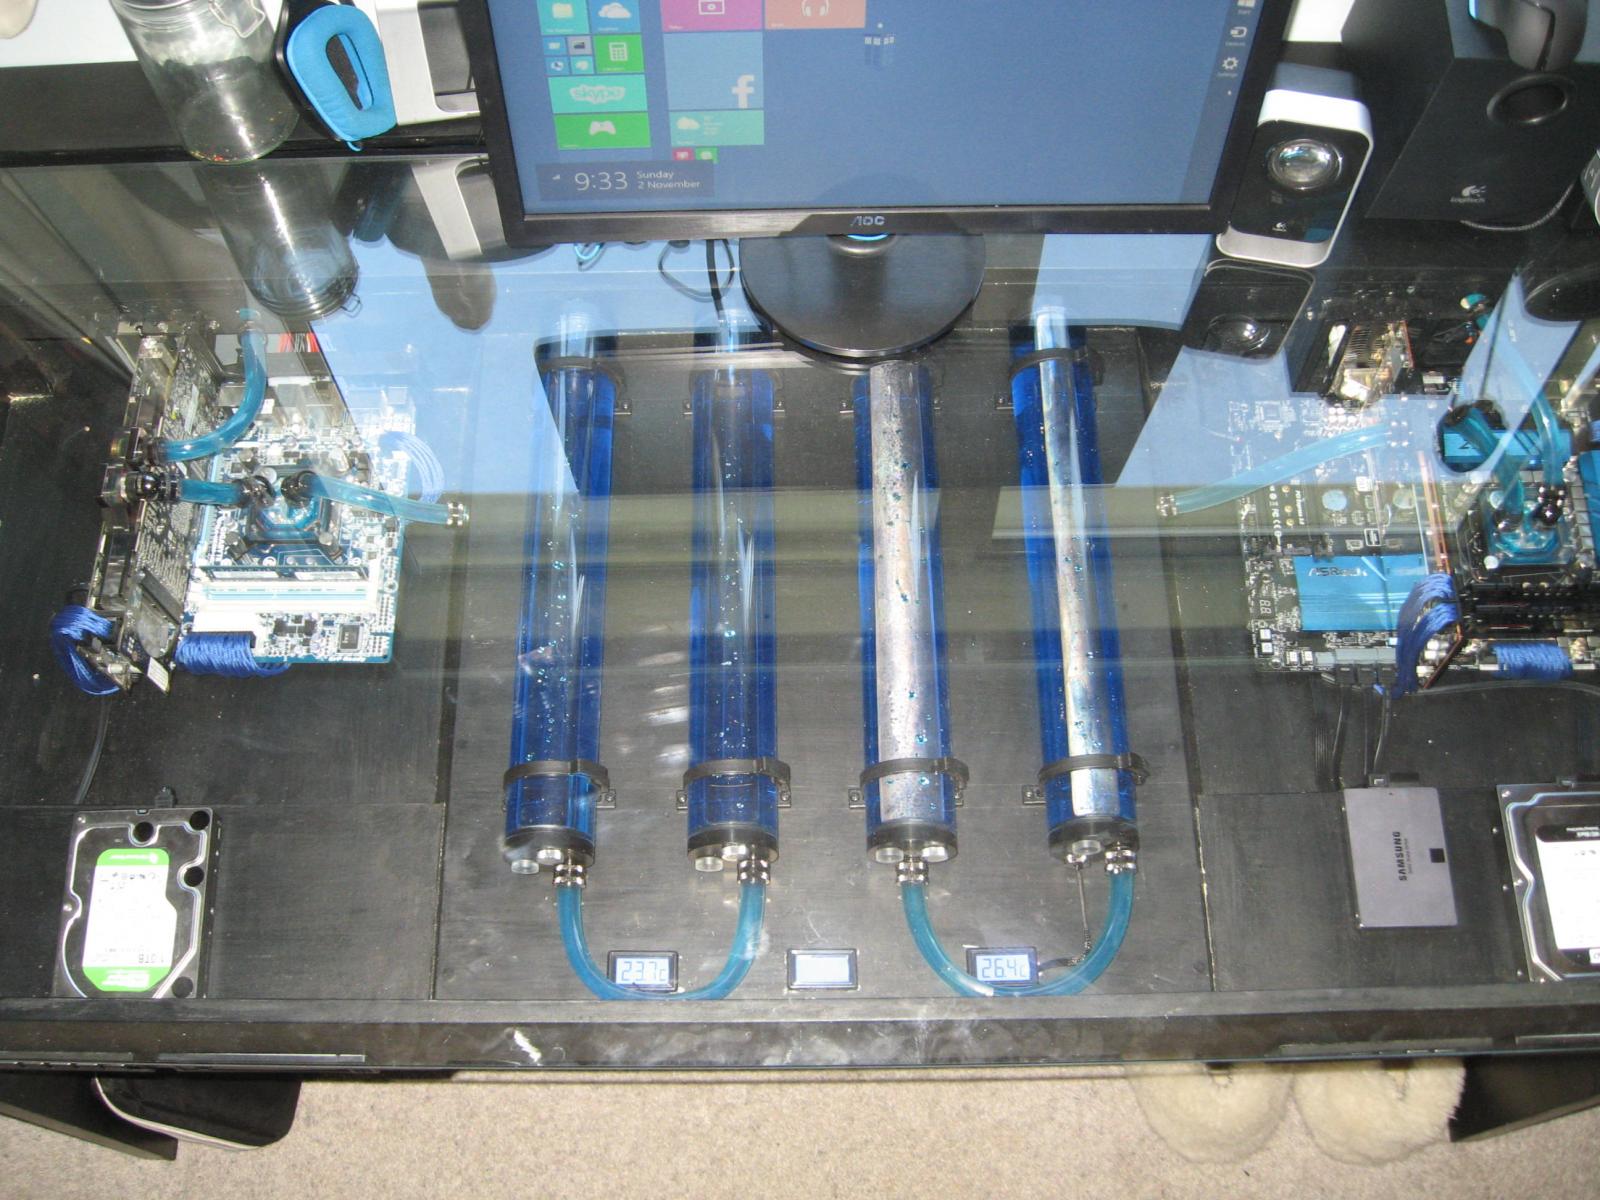
The rest of the internal holes are for tubing, I really want a clean aesthetic going on and so as little tubing and cabling shown as possible.
Where does the radiator pump and PSU go?
This all goes into the back box thing behind the mobo/s as seen in the red harbinger etc
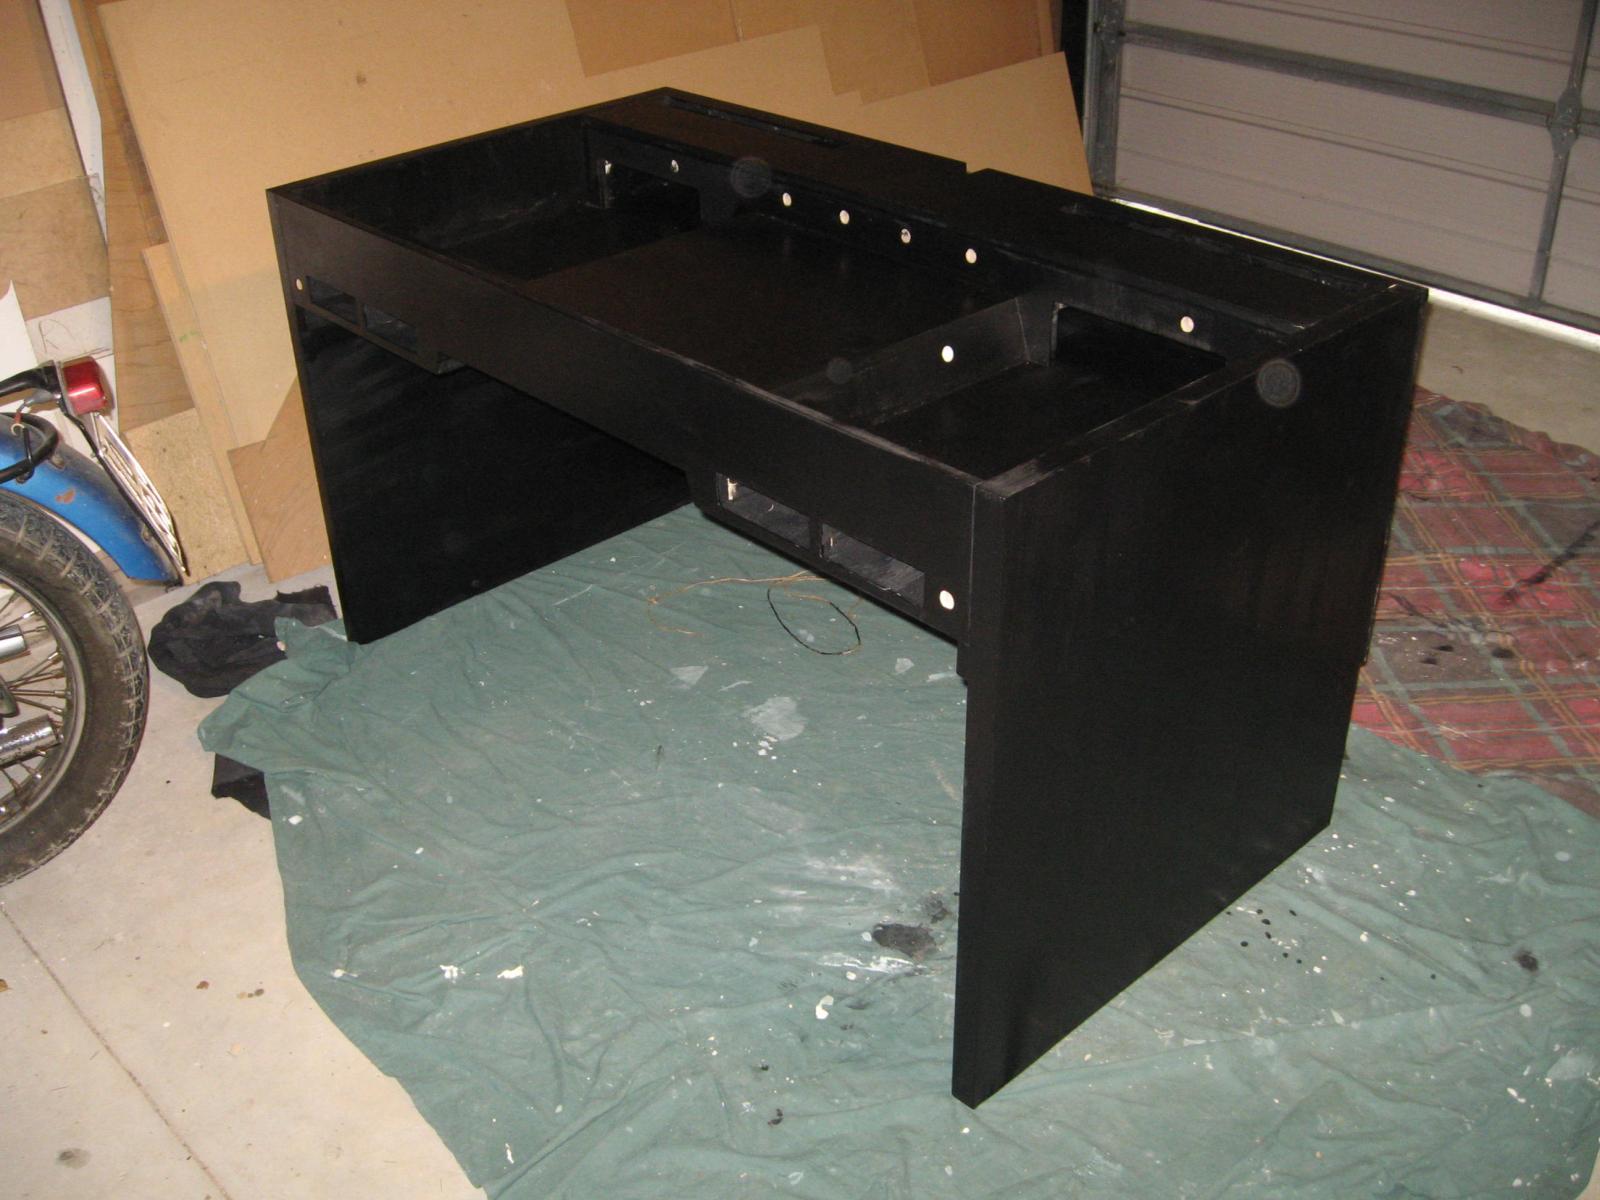
The Desk Is Finally Built
Because of the gaping great hole that was the back of the desk I decided to cover it using the rear IO cannibalized from another PC, and after drilling several hundred rivets from two very generic Cooler Master Cases I 'borrowed' from my school's tech department I painted it with the same metal primer that my desk was now coated in.
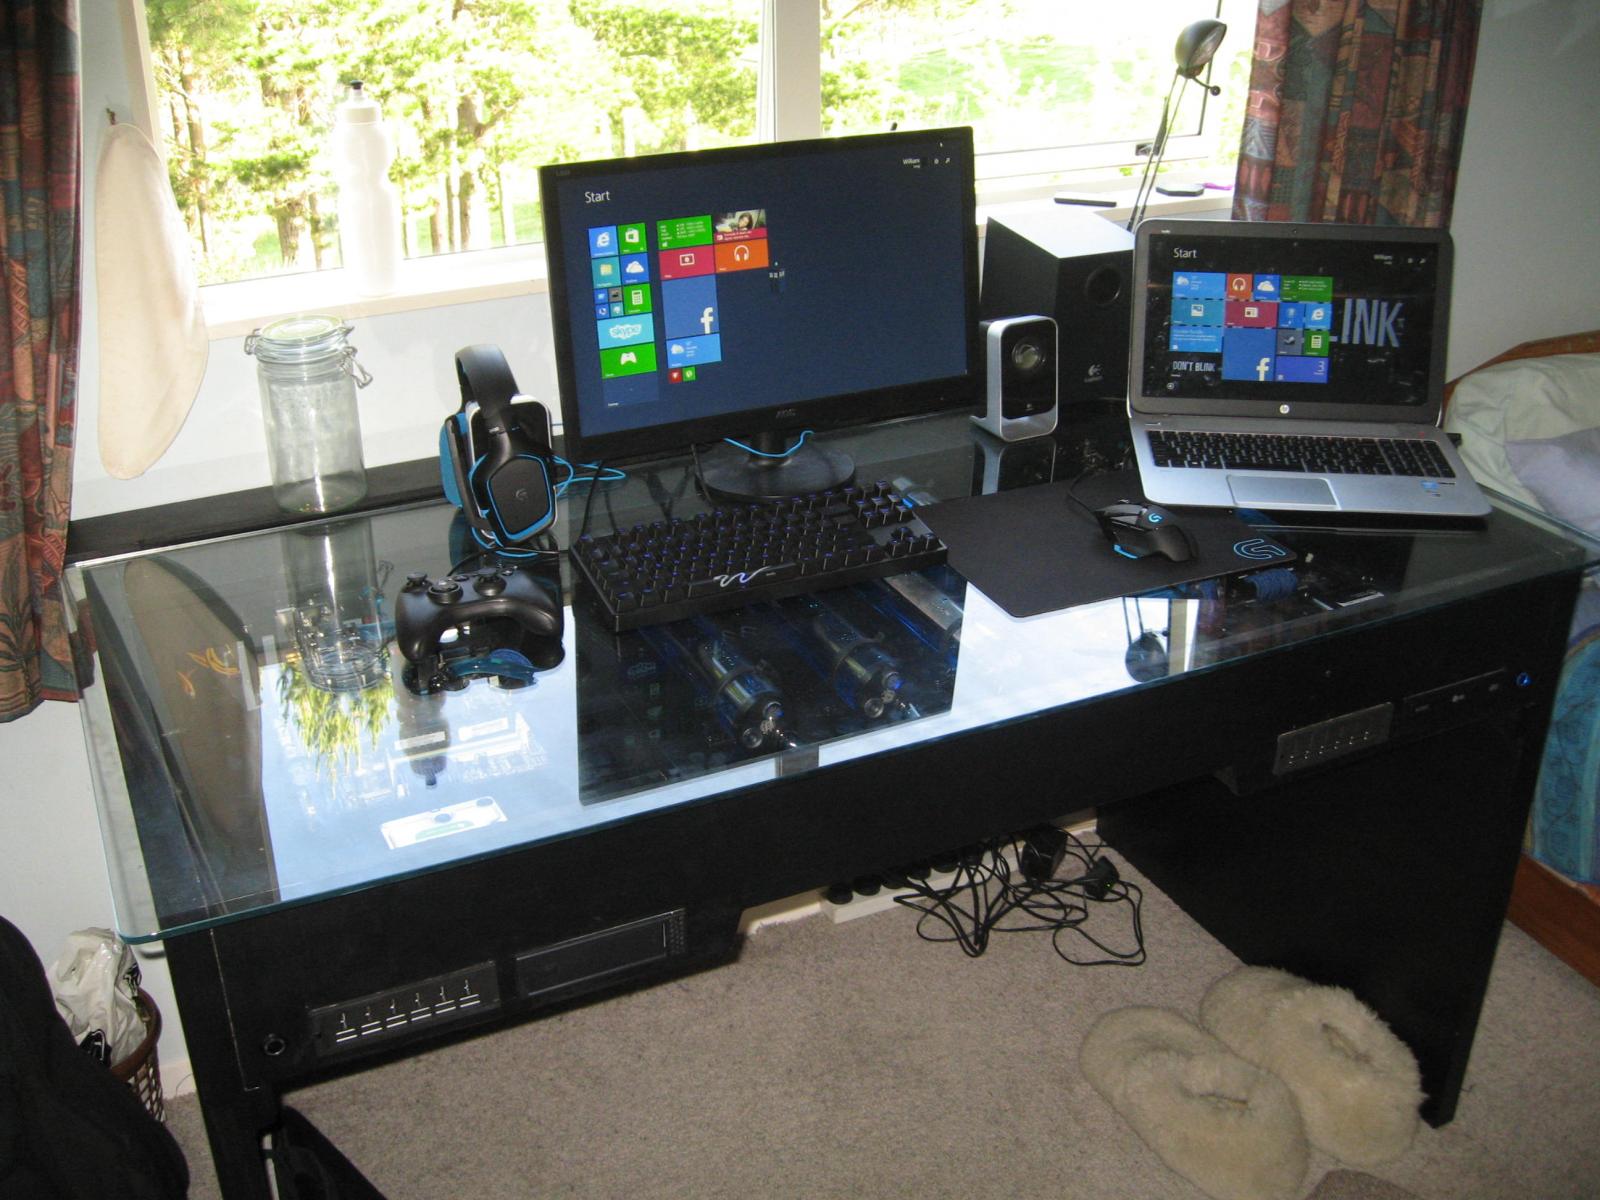
And without further ado it was finally DONE ready for my very interesting selection of components.
Components
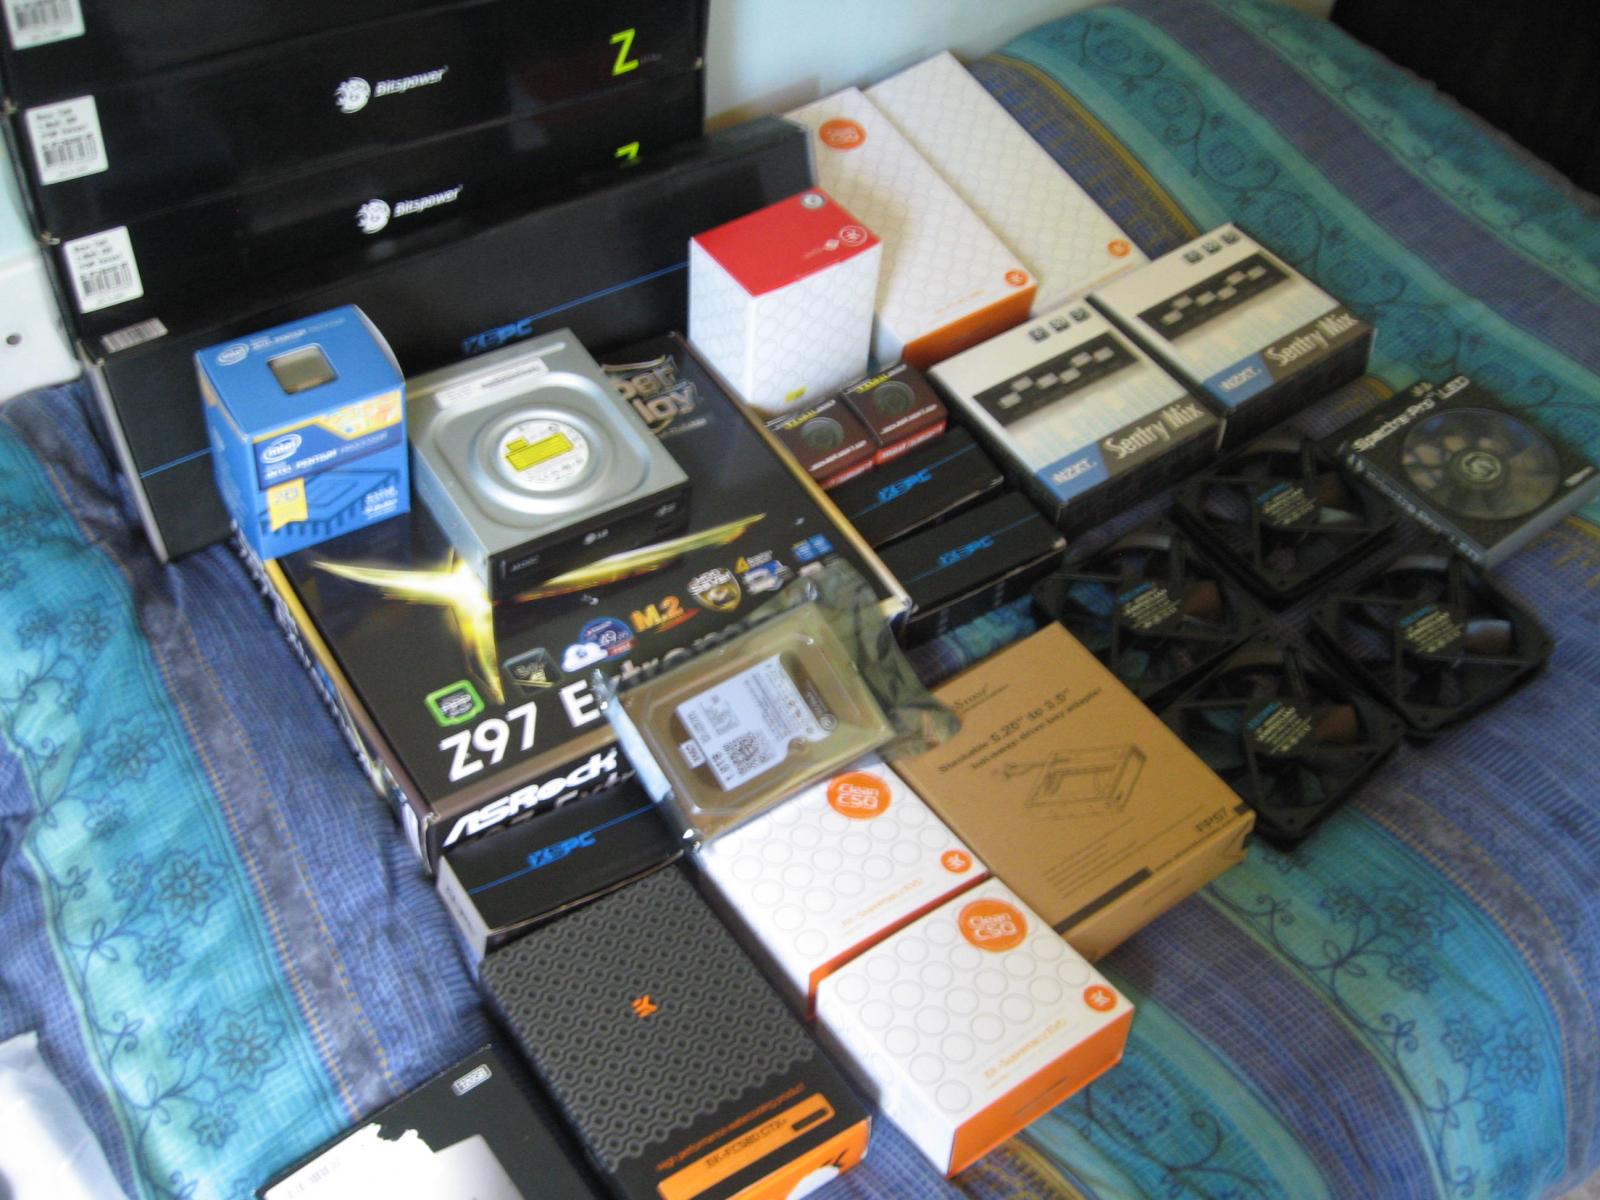
Rather than show you pictures of all the components coming in there own individual shipments (From all over the world I might add) I thought I might just show you a picture of all of them, then list all the components I used.
Main Hardware
Computer #1 (My Personal And Everyday Rig)
CPU: Intel Pentium g3258 (Its watercooled so I hope to get this baby up to 5GHz and as I said I was on a budget)
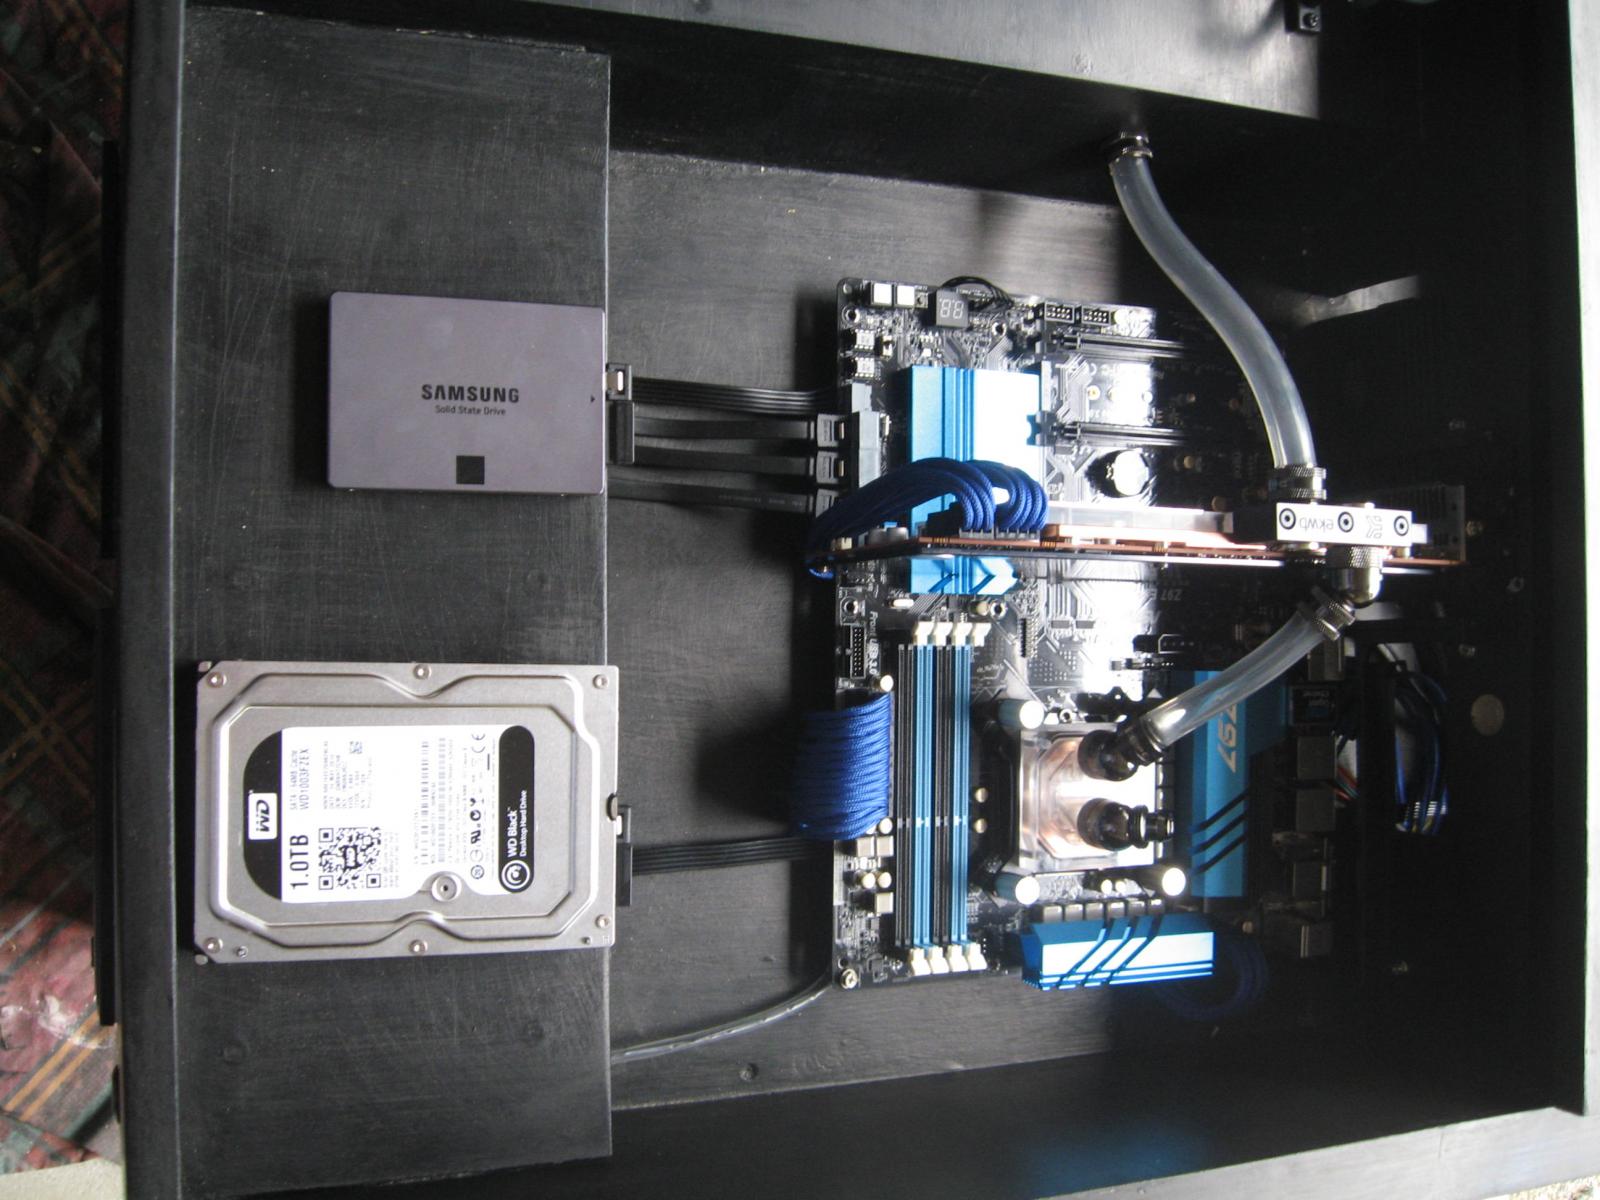
MOBO: ASrock z97 Extreme 4
RAM: Kingston HyperX beast 8gb
GPU: Radeon R9 290
PSU: Cooler Master V650
Watercooling:
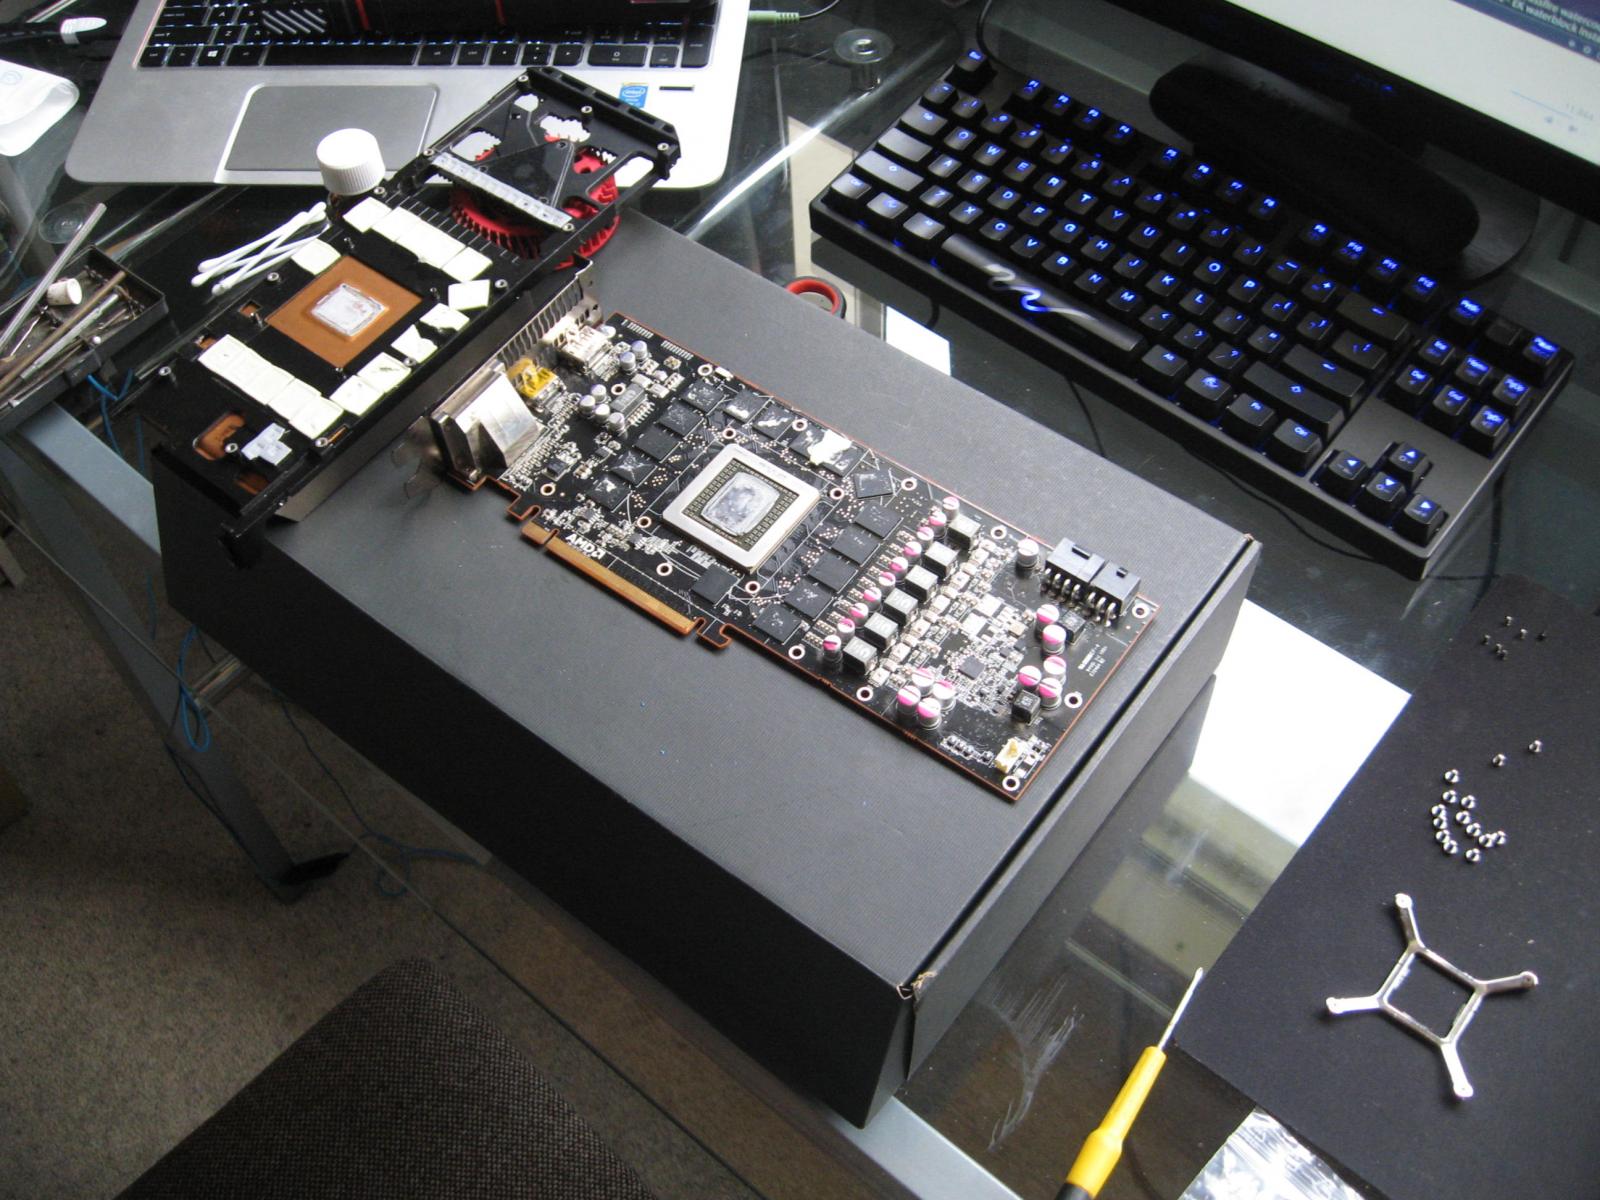
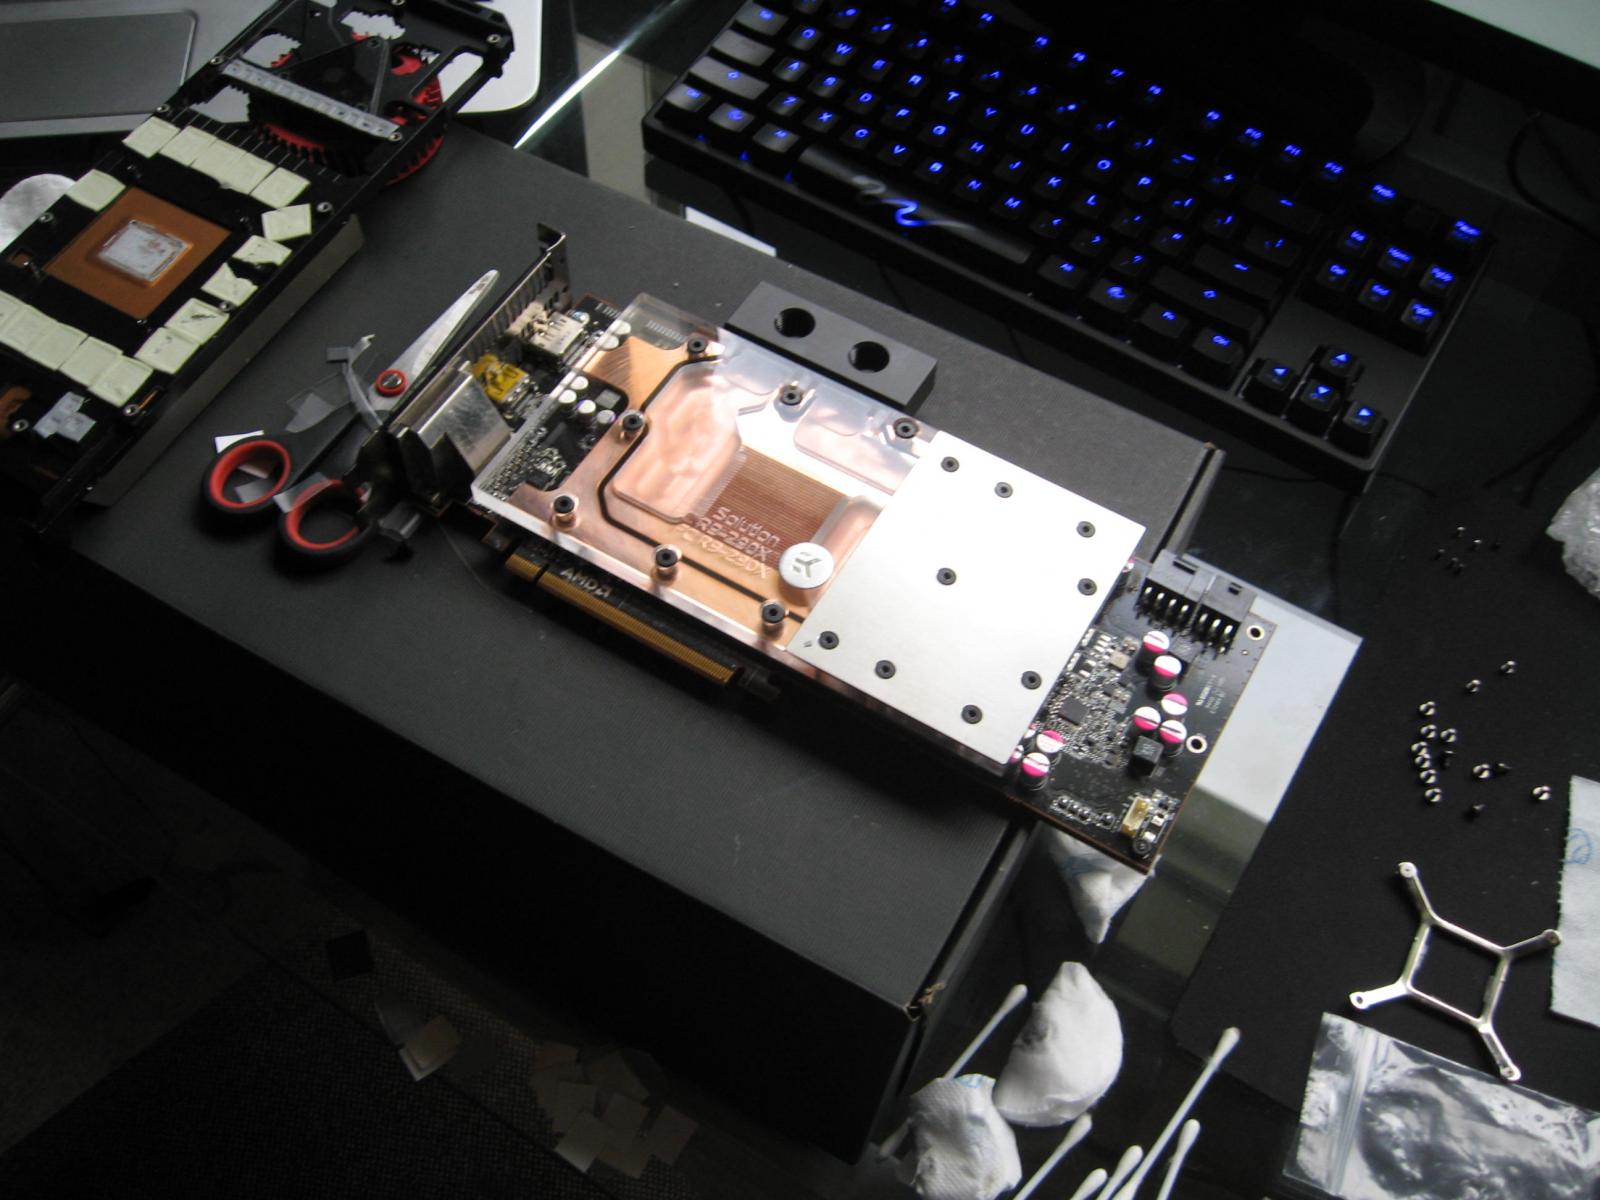
EK Copper Plexi Clean CSQ CPU WB
EK Copper Plexi Clean CSQ r9 290X WB With Backplate
Swiftech MP655 (This pump is/used to be Linus's favorite and I have to say I LOVE IT)
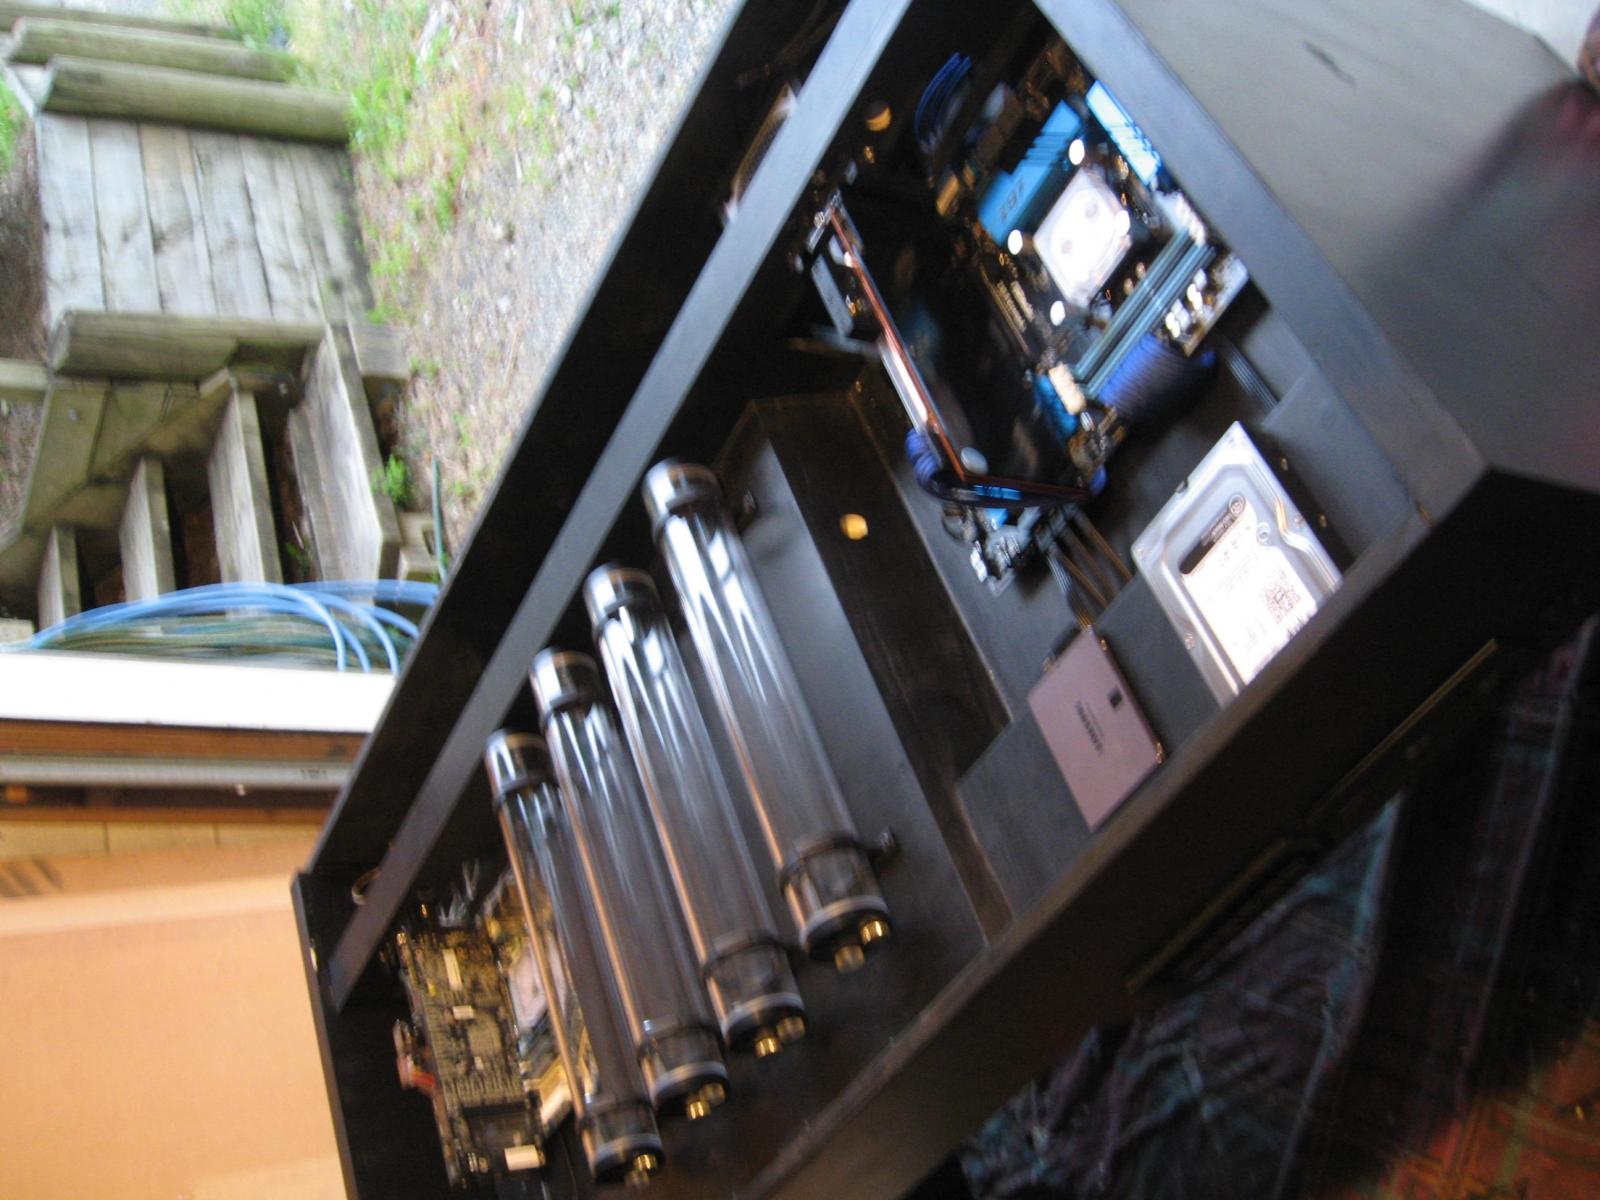
Xspc EX480mm Rad (With matching XSPC fans)
12x XSPC 5/8" Black Chrome v2 Compression Fittings (These were the cheapest in nz and I gotta say I like the look of em Thanks Techworld.co.nz)
3x XSPC 45* Rotary Fitting
2x Bitspower Water Z Multi 400 (This is 2 of the 4 reservoirs in the build)
Extras:
-NZXT Sentry MIX Fan controller
-Generic LG DVD Drive (Yes I thought I might use it one day)
-Bitfenix Alchemy Cabling
Computer #2 (This is a VERY odd selection of components that I sort of just had lying around, this will be my server and when a mate comes over a co-op rig)
CPU: i3 530 (Yes a first gen i3 DEAL WITH IT IM ON A BUDGET, OC'd this thing will go to 4.6GHz)
MOBO: Gigabyte GA 55 something something something (Again DEAL WITH IT I GOT IT FOR FREE)
RAM: 8gb DDR3 1333Mhz (I dont even know where this ram came from)
GPU: Geforce GTX 295 (God I love this card whoever designed it was a freaking genius)
PSU: Coming Soon (Yeah leave me alone I blew all my money on 4 reservoirs)
Watercooling:
EK Copper Plexi Clean CSQ CPU WB
Koolance something a-rather cooling my GTX 295
EK DCP 2.2 (Really not a bad pump for the money)
Xspc EX480mm Rad (With matching XSPC fans)
12x XSPC 5/8" Black Chrome v2 Compression Fittings (These were the cheapest in nz and I gotta say I like the look of em Thanks Techworld.co.nz)
3x XSPC 45* Rotary Fitting
2x Bitspower Water Z Multi 400 (This is 2 of the 4 reservoirs in the build)
Extras:
-NZXT Sentry MIX Fan controller
-Silverstone Hot Swap Bay (For when friends come over if they want they can easily bring and install their hard drive)
-Bitfenix Alchemy Cabling
Yes this is a very odd selection of components I know, although combined with the bitfenix cabling it actually looks really nice, please not that I am currently only employed 5 hours a week on minimum wage and I like to save my money hence some of the 'shabby' components. That said all components intend to be upgraded in due time including a gtx 580 and a Asrock extreme 4 for the second computer (Ordered and on their way) and a better CPU and second/third GPU for the main computer.
I'm not afraid to say installation of the GPU waterblock made me **** my pants
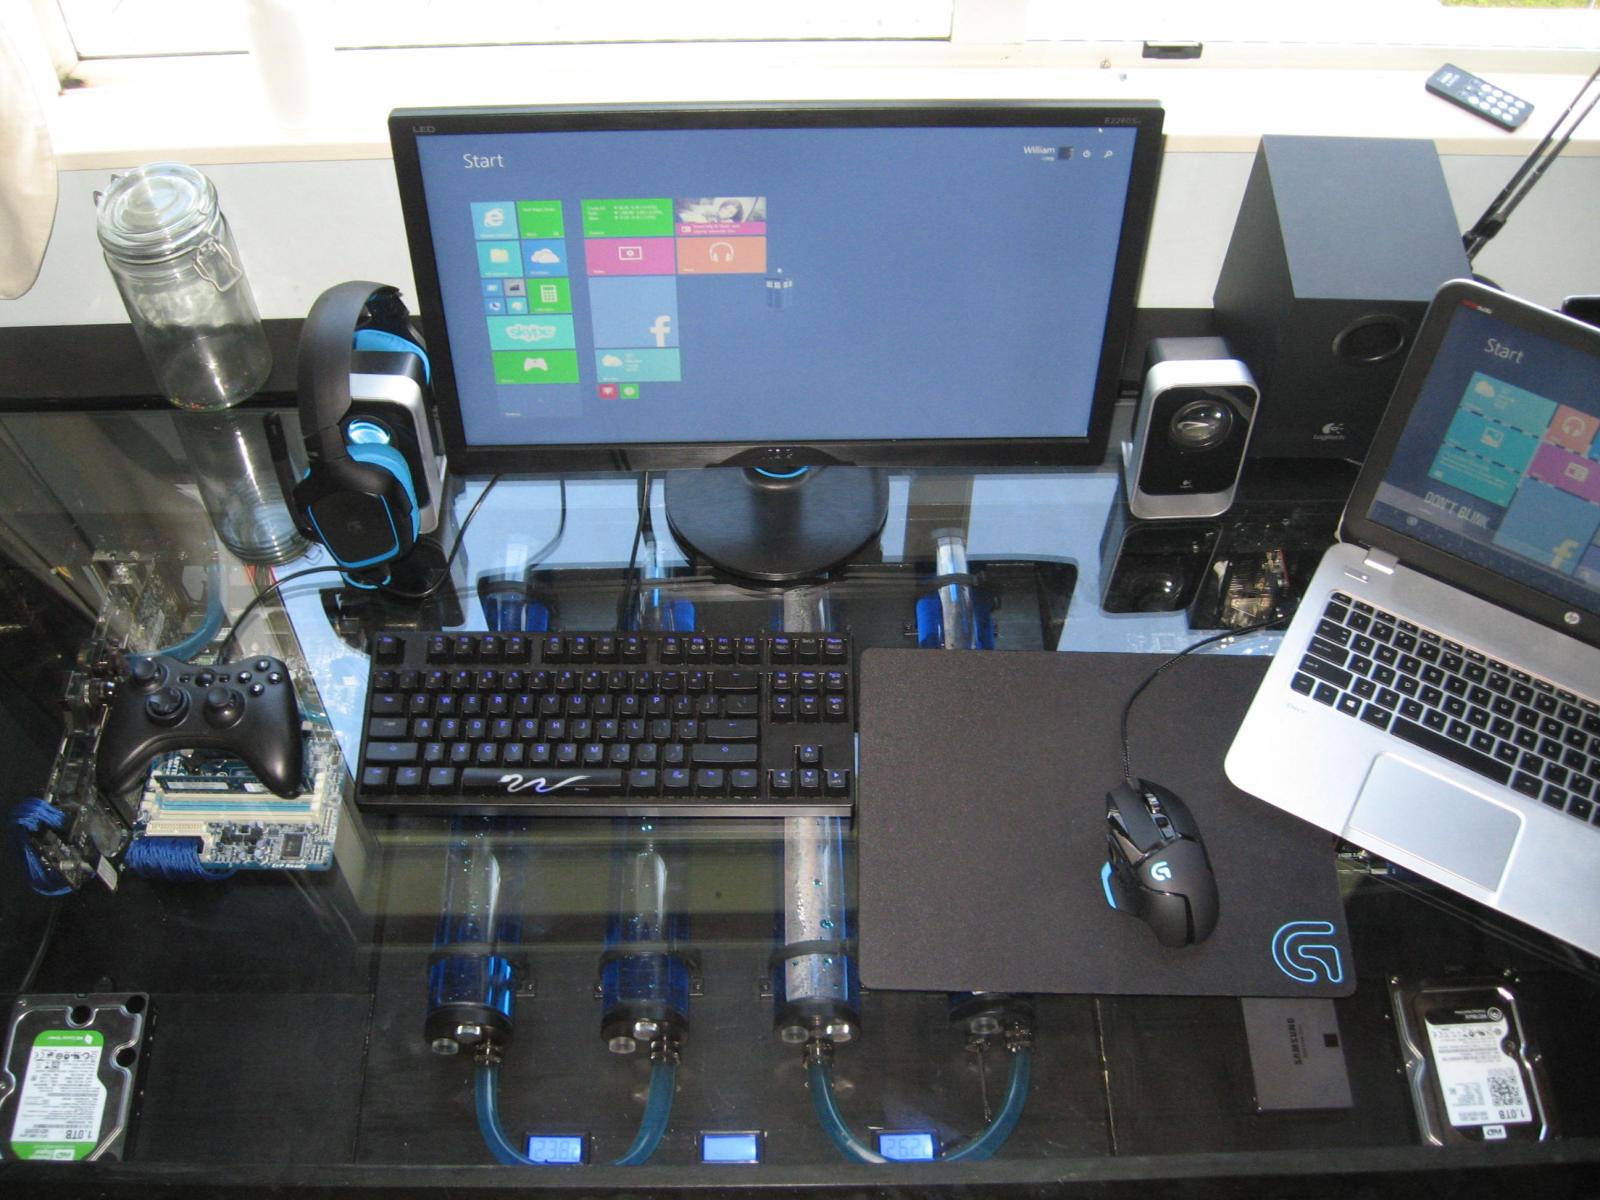
And so finally we come to photo's showing where I am now in the build:
I have one more order I need to make before I can complete the desk, that is some additional cabling and another 2m of tubing until then this project is offically under wraps
So now that you have reached the end of this build (I hope you liked it) I have a question to ask, I have already ordered 2 bottles of DARK BLUE dye and with time I will hopefully get into some UV lighting and I was wondering:
What should I call it? (Boy Or Girl?)


")