


avenge_peach
-
Posts
27 -
Joined
-
Last visited
3 Followers


Recent Profile Visitors
avenge_peach's Achievements
")
-
The Lightning 350D - [BUILD UPDATE 4/3/14]
avenge_peach replied to avenge_peach's topic in Build Logs
I ordered the sleeving from www.lutro0-customs.com or Lutro0's section on Frozencpu. I learned how to sleeve the wires from Lutro0's videos on their website. -
The Lightning 350D - [BUILD UPDATE 4/3/14]
avenge_peach replied to avenge_peach's topic in Build Logs
This is all plastic Telios sleeving from Lutro0 Customs. -
The Lightning 350D - [BUILD UPDATE 4/3/14]
avenge_peach replied to avenge_peach's topic in Build Logs
Also, I entered the build into Corsairs PC Domination contest in the Open System category (apparently didn't qualify for standard system because I drilled holes in the chassis to mount the HDD but whatever). Let's just say I'm feeling confident at this point! -
The Lightning 350D - [BUILD UPDATE 4/3/14]
avenge_peach replied to avenge_peach's topic in Build Logs
Build update! I also modified the OP with the new pictures and stuff below: Update 4/3/14: I spent the last few months since my first post making some updates to the build. Updates copied from my reddit post on /r/cablemanagement: Re-sleeved the 24-pin to remove the cable extension and sewed the wires to maintain the evenness of the cable coming out of the motherboard. Shortened the length of the PCI-E cable and added three stitches to maintain evenness. The stitches keep the cable very rigid and as it passes through the back panel grommet I have it running under the corner of the GPU. This serves to prop the GPU up, eliminating GPU sag completely. Removed the drive cages and mounted the HDD to the floor with anti-vibration mounting (before while in the Corsair cage, the HDD vibrations would move my mouse cursor. Problem solved and bonus airflow.) Mounted the SSD to the rear panel to be in view from the window. Non-cable management related: Added Bitspower fan adaptors and 120mm SP120 PWM fans to the rad. I had to literally break the locking clip on the ESP connector to get it to fit. The ESP connector is very rigid due to the sleeving, routing, and sewing so it does not budge unless I remove the whole cable. Upgraded to 4770K thanks to Staples for $230 Enjoy! -
The Lightning 350D - [BUILD UPDATE 4/3/14]
avenge_peach replied to avenge_peach's topic in Build Logs
Yup! Those are the colors. -
The Lightning 350D - [BUILD UPDATE 4/3/14]
avenge_peach replied to avenge_peach's topic in Build Logs
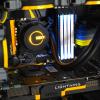
Settled on the Motherboard first and built around it. The Lightning and PSU were kind of lucky as I was planning on painting/modding units that did not match. The Lightning dropped in price (was $750) due to the 290X release, and the RM750 was just released, reviewed pretty well and had matching yellow. Here is a teaser potato picture with my phone of the new fan and HDD set-up. I wish there was an elegant way to leave the GPU like that but alas. -
The Lightning 350D - [BUILD UPDATE 4/3/14]
avenge_peach replied to avenge_peach's topic in Build Logs
It's actually not too much smaller than say a Fractal R4 ATX case. Mainly due to radiator accommodations on the ceiling and front of the case. The ceiling can fit a 320mm rad and the front can fit a 240mm rad with space to push/pull. It starts to get pretty cozy. -
The Lightning 350D - [BUILD UPDATE 4/3/14]
avenge_peach replied to avenge_peach's topic in Build Logs
Build update. I'll provide pictures within the next few weeks: - Removed 140mm AF fans from rad and replaced with 120mm PWM SP120s mated to Bitspower fan adaptors. - Replaced exhaust fan with 120mm AF120 - i7 4770k on the way. $219 could not pass it up. - RM750 PSU had to be RMA'd due to Corsair recall. Cooling fan never spun and I speculate this is the cause of the system crashing when stress-testing overnight even though temps were fine and overclock was very stable in IBT. - Removed HDD cage and mounted the platter drive to the floor of the case with vibration reducing screw mounts. Involved drilling some holes in the bottom of the case with a dremel. Space behind the intake fans is nice and clear and ready for a 240mm rad in push-pull for the future. - Relocating the SSD to the back panel with velcro so that it is visible. - Completely redid all the back panel cable management. Removed 24-pin extension, sewed all sleeved cables. Had to cut and recrimp the 24-pin because there was slight excess wiring and it looked funky coming out of the PSU. - Also planning to make a small metal rod with rubber feet between the GPU and PSU to aid with GPU sag. it's a fairly short trip in for a mATX set-up. Anyone want a delidded 4670K who happens to be a decent overclocker? I'll include some Coollab Liquid Pro. -
The Lightning 350D - [BUILD UPDATE 4/3/14]
avenge_peach replied to avenge_peach's topic in Build Logs
AFAIK a Nikon D80. -
The Lightning 350D - [BUILD UPDATE 4/3/14]
avenge_peach replied to avenge_peach's topic in Build Logs
Sure that sounds good. You can link back to the OP in this thread or my reddit post: http://www.reddit.com/r/buildapc/comments/1u0p8g/build_complete_the_lightning_350d/. Also, make sure and drop the link in this thread so that we can check it out! -
The Lightning 350D - [BUILD UPDATE 4/3/14]
avenge_peach replied to avenge_peach's topic in Build Logs
I have an update post that will come through in the next couple of weeks. I had to RMA the PSU due to a Corsair recall. Regarding the fans, I have installed two SP120 PWM fans using BitFenix 140mm to 120mm fan adapters. Further, I replaced the rear exhaust fan with an AF120 performance edition. Lastly, to free up so more airflow from the front AF140mm intakes, I removed the hard drive cage and have mounted the HDD to the bottom of the case using some anti-vibration mounting screws. At the time of the initial build, I sacrificed some performance on the rad since Corsair does not make 140mm SP fans. -
The Lightning 350D - [BUILD UPDATE 4/3/14]
avenge_peach replied to avenge_peach's topic in Build Logs
The rings come with the Corsair fans. I spray-painted them yellow. No MPower mATX board. Trust me, I wanted to. I sleeved the cables myself using the heat-shrinkless method. Check out Lutro0 Customs website. I followed the video guides almost 100% to get the process down. -
The Lightning 350D - [BUILD UPDATE 4/3/14]
avenge_peach replied to avenge_peach's topic in Build Logs
Small teaser update as I move into cable management phase 2. -
The Lightning 350D - [BUILD UPDATE 4/3/14]
avenge_peach replied to avenge_peach's topic in Build Logs
This is absolutely true. I made some performance concessions due to the X60's 280mm radiator and since Corsair only makes 140mm AF series fans. I have some 120mm SP fans ready to install on the rad but the Bitspower 140mm to 120mm fan adapters I bought are too tall by like 5mm in order to clear the CPU power connector on the mobo. I will have to make an adaptor plate of some kind. -
The Lightning 350D - [BUILD UPDATE 4/3/14]
avenge_peach replied to avenge_peach's topic in Build Logs
Good the hear! If it does end up on the WAN show is there any advance notice given? There was some discussion in the livestream about having the builders available for questions, etc.
