


Zeuligan
-
Posts
148 -
Joined
-
Last visited
Reputation Activity
-

 Zeuligan got a reaction from KrZaj in [Sponsored] Angl3d Ti - Dual Custom Loop EKWB | ASUS ROG | be quiet! Dark Base Pro 900 | by Zeuligan
It's not that common for me to do an update not directly related to a computer mod, but after the amazing news that Ryobi decided to sponsor me, I had to rebuild my modding room.
I will just let the pictures speak for themselves. Turned my 2,2x3,1m modding room from a dull and quite ugly place into a modern and functional modding area.
Reason for building as I did, is that I live in a subletting appartment and are not not allowed to do any none-reversable changes to the appartement. This was my modding solution to a modding area without a permanent change to the walls.
-
 Zeuligan got a reaction from LaserLion in [Sponsored] Angl3d Ti - Dual Custom Loop EKWB | ASUS ROG | be quiet! Dark Base Pro 900 | by Zeuligan
I'll add this small update as well. This is the top, after I sanded it down. Almost ready for paint or vinyl
-
Zeuligan got a reaction from LaserLion in [Sponsored] Angl3d Ti - Dual Custom Loop EKWB | ASUS ROG | be quiet! Dark Base Pro 900 | by Zeuligan
Last piece before the exterior frame is complete is the front. It is also the hardest due to my design choice to expose the 3 front fans. As I have a challenge with the precision with my hand tools, I decided that the only way to get a prefect fit, is to make the holes for the fans to small and then I have to gradually grind them into shape and size, but first things first...
It doesn't look like it's that much left to do, but with the cut outs I knew I had my work layed out for me
Started with cutting and filing 4 pieces to start the cut outs. The challenge is that the holes needs to be flat, but I want an angled front.
Lot's of tape to keep the small edges together and in place while setting.
Perfect fit, even if the tape adds to the future sanding job.
I had an idea for a slight indent in the front, to make it less flat. Looks good, but adds another dimension to the complexity of this piece.
Better angle for how the design will look.
Fun feeling to start to see the design take shape.
Almost done with the first cut out, but as I don't have anything to connect the last piece, I needed to start working with the next cut out.
Six small pieces later and the middle cut out is starting to form.
This is a good angle to show the complexity and how many extra pieces is needed to keep the angled design and still ensure flat cut outs.
Many hours later and the front is slowly taking shape
Two larger triangles to start working on the bottom of the front and the last cut out.
So small and fragile. Took forever to handfile them into shape, but managed without breaking them.
Added two corresponding angles to the bottom
Intentionally I didn't close the gap yet. Want to ensure I have a good connection and shape towards the midddle cut out.
One last piece to make the first and top fan cut out ready.
This is how it looks before I go to work with my hand file
Takes A LOT of filing, but eventually it will be the right shape.
Look at that. First connection and first cut out ready. Long update this one. Next update will hopefully be the full front, but first I'm taking a small break, redesigning my modroom, due to a new very exciting sponsorship with Ryobi.
-
Zeuligan got a reaction from LaserLion in [Sponsored] Angl3d Ti - Dual Custom Loop EKWB | ASUS ROG | be quiet! Dark Base Pro 900 | by Zeuligan
After over 100 hours of hand filing and acrylic focus the base shape of the PSU Shroud for project Angl3d Ti is finished. Managed to create it divided into two pieces without a visible edge.
One of the last pieces of the PSU Shroud mod. All 3 sides angled in opposite directions and created with a hand file. I just love working with acrylic. Such a beautiful and exciting material.
This is how I decided to solve the problem with the edge between the two pieces. A small counter-edge to force the upper piece to snap in place into the lower. Main challenge with this solution was to create a perfect fit, but turned out to work like a charm.
This is how it turned out. I'm as happy as my fingers hurt The white edges is where I filed and combined the pieces together. As I also plan to paint them glossy black, I didn't bother to keep the acrylic spotless. On the contrary. I added lot's of Acrifix 116 in on the backside on all joints and edges to make it as sturdy as possible.
Both pieces mounted in the case. The shape is so snug it just snaps in place without any mounting screws needed...
I plan to add a screw in the flat square piece in the upper left, fixating the shroud in the PSU mounting bracket.
The different angles of the triangles reflects light. Will work even better in glossy black.
A full time lapse of the PSU Shroud creation will be added once it's edited. I got 228gb of footage so almost have equal amount of work editing that as creating the shroud hehehehe...
Next step of the shroud is to sand down all angles individually and ensure that edge edge is super sharp and perfect. Expect that to take 10-20 hours. After that, it's ready for 2 coats of base primer before 3 coats of glossy black and 2 coats of clear varnish.
-
Zeuligan got a reaction from LaserLion in [Sponsored] Angl3d Ti - Dual Custom Loop EKWB | ASUS ROG | be quiet! Dark Base Pro 900 | by Zeuligan
Instead of boring you with countless and countless of pictures of triangles I decided to put together a short movie when creating one triangle. At this stage I have spent well beyond 70h sawing, grinding, filing, sanding and combining triangles to create my PSU Shroud for project Angl3d Ti.
PSU Shroud piece one of two. At this point I am about 80% done.
The plan for the PSU Shroud is to have it divided into two pieces for easier access and management. It is not intended to be crystal clear acrylic finish as I will paint it. Therefor I have rather added extra Acrifix 116 to all the joints to keep it as sturdy as possible.
It is starting to take shape. The lower part of the PSU shroud that will be beneath the EKWB D5 Plexi pumps is more or less done. I will join the upper part as the last part of the PSU shroud. I will also need to fabricate some sort of quick joint between the pieces.
Would love to hear what you think about this...
-
Zeuligan got a reaction from LaserLion in [Sponsored] Angl3d Ti - Dual Custom Loop EKWB | ASUS ROG | be quiet! Dark Base Pro 900 | by Zeuligan
It will be an immense amount of work to finish the custom PSU shroud with its 118 individual angled acrylic pieces. That is also part of the charm of this build. The level of details needed. Only way to reach the end is to start.
With the use of Acrifix 116 I fixed 2 triangles on the pump base plate. Each edge needs it's own individual angle to ensure the right shape of the shroud.
Ensuring as versatile visuals as possible I try to alterate the size of each triangle as well. This one has a base of 45mm.
Here is a shot of the angled edge of the third triangle. After sawing each triangle into it's designated shape, I grind each edge straight and proper angled to build the shape. Fixating it with Acrifix 116, wait until it sets (about 5-10min) and start on next.
8 triangles and a few hours later and the base shape starts to reveal itself. As I'm going to paint it black, I don't care about getting Acrifix 116 on the pieces. On the contrary I keep adding Acrifix on the backside of each joint to strengthen the bond.
I cut a plate to sit below the radiator and took a measurement where to mount it on the base pump plate. 30mm to the edge.
Lot's of hours spent already and only 19 triangles created. Very time consuming, but rewarding mod creating this PSU shroud.
Started fixating triangles on my way to the front of the case. Need to ensure that the height of the front triangles stay below the lower edge of the Plexi top of the pumps.
Want to create a front base plate to display the amazing sponsors of the build.
9 additional triangles and a romb later and the front logo plate is joined with the base plate for the pumps. Will need to wait longer for this to set before I move it.
Love the contrast look of the hard edges of the triangles with the smooth roundness of the beautiful EK Water Block D5 Plexi top. Very close, but managed to avoid building to high in the front. 5mm to spare to the bottom of the plexi top.
Somehow this makes me feel about the catamaran. Love how the different angles play with the light. This will look dope in black once finished. Doesn't look like much left, but will take atleast 10-15 more triangles to close the holes and finish part one of the shroud. Plan to build it in two pieces for easier mounting and cable management. Will need to figure out some sort of quick snap lock for that, but not until both parts of the floor is ready. That is MANY hours still
Starting to look really good imho, but would love to hear what you feel about it. Please drop a comment below and I will reply as soon as I can.
-
Zeuligan got a reaction from LaserLion in [Sponsored] Angl3d Ti - Dual Custom Loop EKWB | ASUS ROG | be quiet! Dark Base Pro 900 | by Zeuligan
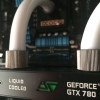
Project Angl3d Ti - Custom PC with dual water cooling loop, vertical GTX 1080Ti sponsored by ASUS ROG, EK Water Blocks, be quiet!, Teamgroup and Enermax. A huge thank you to all of them, making this extraordinary build possible.
The inspiration started when I created custom gaming PC Zeuligan and instantly fell in love with the design of the GTX 1080 Ti. When ASUS released their new VR headset with the amazing hexagon design I just knew I had to create a build inspired by the two. I also want to create a build that is the opposite of Zeuligan. More tech and modern with harder lines with an a tribute to acrylic.
I'm proud to announce project Angl3d Ti. An almost scary amount of custom acrylic angles combined into what I hope will be an extraordinary custom gaming PC.
The planning, as usual, started in Fusion 360 with endless of drawings and tests. With that many individual pieces there is no room for errors. This is the finished concept sketch of the PSU shroud. My main concern is how I can craft the 118 individual acrylic triangles with angled edges in multiple planes by hand. Hey, who doesn't love a challenge?
I want to use the fan integrated into the GTX 1080 Ti as an inspiration for a custom front and custom top with visible fans. My concept sketch shows a cut-out from my logo. Might be a sponsor symbol or other solution once in production. But the idea is a visual front fan with a front panel cut out.
Specifications:
be quiet! Dark Base Pro 900
ASUS ROG MAXIMUS X FORMULA
Intel i7 7700K or 8700K (jury is still out on that one)
ASUS GTX 1080Ti FE
4x 8GB T-Force Delta RGB RAM DDR4
be quiet! Straight Power 11 750w
8x Enermax T.B.RGB 120mm fans
Custom addressable LED strips
Water cooling:
EK-FC GeForce GTX FE - Nickel Water Block
2x EK-XTOP Revo D5 PWM - Plexi
2x EK-RES X3 250 RGB
2x EK-CoolStream SE 360 (Slim Triple)
EK-Supremacy EVO - Nickel
EK-HDC Fitting 12mm G1/4 - Black
EK-HD PETG Tube 10/12mm 500mm
It is almost a shame to pull that piece of art into pieces, but sometimes you need to break an egg to make an omelette. After Project Zeuligan I know how to fastest do it, so might as well get cracking. Just one last look at that beautiful case.
Up on the operating table. Time to take this baby apart.
This is how the inside of the be quiet! Dark Base Pro 900 looks like without the tempered glass side. Everything is modular and get be taken apart with just screws. No need for a Dremel at this point. Love this case.
The beautiful brushed aluminium panels detached.
Never stops amazes me how beautiful a naked computer case can look. Maybe it's just me that is weird. What do you feel about naked chassis?
Even with the generous space of the huge be quiet! Dark Base Pro 900 it will be a challenge to fit all these amazing products. It has always bean a dream of mine to get EK Water Blocks as a sponsor. Still feels unreal that it's not longer a dream. Thank you ❤️
Just as with Project Zeuligan I intend to use the drive cage ladder as a base for fastening an inside wall. But this time I will use it to hold the dual EK-RES X3 250 RGB reservoirs.
220x450mm. Wider and I will overlap the motherboard.
Leaving some room at the top and bottom for cable routing.
Included one of the black beautiful EK-CoolStream SE 360 (Slim Triple) radiator to ensure that I have enough room between reservoirs and radiator.
The only thing that is and looks better than an EK-XTOP Revo D5 PWM - Plexi (incl. pump) is two These are the un-sleeved version as I will of course sleeve my own in relation to the color theme. Sleeving will be done with MDPC-X.
One last measurement to check the position of the pumps. I will need to create my own pump brackets so I can integrate them into the PSU shroud / floor.
Naked aluminum is sexy This is a 4mm thick 60mm wide aluminum beam. It will be the base of the bracket.
Measuring the middle of the 20mm side aluminum beam that will be part of the pump brackets. Just love having a digital caliper.
It still amazes me how much fun stuff I can create with my Dremel mounted to the drill press. It is surprisingly accurate if used with patiences. The week spot is as always the shaft of the Dremel that moves.
Cut the remaining beams and an additional piece of acrylic as top cover. I need the extra height, but also need the top layer to be acrylic as I will combine it with the 118 individual pieces.
This is my vision for the bracket. Using the bottom fastening holes for the fans to keep it in place. Ok, will need to put this together.
Something almost sexy about black countersunk hex bolts in naked aluminum. Very satisfied with this solution.
4 holes, 4 countersunk holes, 4 bolts and 1 sturdy dual pump bracket.
Positioning the dual EKWB D5 Plexi top pumps to ensure maximum space between them, but with optimum placement on the bracket. The original measurement above was 190mm from the front panel below the radiator to the last bracket hole. I then worked backwards from there.
Back to the Dremel press after marking out the 8 holes for the pumps.
Not bad at all. Almost looks like the chassi for a small toy car.
Added two 5mm acrylic pieces below the bracket to raise the entire height another 5mm. Will be need to match where the PSU shroud / floor needs to be at it's lowest point.
One last measurement and time to start, what most likely will be an endless amount of time spent in cutting, grinding and fixating the acrylic triangles. Hence the name of the build - Angl3d Ti.
First cut is the deepest...
After some painfully slow and inaccurate attempts to file or sand the triangles sides into proper angles I found a solution that will kick ass. I belt grinder flipped up side down. Only thing to worry about now is my fingertips.
Suddenly I feel that this almost impossible endever is doable. The speed with the belt grinder was so much higher. Accuracy is still a problem and will be, but I recon I will get a better and better feel for it the more I create.
Knife sharp and straight edges. I'm saved...
First time pieces fitted to the pump base plate. Both at an angle to each other and the base plate.
It has been a long but very productive day. So amazingly fun to be starting a new project again. This time it feels extra special as I have new friends supporting me. I hope you like what you have seen so far. Please follow the build if you want to see more and I just love to hear your thoughts and get feedback.
-
Zeuligan got a reaction from KrZaj in [Sponsored] Angl3d Ti - Dual Custom Loop EKWB | ASUS ROG | be quiet! Dark Base Pro 900 | by Zeuligan
Last piece before the exterior frame is complete is the front. It is also the hardest due to my design choice to expose the 3 front fans. As I have a challenge with the precision with my hand tools, I decided that the only way to get a prefect fit, is to make the holes for the fans to small and then I have to gradually grind them into shape and size, but first things first...
It doesn't look like it's that much left to do, but with the cut outs I knew I had my work layed out for me
Started with cutting and filing 4 pieces to start the cut outs. The challenge is that the holes needs to be flat, but I want an angled front.
Lot's of tape to keep the small edges together and in place while setting.
Perfect fit, even if the tape adds to the future sanding job.
I had an idea for a slight indent in the front, to make it less flat. Looks good, but adds another dimension to the complexity of this piece.
Better angle for how the design will look.
Fun feeling to start to see the design take shape.
Almost done with the first cut out, but as I don't have anything to connect the last piece, I needed to start working with the next cut out.
Six small pieces later and the middle cut out is starting to form.
This is a good angle to show the complexity and how many extra pieces is needed to keep the angled design and still ensure flat cut outs.
Many hours later and the front is slowly taking shape
Two larger triangles to start working on the bottom of the front and the last cut out.
So small and fragile. Took forever to handfile them into shape, but managed without breaking them.
Added two corresponding angles to the bottom
Intentionally I didn't close the gap yet. Want to ensure I have a good connection and shape towards the midddle cut out.
One last piece to make the first and top fan cut out ready.
This is how it looks before I go to work with my hand file
Takes A LOT of filing, but eventually it will be the right shape.
Look at that. First connection and first cut out ready. Long update this one. Next update will hopefully be the full front, but first I'm taking a small break, redesigning my modroom, due to a new very exciting sponsorship with Ryobi.
-
Zeuligan got a reaction from KrZaj in [Sponsored] Angl3d Ti - Dual Custom Loop EKWB | ASUS ROG | be quiet! Dark Base Pro 900 | by Zeuligan
I'll add this small update as well. This is the top, after I sanded it down. Almost ready for paint or vinyl
-
Zeuligan got a reaction from KrZaj in [Sponsored] Angl3d Ti - Dual Custom Loop EKWB | ASUS ROG | be quiet! Dark Base Pro 900 | by Zeuligan
Final stretch of the top exterior acrylic case part. Wanted to bring back more angles and tigh the entire design together with the previously created PSU Shroud.
First task was to file down the front edge to make sure it was a perfect fit against the front. I made the front and top 3mm to large just to be sure I could file it into a perfect fit.
Like a glove.
With most of the upper part of the top still unfinished, not much to pray for. Need more triangles.
Looks so messy with all the Acrifix, tape marks and finger prints, but it will not matter as it will be sanded and I will add plastic "wood" att all joints not perfect.
That front is starting to look good...
I can't add two large triangles into that obvious triangular space as that is in the same angle as the joining pieces. Would just create one large flat surface with joints.
Instead I created 4 triangles and angled the joining edge slightly upwards. Perfect, as I have to have a piece in the middle that isn't joined in the middle. That would create a long line in the center that the eyes will have a problem with.
Two angled larger and more flat pieces got to finish the top of the top.
Two small holes at the back to close before the first of the 3 exterior pieces are done.
Testfit towards the front, just to makes sure nothing has warped and still fit perfectly.
The top was the last one I started but the first to be finished. Now I will spend the next 2 days adding Acrifix to the backside of each joint to ensure it's strong and tight. Then I can move on adding plastic wood and sand down a perfect finish before I can add vinyl or paint.
-
 Zeuligan got a reaction from Rosinbole in [Sponsored] Angl3d Ti - Dual Custom Loop EKWB | ASUS ROG | be quiet! Dark Base Pro 900 | by Zeuligan
It was time to start working on the 3rd and final external case part, the top. With the front IO panel as the major component to work around and into this case part as the biggest challenge. I also need to figure out a good way to bridge the top part with the front part so there is one fluid design as well as no cap between the pieces.
Same dimensions on this piece as the bottom part. 230x540mm.
Need airflow as well as room for alternative radiator and fan mounting.
With the base shape cut I can move on with securing it to the case. Modularity is still a key
Worked for the front, so why not for the top. 8 small 12x5x4mm acrylic brackets.
Fliped the case upside down and positioned the frame in the right location. Fixed the brackets with Acrifix and waited for it to set.
Marked a center line and took some measurements for the IO panel custom bracket. Decided that I wanted to use the original screw holes. No need to reinvent the wheel.
First I did a cut out in the main top frame. This is where I will create the front panel bracket.
Created a piece equal to the one I cut out from the frame. Drilled 2 holes and viola.
My take on a bracket for the IO panel. Don't like the original solution with screws clamping it in place.
As @Zando Bob mentioned earlier that Batman would approve of my angles. That actually gave me inspiration for this bracket Thx for that
Acrifix is messy but amazing for this type of job.
Not bad for a small batman-holder.
Two larger parts for the top front frame. After some testfitting with the side glass panel I decided to go with a more straight side for the top. Makes for a better transition from the glass.
Added the sides to the base plate and created a small clip-on type of counter-bracket for the IO panel.
Snaps on tighter than a batman suit.
A real milestone right here. Connection to the frame and the front IO panel cover. This also marks the front end edge of the top piece. This will make it possible, once I connect the front to the top, to start working on both the top and front simultaniously. Will increase the speed as I can work on one piece while the other dry when fixing stuff with the Acrifix. But first I need to create the top part, which will be the next update of this mod.
-
Zeuligan got a reaction from KrZaj in [Sponsored] Angl3d Ti - Dual Custom Loop EKWB | ASUS ROG | be quiet! Dark Base Pro 900 | by Zeuligan
I mentioned in last update that I realized that I ran into a problem. That problem is the front IO panel. Reason is of course that it needs to be fixed before I can fasten the front and top cover. That also means that I need to figure out how to manufacture a panel and a cutout for the top (or front). I'm just glad I figured it out prior to finishing the front and or the top. Here is the problem. I decided that I want to try to keep the original IO panel with the power buttons etc. 150x40mm will cover all the ports but be just as small as possible to minimize any straight parts on my angled mod. Gently removed the power button from the original top. I figured that this should be the easiest hole to make and if I can't solve that, no need to spend time on the smaller holes. Marked middle and the size, 22mm As I don't have a CNC or a laser cutter, I just put a 3mm drill in my Dremel drillpress and started drilling. I couldn't fit my hand-file into the small hole so actually took a small nail file and made the hole. YES, it took freaking forever. Marked out the holes for the usb connectors and swiched to a 0,8mm drill. Decided to try to manually use the drill as a router. Not the easiest of tasks to push the plate straight. It worked surprisingly good. After almost 2h with my nail file (GF will not be happy when she gets home) and a cramp in my hand for clutching the piece I was done. Really happy with that result. Now I just need to figure out how to fit this to the case and make a cut out / hole in the top case part, but that will be in next update. -
Zeuligan got a reaction from KrZaj in [Sponsored] Angl3d Ti - Dual Custom Loop EKWB | ASUS ROG | be quiet! Dark Base Pro 900 | by Zeuligan
With the base structure done from the previous part it was not much to wait for. The hard part about this part of the mod of creating an angled front structure is that each piece will influence all the others. The size, the angle, the shape all influence eachother. Almost like laying a puzzle without the picture, the size and the pieces them self.
The best solution to solve the puzzle turned out to be tape. Made it possible to fix each piece while take measurements for the next.
First piece of the puzzle fixed for real.
Moved on to fix the next part. Both of these pieces was the last pieces created in the previous part of the mod.
With tape tightly attached on the outside I could use tape on the inside to stretch and bend it into the right angle.
Secured. Only down real downside of the tape solution is that the tape will suck upp Acrifix and make the surface look like ****, but with the need to sand it down, the upside it much larger the the downside.
Starting to fold it self over the fans. Starting to feel a good tingling feeling. This might work!
Two wings for finishing up the front and bind the sides together.
Not bad, not bad at all.
After A LOT of hand filing I managed to create part of a circle to match the diameter of the fans. This also reviels my plan for the front. I want to leave the front with 3 open "holes" for the fans to be both visible, but also for a air intake. Only thing I lack with the be quiet! Dark Base Pro 900 is a windowed front door. This is my take on that. With Enermax front RGB ring, this will also bring light to the front. Will fit a dustfilter between the fans and radiator.
Needed to start on the top part of the bottom after realizing I have a problem...
Same procedure...
More parts. The cirle cut outs are a pain to create with just a saw and a hand file, but do add a nice finish.
Had to remake and refit several times. One mm or even less both in elevation or size and I'm not centred and the fan cut out will be off or the look will look crocked. But eventually...
Several hours later I'm happy with the end result...
This is how far I managed...
-
 Zeuligan got a reaction from Anthony_95 in [Sponsored] Angl3d Ti - Dual Custom Loop EKWB | ASUS ROG | be quiet! Dark Base Pro 900 | by Zeuligan
It was time to start working on the 3rd and final external case part, the top. With the front IO panel as the major component to work around and into this case part as the biggest challenge. I also need to figure out a good way to bridge the top part with the front part so there is one fluid design as well as no cap between the pieces.
Same dimensions on this piece as the bottom part. 230x540mm.
Need airflow as well as room for alternative radiator and fan mounting.
With the base shape cut I can move on with securing it to the case. Modularity is still a key
Worked for the front, so why not for the top. 8 small 12x5x4mm acrylic brackets.
Fliped the case upside down and positioned the frame in the right location. Fixed the brackets with Acrifix and waited for it to set.
Marked a center line and took some measurements for the IO panel custom bracket. Decided that I wanted to use the original screw holes. No need to reinvent the wheel.
First I did a cut out in the main top frame. This is where I will create the front panel bracket.
Created a piece equal to the one I cut out from the frame. Drilled 2 holes and viola.
My take on a bracket for the IO panel. Don't like the original solution with screws clamping it in place.
As @Zando Bob mentioned earlier that Batman would approve of my angles. That actually gave me inspiration for this bracket Thx for that
Acrifix is messy but amazing for this type of job.
Not bad for a small batman-holder.
Two larger parts for the top front frame. After some testfitting with the side glass panel I decided to go with a more straight side for the top. Makes for a better transition from the glass.
Added the sides to the base plate and created a small clip-on type of counter-bracket for the IO panel.
Snaps on tighter than a batman suit.
A real milestone right here. Connection to the frame and the front IO panel cover. This also marks the front end edge of the top piece. This will make it possible, once I connect the front to the top, to start working on both the top and front simultaniously. Will increase the speed as I can work on one piece while the other dry when fixing stuff with the Acrifix. But first I need to create the top part, which will be the next update of this mod.
-
 Zeuligan got a reaction from Zando_ in [Sponsored] Angl3d Ti - Dual Custom Loop EKWB | ASUS ROG | be quiet! Dark Base Pro 900 | by Zeuligan
It was time to start working on the 3rd and final external case part, the top. With the front IO panel as the major component to work around and into this case part as the biggest challenge. I also need to figure out a good way to bridge the top part with the front part so there is one fluid design as well as no cap between the pieces.
Same dimensions on this piece as the bottom part. 230x540mm.
Need airflow as well as room for alternative radiator and fan mounting.
With the base shape cut I can move on with securing it to the case. Modularity is still a key
Worked for the front, so why not for the top. 8 small 12x5x4mm acrylic brackets.
Fliped the case upside down and positioned the frame in the right location. Fixed the brackets with Acrifix and waited for it to set.
Marked a center line and took some measurements for the IO panel custom bracket. Decided that I wanted to use the original screw holes. No need to reinvent the wheel.
First I did a cut out in the main top frame. This is where I will create the front panel bracket.
Created a piece equal to the one I cut out from the frame. Drilled 2 holes and viola.
My take on a bracket for the IO panel. Don't like the original solution with screws clamping it in place.
As @Zando Bob mentioned earlier that Batman would approve of my angles. That actually gave me inspiration for this bracket Thx for that
Acrifix is messy but amazing for this type of job.
Not bad for a small batman-holder.
Two larger parts for the top front frame. After some testfitting with the side glass panel I decided to go with a more straight side for the top. Makes for a better transition from the glass.
Added the sides to the base plate and created a small clip-on type of counter-bracket for the IO panel.
Snaps on tighter than a batman suit.
A real milestone right here. Connection to the frame and the front IO panel cover. This also marks the front end edge of the top piece. This will make it possible, once I connect the front to the top, to start working on both the top and front simultaniously. Will increase the speed as I can work on one piece while the other dry when fixing stuff with the Acrifix. But first I need to create the top part, which will be the next update of this mod.
-
Zeuligan got a reaction from Rosinbole in [Sponsored] Angl3d Ti - Dual Custom Loop EKWB | ASUS ROG | be quiet! Dark Base Pro 900 | by Zeuligan
I mentioned in last update that I realized that I ran into a problem. That problem is the front IO panel. Reason is of course that it needs to be fixed before I can fasten the front and top cover. That also means that I need to figure out how to manufacture a panel and a cutout for the top (or front). I'm just glad I figured it out prior to finishing the front and or the top. Here is the problem. I decided that I want to try to keep the original IO panel with the power buttons etc. 150x40mm will cover all the ports but be just as small as possible to minimize any straight parts on my angled mod. Gently removed the power button from the original top. I figured that this should be the easiest hole to make and if I can't solve that, no need to spend time on the smaller holes. Marked middle and the size, 22mm As I don't have a CNC or a laser cutter, I just put a 3mm drill in my Dremel drillpress and started drilling. I couldn't fit my hand-file into the small hole so actually took a small nail file and made the hole. YES, it took freaking forever. Marked out the holes for the usb connectors and swiched to a 0,8mm drill. Decided to try to manually use the drill as a router. Not the easiest of tasks to push the plate straight. It worked surprisingly good. After almost 2h with my nail file (GF will not be happy when she gets home) and a cramp in my hand for clutching the piece I was done. Really happy with that result. Now I just need to figure out how to fit this to the case and make a cut out / hole in the top case part, but that will be in next update. -
Zeuligan got a reaction from Anthony_95 in [Sponsored] Angl3d Ti - Dual Custom Loop EKWB | ASUS ROG | be quiet! Dark Base Pro 900 | by Zeuligan
I mentioned in last update that I realized that I ran into a problem. That problem is the front IO panel. Reason is of course that it needs to be fixed before I can fasten the front and top cover. That also means that I need to figure out how to manufacture a panel and a cutout for the top (or front). I'm just glad I figured it out prior to finishing the front and or the top. Here is the problem. I decided that I want to try to keep the original IO panel with the power buttons etc. 150x40mm will cover all the ports but be just as small as possible to minimize any straight parts on my angled mod. Gently removed the power button from the original top. I figured that this should be the easiest hole to make and if I can't solve that, no need to spend time on the smaller holes. Marked middle and the size, 22mm As I don't have a CNC or a laser cutter, I just put a 3mm drill in my Dremel drillpress and started drilling. I couldn't fit my hand-file into the small hole so actually took a small nail file and made the hole. YES, it took freaking forever. Marked out the holes for the usb connectors and swiched to a 0,8mm drill. Decided to try to manually use the drill as a router. Not the easiest of tasks to push the plate straight. It worked surprisingly good. After almost 2h with my nail file (GF will not be happy when she gets home) and a cramp in my hand for clutching the piece I was done. Really happy with that result. Now I just need to figure out how to fit this to the case and make a cut out / hole in the top case part, but that will be in next update. -
Zeuligan got a reaction from Zando_ in [Sponsored] Angl3d Ti - Dual Custom Loop EKWB | ASUS ROG | be quiet! Dark Base Pro 900 | by Zeuligan
Hehehe
-
 Zeuligan got a reaction from KrMaH in [Sponsored] Angl3d Ti - Dual Custom Loop EKWB | ASUS ROG | be quiet! Dark Base Pro 900 | by Zeuligan
With the base structure done from the previous part it was not much to wait for. The hard part about this part of the mod of creating an angled front structure is that each piece will influence all the others. The size, the angle, the shape all influence eachother. Almost like laying a puzzle without the picture, the size and the pieces them self.
The best solution to solve the puzzle turned out to be tape. Made it possible to fix each piece while take measurements for the next.
First piece of the puzzle fixed for real.
Moved on to fix the next part. Both of these pieces was the last pieces created in the previous part of the mod.
With tape tightly attached on the outside I could use tape on the inside to stretch and bend it into the right angle.
Secured. Only down real downside of the tape solution is that the tape will suck upp Acrifix and make the surface look like ****, but with the need to sand it down, the upside it much larger the the downside.
Starting to fold it self over the fans. Starting to feel a good tingling feeling. This might work!
Two wings for finishing up the front and bind the sides together.
Not bad, not bad at all.
After A LOT of hand filing I managed to create part of a circle to match the diameter of the fans. This also reviels my plan for the front. I want to leave the front with 3 open "holes" for the fans to be both visible, but also for a air intake. Only thing I lack with the be quiet! Dark Base Pro 900 is a windowed front door. This is my take on that. With Enermax front RGB ring, this will also bring light to the front. Will fit a dustfilter between the fans and radiator.
Needed to start on the top part of the bottom after realizing I have a problem...
Same procedure...
More parts. The cirle cut outs are a pain to create with just a saw and a hand file, but do add a nice finish.
Had to remake and refit several times. One mm or even less both in elevation or size and I'm not centred and the fan cut out will be off or the look will look crocked. But eventually...
Several hours later I'm happy with the end result...
This is how far I managed...
-
 Zeuligan got a reaction from Lathlaer in [Sponsored] Angl3d Ti - Dual Custom Loop EKWB | ASUS ROG | be quiet! Dark Base Pro 900 | by Zeuligan
With the base structure done from the previous part it was not much to wait for. The hard part about this part of the mod of creating an angled front structure is that each piece will influence all the others. The size, the angle, the shape all influence eachother. Almost like laying a puzzle without the picture, the size and the pieces them self.
The best solution to solve the puzzle turned out to be tape. Made it possible to fix each piece while take measurements for the next.
First piece of the puzzle fixed for real.
Moved on to fix the next part. Both of these pieces was the last pieces created in the previous part of the mod.
With tape tightly attached on the outside I could use tape on the inside to stretch and bend it into the right angle.
Secured. Only down real downside of the tape solution is that the tape will suck upp Acrifix and make the surface look like ****, but with the need to sand it down, the upside it much larger the the downside.
Starting to fold it self over the fans. Starting to feel a good tingling feeling. This might work!
Two wings for finishing up the front and bind the sides together.
Not bad, not bad at all.
After A LOT of hand filing I managed to create part of a circle to match the diameter of the fans. This also reviels my plan for the front. I want to leave the front with 3 open "holes" for the fans to be both visible, but also for a air intake. Only thing I lack with the be quiet! Dark Base Pro 900 is a windowed front door. This is my take on that. With Enermax front RGB ring, this will also bring light to the front. Will fit a dustfilter between the fans and radiator.
Needed to start on the top part of the bottom after realizing I have a problem...
Same procedure...
More parts. The cirle cut outs are a pain to create with just a saw and a hand file, but do add a nice finish.
Had to remake and refit several times. One mm or even less both in elevation or size and I'm not centred and the fan cut out will be off or the look will look crocked. But eventually...
Several hours later I'm happy with the end result...
This is how far I managed...
-
Zeuligan got a reaction from Rosinbole in [Sponsored] Angl3d Ti - Dual Custom Loop EKWB | ASUS ROG | be quiet! Dark Base Pro 900 | by Zeuligan
Hehehe
-
 Zeuligan got a reaction from Velcade in [Sponsored] Angl3d Ti - Dual Custom Loop EKWB | ASUS ROG | be quiet! Dark Base Pro 900 | by Zeuligan
With the base structure done from the previous part it was not much to wait for. The hard part about this part of the mod of creating an angled front structure is that each piece will influence all the others. The size, the angle, the shape all influence eachother. Almost like laying a puzzle without the picture, the size and the pieces them self.
The best solution to solve the puzzle turned out to be tape. Made it possible to fix each piece while take measurements for the next.
First piece of the puzzle fixed for real.
Moved on to fix the next part. Both of these pieces was the last pieces created in the previous part of the mod.
With tape tightly attached on the outside I could use tape on the inside to stretch and bend it into the right angle.
Secured. Only down real downside of the tape solution is that the tape will suck upp Acrifix and make the surface look like ****, but with the need to sand it down, the upside it much larger the the downside.
Starting to fold it self over the fans. Starting to feel a good tingling feeling. This might work!
Two wings for finishing up the front and bind the sides together.
Not bad, not bad at all.
After A LOT of hand filing I managed to create part of a circle to match the diameter of the fans. This also reviels my plan for the front. I want to leave the front with 3 open "holes" for the fans to be both visible, but also for a air intake. Only thing I lack with the be quiet! Dark Base Pro 900 is a windowed front door. This is my take on that. With Enermax front RGB ring, this will also bring light to the front. Will fit a dustfilter between the fans and radiator.
Needed to start on the top part of the bottom after realizing I have a problem...
Same procedure...
More parts. The cirle cut outs are a pain to create with just a saw and a hand file, but do add a nice finish.
Had to remake and refit several times. One mm or even less both in elevation or size and I'm not centred and the fan cut out will be off or the look will look crocked. But eventually...
Several hours later I'm happy with the end result...
This is how far I managed...
-
Zeuligan got a reaction from Rosinbole in [Sponsored] Angl3d Ti - Dual Custom Loop EKWB | ASUS ROG | be quiet! Dark Base Pro 900 | by Zeuligan
Was with extra excitment that I was ready to start working with the front case part of this mod. I have had an idea about the front since I started this project. In fact, it was the idea of the front that even started this whole project.
First I need to ensure it's located in the right location. Had an idea how to fasten this part. Still thinking modularity...
10mm wide, small stuff...
My idea of a fastening "tool" to get these clamps in the right location.
Added Acryfix to create a ridge that I then filed down into a rectangular edge...
All eight fastening brackets in place.
Decided to go with a little different solution for the front. I need a frame to anchor the other parts. More stability and I can also create parts in different levels.
Look at that. It snapped even harder than the original. Amazing what you can do with a little acrylic and a file.
Next step is to start to build the shape and design of the front. After a few paper templates, tape and four mugs of coffee I decided for a design.
Symetrical design requires two of each.
Two turns four.
Enough parts to start to do the real first building.
This is actually the front. The case is flipped. Just makes it easier to work with. Here this beautiful radiator from EK will be mounted on the outside of the case frame.
I starts to look like a real computer. Love when you reach the part where you can start to unpack components for the first time.
Next update will contain the real design of the front. Stay tuned and as always, please share your thoughts or questions...


