


geo3
-
Posts
3,620 -
Joined
-
Last visited
Reputation Activity
-
.png "Funny")

-

 geo3 reacted to Hinjima in 4k 120Hz, Get 4080 now or wait for super series?
Only rumors now but they should release in late January.
I own a 4080 and I love it, I did buy it on release a year ago though.
Only roughly a month away so wait if you can.
-

 geo3 got a reaction from Skiiwee29 in Does anyone have a good chair recommendation?
Herman Miller Aeron. Only valid chair to have ever existed.
-
 geo3 got a reaction from Psittac in Cheapish speakers?
If you want actual decent speakers for cheap ($100ish range) get Edifier. R1280T for example.
I'd stay away from PC and peripheral companies for audio stuff.
-
geo3 reacted to GarlicDeliverySystem in Mechanical Keyboard Club!
The main appeal of Keychron was always the decent tradeoff between price, quality, choice (full-size, ISO layouts), and convenience; especially when you are new to this world of mechanical keyboards.
Yes, you could get better deals in group buys or with some specific vendors (and even more so now to be honest), but you have to find those. Keychron just offers this nice one-stop shop where you can almost everything in good enough quality for a good enough price. And in some cases, like full-size keyboards with normal layout, it is one of the few budget friendlier vendors (especially with K Pro and V series).
Plus all of the accessories and little things like switches, keycaps etc. with convenient compatibility lists etc.
Most other places I have seen don't offer full-size, or only 96% or something just slightly smaller that I never understood (looking at you Nuphy, why no regular full-size?!). In the TKL and smaller market the competition has become quite stiff though, and I already know my next purchases for those christmas presents will be a Cidoo or other model over the Q series. (BTW, anyone know whether those are also available in ISO layout?)
-
 geo3 reacted to Volbet in Mechanical Keyboard Club!
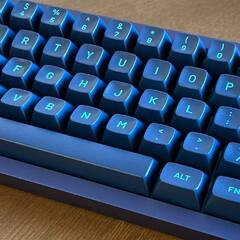
I decided to try another Alice layout keyboard, this time a Keychron Q14 Pro:
The board has been build out with lubed and filmed KNCKeys Clackbits linear switches and PBTFans BoW keycaps. The extra keys over the numpad are just metal keycaps bought from Keychron.
As is the case with a lot of entry-level keyboards, the white that Keychron has gone with for the case isn't really white. In person it has a pretty obvious pink/purple tint. It's not something you notice in daily use, but it's definitely noticeable.
I also decided to do as I say and actually use the included stabilizers. Lubed up, they're actually really good. I put a bit of Krytox 205g0 in the housing, some XHT-BDZ on the wires, and a bit of insulation foam under the wire and all is good. No rattle or sticking in sight.
It seems that the "issues" that I've experienced with other of Keychron's aluminum keyboards is still present on the new Pro-line. So I still highly recommend to do a the forcebreak mod, a tape mod and find something to stuff the case with.
For me the filling seem to default to pouring silicone into it:
After I bought the keyboard, Keychron put an acoustic upgrade kit up for sake on their website. As I decided to go all in, I can't really comment on how well that works, but it might be worth it, if you're interested in a Q-series Keychron.
But without any kind of filling, the keyboard has a rather loud metallic ring. Every time you hit a key it's like hitting a bell.
-
 geo3 got a reaction from Coldblackice in Switch lubing guide.
I've responded to more than a couple questions on here about lubing keyboards and since I have my last endeavor documented I though I'd write up a picture guide on how to do it. I'm not doing it here but you can take this opportunity to do a spring swap if you want. Or even change the stem. You could go from a brown, to a red, to a blue switch, just by swapping the stem and spring. My switches here are Zealios, a special type of tactile Gateron switch similar to an MX Clear.
I don't claim this is the definitive method, but it's how I do it and that's worked out pretty well so far.
First the tools and links to buy them: Switch opener, Lube, Brush. It also helps to have a tray to keep loose odds and ends in, like all your removed keycaps.
(Note, If you are working with loose switches, either you have a hotswap PCB or you're lubing before you solder, then get a switch opener like this : KBD Fans switch opener or Gateron Switch Opener and skip all the switch opening steps, those are for already soldered switches)
Insert the switch openers into the two slots on either side of the switch. This works for Gateron and Cherry for sure, not for Kailh. Can't comment on other brands as I don't own any others. Also this won't work if you have LEDs that go through the switch unless you desolder the LED first. If you have SMD LEDs (ones that reside under the switch) you should be good.
Pry with one tool in toward the switch (not downward but laterally across the keyboard) which will pop up one side.
Then flip that tool over and insert it under the switch top. We're not going to pry at all again on this side, it's just there to prevent this side from snapping back together and closing itself again. These guys snap closed really easily.
Next pry with the other tool, again across the board, not down or up. The second half will take about twice as much force to get open.
It may come off all together or just the top by it self. Just be careful when pulling stuff off that there is no tension on the spring as it can easily shoot itself across the room and disappear forever.
Here we see just the top has been removed.
Switch top, spring and stem. I put the spring inside the switch top like this so it can't roll away and get lost.
Skip to this point for unsoldered switches or hotswap boards Instead open the switches with one of these: KBD Fans switch opener or Gateron Switch Opener
Time to load up some lube on your brush. You just need a very small amount. This here is probably a little much.
First I lube the center post in the switch bottom. This is what the spring rides on. So this step not only smooths out the feel of the switch, but also dramatically reduces pinging sounds from the spring.
Also lube the two channels on either side. This is what the stem rides in. No need to reload your brush at this point.
Next lube the stem. Get all four sides and the under side of the stem where it contacts the spring. Just in the circular channel, you don't need to lube that post. I do reload the brush with some more lube for this step, but only like 25% of what I put on initially.
Now it's time to reassemble. Put the spring in first. It should feel different sliding in that it did coming off. It should feel softer and more velvety now.
Put the stem on top of the spring. Make sure the little arms on the stem face the electrical contacts. Those arms are responsible for separating the contacts and are what make the switch work at all. If it's backwards the switch won't operate.
Next put the top back on the stem. The more steeply shaped side of the top should also face the electrical contacts. Press it down gently and it should easiy snap and clip shut. If it's not going on easily don't apply force, something is not aligned up and you might bend the metal contacts. Take it off and double check it's all aligned.
Once it clips in to place you're done. Move on to the next one. If you get into a real rhythm you should be able to do 1 switch every 45 seconds. Also I use a single key cap to mark my progress so I don't lose my place.
Addendum: Kail BOX Switches:
BOX switches are already pretty smooth and don't benefit as much from lubing. Even so, the internals are different so here are the lube points if you do want to do it. I don't think you can open these if they are in a plate so you will need the KBDFans style opening tool that offers a Kailh opening side. KBD Fans switch opener
VID_20200311_171149.mp4 VID_20200311_171149.mp4 -
geo3 got a reaction from Coldblackice in lubricating a k70rgb keyboard
Here are the 4 lube points marked in red. In the 2 channels in the base of the switch that the notches on the stem ride in, on the left and right sides. On and round the post in the base that the spring sits on. And around the post on the under side of the stem, again where the spring sits. With the stem pressed in all the way you would be able to expose the top half of the 2 channels.
I'd recommend a super fine tip paint brush to apply the lube. You only want a thin coating, too much will bog down the motion of the switch. Since you can't open them, if you fuck up and put too much I don't see how you'd get the excess out, so be careful.
-
geo3 got a reaction from Coldblackice in lubricating a k70rgb keyboard
There are many different consistencies. The stuff I linked is a mix with the best consistency for switches.
@Add2017 You should also get a super fine tip paint brush which helps apply the right amount.
-
geo3 reacted to saintlouisbagels in Secretlab chair
Find used Herman Miller Aeron or Steelcase chairs. Don’t waste your money on gamer shit.
-
geo3 reacted to Nighters in Madison reveals experiences working at LMG
Oh no, you cannot read and copmprehend text. What an incel:D
-
geo3 reacted to Psittac in Any recommendations for a motherboard with good audio performance at 192KHz?
Why motherboard audio and not external?
-
geo3 reacted to VoidX in high end audio
Those are usually sellouts or heavily biased voodoo believers with a complete disregard for science/measurements. It's very rare that someone actually measures and reaches out to engineers (like Audioholics), and it's even more rare that they have the money or equipment for quality reviews (Amir, Erin). Things like the Meridian tour are only possible with the reach of Linus.
-
geo3 reacted to Blue4130 in high end audio
What can Linus offer that isn't covered by other more qualified reviewers?
-
geo3 reacted to HenrySalayne in XLR - XLR cable vs XLR - minijack cable
XLR is a balanced connector with phantom power (generally 48 V), the 3.5mm mini jack is an unbalanced connector with a bias voltage (5 V).
Only dynamic XLR microphones are somewhat compatible with a mini-jack, but it's mostly jerry-rigging. The 5 V bias voltage could damage or destroy microphones (it's unlikely) and you lose the benefits of the balanced connection.
tl;dr
Use a proper XLR input (for example on a USB interface) for a XLR microphone.
-
 geo3 got a reaction from saintlouisbagels in Chair reccomendations
Bad advice. This lead to a string of bad office chairs for me. You can't judge a chair by sitting in it for 5min.
-
geo3 got a reaction from Psittac in Good Budget Speakers?
Look at something from Edifier in that range. Just type Edifier into Amazon.
-
 geo3 got a reaction from cmndr in DIY Acoustic Panels
Finally done. Most of the hold up was finding a way to mount these. Settled on these drywall mounting hooks and eye loops.
And here they are mounted:
I've got 4 in total, 2 on each side wall in the rear of the room. I'll likely add 4 more, and additional 1 on each side and one center front wall and center rear wall.
-
 geo3 got a reaction from Omon_Ra in DIY Acoustic Panels
So I've been looking at getting room treatments for my living room. But Professional panels are expensive and the foam squares from Amazon kind suck. So... DIY it?
The quality panels you can get from places like GIK Acoustics or Music City are essentially just a fancy enclosure filled with mineral wool or something similar. Since that's readily available at my local Lowe's I figured it couldn't be to hard. Everything I needed to build these I either already had or got from Lowe's with the exception of the fabric which I got from Hobby Lobby.
Results first:
3 of the six, one of each color.
Mounted on the wall
Tools:
You'll need: Saw, Stapler, Scissors, Power Drill
Materials:
Lumber 2x4x92 Fir wall studs, $40 for 12
Rockwool insulation, $54 for 12 batts These are the 3in thick kind. If you want to trap lower frequencies you can buy thicker 5.5 inch batts or double stack these one in front of the other. Though you'll need to build a thicker frame using 2x6 planks.
Fabric. $210 for 30 feet of this fabric. I could almost definitely find cheaper fabric.
Wood screws 8x3, $5
Hanging hardware, <1$
Process:
Cut your lumber to size, I chose 33.5x50 inches because that fits 2 rockwool batts side by side. Remember to account for the thickness of the frame itself.
Screw the corners together. 3 screws per corner seemed sturdy enough.
Lay the fabric out on a table and place the frame on top of it. Cut it to length then staple the edges to the back side of the frame.
Cut and tuck fabric under itself to form neat corners.
The rockwool simply layers in place. Since they insulation and the lumber are both intended for wall construction the fit each other perfectly. The thickness is just right. Touching it is rather itchy though so maybe use gloves.
I'll add a backing fabric to these later, but for now the insulation seems to stay in there pretty snuggly.
Attach mounting hardware.
Backing fabric and wire mounting
-
 geo3 got a reaction from Needfuldoer in DIY Acoustic Panels
Finally done. Most of the hold up was finding a way to mount these. Settled on these drywall mounting hooks and eye loops.
And here they are mounted:
I've got 4 in total, 2 on each side wall in the rear of the room. I'll likely add 4 more, and additional 1 on each side and one center front wall and center rear wall.
-
geo3 reacted to Blue4130 in When will we reach the point that graphics and performance will no longer be a important aspect of a game?
Shit optimization will never be acceptable. Why would anyone ever think that is ok?
-
geo3 got a reaction from cmndr in I have 4 Dayton ND91-8 speakers. Can someone design me a box or something
This is a bad idea, period. A full range driver, like a tweeter, should play by itself. Combining multiple will sound like crap. Only when the driver is significantly smaller than the wavelength of the sound it's playing does it make sense to have more than one.
The exception is when your are making a line source speaker, but you need a dozen or so per side for that to start to make sense.
If I were you I would make 4 individual surrounds using those.
-
 geo3 got a reaction from Fast_N_Curious in Who's got a decent sound system? Post it here
Speakers: NX-Otica, DIY full open baffle speaker from GR-Research
AMP: SMSL VMV A1
DAC: SMS: VMV D1Se
Streamer: Wiim Mini
-
geo3 got a reaction from Psittac in Who's got a decent sound system? Post it here
Speakers: NX-Otica, DIY full open baffle speaker from GR-Research
AMP: SMSL VMV A1
DAC: SMS: VMV D1Se
Streamer: Wiim Mini
-


