


aithos
-
Posts
582 -
Joined
-
Last visited


aithos's Achievements
")
-
Upscaling increases the number of pixels, but it isn't going to increase the resolution of the texture itself. You can run HalfLife 2 in 4K but it isn't going to look like a modern game running in 4K, and a modern 4K game wouldn't look anything like a future game with 4K native textures. Most games use 1080p textures and upscale, they will look better in 4K but NOTHING like native 4K content would. That's why 4K is stupid for gaming when you have to go back to 60hz and deal with things like increased delay between frames, motion blur, poor shot registration from less accurate positional information, etc. It isn't worth all those negatives just to upscale. 1440p looks considerably better than 1080p, will have native content much sooner (and some exists today), is easier to run and still enables things like ULMB for eliminating motion blur.
-
How did you use RadeonPro and what OS are you on? Did you create a custom resolution or something? I have the same problem with my Asus monitor and I didn't have any luck with using CRU or a number of other methods of doing that, League either goes completely black and doesn't appear or I have to run in borderless windowed. My old PC worked fine but I think something in Windows 10 makes the new one not work the same way
-
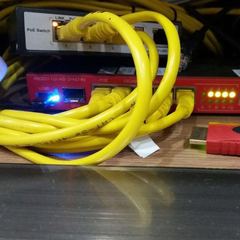
You use Cat6 because it is a thicker cable with better transfer speeds, better shielding, and yes... it future proofs you. The cost difference is also relatively minor, so it isn't worth investing in a cable like Cat5e that has been outdated for over 5 years at this point.
-
Well if you have the ability your options for wiring without doing that: 1) Drill a hole right in the floor. This is the janky option, it's going to look bad and if you rent or live with your parents it is probably a no-go. With that being said it's super fast, cheap and easy so if you own and don't give a damn about how it looks then this will get it done and you can just slap some conduit to your wall and paint it to match the wall. 2) You cut a hole (4" x 5" roughly) at the base of the wall in your room (after you locate the studs and make sure there is no electrical wire in the wall, always turn off the breaker for the room/wall you're cutting into first). Then you drill a hole in the floor plate, which will let you drop the cable into the wall. If the room is literally below you then as long as you make sure you get the right cavity between studs all you'll have to do is cut two smaller holes for the wall jacks and spend a little time fishing the cable. Then you get a wall patch kit from your local home depot or whatnot and patch the wall, prime and repaint. No one will ever know there was a hole there and you'll have ethernet connecting the two rooms. Here's a guide if you're interested in how to do it... but please note that this is still kind of a janky option because you're wiring between two rooms and not to a central location. It's better than a hole in the floor and a cable hanging on a wall, but the ideal solution would be to run to a central location with a patch panel, switch, and router setup. For supplies you'd need: - Drill and 1/2" to 3/4" drill bit (may need a right angle drill or adapter) - Small piece of drywall, patch kit, fiberglass tape and spackle/joint compound, 120-150~ grit sanding block - two single gang boxes, two Cat6 keystones, two single port modular faceplates - Cat6 cable (23AWG, solid wire that is CM rated or better) - punch-down tool, screwdriver, putty knife, wire stripper, utility knife, pencil, small level - hand drywall saw, dust mask and safety glasses, stud finder, network tester Directions: - Use the stud finder to determine where the studs are near your computer and the router, ideally they would be on the same wall and not opposite sides. If you can't re-arrange your room and this isn't the case you may still need to run a cable across your room from the wall jack, but may be able to use trim to hide it under. Make sure you check for power, you don't want the jack in the same cavity as an outlet so if there is an outlet for your setup move a cavity over at least. - Mark the studs with a pencil and measure out where you want to cut your hole in the wall to drill through the floor (in the center of the studs). Use a level to draw the lines so you have a nice square box, but do NOT start cutting anything yet. - Plug a power strip into the same wall and figure out which circuit breaker turns off the outlets on that wall (have someone tell you when the light on the strip goes out, don't rely on the room lights turning off to tell you because sometimes lights are on a separate breaker from outlets). Turn off the breaker so there is no chance of you accidentally drilling/cutting into a power wire that is live. IMPORTANT: repeat for the room below as well. - Use the hand saw to carefully cut out your hole on three sides, for the fourth you can either cut it (stop before going all the way through and hold the piece so it doesn't fall anywhere), or you can score it with a utility knife and then break it off. I prefer to cut with the saw but YMMV. - Verify there is nothing unexpected behind the hole, locate the floor plate (usually just a 2x4) , put on your safety glasses and drill your hole through. If you want to be super thorough you could roll up some sandpaper and sand the edges to make sure it isn't rough or sharp to snag the cable while pulling but it isn't really necessary. - Use the gang box, level and pencil to trace an outline on the wall at the same height as the wall outlets. That's important, for the love of god don't stick the box in the middle of the wall because your desk is at that height. That's a super amateur move that will decrease the aesthetic in the room and look really stupid if you (or someone else) moves stuff around. Having it at the height of the outlet makes it blend in with the room. - Carefully cut out the drywall opening for the gang box, minding the contours as closely as you can because you want a nice tight fit. Make sure to open the cable pass through areas on the gang box before you install it or you're going to have a bad time when you can't actually fish the cable through. - Go downstairs and repeat in the location where that gang box is going, then get your Cat6 cable and fish it through the wall until you have it sticking out of the holes where each gang box will be installed. Pull the cable through the gang box and get your keystones. Strip about two inches of cable, trim the center shield if there is one (be careful not to nick the wires). Use the punchdown tool and follow the "B" configuration and make sure both keystones are wired the same way. - Use the network tester to make sure the connections work (you may need a couple short patch cables to test with if the tester didn't include them, but it should). Once you have verified the jacks work (you didn't damage the cable, etc) then you can install the gang boxes in the wall. NOTE: make sure you get "old work" gang boxes, those have tabs to hold it in place in the middle of a wall cavity and don't need to be attached to studs. That's what you want, trust me. - Snap the keystone into the faceplate, screw it onto the gang box and you're almost done! - Go back upstairs with your small piece of drywall, your patch kit (little plates that screw into drywall and let you screw the patch piece into them) and the rest of the stuff (putty knife, fiberglass tape, compound, etc) - Make sure the opening is as square as possible and install the drywall patch clips on each of the four sides. Measure again and cut your piece of drywall as close to that size as you can cleanly manage. Put it in place and make sure you have marked where the clips are at, screw the drywall patch into each of the four clips. - Tape each of the four sides with fiberglass tape for stability, cover each piece with spackle or preferably joint compound. Make sure it gets down into the seam and try to feather it out (YouTube it if you've never done it), that lets you blend it with the wall without having raised areas. Let it dry and then use the putty knife to scrape any rough areas off it, you don't have to get crazy here. Sand it lightly and then put two more coats on doing the same thing each time. The final time you want to sand it pretty thoroughly (and make sure to wear your mask, the dust is horrible for you to breath). When you run your hand from the wall over the seams you should barely feel it raise where the patch is and you won't be able to see it when you're done which is the important thing. If you get too heavy handed with the compound you will have to sand it aggressively, so watch some videos and put it on thin. - Prime the area (if you don't it will never match the rest of the wall), let it dry completely and then paint with two coats of paint matched to the room. Then you're done! Just plug in your ethernet cables to the jacks on either end and enjoy your super solid connection!
-
I would recommend it, it's the best value/money. Cat5e would work but for longer runs has a cap of 100MB/s where Cat6 is 1GB/s (in short distances they are 1GB/s and 10GB/s respectively). Cat7 is also out there but is considerably more expensive and not at all worth the cost at this point. How far away is your router from where your computer is located?
-
I'm not saying what you're doing is bad either, if it works for you that's totally fine. However, the OP is here because they are having disconnects and lag using an existing wireless connection... so suggesting that wireless can be good enough is probably not a good recommendation in this case. Could he/she get a better router or card? Yeah, and it might fix the problem. Or there could be other factors about the situation where it wouldn't help at all and would be a waste of time/money. Which is why I recommended wired or an alternative wired solution, because there is no real guess-work... its going to be a more stable connection than the current setup and the cost is less as well.
-
It is a device that plugs into your wall outlet in two places and uses the power cables in the walls to transfer data from one place to another. It's decent, but there are certain cases where it won't work... such as when a building has different circuits and there isn't a direct path from each outlet. You plug one in near the router/modem and one near your computer and can then run ethernet to each device, it's extremely simple. You won't get blazing speeds but it will be more stable.
-
You must not be doing things like network backups or media sharing then, because I can tell you right now that if you were backing up several TB of data to a NAS you wouldn't have the same experience with your wireless connection as what I'm hard-wiring in my house If he's already having issues with disconnects and lag then he could try tweaking the router settings a bit to boost the stability, but I wouldn't recommend a new dongle because the dongle is almost never the issue. To the people talking about bedrooms... if you own or live somewhere that you can make modifications it's relatively easy to drill a few holes and install a couple wall jacks with a patch panel and inexpensive switch. It can be tedious and you have to be comfortable cutting holes in your walls and pulling wire, but it isn't hard work. I am in the process of wiring my house and I have a Ubiquity in-wall AP for phones/tablets and have my computer plugged in to the jack while my router/modem is in my utility room where the cable comes into the house for the best possible signal strength...
-
There is literally no scenario when it comes to performance where wireless is better for gaming. Even if you have rock solid wireless and have no issue with lag caused by the connection itself you can still get signal issues (too weak, too strong, too much interference, etc) and still drop your connection. Forget getting a better wireless dongle or card, get yourself a good cat6 ethernet cable and run a connection right to your router. If you absolutely can't do that (or relocate the router/modem) then look into one of the alternative solutions like ethernet over power or coax as a last option, it's not nearly as good as running an ethernet cable but far better than wireless in most situations. You may be fortunate to live in a space where you have no issue with interference from other people near you, and no issues with signal strength, and you may be lucky to get no random resets or dropped connections... but that doesn't mean everyone will have similar experiences. My fiance uses a wireless card on her PC because we had it in a room that would have been stupid in our old apt to run a wire and even though it's less than 40 feet down the hallway with nothing in the way it would still occasionally reset because of other people in the complex. It didn't matter which channel I ran it on, which band (2.4 or 5k) it still sometimes got random lag and disconnects. She's using a nice TP-Link card and I have a Nighthawk router with my own modem and a rock solid signal... so it wasn't the components.
-
A couple things: 1) Get used to using Google and come up with an intelligent bookmark system for coding references. It doesn't matter how long you code or how good you are, you're going to constantly run into problems you don't know how to deal with and you're going to be referencing coding sites a lot. Having a good organization structure for your bookmarks is key because it will let you find relevant info again later. I break mine down by language and primary task... so if I run into a JavaScript/jQuery error or snippet it goes into that folder, if I run into a SQL problem it goes into that folder, etc. 2) Start small and just start DOING, don't pick a huge application or you'll never get anything done. Writing from scratch is pointless, professionally you're likely to never write from scratch unless you start your own development company and create applications from the ground up. I'd say that 99% of all day to day coding is dealing with other people's poorly designed code (with no documentation) and trying to figure why in the hell it's so messed up and how to fix it. If you really want to write from scratch break things down into manageable parts, i.e. what kind of database needs will you have, what kind of user input/interface do you need, what kind of information are you dealing with, etc. 3) Get good at refactoring code and learn SQL inside and out. If you are a database rockstar companies will love you, because a lot of performance issues stem from poorly written queries and/or poorly designed databases. No one cares about a sweet looking UI if it takes two minutes to load a page, and just because a page loads in a second with 100 records doesn't mean it won't take 2 minutes with 10,000.
-
Deitel and Deitel. Hands down THE best C++ series you can buy, they are extremely good about updating and present things in a way that makes sense. Get one that's a year or two old and you'll save a bunch without losing too much, don't go more than a couple years back though.
-
Get a CPU that's better at multi-threading and/or get a CPU that's faster.
-
It's not strange, you're attempting to use a object/attribute that doesn't have a value or isn't instantiated. It may be that your enemy was no longer in scope and you referenced it, it could be a specific attribute that you're trying to use that hasn't been set, it could be a function call that is supposed to return a list and doesn't, or it could be any number of other things. What we know for certain is that you're attempting to use something that doesn't exist, period. Argue about what the environment says all you want, that's what the error means and if you knew even a tiny bit about coding you'd realize that. Stop making games and take a CS101 course and learn to code first, copying code and scripting isn't going to help you when you don't have the bare bones fundamentals. edit: also... I don't use Unity because I'd rather have open source, but if I had to hazard a guess you've put them on the scene but you haven't actually spawned the enemy and you're trying to do something to manipulate it before it's actually created.
-
Just significantly upgraded internet speed. Router/Modem help NEEDED!
aithos replied to TheLetterSee's topic in Networking
I also suggest getting your own equipment. Aside from the fact that ISP modems are typically garbage they are often worn out (poor components/capacitors, etc) you're also paying a rental fee. If you buy your own and use it for a year or two you will have more than paid for the cost even if you buy an expensive one. A good router also matters, I went from standard Linksys stuff to a Netgear Nighthawk AC router and it's MUCH faster. Also, the LAN throughput is much better and far more consistent. I was getting packet loss playing some games and that was immediately resolved when I got a better router. PS: anyone who says wired throughput doesn't matter because it's a lot more than your ISP bandwidth doesn't know what they are talking about. The issue I was having was directly related but had nothing to do with the modem being incapable of handling the speed of my internet. -
Asus PG279Q. Settings: - download ICC profile or calibrate using decent tool - disable GSync (you don't need it) - refresh rate: 120hz (can't go higher w/ULMB) - ULMB: ON, 65 pulse width Enjoy the best gaming experience on the market for less than $2000.
