


CoreVengeance
-
Posts
18 -
Joined
-
Last visited
Reputation Activity
-

 CoreVengeance got a reaction from HybridB in Dark Vengeance - First Personal Rig
Hello everyone, this is my first build log as well as my very first custom built PC. I decided to take on the challenge of making it a Batman themed build and I have to say that I had a blast working on it.
I bought all the parts during Black Friday and Cyber Monday back in November 2013. I have been working on the rig since then and I finally managed to fully finish it.
So let's start with the the specs:
http://pcpartpicker.com/p/2ggKc
CPU: Intel Core i7 4770K
Cooler: Corsair H100i
Motherboard: ASRock Z87 Extreme 6
RAM: Kingston HyperX Black 2x8GB
GPU: EVGA GTX 770 ACX
SSD: Kingston HyperX 3K 120GB
HDD: Seagate 3TB
PSU: Corsair RM750 80+ Gold
Case: Fractal Design Define R4 w/ window
Extras (For a temperature controlled RGB LED Strip):
Arduino Uno R3
5m RGB LED Strip (~4m used)
One Wire Digital Temperature Sensor - DS18B20
MOSFET Transistor N-Channel 60V/16A STP16NF06 DE3268
Received all the parts!!
Did a test build. At first, I pressed the power button and nothing happened - my heart sunk. Pressed it again and still nothing. Then I realized my noob mistake: I didn't plug in the 24-pin power connector. Plugged it in and phew...it turned on.
Motherboard and CPU are in.
All parts in and wired.
Now time for some cable management.
Wire management done.
She's alive! Installing Windows 8.
Aluminium Batman Logo:
Now it's time to create an aluminium Batman logo! I made this sketch in SolidWorks using an image as a reference in the background.
I decided to get it cut with a CNC machine, which I have access to at my university. Someone helped me transfer the SolidWorks drawing to MasterCam, which calculates the path that the CNC takes to cut the metal.
For the Batman silhouette, I didn't use SolidWorks as it would have been really tedious trying to dimension it. I opted for creating a paper template and hand-cutting it with a dremel.
It was really hard to cut but I did it. Took me about an hour to cut and 4 hours to refine.
I refined both the Batman logo and the silhouette by filing and sanding.
Time for a brushed aluminium finish!
First pass on the silhouette
I think it turned out pretty nice.
To attach the logo and the silhouette, I used Uglu (amazing stuff). It holds them on the case very strongly and I don't think I ever have to worry about the aluminium falling off.
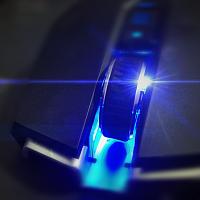
RGB LED Strip:
Then I moved on to creating the temperature controlled RGB LED strip. I cut the 5m LED strip to size and put it around the side perimeter of the case. For making the circuit, I followed this tutorial: http://www.jerome-bernard.com/blog/2013/01/12/rgb-led-strip-controlled-by-an-arduino/
To power the LED strip and the arduino, I used the 12V and 5V supply from the PSU molex connector. I haven't had any issues with the LED flickering or pulling too much current. And the arduino still works after about 3 months of use. Eventually, I would like to take the arduino out and just use the Atmega 328 chip to run the circuit.
Testing the strip with the old PSU
Without further ado, here's the final product:
Next steps:
I would like to some day finish the GPU backplate I started working on. I measured everything on the GTX 770 and even created the SolidWorks model for it but never really got around to finishing it. I'll be sure to post back if I ever finish it.
Anyways, I hope you enjoyed this build log. I sure had a lot of fun building "Dark Vengeance" and I learned so much.
-
 CoreVengeance got a reaction from Old Man Snail in Dark Vengeance - First Personal Rig
Hello everyone, this is my first build log as well as my very first custom built PC. I decided to take on the challenge of making it a Batman themed build and I have to say that I had a blast working on it.
I bought all the parts during Black Friday and Cyber Monday back in November 2013. I have been working on the rig since then and I finally managed to fully finish it.
So let's start with the the specs:
http://pcpartpicker.com/p/2ggKc
CPU: Intel Core i7 4770K
Cooler: Corsair H100i
Motherboard: ASRock Z87 Extreme 6
RAM: Kingston HyperX Black 2x8GB
GPU: EVGA GTX 770 ACX
SSD: Kingston HyperX 3K 120GB
HDD: Seagate 3TB
PSU: Corsair RM750 80+ Gold
Case: Fractal Design Define R4 w/ window
Extras (For a temperature controlled RGB LED Strip):
Arduino Uno R3
5m RGB LED Strip (~4m used)
One Wire Digital Temperature Sensor - DS18B20
MOSFET Transistor N-Channel 60V/16A STP16NF06 DE3268
Received all the parts!!
Did a test build. At first, I pressed the power button and nothing happened - my heart sunk. Pressed it again and still nothing. Then I realized my noob mistake: I didn't plug in the 24-pin power connector. Plugged it in and phew...it turned on.
Motherboard and CPU are in.
All parts in and wired.
Now time for some cable management.
Wire management done.
She's alive! Installing Windows 8.
Aluminium Batman Logo:
Now it's time to create an aluminium Batman logo! I made this sketch in SolidWorks using an image as a reference in the background.
I decided to get it cut with a CNC machine, which I have access to at my university. Someone helped me transfer the SolidWorks drawing to MasterCam, which calculates the path that the CNC takes to cut the metal.
For the Batman silhouette, I didn't use SolidWorks as it would have been really tedious trying to dimension it. I opted for creating a paper template and hand-cutting it with a dremel.
It was really hard to cut but I did it. Took me about an hour to cut and 4 hours to refine.
I refined both the Batman logo and the silhouette by filing and sanding.
Time for a brushed aluminium finish!
First pass on the silhouette
I think it turned out pretty nice.
To attach the logo and the silhouette, I used Uglu (amazing stuff). It holds them on the case very strongly and I don't think I ever have to worry about the aluminium falling off.
RGB LED Strip:
Then I moved on to creating the temperature controlled RGB LED strip. I cut the 5m LED strip to size and put it around the side perimeter of the case. For making the circuit, I followed this tutorial: http://www.jerome-bernard.com/blog/2013/01/12/rgb-led-strip-controlled-by-an-arduino/
To power the LED strip and the arduino, I used the 12V and 5V supply from the PSU molex connector. I haven't had any issues with the LED flickering or pulling too much current. And the arduino still works after about 3 months of use. Eventually, I would like to take the arduino out and just use the Atmega 328 chip to run the circuit.
Testing the strip with the old PSU
Without further ado, here's the final product:
Next steps:
I would like to some day finish the GPU backplate I started working on. I measured everything on the GTX 770 and even created the SolidWorks model for it but never really got around to finishing it. I'll be sure to post back if I ever finish it.
Anyways, I hope you enjoyed this build log. I sure had a lot of fun building "Dark Vengeance" and I learned so much.
-
 CoreVengeance reacted to Veltrix in Dark Vengeance - First Personal Rig
Hahaha well I have a downdraft cooler [Noctua NH-C12P-SE14] and so the cooler is placed in a way that the fins are vertical because that was one of the two recommended way to mount the cooler from Noctua. So the air is drafted upwards and down to the graphics card 50/50 and having that rear exhaust would be useless or less efficient. I saw what you did with the modular vent and so I did that and put the fans as one of the top exhaust. I have better temps now, thanks to you and my system is still silent [Double edge sword]. {side note: I should upload my R4 rig too, maybe when I get the time to do a photo shoot for my system haha}
-
 CoreVengeance got a reaction from Veltrix in Dark Vengeance - First Personal Rig
Aha np. Surprised you actually noticed that. It's one of those things that make the build look neater without actually being noticed.
-
 CoreVengeance got a reaction from pu11 in Dark Vengeance - First Personal Rig
Hello everyone, this is my first build log as well as my very first custom built PC. I decided to take on the challenge of making it a Batman themed build and I have to say that I had a blast working on it.
I bought all the parts during Black Friday and Cyber Monday back in November 2013. I have been working on the rig since then and I finally managed to fully finish it.
So let's start with the the specs:
http://pcpartpicker.com/p/2ggKc
CPU: Intel Core i7 4770K
Cooler: Corsair H100i
Motherboard: ASRock Z87 Extreme 6
RAM: Kingston HyperX Black 2x8GB
GPU: EVGA GTX 770 ACX
SSD: Kingston HyperX 3K 120GB
HDD: Seagate 3TB
PSU: Corsair RM750 80+ Gold
Case: Fractal Design Define R4 w/ window
Extras (For a temperature controlled RGB LED Strip):
Arduino Uno R3
5m RGB LED Strip (~4m used)
One Wire Digital Temperature Sensor - DS18B20
MOSFET Transistor N-Channel 60V/16A STP16NF06 DE3268
Received all the parts!!
Did a test build. At first, I pressed the power button and nothing happened - my heart sunk. Pressed it again and still nothing. Then I realized my noob mistake: I didn't plug in the 24-pin power connector. Plugged it in and phew...it turned on.
Motherboard and CPU are in.
All parts in and wired.
Now time for some cable management.
Wire management done.
She's alive! Installing Windows 8.
Aluminium Batman Logo:
Now it's time to create an aluminium Batman logo! I made this sketch in SolidWorks using an image as a reference in the background.
I decided to get it cut with a CNC machine, which I have access to at my university. Someone helped me transfer the SolidWorks drawing to MasterCam, which calculates the path that the CNC takes to cut the metal.
For the Batman silhouette, I didn't use SolidWorks as it would have been really tedious trying to dimension it. I opted for creating a paper template and hand-cutting it with a dremel.
It was really hard to cut but I did it. Took me about an hour to cut and 4 hours to refine.
I refined both the Batman logo and the silhouette by filing and sanding.
Time for a brushed aluminium finish!
First pass on the silhouette
I think it turned out pretty nice.
To attach the logo and the silhouette, I used Uglu (amazing stuff). It holds them on the case very strongly and I don't think I ever have to worry about the aluminium falling off.
RGB LED Strip:
Then I moved on to creating the temperature controlled RGB LED strip. I cut the 5m LED strip to size and put it around the side perimeter of the case. For making the circuit, I followed this tutorial: http://www.jerome-bernard.com/blog/2013/01/12/rgb-led-strip-controlled-by-an-arduino/
To power the LED strip and the arduino, I used the 12V and 5V supply from the PSU molex connector. I haven't had any issues with the LED flickering or pulling too much current. And the arduino still works after about 3 months of use. Eventually, I would like to take the arduino out and just use the Atmega 328 chip to run the circuit.
Testing the strip with the old PSU
Without further ado, here's the final product:
Next steps:
I would like to some day finish the GPU backplate I started working on. I measured everything on the GTX 770 and even created the SolidWorks model for it but never really got around to finishing it. I'll be sure to post back if I ever finish it.
Anyways, I hope you enjoyed this build log. I sure had a lot of fun building "Dark Vengeance" and I learned so much.
-
 CoreVengeance got a reaction from tristan1035 in Dark Vengeance - First Personal Rig
Hello everyone, this is my first build log as well as my very first custom built PC. I decided to take on the challenge of making it a Batman themed build and I have to say that I had a blast working on it.
I bought all the parts during Black Friday and Cyber Monday back in November 2013. I have been working on the rig since then and I finally managed to fully finish it.
So let's start with the the specs:
http://pcpartpicker.com/p/2ggKc
CPU: Intel Core i7 4770K
Cooler: Corsair H100i
Motherboard: ASRock Z87 Extreme 6
RAM: Kingston HyperX Black 2x8GB
GPU: EVGA GTX 770 ACX
SSD: Kingston HyperX 3K 120GB
HDD: Seagate 3TB
PSU: Corsair RM750 80+ Gold
Case: Fractal Design Define R4 w/ window
Extras (For a temperature controlled RGB LED Strip):
Arduino Uno R3
5m RGB LED Strip (~4m used)
One Wire Digital Temperature Sensor - DS18B20
MOSFET Transistor N-Channel 60V/16A STP16NF06 DE3268
Received all the parts!!
Did a test build. At first, I pressed the power button and nothing happened - my heart sunk. Pressed it again and still nothing. Then I realized my noob mistake: I didn't plug in the 24-pin power connector. Plugged it in and phew...it turned on.
Motherboard and CPU are in.
All parts in and wired.
Now time for some cable management.
Wire management done.
She's alive! Installing Windows 8.
Aluminium Batman Logo:
Now it's time to create an aluminium Batman logo! I made this sketch in SolidWorks using an image as a reference in the background.
I decided to get it cut with a CNC machine, which I have access to at my university. Someone helped me transfer the SolidWorks drawing to MasterCam, which calculates the path that the CNC takes to cut the metal.
For the Batman silhouette, I didn't use SolidWorks as it would have been really tedious trying to dimension it. I opted for creating a paper template and hand-cutting it with a dremel.
It was really hard to cut but I did it. Took me about an hour to cut and 4 hours to refine.
I refined both the Batman logo and the silhouette by filing and sanding.
Time for a brushed aluminium finish!
First pass on the silhouette
I think it turned out pretty nice.
To attach the logo and the silhouette, I used Uglu (amazing stuff). It holds them on the case very strongly and I don't think I ever have to worry about the aluminium falling off.
RGB LED Strip:
Then I moved on to creating the temperature controlled RGB LED strip. I cut the 5m LED strip to size and put it around the side perimeter of the case. For making the circuit, I followed this tutorial: http://www.jerome-bernard.com/blog/2013/01/12/rgb-led-strip-controlled-by-an-arduino/
To power the LED strip and the arduino, I used the 12V and 5V supply from the PSU molex connector. I haven't had any issues with the LED flickering or pulling too much current. And the arduino still works after about 3 months of use. Eventually, I would like to take the arduino out and just use the Atmega 328 chip to run the circuit.
Testing the strip with the old PSU
Without further ado, here's the final product:
Next steps:
I would like to some day finish the GPU backplate I started working on. I measured everything on the GTX 770 and even created the SolidWorks model for it but never really got around to finishing it. I'll be sure to post back if I ever finish it.
Anyways, I hope you enjoyed this build log. I sure had a lot of fun building "Dark Vengeance" and I learned so much.
-
 CoreVengeance got a reaction from FlamingDefibs in Dark Vengeance - First Personal Rig
Hello everyone, this is my first build log as well as my very first custom built PC. I decided to take on the challenge of making it a Batman themed build and I have to say that I had a blast working on it.
I bought all the parts during Black Friday and Cyber Monday back in November 2013. I have been working on the rig since then and I finally managed to fully finish it.
So let's start with the the specs:
http://pcpartpicker.com/p/2ggKc
CPU: Intel Core i7 4770K
Cooler: Corsair H100i
Motherboard: ASRock Z87 Extreme 6
RAM: Kingston HyperX Black 2x8GB
GPU: EVGA GTX 770 ACX
SSD: Kingston HyperX 3K 120GB
HDD: Seagate 3TB
PSU: Corsair RM750 80+ Gold
Case: Fractal Design Define R4 w/ window
Extras (For a temperature controlled RGB LED Strip):
Arduino Uno R3
5m RGB LED Strip (~4m used)
One Wire Digital Temperature Sensor - DS18B20
MOSFET Transistor N-Channel 60V/16A STP16NF06 DE3268
Received all the parts!!
Did a test build. At first, I pressed the power button and nothing happened - my heart sunk. Pressed it again and still nothing. Then I realized my noob mistake: I didn't plug in the 24-pin power connector. Plugged it in and phew...it turned on.
Motherboard and CPU are in.
All parts in and wired.
Now time for some cable management.
Wire management done.
She's alive! Installing Windows 8.
Aluminium Batman Logo:
Now it's time to create an aluminium Batman logo! I made this sketch in SolidWorks using an image as a reference in the background.
I decided to get it cut with a CNC machine, which I have access to at my university. Someone helped me transfer the SolidWorks drawing to MasterCam, which calculates the path that the CNC takes to cut the metal.
For the Batman silhouette, I didn't use SolidWorks as it would have been really tedious trying to dimension it. I opted for creating a paper template and hand-cutting it with a dremel.
It was really hard to cut but I did it. Took me about an hour to cut and 4 hours to refine.
I refined both the Batman logo and the silhouette by filing and sanding.
Time for a brushed aluminium finish!
First pass on the silhouette
I think it turned out pretty nice.
To attach the logo and the silhouette, I used Uglu (amazing stuff). It holds them on the case very strongly and I don't think I ever have to worry about the aluminium falling off.
RGB LED Strip:
Then I moved on to creating the temperature controlled RGB LED strip. I cut the 5m LED strip to size and put it around the side perimeter of the case. For making the circuit, I followed this tutorial: http://www.jerome-bernard.com/blog/2013/01/12/rgb-led-strip-controlled-by-an-arduino/
To power the LED strip and the arduino, I used the 12V and 5V supply from the PSU molex connector. I haven't had any issues with the LED flickering or pulling too much current. And the arduino still works after about 3 months of use. Eventually, I would like to take the arduino out and just use the Atmega 328 chip to run the circuit.
Testing the strip with the old PSU
Without further ado, here's the final product:
Next steps:
I would like to some day finish the GPU backplate I started working on. I measured everything on the GTX 770 and even created the SolidWorks model for it but never really got around to finishing it. I'll be sure to post back if I ever finish it.
Anyways, I hope you enjoyed this build log. I sure had a lot of fun building "Dark Vengeance" and I learned so much.
-
 CoreVengeance got a reaction from UselessBread in Dark Vengeance - First Personal Rig
Hello everyone, this is my first build log as well as my very first custom built PC. I decided to take on the challenge of making it a Batman themed build and I have to say that I had a blast working on it.
I bought all the parts during Black Friday and Cyber Monday back in November 2013. I have been working on the rig since then and I finally managed to fully finish it.
So let's start with the the specs:
http://pcpartpicker.com/p/2ggKc
CPU: Intel Core i7 4770K
Cooler: Corsair H100i
Motherboard: ASRock Z87 Extreme 6
RAM: Kingston HyperX Black 2x8GB
GPU: EVGA GTX 770 ACX
SSD: Kingston HyperX 3K 120GB
HDD: Seagate 3TB
PSU: Corsair RM750 80+ Gold
Case: Fractal Design Define R4 w/ window
Extras (For a temperature controlled RGB LED Strip):
Arduino Uno R3
5m RGB LED Strip (~4m used)
One Wire Digital Temperature Sensor - DS18B20
MOSFET Transistor N-Channel 60V/16A STP16NF06 DE3268
Received all the parts!!
Did a test build. At first, I pressed the power button and nothing happened - my heart sunk. Pressed it again and still nothing. Then I realized my noob mistake: I didn't plug in the 24-pin power connector. Plugged it in and phew...it turned on.
Motherboard and CPU are in.
All parts in and wired.
Now time for some cable management.
Wire management done.
She's alive! Installing Windows 8.
Aluminium Batman Logo:
Now it's time to create an aluminium Batman logo! I made this sketch in SolidWorks using an image as a reference in the background.
I decided to get it cut with a CNC machine, which I have access to at my university. Someone helped me transfer the SolidWorks drawing to MasterCam, which calculates the path that the CNC takes to cut the metal.
For the Batman silhouette, I didn't use SolidWorks as it would have been really tedious trying to dimension it. I opted for creating a paper template and hand-cutting it with a dremel.
It was really hard to cut but I did it. Took me about an hour to cut and 4 hours to refine.
I refined both the Batman logo and the silhouette by filing and sanding.
Time for a brushed aluminium finish!
First pass on the silhouette
I think it turned out pretty nice.
To attach the logo and the silhouette, I used Uglu (amazing stuff). It holds them on the case very strongly and I don't think I ever have to worry about the aluminium falling off.
RGB LED Strip:
Then I moved on to creating the temperature controlled RGB LED strip. I cut the 5m LED strip to size and put it around the side perimeter of the case. For making the circuit, I followed this tutorial: http://www.jerome-bernard.com/blog/2013/01/12/rgb-led-strip-controlled-by-an-arduino/
To power the LED strip and the arduino, I used the 12V and 5V supply from the PSU molex connector. I haven't had any issues with the LED flickering or pulling too much current. And the arduino still works after about 3 months of use. Eventually, I would like to take the arduino out and just use the Atmega 328 chip to run the circuit.
Testing the strip with the old PSU
Without further ado, here's the final product:
Next steps:
I would like to some day finish the GPU backplate I started working on. I measured everything on the GTX 770 and even created the SolidWorks model for it but never really got around to finishing it. I'll be sure to post back if I ever finish it.
Anyways, I hope you enjoyed this build log. I sure had a lot of fun building "Dark Vengeance" and I learned so much.
-
 CoreVengeance got a reaction from Homicidium in Dark Vengeance - First Personal Rig
Hello everyone, this is my first build log as well as my very first custom built PC. I decided to take on the challenge of making it a Batman themed build and I have to say that I had a blast working on it.
I bought all the parts during Black Friday and Cyber Monday back in November 2013. I have been working on the rig since then and I finally managed to fully finish it.
So let's start with the the specs:
http://pcpartpicker.com/p/2ggKc
CPU: Intel Core i7 4770K
Cooler: Corsair H100i
Motherboard: ASRock Z87 Extreme 6
RAM: Kingston HyperX Black 2x8GB
GPU: EVGA GTX 770 ACX
SSD: Kingston HyperX 3K 120GB
HDD: Seagate 3TB
PSU: Corsair RM750 80+ Gold
Case: Fractal Design Define R4 w/ window
Extras (For a temperature controlled RGB LED Strip):
Arduino Uno R3
5m RGB LED Strip (~4m used)
One Wire Digital Temperature Sensor - DS18B20
MOSFET Transistor N-Channel 60V/16A STP16NF06 DE3268
Received all the parts!!
Did a test build. At first, I pressed the power button and nothing happened - my heart sunk. Pressed it again and still nothing. Then I realized my noob mistake: I didn't plug in the 24-pin power connector. Plugged it in and phew...it turned on.
Motherboard and CPU are in.
All parts in and wired.
Now time for some cable management.
Wire management done.
She's alive! Installing Windows 8.
Aluminium Batman Logo:
Now it's time to create an aluminium Batman logo! I made this sketch in SolidWorks using an image as a reference in the background.
I decided to get it cut with a CNC machine, which I have access to at my university. Someone helped me transfer the SolidWorks drawing to MasterCam, which calculates the path that the CNC takes to cut the metal.
For the Batman silhouette, I didn't use SolidWorks as it would have been really tedious trying to dimension it. I opted for creating a paper template and hand-cutting it with a dremel.
It was really hard to cut but I did it. Took me about an hour to cut and 4 hours to refine.
I refined both the Batman logo and the silhouette by filing and sanding.
Time for a brushed aluminium finish!
First pass on the silhouette
I think it turned out pretty nice.
To attach the logo and the silhouette, I used Uglu (amazing stuff). It holds them on the case very strongly and I don't think I ever have to worry about the aluminium falling off.
RGB LED Strip:
Then I moved on to creating the temperature controlled RGB LED strip. I cut the 5m LED strip to size and put it around the side perimeter of the case. For making the circuit, I followed this tutorial: http://www.jerome-bernard.com/blog/2013/01/12/rgb-led-strip-controlled-by-an-arduino/
To power the LED strip and the arduino, I used the 12V and 5V supply from the PSU molex connector. I haven't had any issues with the LED flickering or pulling too much current. And the arduino still works after about 3 months of use. Eventually, I would like to take the arduino out and just use the Atmega 328 chip to run the circuit.
Testing the strip with the old PSU
Without further ado, here's the final product:
Next steps:
I would like to some day finish the GPU backplate I started working on. I measured everything on the GTX 770 and even created the SolidWorks model for it but never really got around to finishing it. I'll be sure to post back if I ever finish it.
Anyways, I hope you enjoyed this build log. I sure had a lot of fun building "Dark Vengeance" and I learned so much.
-
 CoreVengeance got a reaction from skullbringer in Dark Vengeance - First Personal Rig
Hello everyone, this is my first build log as well as my very first custom built PC. I decided to take on the challenge of making it a Batman themed build and I have to say that I had a blast working on it.
I bought all the parts during Black Friday and Cyber Monday back in November 2013. I have been working on the rig since then and I finally managed to fully finish it.
So let's start with the the specs:
http://pcpartpicker.com/p/2ggKc
CPU: Intel Core i7 4770K
Cooler: Corsair H100i
Motherboard: ASRock Z87 Extreme 6
RAM: Kingston HyperX Black 2x8GB
GPU: EVGA GTX 770 ACX
SSD: Kingston HyperX 3K 120GB
HDD: Seagate 3TB
PSU: Corsair RM750 80+ Gold
Case: Fractal Design Define R4 w/ window
Extras (For a temperature controlled RGB LED Strip):
Arduino Uno R3
5m RGB LED Strip (~4m used)
One Wire Digital Temperature Sensor - DS18B20
MOSFET Transistor N-Channel 60V/16A STP16NF06 DE3268
Received all the parts!!
Did a test build. At first, I pressed the power button and nothing happened - my heart sunk. Pressed it again and still nothing. Then I realized my noob mistake: I didn't plug in the 24-pin power connector. Plugged it in and phew...it turned on.
Motherboard and CPU are in.
All parts in and wired.
Now time for some cable management.
Wire management done.
She's alive! Installing Windows 8.
Aluminium Batman Logo:
Now it's time to create an aluminium Batman logo! I made this sketch in SolidWorks using an image as a reference in the background.
I decided to get it cut with a CNC machine, which I have access to at my university. Someone helped me transfer the SolidWorks drawing to MasterCam, which calculates the path that the CNC takes to cut the metal.
For the Batman silhouette, I didn't use SolidWorks as it would have been really tedious trying to dimension it. I opted for creating a paper template and hand-cutting it with a dremel.
It was really hard to cut but I did it. Took me about an hour to cut and 4 hours to refine.
I refined both the Batman logo and the silhouette by filing and sanding.
Time for a brushed aluminium finish!
First pass on the silhouette
I think it turned out pretty nice.
To attach the logo and the silhouette, I used Uglu (amazing stuff). It holds them on the case very strongly and I don't think I ever have to worry about the aluminium falling off.
RGB LED Strip:
Then I moved on to creating the temperature controlled RGB LED strip. I cut the 5m LED strip to size and put it around the side perimeter of the case. For making the circuit, I followed this tutorial: http://www.jerome-bernard.com/blog/2013/01/12/rgb-led-strip-controlled-by-an-arduino/
To power the LED strip and the arduino, I used the 12V and 5V supply from the PSU molex connector. I haven't had any issues with the LED flickering or pulling too much current. And the arduino still works after about 3 months of use. Eventually, I would like to take the arduino out and just use the Atmega 328 chip to run the circuit.
Testing the strip with the old PSU
Without further ado, here's the final product:
Next steps:
I would like to some day finish the GPU backplate I started working on. I measured everything on the GTX 770 and even created the SolidWorks model for it but never really got around to finishing it. I'll be sure to post back if I ever finish it.
Anyways, I hope you enjoyed this build log. I sure had a lot of fun building "Dark Vengeance" and I learned so much.
-
 CoreVengeance got a reaction from AlwaysFSX in Dark Vengeance - First Personal Rig
Hello everyone, this is my first build log as well as my very first custom built PC. I decided to take on the challenge of making it a Batman themed build and I have to say that I had a blast working on it.
I bought all the parts during Black Friday and Cyber Monday back in November 2013. I have been working on the rig since then and I finally managed to fully finish it.
So let's start with the the specs:
http://pcpartpicker.com/p/2ggKc
CPU: Intel Core i7 4770K
Cooler: Corsair H100i
Motherboard: ASRock Z87 Extreme 6
RAM: Kingston HyperX Black 2x8GB
GPU: EVGA GTX 770 ACX
SSD: Kingston HyperX 3K 120GB
HDD: Seagate 3TB
PSU: Corsair RM750 80+ Gold
Case: Fractal Design Define R4 w/ window
Extras (For a temperature controlled RGB LED Strip):
Arduino Uno R3
5m RGB LED Strip (~4m used)
One Wire Digital Temperature Sensor - DS18B20
MOSFET Transistor N-Channel 60V/16A STP16NF06 DE3268
Received all the parts!!
Did a test build. At first, I pressed the power button and nothing happened - my heart sunk. Pressed it again and still nothing. Then I realized my noob mistake: I didn't plug in the 24-pin power connector. Plugged it in and phew...it turned on.
Motherboard and CPU are in.
All parts in and wired.
Now time for some cable management.
Wire management done.
She's alive! Installing Windows 8.
Aluminium Batman Logo:
Now it's time to create an aluminium Batman logo! I made this sketch in SolidWorks using an image as a reference in the background.
I decided to get it cut with a CNC machine, which I have access to at my university. Someone helped me transfer the SolidWorks drawing to MasterCam, which calculates the path that the CNC takes to cut the metal.
For the Batman silhouette, I didn't use SolidWorks as it would have been really tedious trying to dimension it. I opted for creating a paper template and hand-cutting it with a dremel.
It was really hard to cut but I did it. Took me about an hour to cut and 4 hours to refine.
I refined both the Batman logo and the silhouette by filing and sanding.
Time for a brushed aluminium finish!
First pass on the silhouette
I think it turned out pretty nice.
To attach the logo and the silhouette, I used Uglu (amazing stuff). It holds them on the case very strongly and I don't think I ever have to worry about the aluminium falling off.
RGB LED Strip:
Then I moved on to creating the temperature controlled RGB LED strip. I cut the 5m LED strip to size and put it around the side perimeter of the case. For making the circuit, I followed this tutorial: http://www.jerome-bernard.com/blog/2013/01/12/rgb-led-strip-controlled-by-an-arduino/
To power the LED strip and the arduino, I used the 12V and 5V supply from the PSU molex connector. I haven't had any issues with the LED flickering or pulling too much current. And the arduino still works after about 3 months of use. Eventually, I would like to take the arduino out and just use the Atmega 328 chip to run the circuit.
Testing the strip with the old PSU
Without further ado, here's the final product:
Next steps:
I would like to some day finish the GPU backplate I started working on. I measured everything on the GTX 770 and even created the SolidWorks model for it but never really got around to finishing it. I'll be sure to post back if I ever finish it.
Anyways, I hope you enjoyed this build log. I sure had a lot of fun building "Dark Vengeance" and I learned so much.
-
 CoreVengeance got a reaction from mikeangeles 75 in Dark Vengeance - First Personal Rig
Hello everyone, this is my first build log as well as my very first custom built PC. I decided to take on the challenge of making it a Batman themed build and I have to say that I had a blast working on it.
I bought all the parts during Black Friday and Cyber Monday back in November 2013. I have been working on the rig since then and I finally managed to fully finish it.
So let's start with the the specs:
http://pcpartpicker.com/p/2ggKc
CPU: Intel Core i7 4770K
Cooler: Corsair H100i
Motherboard: ASRock Z87 Extreme 6
RAM: Kingston HyperX Black 2x8GB
GPU: EVGA GTX 770 ACX
SSD: Kingston HyperX 3K 120GB
HDD: Seagate 3TB
PSU: Corsair RM750 80+ Gold
Case: Fractal Design Define R4 w/ window
Extras (For a temperature controlled RGB LED Strip):
Arduino Uno R3
5m RGB LED Strip (~4m used)
One Wire Digital Temperature Sensor - DS18B20
MOSFET Transistor N-Channel 60V/16A STP16NF06 DE3268
Received all the parts!!
Did a test build. At first, I pressed the power button and nothing happened - my heart sunk. Pressed it again and still nothing. Then I realized my noob mistake: I didn't plug in the 24-pin power connector. Plugged it in and phew...it turned on.
Motherboard and CPU are in.
All parts in and wired.
Now time for some cable management.
Wire management done.
She's alive! Installing Windows 8.
Aluminium Batman Logo:
Now it's time to create an aluminium Batman logo! I made this sketch in SolidWorks using an image as a reference in the background.
I decided to get it cut with a CNC machine, which I have access to at my university. Someone helped me transfer the SolidWorks drawing to MasterCam, which calculates the path that the CNC takes to cut the metal.
For the Batman silhouette, I didn't use SolidWorks as it would have been really tedious trying to dimension it. I opted for creating a paper template and hand-cutting it with a dremel.
It was really hard to cut but I did it. Took me about an hour to cut and 4 hours to refine.
I refined both the Batman logo and the silhouette by filing and sanding.
Time for a brushed aluminium finish!
First pass on the silhouette
I think it turned out pretty nice.
To attach the logo and the silhouette, I used Uglu (amazing stuff). It holds them on the case very strongly and I don't think I ever have to worry about the aluminium falling off.
RGB LED Strip:
Then I moved on to creating the temperature controlled RGB LED strip. I cut the 5m LED strip to size and put it around the side perimeter of the case. For making the circuit, I followed this tutorial: http://www.jerome-bernard.com/blog/2013/01/12/rgb-led-strip-controlled-by-an-arduino/
To power the LED strip and the arduino, I used the 12V and 5V supply from the PSU molex connector. I haven't had any issues with the LED flickering or pulling too much current. And the arduino still works after about 3 months of use. Eventually, I would like to take the arduino out and just use the Atmega 328 chip to run the circuit.
Testing the strip with the old PSU
Without further ado, here's the final product:
Next steps:
I would like to some day finish the GPU backplate I started working on. I measured everything on the GTX 770 and even created the SolidWorks model for it but never really got around to finishing it. I'll be sure to post back if I ever finish it.
Anyways, I hope you enjoyed this build log. I sure had a lot of fun building "Dark Vengeance" and I learned so much.
-
CoreVengeance reacted to ShearMe in Difference between a sound card and a stereo amplifier?
To make sound from a digital source (a computer) you need a DAC to convert the digital file to analog, an amplifier to pump up the voltage to drive the speakers, and speakers (headphones are speakers) to deliver the sound to your ears.
A "soundcard" typically combines the DAC and the amplifier into one simple component for users to connect their speakers. "Active" speakers merely have an amplifier inside of them, usually just to make it easier to change the volume via a knob of some sort. It is possible to chain multiple amplifiers (ie soundcard with an amp, then active speakers). The "best" solution varies depending on your usage, your budget, and which audiophile you ask for advice.
Having an external optical DAC, going into a nice amplifier, going into nice speakers is the only thing I'd personally recommend for serious listening.
Having a separate amplifier in the chain doesn't make sense if your speakers are connected through an audio receiver as it only degrades the signal by amplifying it too much.
Having just a nice soundcard is good enough for just about everything if you're not extremely picky.
-
CoreVengeance reacted to HEXiT in Difference between a sound card and a stereo amplifier?
+1 but wont do anything to improve the overall quality of the onboard sound.
while a sound card should as long as you dont buy the bottom end xonars and creative xfi.
minimum spend is no less than $50/£50. if your gonna spend less than that your wasting your money as the resulting sound will be no better than the onboard if you have anything more than the most basic motherboard.
my personal recommendation if you want a cheap sound card is the creative xfi Xtreme gamer or the asus xonar dx
-
CoreVengeance reacted to Andi in Difference between a sound card and a stereo amplifier?
Active = Amp is in the speaker, thats right.
Soundcard -> Amp -> Speaker
If you want good sound all 3 things have to be good :D
Soundcard: Digital to Analog converter
Amp: makes the small powerless signal from your soundcard powerfull enough to drive a speaker.


