


F.A.T.
-
Posts
79 -
Joined
-
Last visited
Reputation Activity
-

 F.A.T. got a reaction from DumbAsshole32 in F(L)AT by F.A.T. (rhymes ;) )
Thanks guys !
Ok,
After welding trying to fit everything together again!
The on/off switch
Ofcourse we tried to testfit every component, so that you have a good idea of the size of the frame in total.
On the right of the motherboard there will be a 240 radiator and below the GPU. The powesupply and the SSD will be placed in the foot at the back!
The frame, sanded and ready for painting.
The corners of the frame are made of POM (acetal) a very tough and hard kind of plastic which will not break
They will protect the frame from blows and other things during transportation.
In the next update I will add the pictures of making these corner pieces!
Drilling is relatively easy in this material. These holes are for some customized nuts. The nuts are customized on a lathe so that they can be easily pressed in the corner pieces.
In the corner pieces we made some thread to hold the bolts in place. The thread will make sure that the bolts don’t have to be glued in but are simply clamped by the thread.
Cut out a bit of material to make it fit to the frame perfectly.
Maybe you have already met “Dave” the multitool ;)?! He has been SUPER helpful!!
(Next update I will post another photo of dave !)
Now just press in the bolt with the vice and because of the thread it slides in nicely and stays in place!
Tadaa, the final result of the corner pieces on the frame, In total there are 4 pieces!
Also you can see the result of painting !
-
F.A.T. got a reaction from DumbAsshole32 in F(L)AT by F.A.T. (rhymes ;) )
Super long update coming up!!!!
But first…
Took me some time to post a new one, I’ve been working on my jewelry collection. I had a big jewelry exhibition and everything worked out very well!
here are a few pic’s of the jewelry and presentation! (the casemodding skills came in quite handy with the presentation) !
that said…. lets add some pictures :D!
Here you see how the corner pieces are attached to the frame. First we drilled holes in the steel and made some thread….again….
In the last update you saw the corner pieces for the frame. Here you can see how they were made.
Neatly finished and all!
To screw on the window we used standard bolts and customized them, so they can be screwed in and removed easily by hand.
Mass production
Before and after
Acrylics for the window.
Dave in action…
Window for the frame, the safety foil states on until the build is done (…one learns from ones mistakes )
Next update more pictures on the wooden panels covering up the back of the frame.
-
F.A.T. got a reaction from DumbAsshole32 in F(L)AT by F.A.T. (rhymes ;) )
Yes, try it, its very effective! Let me know if it worked ;) !!
The frame is ready now we don’t need to weld anymore. So we can drill some holes for mounting.
and ofcourse…making thread again !….
The panels we use to cover up most of the case are made of wood. They all be covered in black self adhesive foil with a kind of 'sandpaper look’ texture.
These are the panels under the lasercutter.
the first parts glued together.
Luckily we have enough steel ;)!
This is where the GPU will fit in!
Behind the radiator there is a opened up part where the air can go through.
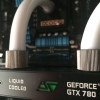
Test fit with the MSI 980ti
Drilling the holes for the pci express cable.
Motherboard standoffs
Spray painting all the corners and edges, on top the self adhesive foil.
Just a sneak peak how we will finish the foot ;)!
-
 F.A.T. got a reaction from TheCamba in F(L)AT by F.A.T. (rhymes ;) )
Thanks :D! DIY building package to make the foot for the PSU Tape is very useful ;)! Drilling holes in the frame to attach the foot to Test fit for the power supply, big one that Cooler Master V1200 And wrapped it up with foil Just as important as the Casemod, a case for sending it! It will be send through Europe and should be able to withstand a lot! tadaaa Firm cases, don’t you think :)? -
 F.A.T. got a reaction from Th3_Pookie in F(L)AT by F.A.T. (rhymes ;) )
Hi Guys!
It has been a bit quiet lately, but that doesn’t mean I’ve been sitting around entertaining Pixel (.. ok a bit true ;))
This is a build made for MSI, they asked to make 3 demo systems to sent to reviewers and press in Europe.
There were a few conditions to this build;
All the best features of the hardware had to show (duhuu)
It had to be solid and sturdy so it could be send to lots of different locations.
New hardware that hasn’t even been invented yet has to fit in there !
The first one was the prototype and this one was displayed at a event in the Netherlands called Firstlook.
Here are the renders of the scratch build!
Very easily said, it is a flat surface where you can install the motherboard and the GPU. In the stand at the back of the case we will build the power supply and SSD.
2 things are very important, a good PCI-express cable and a modded AIO cooler!
Highflow.nl has the perfect PCI-expresscables from Li Heat. these calls run stable on 3.0 and are available till 35cm and nicely covered in black fabric. Looks perfect!
This is where it all begins, steel steel and more steel ;)!
Drawing everything on
&…..cutting!
Cutting angles so all the parts will fit together nicely in the end.
Now, puzzle everything together ;)!
This will be a part of the stand at the back of the case which will hold the power supply.
In the middle there is extra steel reinforcements on which we can attach the foot of the case.
The cable has to go through the frame so there will be a rectangular hole in the profile so it will fit through nicely!
The On/Off switch will be placed there
Checking the angles!
Ready to weld everything together!
Normally we solder stuff together in stead on welding. Welding something together is no problem, but I doubt that it will win in a ‘beautiful-welds-contest' ! Luckily it will look nice afterwards.
-
 F.A.T. got a reaction from Anthony_95 in F(L)AT by F.A.T. (rhymes ;) )
Yes, try it, its very effective! Let me know if it worked ;) !!
The frame is ready now we don’t need to weld anymore. So we can drill some holes for mounting.
and ofcourse…making thread again !….
The panels we use to cover up most of the case are made of wood. They all be covered in black self adhesive foil with a kind of 'sandpaper look’ texture.
These are the panels under the lasercutter.
the first parts glued together.
Luckily we have enough steel ;)!
This is where the GPU will fit in!
Behind the radiator there is a opened up part where the air can go through.
Test fit with the MSI 980ti
Drilling the holes for the pci express cable.
Motherboard standoffs
Spray painting all the corners and edges, on top the self adhesive foil.
Just a sneak peak how we will finish the foot ;)!
-

-
 F.A.T. got a reaction from Heesleemer in AIO for Computex 2016 by F.A.T.
Now the final pics!!!
enjoy!
It arrived safely at Computex ☺
Hope you like it!
-
F.A.T. got a reaction from Heesleemer in AIO for Computex 2016 by F.A.T.
Thanks a lot!
Last update before the final pictures!
We wanted the outside of AIO to blend in with the inside details. To do that we cut out patterns of adhesive foil:
First black textured foil
And then details with white
Also on the front where we couldn’t mod much because most of it is glass
sneakpeak
Cutting all of the foil made me dizzy....
And ofcourse the crate!!!! Very sturdy with a hinge for the lid. Hopefully it will protect the aio during all of its travels.
-
 F.A.T. got a reaction from MattBoxer in AIO for Computex 2016 by F.A.T.
Now the final pics!!!
enjoy!
It arrived safely at Computex ☺
Hope you like it!
-
 F.A.T. got a reaction from neSSa in AIO for Computex 2016 by F.A.T.
Now the final pics!!!
enjoy!
It arrived safely at Computex ☺
Hope you like it!
-
F.A.T. reacted to Heesleemer in F(L)AT by F.A.T. (rhymes ;) )
ooh, i might have to do that with a spare IO (as it needs a fill port, since I've changed the tubing)
-
F.A.T. got a reaction from Heesleemer in F(L)AT by F.A.T. (rhymes ;) )
Yes, try it, its very effective! Let me know if it worked ;) !!
The frame is ready now we don’t need to weld anymore. So we can drill some holes for mounting.
and ofcourse…making thread again !….
The panels we use to cover up most of the case are made of wood. They all be covered in black self adhesive foil with a kind of 'sandpaper look’ texture.
These are the panels under the lasercutter.
the first parts glued together.
Luckily we have enough steel ;)!
This is where the GPU will fit in!
Behind the radiator there is a opened up part where the air can go through.
Test fit with the MSI 980ti
Drilling the holes for the pci express cable.
Motherboard standoffs
Spray painting all the corners and edges, on top the self adhesive foil.
Just a sneak peak how we will finish the foot ;)!
-
 F.A.T. got a reaction from Leinahtan in AIO for Computex 2016 by F.A.T.
Now the final pics!!!
enjoy!
It arrived safely at Computex ☺
Hope you like it!
-
 F.A.T. got a reaction from Avericious in AIO for Computex 2016 by F.A.T.
Now the final pics!!!
enjoy!
It arrived safely at Computex ☺
Hope you like it!
-
F.A.T. got a reaction from Anthony_95 in F(L)AT by F.A.T. (rhymes ;) )
Super long update coming up!!!!
But first…
Took me some time to post a new one, I’ve been working on my jewelry collection. I had a big jewelry exhibition and everything worked out very well!
here are a few pic’s of the jewelry and presentation! (the casemodding skills came in quite handy with the presentation) !
that said…. lets add some pictures :D!
Here you see how the corner pieces are attached to the frame. First we drilled holes in the steel and made some thread….again….
In the last update you saw the corner pieces for the frame. Here you can see how they were made.
Neatly finished and all!
To screw on the window we used standard bolts and customized them, so they can be screwed in and removed easily by hand.
Mass production
Before and after
Acrylics for the window.
Dave in action…
Window for the frame, the safety foil states on until the build is done (…one learns from ones mistakes )
Next update more pictures on the wooden panels covering up the back of the frame.
-
-
F.A.T. reacted to Albatross in F(L)AT by F.A.T. (rhymes ;) )
Amazing! I can't wait to see what it looks like when it is completed.
-
-
-
-
F.A.T. got a reaction from Heesleemer in F(L)AT by F.A.T. (rhymes ;) )
Thanks Guys ! Good to read your comments !
Another update on….
Hardware it is!
For the cooling of the build we used a Nepton 240 from CoolerMaster. Ofcourse we had to tweak it before it could be used in the build. The space for the cooler is quite limited.
Thats why we choose a AIO so you don’t have to add a separate pump and reservoir. The tubes on the AIO are positioned in a way that they stick out to the front which is not really convenient in this build. So we decided to upgrade the aluminium radiator with a copper one and adjust the position of the tubes !
The patient; a Coolermaster Nepton 240M
Ok…there it goes…
Everytime I see this i have to think of.. 'We void your warranty' ...
Under this rubberplug there is a screw with a rubberring that we need to make a new fill port in the new copper radiator
New radiator and better :D!
Coolermaster fans on the new !
Here you see the first version of the fill port! We drilled a hole on the bottom and glued on some extra metal with M4 thread.
Works well, but could be better. The next try was a bit different from the one before.
Step one is cutting the screw to the right size so it doesn’t block the water flow.
This time the fill port is located in the fitting, so it is richt on top of the radiator and facing the top of the case.
Step 2. is making a facet with a vile on the topside of the fitting.
Step 3. Drilling a 1,5mm hole.
Step 4. drilling the hole again with a 3,2mm drill
Step 5. Ofcourse…making thread (what else..) M4 because that is the size of the CM screw !
En thats it!
And don’t forget about the rubber ring!
Next update more !
-
F.A.T. got a reaction from Leinahtan in F(L)AT by F.A.T. (rhymes ;) )
Thanks Guys ! Good to read your comments !
Another update on….
Hardware it is!
For the cooling of the build we used a Nepton 240 from CoolerMaster. Ofcourse we had to tweak it before it could be used in the build. The space for the cooler is quite limited.
Thats why we choose a AIO so you don’t have to add a separate pump and reservoir. The tubes on the AIO are positioned in a way that they stick out to the front which is not really convenient in this build. So we decided to upgrade the aluminium radiator with a copper one and adjust the position of the tubes !
The patient; a Coolermaster Nepton 240M
Ok…there it goes…
Everytime I see this i have to think of.. 'We void your warranty' ...
Under this rubberplug there is a screw with a rubberring that we need to make a new fill port in the new copper radiator
New radiator and better :D!
Coolermaster fans on the new !
Here you see the first version of the fill port! We drilled a hole on the bottom and glued on some extra metal with M4 thread.
Works well, but could be better. The next try was a bit different from the one before.
Step one is cutting the screw to the right size so it doesn’t block the water flow.
This time the fill port is located in the fitting, so it is richt on top of the radiator and facing the top of the case.
Step 2. is making a facet with a vile on the topside of the fitting.
Step 3. Drilling a 1,5mm hole.
Step 4. drilling the hole again with a 3,2mm drill
Step 5. Ofcourse…making thread (what else..) M4 because that is the size of the CM screw !
En thats it!
And don’t forget about the rubber ring!
Next update more !
-
F.A.T. got a reaction from TheCamba in AIO for Computex 2016 by F.A.T.
Thanks a lot!
Last update before the final pictures!
We wanted the outside of AIO to blend in with the inside details. To do that we cut out patterns of adhesive foil:
First black textured foil
And then details with white
Also on the front where we couldn’t mod much because most of it is glass
sneakpeak
Cutting all of the foil made me dizzy....
And ofcourse the crate!!!! Very sturdy with a hinge for the lid. Hopefully it will protect the aio during all of its travels.
-
F.A.T. got a reaction from TheCamba in F(L)AT by F.A.T. (rhymes ;) )
Super long update coming up!!!!
But first…
Took me some time to post a new one, I’ve been working on my jewelry collection. I had a big jewelry exhibition and everything worked out very well!
here are a few pic’s of the jewelry and presentation! (the casemodding skills came in quite handy with the presentation) !
that said…. lets add some pictures :D!
Here you see how the corner pieces are attached to the frame. First we drilled holes in the steel and made some thread….again….
In the last update you saw the corner pieces for the frame. Here you can see how they were made.
Neatly finished and all!
To screw on the window we used standard bolts and customized them, so they can be screwed in and removed easily by hand.
Mass production
Before and after
Acrylics for the window.
Dave in action…
Window for the frame, the safety foil states on until the build is done (…one learns from ones mistakes )
Next update more pictures on the wooden panels covering up the back of the frame.


