


bennyino
-
Posts
636 -
Joined
-
Last visited
Reputation Activity
-

 bennyino got a reaction from zuboici in How to run higher than the maximum resolutions on your display
it would be interesting to use this as a benchmark before buying a newer higher res monitor to see if your gpu can handle it
-
 bennyino reacted to RankUpGamers in Apple set to overtake LTT in 2.3 weeks
THey fold on your iphone while you look away, that's why the battery life sucks!
-
 bennyino got a reaction from Youbetternot in Non Reference R9 cards
the latest one's (780) looks soooo good
-
-
 bennyino got a reaction from crocski in HD7770 screen glitches out
so far it's fine! thanks for the help, I love this community, i'm proud to be a member of it since the start
-
-

-

-
bennyino reacted to Shrubpig in Tech Confession Time!
I love razer stuff! I don't really understand all of the flak that they get :(
-
-
bennyino reacted to Denned in Denned's Watercooled 600T
This is my rig in it's current form. My rig always changes, due to testing of new parts, upgrades etc.
The specs of my rig is as follows:
Intel Core I5 3750K at 4,2GHz
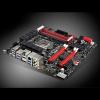
MSI z77 Mpower
Corsair Dominator Platinum 2x8GB 1600Mhz
Asus GTX 980 4GB
Corsair AX860i
2x Corsair Force in RAID0
2x Western Digital Black 1TB in RAID0
Watercooling specs:
EK Supremacy CSQ Clean
EK FC980 GTX CSQ Clean
EK-D5 x-res 140 CSQ
Alphacool VPP655 D5 pump
Alphacool Nexxos St30 360mm
Phobya Xtreme 200mm V2
Variety of EK fittings and angled fittings.
Mayhems Pastel White.
Mods I've done to the case / hardware:
Cut out the top out of the case to make room for the 360 in the roof.
Modified the radiator bracket on the 200mm to allow a better positioning.
Cut a 13mm hole in the 5.25" area to route the hose in a neat way.
Modified the screws from the graphics card block, so that I could mount it with the EVGA backplate.
Modified the hard drive cage to mount the pump, along with a hole to route the cable from the pump.
Aircooling build log!
The new powerhouse in it's new home.
Included this pictures to annoying all you OCD guys. But it was the best way I could mount it in order to hide the wires in a good way.
2x Back mounted Corsair Force 120gb's
My trusty EVGA gtx 680
Nearly finished.
The money shot! :)
Watercooling build log!
-
bennyino reacted to Ghost in Watercooling at it's best.
Thought I would link this video. Creator goes by the name of FabsSpeed (German) and the rig is called Project N.V.
I put this thread here because I am of course not the original creator so posting it in build logs would be inappropriate and this is watercooling related.
Build log can be found here: http://forums.bit-tech.net/showthread.php?t=255350 and http://www.overclock.net/t/1408451/project-n-v
-
bennyino reacted to PBaines in Custom Water Cooled Desk - 56k warning. Lotsa Pictures! *Now with Table of Contents*
I probably won't be able to get another huuuge update out till next week as I have had a lot of work lately!
However, will just let you know what i've been up to on this;
I have finished wiring the GPU cables,
I took the loop apart and gave it a final flush out to get rid of any internal flakes that came from the radiator.
I got some Black SATA Data cables to replace the red ones
Time to start sleeving everything which will be a painstakingly long process but "perfection takes time", and with sleeving. I don't settle for anything that isn't perfect.
here is a quick snap that I took with my HTC One, the DSLR has been kidnapped by my mother for a few days :P
I have made the decision to only use ONE CPU cable, this is to reduce cable clutter and I think it looks much more aesthetically pleasing. I will only be overclocking my 3770k to a 24/7 clock of 4.5 @ 1.28v so no need for the second CPU cable.
-
bennyino reacted to PBaines in Custom Water Cooled Desk - 56k warning. Lotsa Pictures! *Now with Table of Contents*
First things first, thank you very much Mayhems for sponsoring me 2L of Mayhems Pastel Orange Coolant :)
(will add picture of logo shortly after I get it from Mick)
It has been a bit too long without an update, here is a small one while the I get onto making a PCB for the GPU cables.
After getting a hold of the last bit of crystal link It was time to start filling it up! Just for testing to see how the fittings are and that I have no leaks. The top of the reservoir has a T fitting, on the top right of the T I have a Tap that I used
As untreated wood absorbs water I laid handy towels under every fitting joint otherwise if I do not see a leak in time there will be a different shade and an outline of the drop.
Think this is a 1L Koolance filling bottle, super simple. Fill, screw, squeeze!
After filling it all, giving it a few rounds I noticed a leak. Now, as soon as I saw it I knew what was wrong with it. As you can see quite a large air bubble at the end, you know that there is not a complete seal around the O-Ring, which means that the O-Ring would be quite damaged. If it were a leak that had partial damage to the O-Ring, there would be no air bubble, and just a little drop forming every now and then. Still, either way the fitting was binned!
Time to drain it, to replace the fitting. Draining... something I had not thought about before filling. Only way I thought of doing it was this way, which did create a bit of a spill but that is what the handy towels are for!
I fixed the fitting and found that the flow rate of the loop was terrible. I mean, literally dismal. I thought that if I took out that manifold, and ran the pumps in serial it would fix it. (though still intaking from their own reservoir)
But I thought wrong, as the left pump intaked water it would flow water into the right pump, but also would flow water into the right reservoir too. That being said, the flow rate of the loop was better, but still very poor. The option that was always there, but I would rather not have done it for aesthetical reasoning, have the left pump intaking from both the left and right res and running the pumps in serial.
Though again, not thinking about draining whatso ever, I had to be delicate and lift the reservoirs up, take the pumps off, and then put a stop fitting on the end of the reservoirs until my new fittings came to eliminate the problem
So I got my fitting, the configuration is a T fitting on the left, and an L fitting on the right. I think from this close up you can easily see what is going on
I just put the loop together quickly to see how the flow rate is. And it is much better, perfect pretty much!
Time to move onto a different aspect of the build, the storage. I changed the SSD's to: x1 256GB Samsung 840 Pro for the OS and then x2 Samsung 250GB SSD's in RAID 0 for my Steam, Origin and other gaming stuff. All of my media is on a file server that I just stream through Plex over the network
Anywho, I decided that I would actually put the SSD's up by the PSU. This made cabling a lot easier, and also would make it a lot tider. However it does leave a bit of space for where I was going to put them originally, though I will probably put something there in due time
To power the 3 drives I had to run the SATA Power cable under the PSU. I folded the cable over and crushed it with some pliers to make it sit flat
Time to make the new SATA Power cable, I measured where the bottom connector would go.
Sat the drive on top and pushed the wires into the grooves
Third one on, with this one I have to cut the wires off the top, and has to be very flush to the top of the connector otherwise the close-over cap will not fit on.
Excellent!
Test fit
Though the red cables do not mix in well with the build, I will be sleeving them black so no need to worry :)
I didn't really like the way the GPU went to the Pump, so I changed it. It gives it less of a bunched up in the corner look, and also makes the gpu's both look a bit more symetrical on each end too
The permanent filling solution. squeeze water into this, and blow on the tube to get the water in (because the reservoirs are horizontal you can only fill them to a certain point. Where when you blow water in and close the valve it lets you fill it properly)
I also had the GPU SLI Link too short, so when I put the SLI Bridge on the fitting leaked, after fixing that time to leak test again!
After an hour and a bit of leak testing I was happy that there were no leaks (To me, if it hasn't leaked in an hour. It won't leak at all) so I decided I may as well do some quick benchmarks and see how the rig goes!
Here are the results including Heaven, 3DMark and also the Temps (Note, only using 4 fans in pull on the first rad, have not hooked up cooling on the back rad at the moment)
17577 3D Mark
http://www.3dmark.com/3dm11/6840143
That is it for this update, there isn't much left to do! Just wiring really and then will be filling everything with Mayhems Pastel Orange :)
-
bennyino reacted to extremescouter in Reference Cooler Vs After Market Cooler
The GPU will perform better with an aftermarket cooler, because it will keep your card cooler, which would allow for a larger over clock. So yes, theoretically an aftermarket cooler design will perform better.
-
 bennyino got a reaction from TheRocK in Asus 7970 Platinum OR Gtx 770 ??
They should perform fairly similar after overclocking since the 770 is bascially a higher memory clocked 680 and that was about the same as a 7970 so consider surround and 3d and see which one is best for you
-
 bennyino got a reaction from BCMods in EK Announces New Supremacy CPU Waterblock Tops
http://linustechtips.com/main/topic/27365-new-supremacy-tops/
not a big deal, i just wanted to give credit to him :)
-

-
 bennyino got a reaction from rhoscrazy in Need to calculate PSU size...
you can do it with the 650w i recon but i would get the 760w one for upgradability
-

-
bennyino reacted to Snickerzz in [Giveaway] the MAW (closed)
http://www.rafflecopter.com/rafl/display/9824541/ :DD
-
 bennyino got a reaction from delet my acc pls in Good keyboard without numpad
ducky http://www.duckychannel.com.tw/en/DK9087_shine2.html
cm storm has some too http://www.cmstorm.com/en/products/keyboards/quickfirerapid/
-
 bennyino got a reaction from zoso_the_page in Good quiet Case Fan's and fans for a H220
noiseblocker eloop's perform better for the noise they produce compared to any other fan
when it comes to rads and heatsinks
-
 bennyino got a reaction from Froggyy0 in Lighting for New PC - LED Strips or Cold Cathodes
afaik they are some of the best, check out linus's vvideo on them
-
bennyino reacted to PBaines in Custom Water Cooled Desk - 56k warning. Lotsa Pictures! *Now with Table of Contents*
Anyways, enough talk about internet :P We are here for a build log!
Will be posting this small update just because it will be a little while before I can do mass amount of work on the next points to cross off the list.
here I started the initial planning for the cablemanagement.
I measured the width of a sleeved 24 Pin cable I had in the wardrobe and used that as my guide for how I will be having the stand offs
As you can see, The cable will sit in there like that. With a clamp on that will be help by the ends of the M3 motherboard standoffs. Might use some clear plexi/acrylic. Not sure yet! As I have said, that is still in the planning stage
Can I use the original PSU 8-Pin EPS connectors?
I could... But would rather go custom :D
First wire measured to length, and crimped
I lengthened the wires so that when they wires are basically horizontal they have a curve in the end. This just makes things tider at the CPU end and will make cablemanagement easier to do
After about an HOUR I had finally cut all 8 wires, crimped them and plugged them all into their respective holes. Is a lot more time consuming than one would think
As you can see, with the wires flat at one end, the wires have been staggered
Just making sure that the cable will sit how I want it to
Time to start the 24-Pin, the thing I love MOST about the AX***i series is that they basically use 1:1 wiring (if you don't know what that means it doesn't matter :P ) so that will make the cable management so much easier, and basically if I have enough brain as I think I do, I shouldn't put the wires in the wrong holes eg, a 12v wire on the Motherboard end goes into a 5v plug. NUT GUD.
Had a spare motherboard, thought I would just test the new cables out, looks like all is well
I received my 40 Link adapters from the states, I probably won't end up using 40 but is always handy to have a few extra.
Time to start putting them all in place, and adding my Crystal Tubes. Not sure if previously stated in the log but the tubing I am using is 12/8mm. Where the Bitspower ones are 12/10mm. This is not a bad thing at all, just means I need less coolant which = win ;)
Here is where the tube splits into three. Just to take up the space, and do something different is why I did this really. Just to point out though, as the water flows through the loop and it comes to this split join it will go through the middle one mainly, and just move the side ones a bit. There will be no pressure issues when joining back to being a single route.
I needed my Q fitting to go into my radiator. Which I will be using a side port on the NeXXoS Monsta Rad. For this I need a hole in the middle board of the desk. To do so I will be using this drill bit here, known as a "wood spade". She's a bit rusty, but still bloody sharp. It is a 20mm Piece
making sure my extender fitting sits in it
After marking out where the hole needs to be using my Sliding Square.
Hole is set
Top stop the other side of the wood to shatter apon drilling through, you drill half on one side, half on the other
Lovely Jovely
(awkward picture)
Same was done on the other side
To measure the exact right length, to keep the 3-way splitted tubing square I used this little tool. Cannot remember the name of the top of my head, but I am sure someone will :P
I got the top measurement of where the link comes out, then square that up at the bottom and thus measure from the long horizontal piece going from elbow to elbow-to-rad fitting
The process of getting the links to size goes like this
Measure
Cut with dremel, very carefully
Sand with rough, 120 grit paper
sand with super smooth 1200grit paper
And BALLBAG. I needed one last piece of about 550mm, the last piece I had of link was 500mm :( Looks Like I will not be leak testing today! Another metre of 12/8mm tubing to get..
Anyways, this is where we are at now


