


ALwin
-
Posts
5,249 -
Joined
Reputation Activity
-

 ALwin got a reaction from Ben17 in Asus Rog PG279Q - USB
You have to treat the USB ports on the monitor like ports on a USB hub. The HDMI, DisplayPort, DVI cables do not carry USB data signals. Hence you need a USB cable from the PC to the monitor (the USB B) to act as the cable that connects the computer to the hub.
Same thing with USB ports on a PC case's front panels, for this you should have a cable in the case that connects the front panel to the USB header on the logic board.
-
.png "Funny")
 ALwin got a reaction from EminentSun in How do you become a moderator on this forum?
I think you need to be willing to perform "certain acts".
-
 ALwin got a reaction from VicBar in How do you become a moderator on this forum?
I think you need to be willing to perform "certain acts".
-
.thumb.png.2b37a2d242d91f04d784eacf0a8d9e14.png) ALwin got a reaction from TVwazhere in How do you become a moderator on this forum?
ALwin got a reaction from TVwazhere in How do you become a moderator on this forum?
I think you need to be willing to perform "certain acts".
-
 ALwin got a reaction from cynexit in Monitor stand for "two above one" configuration
Ergotron makes monitor stands that might support this configuration or you may need two separate stands (one for two monitors and one for a single monitor), there might be other brands that also makes stands that are capable of supporting multiple monitors. You just need to make sure they can support the weight and be mounted on the desk the way you want.
http://www.ergotron.com/
Or you just need the stand for the top two monitors, the single below can use the stand that comes with it.
-
 ALwin got a reaction from vKarmah in Total noob in photography.
Aperture is the size of the iris opening inside the lens:
This image explains how shutter speed, aperture and ISO work.
larger the "F" number, the smaller the aperture, and usually Aperture (also referred to as F-Stops) is more appropriately indicated as F/##. F-stop is the Focal Length of the lens divided by the diameter of the iris opening. hence F/##, e.g. F/1.4, F/1.2. Wider aperture, faster F-stop means thinner Depth of Field (DoF), narrower aperture, slower F-stop means wider DoF. Depth of Field refers to how much of the scene is in focus. (see the image below with the stuffed monkey to get an idea of what DoF means) Slower shutter speed more motion blur, faster shutter speed less motion blur. Most digital cameras have shutter speeds ranging from 1/8000th of a second and up to 30 seconds, then they also include BULB mode so that the photographer can either manually hold down the shutter release button or use a timer remote to set any desired shutter speed longer than 1-30 seconds. ISO in relation to photography originates from film days when more sensitive film stock used larger grains of the chemicals coated on the film. In digital photography, ISO relates to how much the camera boosts the signal that's generated by light hitting the camera sensor. With digital cameras, increasing the ISO doesn't mean that the sensor becomes more sensitive to light, it means the camera is amplifying the signal. Lower ISO = cleaner looking image, higher ISO = image contains more noise.
This chart shows you various sensor sizes and their crop factors (which is measured relative to 35mm Full Frame size being 1x). Smaller sensors than Full Frame have a larger crop factor and sensors larger than FF have a smaller crop factor. Basically what this means is that if you mount a 50mm lens on an APS-C sensor with a crop factor of 1.5-1.6, the field of view you see looking through the viewfinder is similar to having mounted a 75mm lens on a FF sensor camera.
And this article explains focal length and field of view
http://www.nikonusa.com/en/learn-and-explore/article/g3cu6o2o/understanding-focal-length.html
-
ALwin got a reaction from vKarmah in Total noob in photography.
By the way, I forgot to mention. Knowing and understanding the meaning of those terms is not enough. You should also learn how to apply them in photography.
For example, Aperture allows you to achieve two main things:
The first is it allows you to control how much light reaches the sensor (similar to how shutter speed can control how long the sensor is exposed to light). If you use a small aperture less light reaches the sensor while a wider open aperture means more light of course. This can be useful when you photograph in places where the external lighting is not sufficient. However.... However because the size of the aperture opening also determines the depth of field, opening or closing the aperture should not necessarily be the first thing you do when shooting in low or highly lit conditions. An example is portrait photography where many professionals prefer to use a wide aperture to take portraits. Wide apertures like F/1.2, F/1.4, F/2.8 have shallow depth of field that are just a few millimeters thick. What portrait photographers do is they use that wide aperture and very thin DoF and when taking a portrait photo of a person they focus mainly on the eyes of their subject. This creates an effect where only elements of the person's face that is in the same plane of focus as their eyes are in sharp focus while everything in front and in the back appear soft/out-of-focus. This helps in reducing the visibility of pores and perhaps flaws in the skin. Shallow DoF also makes backgrounds look blurry, creamy, with nice bokeh. Note: By the way, like the crop factor that affects the field of view of a lens, the crop factor also affects the DoF and it is easier to achieve thinner DoF with larger sensors.
-

-4.jpg.fe2ababeb75799e36b0c871060336449.thumb.jpg.20251b93ab4bbfecc6e0bb4bc40d7a1d.jpg) ALwin got a reaction from ShadowCaptain in BMPCC Alternative
ALwin got a reaction from ShadowCaptain in BMPCC Alternative
In some cases importing from abroad will cost you more:
Shipping costs VAT (and even in cases where the place you order from, e.g. B&H, which do not apply VAT on your initial payment and delivery cost, the shipping company, e.g. DHL, UPS, etc., will apply the VAT when they send you a bill later and I've found that this can sometimes be more expensive). For example, I've ordered some stuff from B&H and had them shipped to my home in Switzerland because the US prices are cheaper even after taking shipping costs and VAT into account, but still the bill I get from UPS for paying the VAT/Import taxes after delivery is higher than expected because they also add the processing fee/service charge as they pay the VAT/Import tax at the customs for you when it arrives and sends you the bill to pay them back for it later. Sure the 150~GBP VAT on CVP looks high, but if you take into consideration other stuff it can be somewhat cheaper. Unless of course there's a coincidence that you're traveling to Geneva for some event and you're already spending money for that trip, in which case someone like me can order from CVP and hand it over to you here and you pay me back (which is going to cost you about 688.89GBP for the product, about 20GBP for the shipping, and about 50GBP for the VAT that DHL will bill me later, totaling around 760GBP).
-
 ALwin got a reaction from kirashi in how far can i replace a phone components?
You can replace everything... it becomes a new phone.
-
 ALwin got a reaction from NinjaJc01 in how far can i replace a phone components?
You can replace everything... it becomes a new phone.
-
 ALwin got a reaction from Blackhole890 in how far can i replace a phone components?
You can replace everything... it becomes a new phone.
-
 ALwin reacted to ShadowCaptain in New to making video media, good budget, need advice
https://www.dpreview.com/reviews/panasonic-lumix-dmc-gh4/11
You can compare the two here directly at all different ISOs, 400iso, A6300 looks better to me, as it does at every single ISO level
in fact the GH4 on 100, and A6300 on 400 look quite similar,
ALSO they are both base 100 ISO, I have no idea what you are talking about, you are completely wrong and sound like some hardcore fanboy not able to look at objective facts
-

 ALwin got a reaction from Mihle in New to making video media, good budget, need advice
100% agreed with you on this. Obsessed with the GH4 and 105mm AIS lens.
-
 ALwin got a reaction from SirDarknight in What'd be a good entry level DSLR camera?
1. A kit lens is quite suitable for a beginner to learn with. It offers both a reasonably wide angle and a short telephoto focal lengths. Taking the crop factor into account, an 18-55 lens is a medium zoom lens.
2. Any camera can be treated as a serious camera, depending on the person using it. There are professional photographers who uses entry level bodies like a Nikon D3#00.
3. Again, probably the dozenth time I repeat myself (feels like I'm talking to baby), while those specific lenses might be very good 105mm or 125mm focal lengths are not for every genre of photography. I'd pick those focal lengths only for portraiture and probably nothing else. And modern lenses can be just as good if not better. Smaller number of lens elements do not always mean better images, modern lenses have improved nano coatings on their glass elements which can negate the effect of having multiple glass elements.
The OP is a beginner, a complete novice, when it comes to photography. An entry level body with a kit lens is more than enough for his/her needs to learn and use the camera for a wide variety of situations. Is it perfect? No. But it's a starting point and a cheaper, safer investment if he/she decides later that photography not a passion and can keep the camera for casual use. If he/she decides that photography is indeed a serious passion or has the goal of becoming a photographer, he/she can decide later how to kit up appropriately.
-
ALwin got a reaction from Mihle in Guide: Film/Photo makers' useful resources (work in progress)
*My guides or reference materials will be kept as "work in progress" forever as I intend to keep on improving and updating them as long as I am able. There are so many things to cover and I have to search again on some great stuff I have used to help others over the years.
Let me start off by saying, whether you're interested in photography, cinematography, or even just recording sound:
While having high quality expensive gear would be nice, don't let the lack of having such gear stop you from being creative.
As you progress, gain experience, you will learn to understand what your gear is capable of doing and what its limitations are. With that you will learn to figure out where you need to upgrade or replace to improve without going out and buying an entirely new set of more expensive gear.
Note: some of the links I post will have a number next to them in brackets. This indicates that there are more than one good explanations or methods to do certain things.
Ok while my other guide on helping beginners choose between a DSLR/Mirrorless camera and a proper video camera, I thought I'd start another thread where I post links and videos on topics that people who are interesting in making videos or improving their photography skills should know.
If you have links to guides, videos, etc. that you believe will provide knowledge to budding film makers, and to photographers too because there are some overlapping of knowledge, feel free to share them.
As this guide is intended for beginners I will cover mainly the basic concepts. For more advanced or technical concepts, I will try to cover them as a Q&A. I also doubt if I will cover everything here, such as color correction, different settings for your speedlights, setting exposures, operating your camera, and so on. I am intending this guide to act as a primer to help beginners improve upon some of the very basic stuff they should know. Feel free to suggest topics you think I should cover, but I withhold the right to decide whether they get added or not.
Guides
Aspect Ratio/Cropping
Choosing a good aspect ration for your video, different genres of film or different storylines of film may require the use of different aspect ratio. 16:9 is not always the best choice to use, as this video will explain.
Aspect ratio: which should you choose Perspective
Understanding perspective when choosing a lens or selecting a focal length to use. The Dolly zoom, sometimes referred to as the Hitchcock zoom/effect, is a pretty good way of explaining to you what happens to your photo or video's perspective when you select a focal length to use or change focal lengths during filming. As a film technique, it is great when used appropriately, but it should not be used all the time. For photographers, observing the effects of the technique will show you the differences between using a wide angle lens and a telephoto lens.
Dolly Zoom Wide angle vs Telephoto Tips for posing your subject(s)
I saw these videos yesterday, created by a wedding photographer named Lexia Frank, and her videos give you quick and easy to understand explanations of how to tell your subject to pose for you in front of the camera. Now while they apply mostly to photography, some of what her tips can be used in video.
Lexia Frank's YT channel More posing tips Rules
KISS, always use KISS (Keep It Simple Stupid) Rule of thirds, the important thing is why the rule works, not what the rule is Other topics
Understanding Hypefocal distance and online calculator Understanding ISO & Film Speed What is Bokeh? Long exposure photography (1) Infrared Photography Astrophotography (1) Astrophotography (2) Frequency Separation Technique for retouching portraits, I really recommend this technique over other techniques to retouch a portrait. It's more realistic looking than what fashion magazines use. Light modifiers guide (1) Camera lens filters, choosing a lens filter and understanding polarizing filters Gear and accessories
Video Gear Guide for DLSR/Mirrorless shooters I'll also make a list of gear and accessories later, as a starter for beginners. The following are the basic gear you will need, and I will expand on each and provide tips on choosing the right one.
Camera, for this you can read my guide about DSLR/Mirrorless cameras and video cameras. This will help you make a decision on which type of camera to get if you want to shoot video. For photos, 80% of the cameras these days are good. Or just let us know your requirements and we will help you find the right camera for you. Lens (for interchangeable lens cameras, both photo and video). As long as you have a lens or set of lenses that cover the 24mm to 200mm focal length range (35mm equivalent), you are set for 95% of your needs. The additional items mentioned below are for videographers.
Audio recording
Built in microphones do not record clean audio. Especially those built into DSLR/Mirrorless camera bodies that have moving parts (reflex mirror, shutter). Some are even sensitive enough to pick up the noise of the AF and IS system in the lenses. Hence using an external microphone attached to the camera or an external recorder is recommended.
Your basic camera setup should have at least 1 external microphone (e.g. Rode Video Mic) or a recorder (e.g. Zoom H1).
The advantage of an external microphone is that it is either off camera or mounted on camera with a mount that is designed to reduce vibrations. The disadvantage, audio amps in DSLRs, mirrorless cameras and consumer camcorders tend to be limited.
External recorders can be mounted to a camera using a variety of mounts (hotshoe adapters, mini arms, etc). Higher end recorders come with multi channel recording capability and support for a variety of inputs. External records such as the Tascam DR-100 or DR-60D, or the Zoom H4n have high quality audio amps built in and are able to provide phantom power to external microphones that require them.
While a person on a budget may consider a low cost video mic or recorder I would recommend that if budget is not a major factor in your purchasing you should get the Tascam DR-100. Why?
Dual battery support (it comes with a Li-Ion battery pack and you can also use 2x AA batteries) The two directional mics in front are very sensitive, it also comes with support for 2x XLR connections. It has a line out port and a headphone port for monitoring audio. This way you can use a line out cable to feed audio to your camera, while recording on the DR-100's memory card at the same time. You use the audio track in camera for syncing with the better audio recorded by the DR-100. The same can be done with the Zoom H4n, however the two mics on the H4n are not aimed straight forward. They can be rotated to provide a 90 degree or 120 degree coverage.
Additional microphones that videographers should invest in:
Shotgun mic (e.g. Rode NTG2), and perhaps a boom stick for the times when the audio source is a distance away from the camera. Wireless lavalier microphones (e.g. Sennheisers), useful when doing interviews. I personally recommend that you have at least two lavalier sets. Wireless lavs are better when you are working alone and don't have an assistant to hold a boom mic. Other accessories you need will be wind covers and dead cat wind muffs, they are very useful for outdoor recording and can reduce ambient and background noise. Tripod and tripod heads
If you want to keep your camera stable, safe, and the camera is going to stay in one place then invest in a good sturdy tripod. Do not buy those cheap flimsy aluminum ones sold in a general department store. You don't have to invest in an expensive Manfrotto or Gitzo, you can go for ebay brands such as Benro which are pretty good. However, before you buy the tripod make sure it is solid enough to support the way of your camera and accessories. (Tip: always add a few extra kilos to your gear's weight to be on the safe side.) Also do not forget to make sure that it can support the tripod head you choose. You do not want a small tripod for a large tripod head.
Now for tripod heads, the type of head you choose will depend whether you are a photographer or videographer. There are a variety of tripod head systems for photographers. I generally prefer a ballhead with friction control and Arca-Swiss style quick release system but perhaps if you enjoy macro photography you want to get a geared head, or for those who do panoramas get a pano head. For videographers, you want a fluid video tripod head with a good handle. You want something solid, able to hold the weight of your gear and has a counter balance system that will help keep things stable. The Manfrotto 502HD is a good video tripod head.
I also recommend that people avoid getting tripods with a geared central column system. A good tripod and tripod head will last you years.
You can also invest in a monopod, however keep in mind you need to keep a hold of them. Unlike tripods they are not meant for hands free use, nor do they provide the very solid stability of a tripod. Monopods are ideal for people who move around with their camera a lot, such as hikers who like to photograph. And they rarely are ideal for videographers, though a long monopod can be used to film from a high angle.
Camera rig (for video)
Whether you are using a tripod, or want to shoulder mount your camera, or hold the camera in other ways you will need a good rig for the camera and accessories. Especially for videographers with a DSLR/Mirrorless camera and need to attach microphones, audio recorders, field monitors and other accessories.
A basic rig for the camera should have a mounting plate and support for two 15mm rods. A better rig will allow you to quickly switch from tripod to shoulder mount and vice versa. You will need several attachment points, either mounted to the rods or as part of the rig's skeleton for mounting accessories (mainly for DSLR/Mirrorless camera users).
Focusing systems
When recording video, unless you are doing home/family/vacation videos and do not have time to carry around all the extra gear, I always recommend that you disable the auto focus and learn to use manual focusing properly. AF systems do not know what you want to focus and how you want the focus to change throughout your filming. Also, I recommend that you invest in a follow focus system as turning the focus ring on the lens with your hands can introduce instability in your recording.
A good follow focus will be adjustable to fit a variety of lens sizes, will operate smoothly and will mount onto the 15mm rods.
With focusing comes the issue of know if you are focusing properly. Optical and electronic viewfinders in cameras, while they generally have an indicator of some sort that tells you of something is in focus or not, rely on the focus points of the AF system in your camera. They are also too small to see if you are focusing properly when pulling focus throughout the scene.
The back or side LCD on your camera is a better option, however even the largest screen on a DSLR/Mirrorless camera is only a few inches in size. And rarely do DSLR/Mirrorless cameras for video include helpful features for videographers. Using a viewfinder loupe that mounts on the LCD can be a bit more helpful. However, unless you are using a proper video camera (most video cameras have LCD displays that show focus peaking), I recommend that you invest in a good field monitor that can be mounted to your rig and can utilize the clean output of your camera. A good field monitor should have the following features
Focus peaking to assist your focus pulling False color display to show your exposure levels Guidelines to help you frame your scenes for different aspect ratios Filters
While modern digital cameras allow you to control the shutter speed, video recording frame rate, ISO and aperture settings, having and using filters in front of your lenses is still essential. For two reasons
Your camera settings may have a limited range. Changing shutter speed, ISO and aperture can change the recorded image in ways you don't want. Two basic types of filters that photographers and videographers should invest in
Neutral Density filters (ND), they can help reduce the amount of light reaching the sensor. Soft, Hard and Reverse edge Gradient Neutral Density filters, especially useful when part of the scene contains extreme shadows or highlights. ND gradient filters can help ameliorate bad lighting conditions or limited dynamic range capability of your sensor. Other filters you can use are color filters, circular polarizers and infrared filters. Take care when using such filters. I generally do not recommend them for videographers. Polarizers and IR filters can be very useful for photographers who know how to use them.
Dolly, sliders, accessories that help you add motion to your shots Lights Other accessories The main thing is DO NOT SKIMP out investing in good gear and accessories.
Workflow
I will only post links to various workflow guides for software that I have experience with. The reason being, while anyone who is familiar with the software can make a workflow guide, if I am not familiar with the software I wouldn't trust myself to judge if the guide is good or someone is just trying to push how they do things which may not always be the optimal method.
Mastering Adobe Lightroom: Basic Post Processing workflow Another Lightroom and Photoshop workflow Adobe Premiere Pro workflow for DSLR
Working as a professional
Here I will cover some aspects of what will be involved when you want to work as a professional. Either for yourself, a freelancer that offers services for agencies, or a contracted professional.
Recording video for your use, either for personal stuff like family/holiday videos or even for your own Youtube tech channel like Linus, it's easy to do. You define your own requirements. However when you record footage for someone else to use, that's where you have to talk to the other party and ask them how they want things. You can't always choose what you want to do, they may tell you they need the video format in ProRes but your camera only records H.264 and they may or may not accept a converted video, what will you do?
I can already give you an example of what you may be required to do when you are working either as a freelancer or contracted professional for an agency that has their own requirements. This is the document given to all freelancers and producers who record footage for an agency where I sometimes work freelance.
(ILO_technical_note_for_producers_ENGLISH2015.doc)
BBC's guidelines are another example.
TIP: If you get hired to work for a client that requires you to record video in 4K but they only have the capacity to handle Standard Definition (SD) video, tell them they are being foolish. Politely of course.
External resources
No Film School Cheesy Cam Philip Bloom's blog Vimeo film school Video Copilot After Effects tutorials Joe Mcnally's blog Photography Life Cambridge in Colour NorthLight Images, great site for learning about color management and printing Filmmaker IQ Youtube Channel Tutorials for Premiere Pro Understanding some technical jargons when it comes to cameras and photography More tutorials Fstoppers Adobe TV Timescapes
I just saw this Behind the Scene video by Vincent Laforet, where he along with two sound guys give a brief talk about capturing audio. Thought I share it here.
Film looks
Sound recording
List of YouTube Channels to follow or just explore.
Feel free to suggest more and I will add them to the list, if I think they provide actual useful guidance or knowledge. So that means NO FroKnowsPhoto. I don't want too many "gear review" or "gear is more important than creativity/vision" type of channels.
Keep in mind that not all the videos in each channel will be relevant or add to your knowledge. Some channels have mixed content, so while I may put them in one group there are videos that relate to the other group too.
Disclaimer: There are so many, I don't even remember all of them at the top of my head so this list will certainly grow.
For cinematography (including channels that deal with recording sound)
Filmmaker IQ Basic Filmmaker Indy Mogul Every Frame a Painting Channel Criswell Tom Antos Ty Ford Curtis Judd (great tips for recording sound here and audio equipment reviews) Griffin Hammond DSLR Guide Film Riot No Film School RODE Microphones (now most of their channel is obviously about their mics, but they do have some nice videos that look at behind the scenes stuff when it comes to recording sound and the concepts can be applied to non-Rode mics) Signature Sound Studio Rocket Jump Film School
For photography:
Craft and Vision B&H Adorama The Camera Store (they also have videos that relate to cinematography) Phlearn Fstoppers Karl Taylor Joe McNally and Scott Kelby (while a lot of their good stuff are behind a paywall, they do have some nice stuff in their free channels) Lovegrove Photography (be warned: he has some video on boudoir photography so it may not be entirely safe for work) Matt Granger
Other resources:
Museum of Modern Art offers online photography course
-
 ALwin got a reaction from xQubeZx in What'd be a good entry level DSLR camera?
Well in the brand new market, you don't have that many choices for a lens at $600. You'll get an entry level body along with a kit lens, which is suitable for beginners.
In the second hand market, you might be able to get a used body with a bit more options for used lenses.
Most of the entry level cameras on the market are good for beginners.
By the way, there's no such thing as a generic appropriate lens for anyone. You choose the lens based on the kind of photography you want to do. For you as a beginner, the kit lens that comes with most entry level cameras is quite suitable for a wide range of activities. Only once you've become better as a photographer you can decide on your own which kind of lenses you need.
-
-
 ALwin got a reaction from Laputacake in does this pic work in black and white?
In LR you can apply a gradient ND filter instead of changing exposure for every part of the image. Or play around with adjusting the highlights and shadows sliders, or the adjustment brush.
-
 ALwin got a reaction from LazyLifeguard in Guide: DSLR or Video camera? (work in progress)
*My guides will be kept as "work in progress" forever as I intend to keep on improving and updating them as long as I am able.
A missing thread in this section is one that discusses why someone should get a DSLR with video recording capability or a dedicated video camera... for recording video. If there is a thread discussing this already, I haven't seen it yet and I am too lazy to look through dozens of pages.
Hence I might as well start one and edit/improve it with input from fellow members.
Let me start off by saying, whether you're interested in photography, cinematography, or even just recording sound:
While having high quality expensive gear would be nice, don't let the lack of having such gear stop you from being creative.
Disclaimer
I am not trying to tell you which way to go, I am only trying to make you aware of the differences between the two. I see people asking in this section whether a particular camera model is good or not, what camera they should get, etc. Many of them do not realize or understand how the cameras work or how the workflow changes between using a DSLR for video and a dedicated video camera for video. They get advice from their friends or online communities, many of whom have limited experience with using various types of cameras and push onto the person asking for advice to go a particular route without explaining why, perhaps they themselves do not know and have forced themselves to stick to the format where they have made their investment.
The first DSLR with video recording capability was the Nikon D90, it came out in the later half of 2008. I bought a D90 in early 2009. My first DSLR for photo was also purchased in January 2009, a Sony Alpha A350. Before that I was taking photos with film and recording videos on magnetic tape drives. Since my first D90 I have owned about 10 different DSLRs including the famous Canon 5D mk II and 3 video cameras, and have worked with more expensive professional grade video cameras belonging to friends and colleagues. I've probably spent over $100,000.00 on camera gear in the past 10 years and have about $50,000.00 worth of gear in my bags when I travel.
Right now I am planning to buy a $3000 semi-professional grade video camera, the Ursa Mini 4K, $7000 Sony PXW-FS7 for my personal and professional freelance work.
I don't make videos for Youtube** nor do I manage a Youtube Channel. I work as a freelance consultant for the United Nations and on my own dime and time I travel around filming and photographing.
So, should you get a DSLR or a Video camera, for video?
(Doesn't matter what your budget level is, it will apply to all in general.)
I also recommend people read this guide on B&H: Basic Equipment for New Filmmaking Students
To start off let's compare a DSLR and a Video camera.
Note: when we talk about DSLR here we will also include mirrorless cameras such as the Sony NEX or A7rII and other models.
1. Price and Cost
Of course price and cost will always be a factor.
2. Sensor size
Both DSLRs and Video cameras come in a range of sensor sizes. For DSLRs the most common flavor of sensor sizes are
Micro Four Thirds APS-C Full Frame (35mm film equivalent) Video cameras come on a wider variety and prices go up as the sensor size becomes larger. A majority of consumer video cameras have sensor sizes much smaller than Micro Four Thirds and very expensive models such as the Sony PXW FS7 ($8000) will have a Super 35mm sensor which is about the same size as an APS-C sensor.
So why is sensor size important? Or to better phrase it, why does sensor size matter?
It matters because of depth of field It matters because of low light capability When photo cameras such as the Canon 5D mk II were produced, with video recording capabilities, it opened the doors for more film makers to achieve visually appealing cinematic looks in their films that was once available only by either using film or buying very expensive digital video cameras. The shallow depth of field meant a more artistic look in the recorded video with blurred backgrounds and beautiful bokeh.
Of course this added a lot of extra work for film makers, as a larger sensor with a shallow depth of field can make things harder to focus or keep in focus.
As for low light capabilities of larger sensors, consider the millions of tiny photosensitive cells on a camera sensor like buckets that can hold light that falls upon the sensor. A larger bucket means it is capable of holding more light, so an 8 megapixel sensor that is larger will have larger photocells than a smaller 8 megapixel sensor.
However there is a disadvantage with larger sensors, which inherently means more pixel count. While a photo camera may record wonderful 20 megapixel still images, a Full HD 1920x1080p video is only about 2 megapixels. So the camera must convert the 20MP image recorded by the sensor into a 2MP frame in the video being saved onto the memory card. Most cameras achieve this down sampling by only taking the image from every X number of lines from the sensors, other cameras downscale the captured image. With this internal resizing of the image captured by the sensor, there are risks of the recorded video having anti-aliasing artifacts, moire, soft look and feel.
But one thing I learned when I started out as a photographer, and which applies for video as well, learn to use both natural and artificial lights. Do not become used to relying on the capability of the sensor or camera. So if natural light isn't enough, before boosting the ISO or widening the aperture or using longer shutter speeds, add more lights. Because changing ISO or aperture or shutter speed can effect the look and feel of the recorded video which is harder to edit in post than adding more lights.
So for sensor size:
Larger means shallower depth of field and a better artistic look to the recorded video (of course this will also depend on the skill, talent of the film maker) Shallower depth of field means harder to keep things in focus, even the slightest movement can change what is in focus Smaller sensors make it easier to keep objects in focus, but of course it hardly gives you that beautiful bokeh or blurred background. Larger sensor also means better low light capability, but again you should always rely on external light before changing settings on the camera Larger sensor means higher cost (true for video cameras, not 100% true for photo cameras) Larger sensor also brings the risk that the image quality of the recorded video will not be as sharp, clear as it should be and have image artifacts such as moire. But can people use videos recorded on a camera with a smaller sensor? YES! YES! YES!
Ask yourself this, do you really need that shallow depth of field look for your videos? NO!
So why spend all that time, money and effort to record a video when it may be faster and easier to record something with a smaller sensor camera. Even for your Youtube channel's videos you don't always, more like hardly ever, need that shallow depth of field look. Not unless you were trying to make an Indie film, and even then you don't always need it for every shot. Otherwise you will be like J.J. Abrams adding lens flare effects to almost every scene in his movies. As for Youtube itself, anytime you upload a video it processes and converts your videos even if you upload something with bit rates and formats using their guidelines, you will lose quality in your uploaded videos.
3. Form factor
It should be obvious why a DSLR is designed the way it looks and a video camera is designed the way it looks. You don't hold a photo camera the way you hold a video camera.
The design of a DSLR is optimized for taking still images, hence it is not optimized for providing the longer term stability hand held as an image takes only a brief moment to capture. While a video camera, especially the larger ones with a design built in for carrying it on the shoulder, is designed for recording several minutes of video while trying to provide the best stability for hand held use. Even a small camcorder, the way it is designed, is optimized for people to hold it longer while it records. The palm up, bent elbow, upper arm braced against the torso makes holding onto that camcorder for several minutes easier and keeps the camera more stable than you would holding a DSLR.
Of course stability can be improved for both types of cameras by using a tripod or other accessories such as steadicams and gimbals. However a tripod is not designed to be used if you need to follow the action while filming a scene that may take place over a distance. And good steadicams and gimbals can be expensive. So many, especially those on budget, opt for the shoulder mount first when trying to chase the action during filming.
You want to rig up a DSLR for shoulder mount, you'll need to buy additional accessories which will will discuss in another section. Mid to high end video cameras tend to be shoulder mount ready.
4. Audio
A DSLR has more or less a bit more internal volume than a comcorder, of course larger DSLRs have more internal volume while mirrorless cameras may have as much room as a small camcorder. Video cameras tend to have larger internal volume, especially in the higher end models. So more internal volume means more room to include more or better features.
However a DSLR such as the Nikon D3300 will have about 25% of it's internal volume of the body used up by the SLR mirror chamber and the pentamirror for the viewfinder. While a small compact camcorder such as the Sony HDR PJ650 will have a volume about the size of a ping pong ball holding the zoom lens, the sensor and part of the stabilization mechanism which might total less than 1/5th of the total internal volume.
DSLRs and mirrorless cameras come with at least two built in microphones to capture stereo audio. But these microphones are small and tend to pick up the sounds of internal moving parts. Additionally as the camera has to also have circuit boards and chips dedicated for photo processing there is hardly any room left to add in any quality preamps or good connection points for external microphones. And all DSLRs come with at most 1 2.5 or 3.5mm port for a microphone.
Video cameras on the other hand, as they are primarily video first, their internal components are designed to assist in recording both the audio and visual aspect of a video. So the microphones and preamps built in tend to be a bit better on the low end and a lot better on the higher end. And higher end models come with connections for multiple audio capture devices and better input ports (i.e. dual XLR vs 3.5/2.5mm jacks in DSLRs)
5. Features
Ability to choose the lens
Obviously DSLRs allow you to change lenses, so you can pick the "right" lens for the job. Few video cameras allow you to change lenses, and most of those few are expensive.
However, video cameras with built in lenses (non changeable) tend to have a longer zoom range than many DSLR lenses. So if you go the DSLR route or buy a video camera with an interchangeable lens system, unless you buy the very expensive broadcast level lenses such as the Canon KJ20x8.2B, you will be sticking to consumer/prosumer camera lenses that have a short zoom range if they have any zoom at all. And even if their prices are lower than B4 mount lenses, if you want to cover a good zoom range you will have to invest in quite a few.
Note: If you are choosing either a DSLR/Mirrorless camera for video, know that in proper video cameras the most common mounts are now Canon's EF mount, Sony's E mount and Micro Four Thirds system mounts. Professional video PL and B4 mounts are dedicated to video only and you almost never see them on photo cameras. So if you buy lenses with EF mounts, E mounts or MFT mounts, you can find both photo cameras and video cameras that can use those lenses. You will have a hard time finding both types of cameras with Nikon F or Sony A mounts, unless you plan to use adapters.
Which brings up something else to consider, lens mount adapters and flange distance.
Flange distance is the distance between the sensor plane and the exterior surface of the lens mount on the camera body.
https://en.wikipedia.org/wiki/Flange_focal_distance
You can find adapters to use Nikon F lenses on a Canon EF body because Nikon lenses are designed to work with a longer flange distance than Canon. So wedging an adapter ring between the lens and the camera body is not an issue. You will be hard pressed to find an adapter that lets you mount a Canon lens on a Nikon body however, because if you wedge a metal ring between the lens and the body, it will increase the flange distance a lot more than what the lens was designed for and you will lose the usage of certain focal lengths and focus distances.
At the moment for both photo and video cameras the most versatile mount is the Sony E-Mount because the flange distance is very short, any lens can be mounted to it using a compatible adapter.
Additionally some expensive adapters will allow you to retain the use of the lens' built in features such as auto focus motor, image stabilization mechanism, zoom feature if any exists on a different camera body. Normally it is nearly impossible to make two different electronic systems (e.g. Canon EF lens to Sony E mount) communicate with each other because they are designed and the firmware are programmed differently. However an adapter with an electronic chip inside can allow the two different components to communicate. And some brands are closed systems (i.e. adapters that allow Nikon lenses to communicate with non Nikon bodies hardly exist at all).
Difference between still photo lenses and cine style lenses (@nickl)
Focusing and Image stabilization
In a camera designed to be photography first (i.e. DSLRs) their auto focusing and image stabilization mechanisms are optimized for recording still images that capture a single moment. Video cameras have auto focus and image stabilization mechanisms that are optimized for continuous usage.
The image stabilization system in a photo camera relies on having a glass element inside the lens, or the sensor being able to shit movement based on the direction of camera vibration/shake. The image stabilization inside a camcorder for example is more like a gimble system, it moves the entire container which holds the lens and sensor.
The first part of this video shows you how in-lens IS works for a photo camera.
Here is a video that shows how sensor shift IS works.
This is how IS works for a proper video camera.
BUT the main downside of auto focus (in all types of cameras) is the "auto" part. The camera is making the decision for you on what it wants to keep in focus. If you want your filmed scene to have focus on different parts of the scene differently, or change focus in a different order, it is always better to use manual focus (even if you are using a $20,000.00 cinema camera), with a manual follow focus accessory or an electronic focus pulling system.
Focus assist and other viewfinder/monitor features
Focus assist features such as focus peaking or false color displays for monitoring exposures tend not to be part of DSLRs. And it certainly is not easy trying to use a tiny optical/electronic viewfinder or a small LCD display on the back of the camera to manually focus. So video cameras come with several features built in to assist the user. For DSLR users they need to rely on external field monitors or viewfinder accessories to get these features. Of course for both DSLR and video camera users having at least one external field monitor will also allow other people to monitor what is being recorded. Especially clients who may want to see a preview.
Recording formats and quality
Most consumer/prosumer level DSLRs with video and video cameras allow you to record in MP4, H.264, AVCHD which are "OK" for editing and publishing on Youtube. However if you want to do serious filming, editing, content creation at full HD, 4K or even better, the recording format not only does it have to use a good codec but also be able to sample at a very high bit rate. DSLR's at most record at 50Mbps (megabits per second) though some do support higher bit rates with an external recorder or firmware hack such as Magic Lantern.
Even if you are able to use an external recorder to capture better quality video than what your camera can do internally, the HDMI or SDI output of your camera has to support that higher quality. An external recorder such as the Atomos Ninja or Samurai can record ProRes HQ 422, but a lot of DSLRs' clean HDMI output tends to be 420 (or 8-bit) color, therefore even if the Atomos was recording the video file as ProRes HQ 422 it is not receiving a true 422 (10 bit) color signal.
A $300 camcorder records h.254 or AVCHD at 25mbps which is as good as the video recorded internally by a $500 DSLR.
Video cameras on the other hand, because they are designed to be video recording devices, support better codecs, better bit rates, better color sampling. Mid to high end video cameras can record at bit rates over 100Mbps, with more advanced codecs like XAVC or ProRes, with true 422 (10-bit) color or better.
Of course better quality video means larger files. But better quality recording makes it easier to post process and better able to bring out hidden details and improve the quality of your final product.
Frame rates, global and rolling shutter
When recording video, you will come to see numbers such as 25p, 23.97fps, 50p, 120fps, etc. These are all various ways of indicating how many frames per second a video is being recorded/played back. Standard video frame rates are
24p which can sometimes be actual 24fps or in most cases 23.97fps 25p which is 25fps 29.97fps 30p which can sometimes be actual 30fps or in most cases it is actually 29.97fps 50p which is 50fps 59.97 fps 60p which can sometimes be actual 60fps or in most cases 59.97fps And some good cameras are capable of recording faster frame rates for producing super slow motion scenes PAL systems are always exact numbers, and they are 25p or 50p (or multiples of either two).
NTSC is 24p, 30p and 60p and their multiples. The .97 fps comes from a NTSC standard and the reason for that can be found in this article: http://www.bodenzord.com/archives/79
Global shutter: To record each image frame for the video, the image captured by the sensor is recorded all at once.
Rolling shutter: To record each image frame for the video, the image captured by the sensor is scanned line by line
http://www.red.com/learn/red-101/global-rolling-shutter
So how are they related?
Global shutters require slightly more processing power and produce more heat, therefore limiting how much it can be used. While rolling shutters utilize slightly less processing power and produce less heat Faster frame rates require the "shutter" to work faster, hence most cameras with high speed frame rates utilize rolling shutters rather than global shutters However, rolling shutters can produce the Jello effect when recording a moving scene or when moving the camera during filming Image quality, color depth and dynamic range
Dynamic Range: When it comes to digital CCD and CMOS camera sensors "Dynamic Range" is an indicator of how much detail that the sensor can record between the darkest and brightest part of a scene. I don't think I could explain it in a few words, so let me link you to a page that explains it in good detail.
http://www.cambridgeincolour.com/tutorials/dynamic-range.htm
Color depth: Is an indicator of how many shades of any particular color is recorded when it comes to cameras, or being displayed when it comes to displays (TVs, monitors, etc).
https://en.wikipedia.org/wiki/Color_depth
Both the dynamic range capabilities of your camera's sensor and your camera's ability to record a certain color depth will affect the recorded image quality.
Most photo cameras are able to take still photos of up to 14-bit color when capturing in RAW mode However most photo cameras, especially at the low to mid end of the product lines, allow up to 8-bit color when recording videos. Both internally and via clean HDMI output. Higher end photo cameras may allow up to 10-bit color in recording video, if it is not capable for internal recording then it will provide it for the clean HDMI out when used with an external recorder Many video cameras record at 10-bit color at the lowest end and can go up higher in more expensive models Better color depth capability will mean larger files Better color depth recordings are more flexible for editing A sensor capable of wider dynamic range will enable you to record more details without having to rely much on accessories such as ND filters or filming techniques that may not work all the time However do not allow the camera to dictate what you can and cannot do, technology is no substitute for knowledge and experience The limitations of dynamic range can be compensated with knowledge, experience and use of certain accessories (e.g. gradient ND filters) or techniques (e.g. HDR) 6. Accessories
Pimping up a DSLR
Base plate or cage Rods Follow focus Field monitor Audio recorder or preamp External microphone Lights Pimping up a video camera
External microphone Lights 7. Investment
Low end DSLR with video recording capability: approximately $400-500
External microphone: at least $100 (on camera mounting, and having at least 1 external microphone is not optional) 2nd external microphone: at least another $100 using two microphones means getting an external recorder or preamp (e.g. Tascam DR-60D): $180 Rig system (including shoulder mount, handles, 15mm rods): at least $200 on ebay Follow focus: at least $50 on ebay Field monitor: at least $200 (not including the cost of batteries for the monitor) Lenses: prices vary Video camera with 2x XLR inputs: using Panasonic AG-HMC80 3MOS AVCCAM as an example: $1500
2x External microphones: at least $100 each (this is optional) Final thoughts
If you're looking to buy a camera to make videos, as in "video first", consider a proper video camera before considering a DSLR or mirrorless camera.
Additionally, after reading what I wrote, you may feel like I am pushing you towards buying a video camera instead of a DSLR. That is not the case. If you are creative, imaginative, talented, know how to edit videos properly, create special effects, etc. perhaps a good DSLR for video may be the better option for you. For making creative works. A proper DSLR video setup with the right set of lenses and accessories, keep in mind I am not talking about sticking with the kit lens, will likely cost less than a video camera that will offer you the same creative potential. If you are only going to stick to the kit lens, while you may get the advantages of a larger sensor, you will not be utilizing the camera to its full capabilities.
Also keep in mind, the higher resolution you record, the better quality you record, the shallower depth of field you use... will be very unforgiving with any mistake you make. It will require more time for preparation, planning and re-doing things until you get it right. Even if the audience of your video doesn't notice it, you as the videographer and editor will always know the mistakes you made.
However if you are simply looking for a video camera for your blog or Youtube hobby channel, perhaps a video camera is a better option. Even if it's simply a low cost camcorder. It will be easier to setup, faster to record and edit, and most of the tools you need will be inside that compact form factor.
And remember cameras are just tools. They don't make any decisions for you, they don't inspire your creativity, your ideas, your visions. They do what you tell them to do, nothing more.
** Not entirely accurate, I do use Youtube to share some stuff with friends.
Comments, tips, edits to help me improve this guide will be most welcome.
-
ALwin got a reaction from Mihle in New to making video media, good budget, need advice
Not exactly sure but I think they were just setting up the Picture Profile to suit their taste. I have similar profile settings on the FS7 and what they allow me to do is try to customize the camera to get the most latitude as possible for a given location being shot. But these are also based on preferences of individual camera operators.
I took a look at a video made by someone showing how they set up the Picture Profiles on the A6300 for their needs, and it looks like Sony may have brought in some menu items from their video camera line. Since in the A6300 they're letting you use stuff like CineGamma, Rec.709, S-Log2/3 and other options like adjusting Knee.
-
 ALwin got a reaction from AlisterM in Total noob in photography.
Aperture is the size of the iris opening inside the lens:
This image explains how shutter speed, aperture and ISO work.
larger the "F" number, the smaller the aperture, and usually Aperture (also referred to as F-Stops) is more appropriately indicated as F/##. F-stop is the Focal Length of the lens divided by the diameter of the iris opening. hence F/##, e.g. F/1.4, F/1.2. Wider aperture, faster F-stop means thinner Depth of Field (DoF), narrower aperture, slower F-stop means wider DoF. Depth of Field refers to how much of the scene is in focus. (see the image below with the stuffed monkey to get an idea of what DoF means) Slower shutter speed more motion blur, faster shutter speed less motion blur. Most digital cameras have shutter speeds ranging from 1/8000th of a second and up to 30 seconds, then they also include BULB mode so that the photographer can either manually hold down the shutter release button or use a timer remote to set any desired shutter speed longer than 1-30 seconds. ISO in relation to photography originates from film days when more sensitive film stock used larger grains of the chemicals coated on the film. In digital photography, ISO relates to how much the camera boosts the signal that's generated by light hitting the camera sensor. With digital cameras, increasing the ISO doesn't mean that the sensor becomes more sensitive to light, it means the camera is amplifying the signal. Lower ISO = cleaner looking image, higher ISO = image contains more noise.
This chart shows you various sensor sizes and their crop factors (which is measured relative to 35mm Full Frame size being 1x). Smaller sensors than Full Frame have a larger crop factor and sensors larger than FF have a smaller crop factor. Basically what this means is that if you mount a 50mm lens on an APS-C sensor with a crop factor of 1.5-1.6, the field of view you see looking through the viewfinder is similar to having mounted a 75mm lens on a FF sensor camera.
And this article explains focal length and field of view
http://www.nikonusa.com/en/learn-and-explore/article/g3cu6o2o/understanding-focal-length.html
-
 ALwin got a reaction from geomi neun babo in New to making video media, good budget, need advice
Not exactly sure but I think they were just setting up the Picture Profile to suit their taste. I have similar profile settings on the FS7 and what they allow me to do is try to customize the camera to get the most latitude as possible for a given location being shot. But these are also based on preferences of individual camera operators.
I took a look at a video made by someone showing how they set up the Picture Profiles on the A6300 for their needs, and it looks like Sony may have brought in some menu items from their video camera line. Since in the A6300 they're letting you use stuff like CineGamma, Rec.709, S-Log2/3 and other options like adjusting Knee.
-
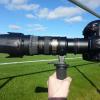
 ALwin got a reaction from bob345 in Should I be able to see the effects of the aperture moving?
For all the trouble you put us through, I believe you should buy us some beer or coffee.
-
 ALwin got a reaction from vanished in Rate the Photo Above you
Since you captured that photo in a camera RAW format, why not process it in LR or Photoshop or any other photo editing software that supports RAW before you post it. I'd clean up a bit of the noise, level the image, and perhaps brighten it up a bit as the first few things I'd do.
-
 ALwin got a reaction from Omon_Ra in Should I be able to see the effects of the aperture moving?
For all the trouble you put us through, I believe you should buy us some beer or coffee.


.thumb.png.2b37a2d242d91f04d784eacf0a8d9e14.png)

-4.jpg.fe2ababeb75799e36b0c871060336449.thumb.jpg.20251b93ab4bbfecc6e0bb4bc40d7a1d.jpg)


